
After reading this article, you will know how to create firewall rules and understand firewall basics. All concepts explained in this tutorial are universal and applicable to most, if not all, firewalls. Also, by creating firewall rules with Pfsense, you will understand more about this operating system.
The tutorial begins by explaining how firewall rules are configured in the first section, with additional practical examples in the second section.
This Pfsense tutorial includes real scenario screenshots for every step, making it easy for all users to understand and apply it.
How to create Pfsense firewall rules:
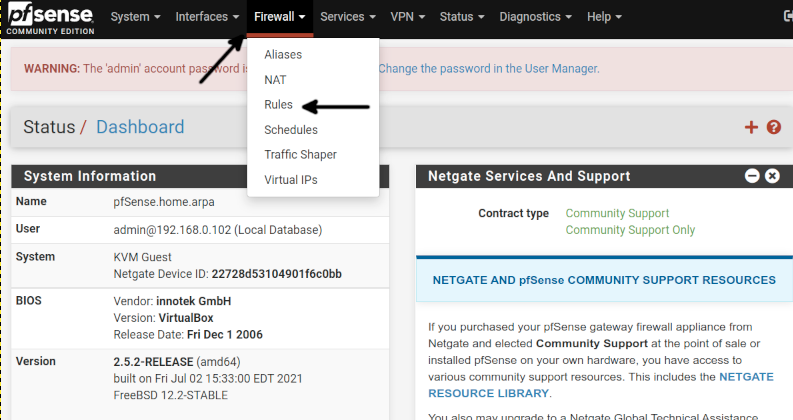
To begin, log in to the Pfsense web interface, press the Firewall button located in the top menu, and press Rules, as shown in the screenshot below.

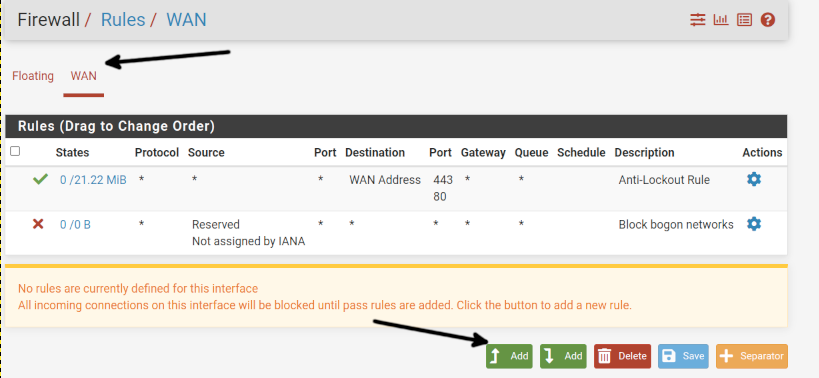
Once in the Rules screen, select the Pfsense network device; in my case, it is the WAN device; you may see a LAN device depending on your Pfsense setup. Then, press the Add button as shown below.

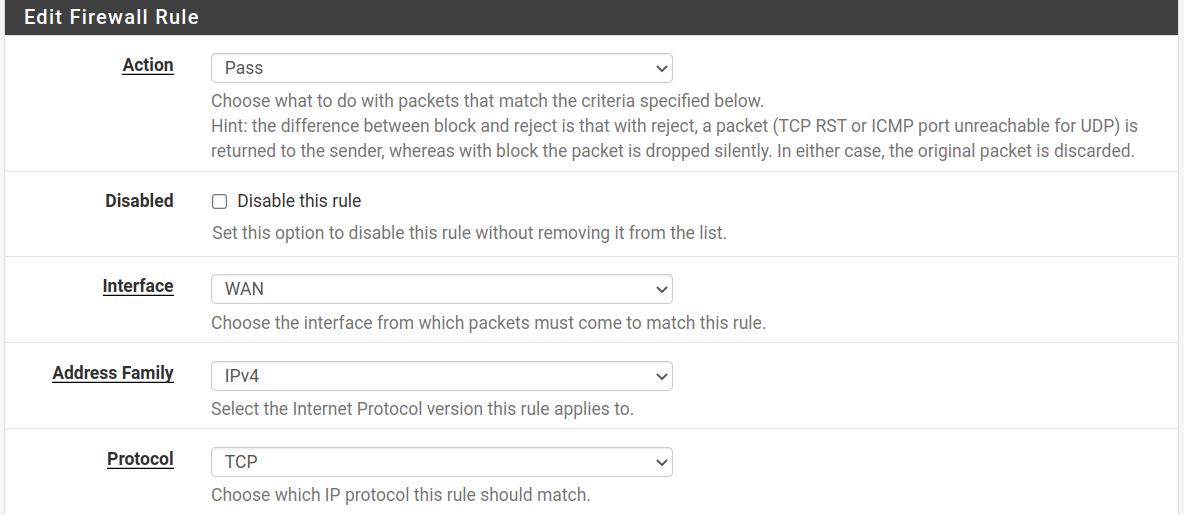
In the image below, you can see the Firewall rules screen. In this tutorial, I will explain each section separately; you need to scroll down to see each section.
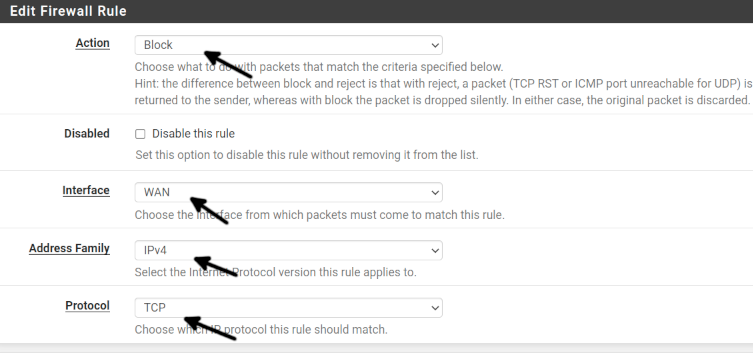
The first field, Action, allows you to select between the three following options to define the rule policy.
- Pass: The traffic is allowed.
- Block: The traffic is blocked without notifying the other side.
- Reject: The traffic is blocked, and the other side is notified that it was refused.
Interface: Here, you can select to what network interface the rule is applied.
Address Family: This field allows you to select between IPv4 and IPv6, or both of them.
Protocol: This field allows you to select protocols TCP, UDP or both of them.
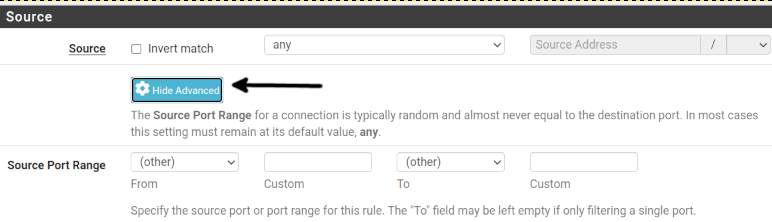
In the Source section, you have two options:
Source: This section allows you to define the source address. You can choose an IP address, an alias containing custom IP addresses, a network, PPPoE, L2TP or WAN networks.
Source Port Range: Here, you can define the port source, port range or an alias containing custom ports.
Destination: This is the inverse of Port Source; here, you define the destination address, which can be an IP address, an alias containing custom IP addresses, a network, PPPoE, L2TP or WAN networks.
Destination Port Range: Here, you can define the port destination, port range or an alias containing custom ports.

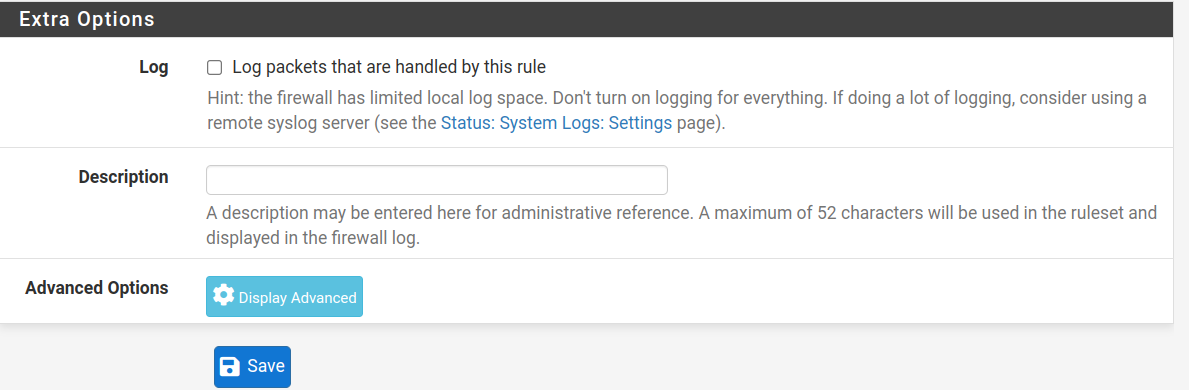
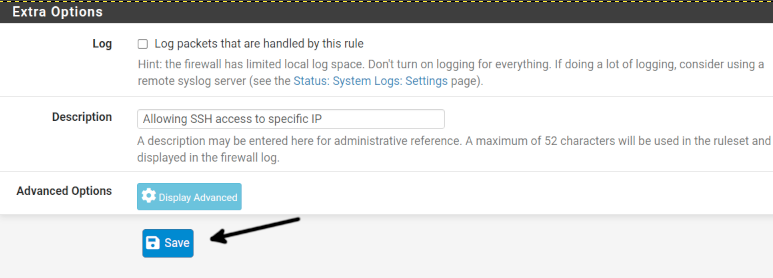
Extra options allow you to keep logs of packets matching the current rule; you also can add a description for the current rule.
There are additional advanced and optional options that are not covered in this tutorial optimized for new to medium users.
Remember always, after creating a rule, press the Save button to save it (Then you will need to press the Apply Changes button as shown in the following section).
Before practical examples: How firewall rules are applied
Before continuing with the next section showing a practical example of firewall rules, it is very important to clarify that the order of the rules is critical for their correct application.
For example, if you want to block all traffic to a specific port, except for a specific address that is allowed to pass, you need to create a rule blocking all traffic to that specific port and then create a new rule adding the exception. You can not create an exception within the same rule.
Also, keep in mind that if you add the exception rule before the rule blocking all traffic, the exception won’t work since new rules overwrite the first rule.
A practical example of the Pfsense firewall rule:
Now let’s apply the knowledge brought in the previous section of this tutorial.
In this section, I will block all SSH connections, except for a specific IP address. Therefore as explained previously, I will first create a rule blocking all traffic through SSH, and then I will add an exception allowing a specific IP to pass through it.
To begin, log in to your Pfsense web interface, and on the top menu, press Firewalls and then press Rules as described in the first step of this article.
On the rules page, select your network interface (In my case WAN) and press the Add button as shown in the screenshot below.
First, let’s create a rule blocking all SSH connections. Select Block, choose your network interface and address family and protocol (SSH uses TCP) in the Actions field.
In the Source section, select any to block all addresses.
In Destination, select any to block ssh to all your network devices.
In the Destination Port Range, choose SSH (22), as shown below.

Add a description to identify the rule, and press the Save button to save changes.

You will be back on the Rules main screen, DO NOT press the Apply Changes button yet. Instead, press the Add button with an arrow pointing down because this rule will add an exception rewriting or correcting the previous rule we created.

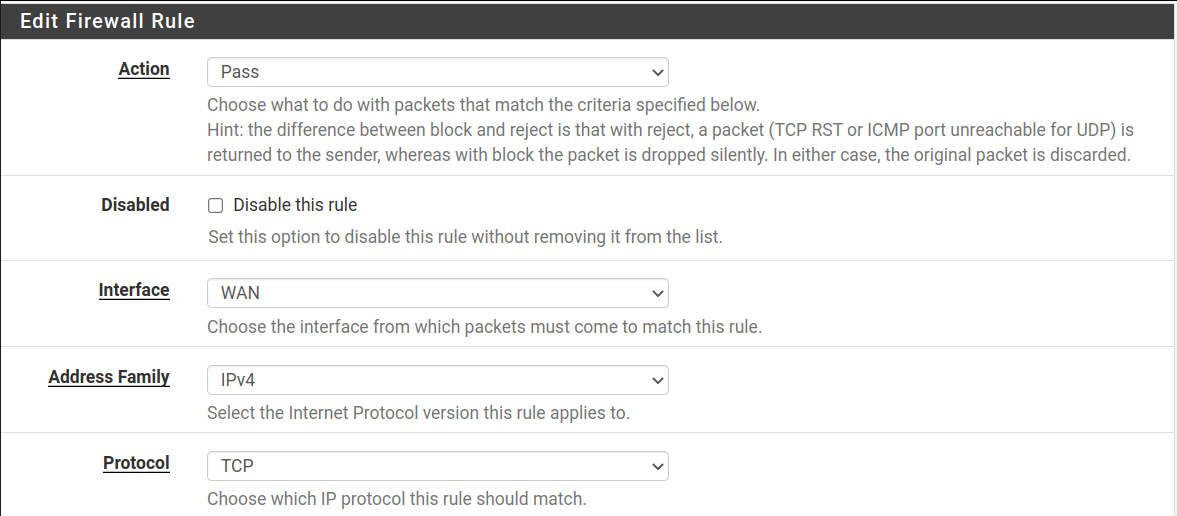
Now in the Actions field, select Pass; you can leave the rest as default since it matches the rule we are adding.
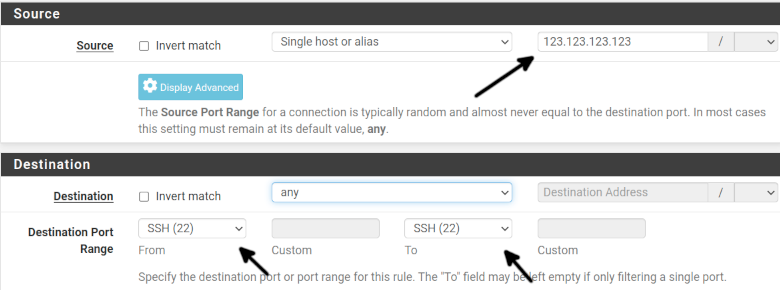
In the Source section, type the IP address enjoying the exception you want to allow to connect through SSH; for this example, I typed a fictional IP 123.123.123.123.
On Destination, select Any, except if you want only specific devices within your network to accept SSH connections; in such a case, you can specify it in this field.
On the Destination Port Range field, select SSH (22) as shown below.
Scroll down and press the Save button.
You will be brought back to the Rules main screen; now press the Apply Changes button to apply your rules.
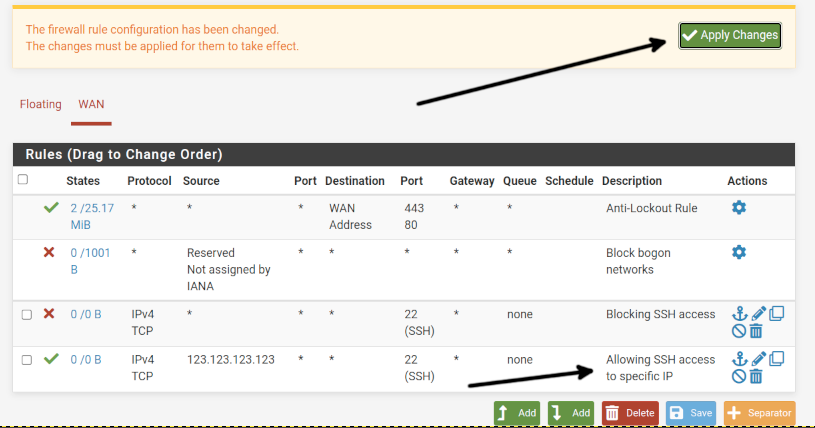
Now all SSH connections will be blocked, except for the specified IP address.
Conclusion:
Pfsense is a great option as a graphical alternative to the text mode Iptables. As you can see in this and other articles on Pfsense published at LinuxHint, this is a potent tool to manage your network and increase its security.
The web interface makes writing firewall rules a very user-friendly task; any user can carry out by following a few steps as described in this document. This software is free and open-source, and the community widely supports it; it also offers commercial support, being a great alternative for home users and businesses. You also can install additional software to increase its functionalities. It is a BSD based operating system, very robust and safe.
Thank you for reading this article explaining how to define Pfsense firewall rules. I hope it was useful for you. Keep reading us for more Pfsense professional articles.