In this tutorial, we will learn the basics of configuring NGINX with ModSecurity.
Requirements:
For this tutorial, we assume that you have the following:
- An Ubuntu or Debian-based server
- Installed NGINX on your server
- Sudo or root permissions on your server
With the given requirements met, we can learn how to install and configure the ModSecurity with NGINX.
Install the Necessary Packages
Let’s start by refreshing the system repositories and installing the required dependencies. We can do this by running the following commands:
$ sudo apt-get install git libpcre3 libpcre3-dev zlib1g zlib1g-dev openssl libssl-dev libtool
With the given packages installed, we can proceed and clone the ModSecurity repository.
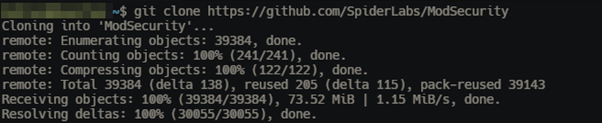
Clone the ModSecurity Repo
Start by cloning the ModSecurity GitHub repository with the following command:
Next, navigate into the clone directory with the following command:
Next, run the following commands to compile the ModSecurity:

Finally, run the “make” and “make install” commands as shown in the following:
$ make
$ sudo make install
Once completed, we can proceed and configure NGINX with ModSecurity.
Install the ModSecurity-Nginx Connector
The next step is to install the ModSecurity-Nginx connector which allows us to integrate the ModSecurity with the NGINX server.
Change to the root directory and clone the connector repository.
Once completed, change to the NGINX source directory and run the following commands to compile the connector:
$ make
$ sudo make install

You can download the NGINX source as shown in the following:
$ tar zxvf nginx-1.25.0.tar.gz
$ cd nginx-1.25.0
We can enable the ModSecurity feature once we have NGINX compiled with ModSecurity.
Enable the ModSecurity
Start by heading over to the ModSecurity directory and copy the “unicode.mapping” file to the /etc/nginx directory.
Next, move to the ModSecurity configuration directory and copy the ModSecurity configuration files to the /etc/nginx directory:
$ sudo cp modsecurity.conf-recommended /etc/nginx/modsecurity.conf
$ sudo cp unicode.mapping /etc/nginx/
Modify the NGINX Configuration
Once completed, modify the NGINX configuration file to include the ModSecurity. For example, add the following commands in the http block:
modsecurity_rules_file /etc/nginx/modsecurity.conf;
An example configuration file is as follows:
modsecurity on;
modsecurity_rules_file /etc/nginx/modsecurity.conf;
server {
listen 80;
server_name localhost;
location / {
root html;
index index.html index.htm;
}
}
}
Save the file and close the editor. Once completed, restart the NGINX service with the following command:
To confirm that ModSecurity is running with NGINX, run the following command:
Output:
Conclusion
This tutorial taught us how to compile and configure the ModSecurity WAF with the Nginx web server in simple steps. It is good to remember that the steps that are outlined in this post configure the fundamentals with basic ModSecurity features. Consider checking the documentation for extensive rules and configuration to secure your web server.