In Milvus, partitions divide the data into different logical categories. The resulting partitions allow us to segment that stored data effectively, making the data management and searching more efficient.
For example, suppose you have a vector database that stores millions of images. We can partition the images dataset based on the type of images such as landscape, portraits, animals, etc. The partitions allow us to perform the search operations within a specific partition much faster than searching the entire dataset.
In this tutorial, we will learn how to configure a partition or multiple partitions in the Milvus vector database using the Milvus CLI.
Requirements:
Before proceeding with this tutorial, ensure that the following tools and packages are installed on your system:
- Milvus database server, local or remote
- Milvus CLI utility
- Attu Manager for Milvus (GUI Method only)
We can learn how to create a Milvus partition with the given requirements.
Create a Partition Using Milvus CLI
To create a partition for a given collection using the Milvus CLI utility, we can use the “create partition” command as shown in the following syntax:
The parameters of the previous command are explained as follows:
-c – It denotes the collection name on which you wish to create the partition.
-p – It allows you to specify the name of your target partition.
-d – This is an optional parameter that denotes the description of the target partition.
Let us demonstrate how we can create a new Milvus partition using the Milvus CLI.
Start by creating a basic Milvus collection as shown in the following command:
color -f brand:INT64:brand id -a -d 'car_collection'
The previous command creates a new collection in Milvus called “car” with four fields: id, vector, color, and brand. The id field is the primary field and partition key.
To ensure that Milvus will not initialize the default partition once the collection is created, we omit the -p parameter which ensures that no partition is configured upon collection creation.
To create a new partition, we can run the command as follows:
The previous command creates a new partition called “new_partition” on the “car” collection with the description of “sample_partition”.
Resulting Output:
| Partition Name | new_partition |
+--------------------+---------------+
| Description | |
+--------------------+---------------+
| Is empty | True |
+--------------------+---------------+
| Number of Entities | 0 |
+--------------------+---------------+
Create partition successfully!
Create a Partition Using GUI in Attu
The second method that we can use to create a new Milvus partition is the graphical user interface in the Attu manager.
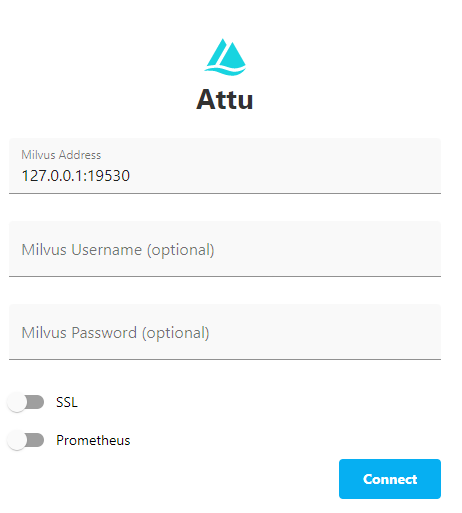
Launch the Attu manager on your system and configure the details to your Milvus cluster. Once configured, click “Connect” to log in to your Milvus instance.
On the main dashboard, select the “Collections” option to list your server’s available collections.
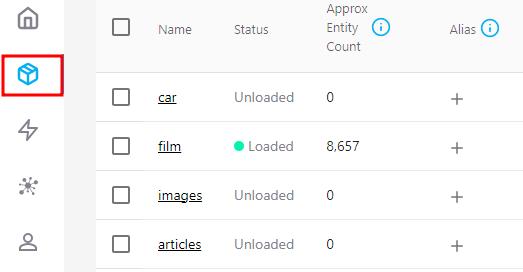
Select and click on the collection that you wish to create a new partition. This expands on more details for the target collection including the schema layout, query interface, data preview, and partitions.
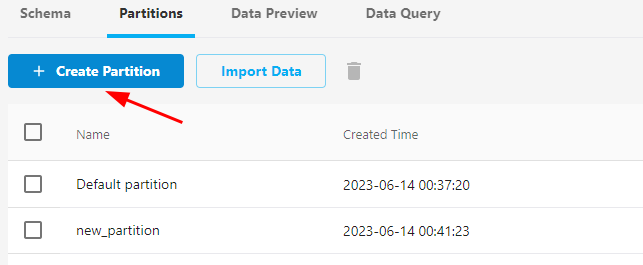
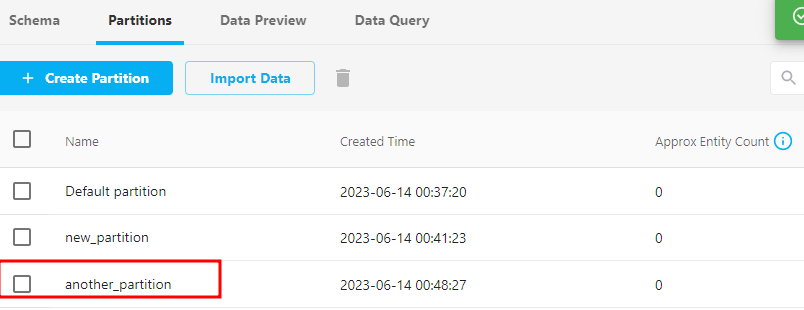
Navigate to the “Partitions” tab to view and create partitions. Select the “Create partition” option to configure a new partition for that collection.
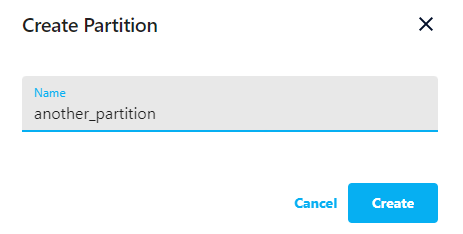
Finally, provide the name for your target partition and click on “Create.”
Upon successful creation, you should see the newly created partition with the target name as follows:
Conclusion
We learned how to use the Milvus CLI and the Attu graphical manager to configure a new partition for a given Milvus collection in simple steps. Feel free to refer to the documentation to learn more about the commands and their implementations.