There can be a situation when you might lose access to some or any of your system’s resources. In Linux Mint, the common reason for this is the misconfiguration in the GRUB settings.
Boot Repair is a simple tool that can solve almost all boot-related problems whether they are of GRUB or any other. In this article, we will explain to you the installation and utilization of this tool for repairing a boot in Linux mint 21.
Installation of Boot Repair on Linux Mint
The installation of Boot Repair on Linux Mint would be done in simple steps. Every instruction or requirement will be elaborated on for you to get a clear understanding of the procedure.
The initial task we need to do is to open the terminal. Through the PPA’s official page, boot repair can be installed. So to add PPA to our system, we first have to run the following command on the terminal.
You are about to add the following PPA:
Simple tool to repair frequent boot problems.
Website: https://sourceforge.net/p/boot-repair/home
More info: https://launchpad.net/~yannubuntu/+archive/ubuntu/boot-repair
Press Enter to continue or Ctrl+C to cancel
Press the Enter key to continue.
gpg: directory '/root/.gnupg' created
gpg: keybox '/root/.gnupg/pubring.kbx' created
gpg: /root/.gnupg/trustdb.gpg: trustdb created
gpg: keybox '/etc/apt/keyrings/3C48D16124B50277AF10D27F32B18A1260D8DA0B.keyring' created
gpg: key 32B18A1260D8DA0B: public key "Launchpad PPA for YannUbuntu" imported
gpg: Total number processed: 1
gpg: imported: 1
Now, we will perform a system update to make sure our Linux is up to date. To update the system the command to be executed is:
Running this command will make our system updated.
Hit:2 http://archive.ubuntu.com/ubuntu jammy InRelease
Get:3 http://security.ubuntu.com/ubuntu jammy-security InRelease [110 kB]
Get:4 http://archive.ubuntu.com/ubuntu jammy-updates InRelease [114 kB]
Hit:5 http://packages.linuxmint.com vera Release
Hit:6 https://dl.google.com/linux/chrome/deb stable InRelease
Get:8 https://ppa.launchpadcontent.net/yannubuntu/boot-repair/ubuntu jammy InRelease [17.5 kB]
Get:9 http://archive.ubuntu.com/ubuntu jammy-backports InRelease [99.8 kB]
Get:10 https://ppa.launchpadcontent.net/yannubuntu/boot-repair/ubuntu jammy/main amd64 Packages [1,824 B]
Get:11 https://ppa.launchpadcontent.net/yannubuntu/boot-repair/ubuntu jammy/main Translation-en [1,596 B]
Fetched 345 kB in 6s (61.5 kB/s)
Reading package lists... Done
Building dependency tree... Done
Reading state information... Done
62 packages can be upgraded. Run 'apt list --upgradable' to see them.
The last command we will write on the terminal would be to install the boot repair. So, the command to install Boot Repair is as follows.
Wait for the installation to complete.
Building dependency tree... Done
Reading state information... Done
The following additional packages will be installed:
boot-sav boot-sav-extra glade2script glade2script-python3 pastebinit
Suggested packages:
boot-info mdadm os-uninstaller gir1.2-appindicator3-0.1
The following NEW packages will be installed:
boot-repair boot-sav boot-sav-extra glade2script glade2script-python3
pastebinit
0 upgraded, 6 newly installed, 0 to remove and 62 not upgraded.
Need to get 718 kB of archives.
After this operation, 3,235 kB of additional disk space will be used.
Get:1 http://archive.ubuntu.com/ubuntu jammy/main amd64 pastebinit all 1.5.1-1ubuntu1 [14.6 kB]
Get:2 http://packages.linuxmint.com vera/import amd64 glade2script-python3 all 3.2.4~ppa23 [35.9 kB]
Get:3 https://ppa.launchpadcontent.net/yannubuntu/boot-repair/ubuntu jammy/main amd64 boot-sav all 4ppa203 [504 kB]
Get:4 http://packages.linuxmint.com vera/import amd64 glade2script all 3.2.4~ppa23 [2,204 B]
Get:5 https://ppa.launchpadcontent.net/yannubuntu/boot-repair/ubuntu jammy/main amd64 boot-repair all 4ppa203 [16.3 kB]
Get:6 https://ppa.launchpadcontent.net/yannubuntu/boot-repair/ubuntu jammy/main amd64 boot-sav-extra all 4ppa203 [146 kB]
Fetched 718 kB in 8s (89.0 kB/s)
Selecting previously unselected package glade2script-python3.
(Reading database ... 573614 files and directories currently installed.)
Preparing to unpack .../0-glade2script-python3_3.2.4~ppa23_all.deb ...
Unpacking glade2script-python3 (3.2.4~ppa23) ...
Selecting previously unselected package glade2script.
Preparing to unpack .../1-glade2script_3.2.4~ppa23_all.deb ...
Unpacking glade2script (3.2.4~ppa23) ...
Selecting previously unselected package boot-sav.
Preparing to unpack .../2-boot-sav_4ppa203_all.deb ...
Unpacking boot-sav (4ppa203) ...
Selecting previously unselected package boot-repair.
Preparing to unpack .../3-boot-repair_4ppa203_all.deb ...
Unpacking boot-repair (4ppa203) ...
Selecting previously unselected package boot-sav-extra.
Preparing to unpack .../4-boot-sav-extra_4ppa203_all.deb ...
Unpacking boot-sav-extra (4ppa203) ...
Selecting previously unselected package pastebinit.
Preparing to unpack .../5-pastebinit_1.5.1-1ubuntu1_all.deb ...
Unpacking pastebinit (1.5.1-1ubuntu1) ...
Setting up glade2script-python3 (3.2.4~ppa23) ...
Setting up glade2script (3.2.4~ppa23) ...
Setting up pastebinit (1.5.1-1ubuntu1) ...
Setting up boot-sav (4ppa203) ...
Setting up boot-sav-extra (4ppa203) ...
Setting up boot-repair (4ppa203) ...
Processing triggers for gnome-menus (3.36.0-1ubuntu3) ...
Processing triggers for man-db (2.10.2-1) ...
Processing triggers for mailcap (3.70+nmu1ubuntu1) ...
Processing triggers for desktop-file-utils (0.26+mint2+vera) ...
The Boot Repair has been installed on our Linux mint.
Now that the required tool is inaugurated on the system, we will launch it from the application menu by simply searching for “Boot Repair”.
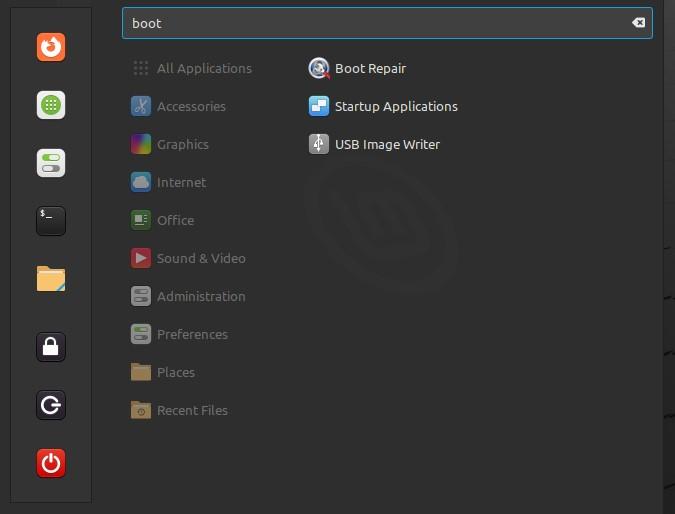
We have found the Boot Repair tool from the application menu. Simply launch it.
As you click on it, a prompt will appear that requires you to authenticate the root password. You must enter the password and hit the “Authenticate” option to proceed.

As you authenticate the admin rights, the scanning will start which would take a few seconds to complete.

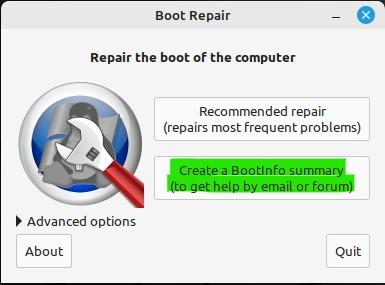
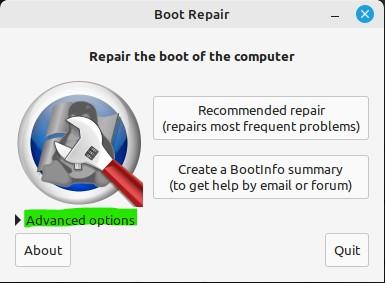
Now, the scanning is finished and you are on the main screen of the Boot Repair Tool. The main screen shows us some options for repair. Two of the main options are “Recommended repair” and the “Create a BootInfo summary”.
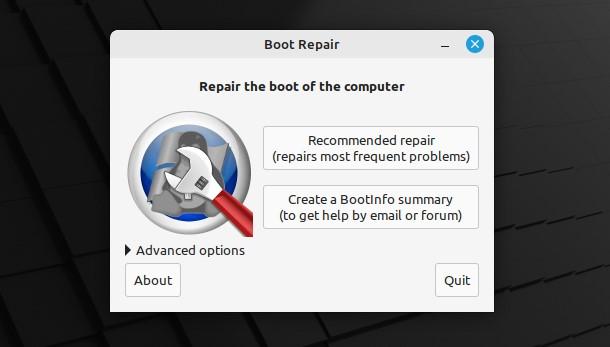
Depending on how much your system needs fixing, you can pick any of these.
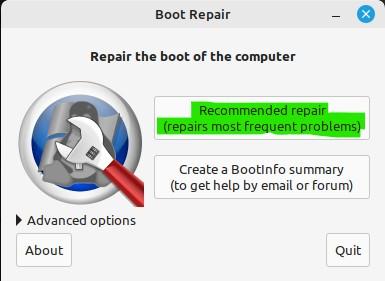
Repairing Through the “Recommended Repair” Option
If you are a novel Linux mint user, better go for the first option which is “Recommended repair”.
Application changes will take a few moments.

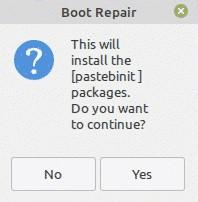
A prompt will ask you if the Pastebin packages will also be installed with this option and whether you want to continue with this or not. Users of the web application Pastebin can exchange text online with others, particularly scripts or configuration information.
The generated report can be uploaded on Pastebin if you want to share it with others through email or forum and they will observe the issue to provide you with a solution.

The system will ask the user whether you want to share this diagnostic report on the forum or you prefer to keep it confidential. The report will be uploaded to Pastebin when you click “Yes.”
Repairing of the system will be completed. You need to restart your system to check if the issue is resolved now.
In the majority of instances, this method resolves the problem.
Repairing Boot Through the “Create a Bootinfo Summary” Option
The other option that we can see on the main screen is “Create a Bootinfo summary”.
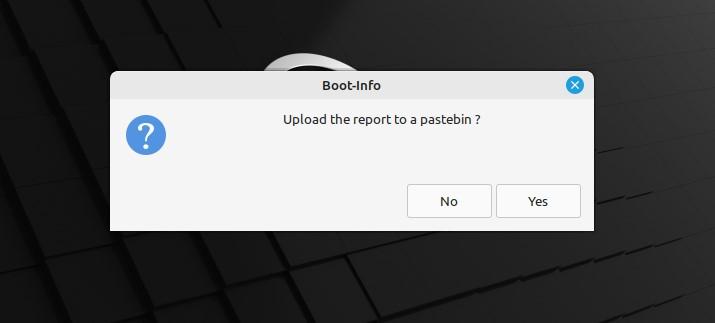
As you hit this option, it will take some moments and creates a report of the issue that resides in your system. Following that, you will be prompted to decide whether to upload the created report to the Ubuntu Pastebin or not.

If you hit the “NO” option, a message will appear on the screen that the report file will be opened in your text viewer. Press the “OK” button.

The report as a text file will be opened in your system’s default text editor. As you can see in the snapshot attached below, our Bootinfo summary has been opened as a text file.

Now, if you need to upload this report on Pastebin, select the other option which is “YES”.
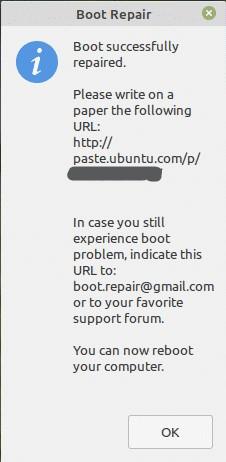
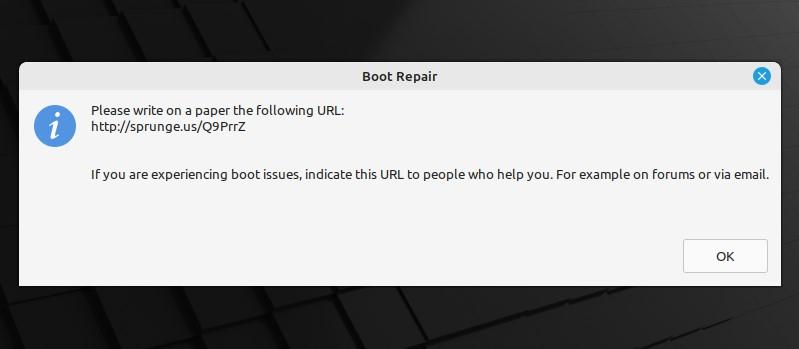
This will deliver you a URL of the report summary upload.
Now, you can use this URL to share the report of the diagnosis you have been facing on your system and communicate with others to get their suggestions.
Advanced Options for Repairing a System on the Boot Repair Tool
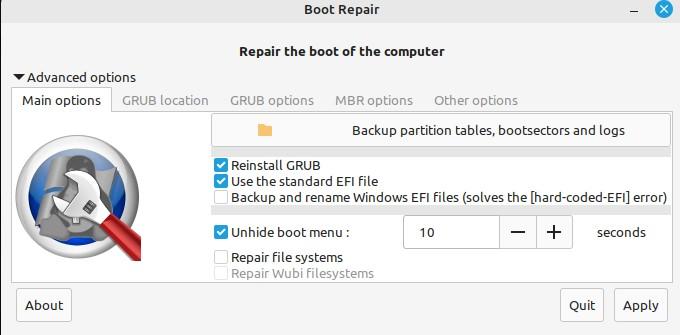
On the bottom left side of the Boot Repair tool’s main screen, you can see “Advanced options”. Let us explore this option.
There are plenty of choices here in advanced options. The first tab we could see is “Main options”. You can back up bootsectors, logs, and partition tables. GRUB can also be reinstalled with this option. In short, you can alter the default repair settings using the advanced options in Boot Repair.
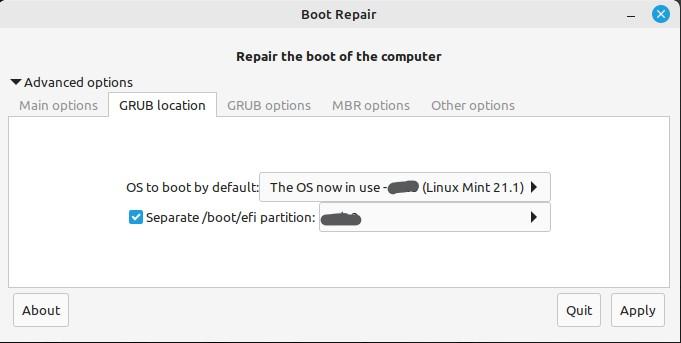
From the “GRUB location” option, you can see which OS to boot into. The default boot OS is displayed to you; the root user can modify it. Additionally, if necessary, it enables you to install GRUB on another device.
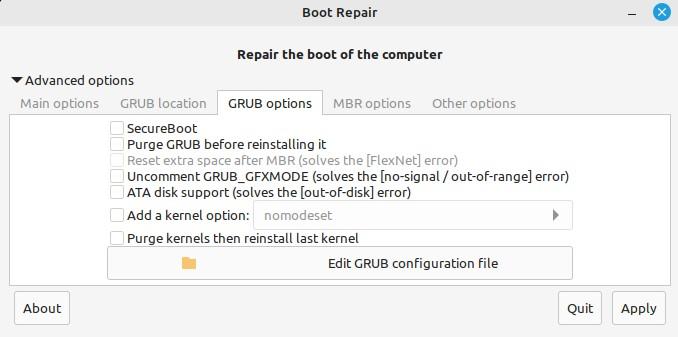
The next selection that we have is “GRUB options”. A list of choices is available with this option. The SecureBoot can be enabled and GRUB and kernels can be purged. Kernel options can be added.
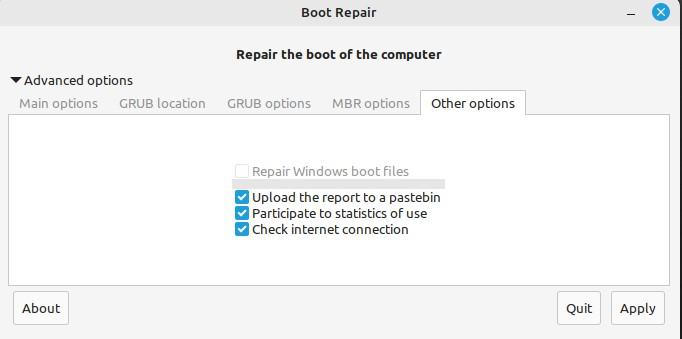
The “Other options” have various options that would help to enhance the system’s performance. It includes uploading the Bootinfo summary on the Ubuntu Pastebin, statics of use, and checking the internet connection. All these choices would eventually boost system efficiency, which would enhance user experience.
Lastly, hit “Apply” to implement the boot repair process.
The system will again ask you whether you want to make an online paste or not, now it’s your choice what you need to do. The boot will be successfully repaired.
Conclusion
Boot Repair is a tool that helps you solve boot issues. In this tutorial, we have walked you through the entire process of repairing your system with this tool. Using the command line, the Boot Repair tool was installed from the terminal. Then we explained all the options that it provides for repairing the boot issues. You can resolve the issue with the “Recommended Repair” option, if it does not work you can go for other options and share the report on forums to get help from others.