Fiddling with NVIDIA drivers and CUDA versions on your computer may cause problems like the NVIDIA drivers not working or leaving you with a black/blue screen of death. So, it’s always a good idea to leave your system as it is and make changes in an isolated environment like the Docker containers. This keeps your main computer clean (of unnecessary development tools).
In this article, we will show you how to install the Docker CE and NVIDIA docker on Linux Mint 21 so that you can access the NVIDIA GPU of your computer from the Docker containers and run the CUDA programs on your NVIDIA GPU.
Topic of Contents:
- Checking If the Official NVIDIA GPU Drivers Are Installed on Linux Mint 21
- Installing the Docker CE Dependencies on Linux Mint 21
- Installing the Docker CE GPG Keys on Linux Mint 21
- Installing the Docker CE Repository on Linux Mint 21
- Installing the Docker CE on Linux Mint 21
- Adding the Linux Mint 21 Login User to the Docker Group
- Checking If the Docker CE Is Installed Correctly on Linux Mint 21
- Installing the NVIDIA Container Toolkit GPG Keys on Linux Mint 21
- Installing the NVIDIA Container Toolkit Repository on Linux Mint 21
- Installing the NVIDIA-DOCKER Drivers on Linux Mint 21
- Checking If the NVIDIA GPU Is Accessible from the Docker Containers on Linux Mint 21
- Conclusion
- References
Checking If the Official NVIDIA GPU Drivers Are Installed on Linux Mint 21
Before you get started, run the following command to verify that you have an NVIDIA GPU installed on your computer.

In this case, we have the NVIDIA GTX 1050 Ti GPU installed on our computer. You will most likely have a different NVIDIA GPU installed on your computer.

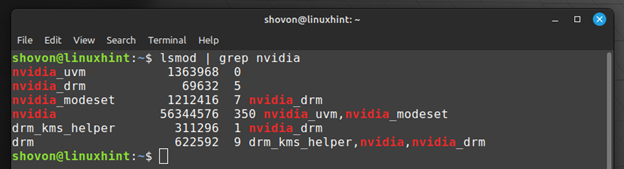
Also, make sure that you have the official NVIDIA drivers installed on your Linux Mint 21 operating system with the following command:

If the official NVIDIA drivers are installed on your Linux Mint 21 operating system, you will see the following outputs:
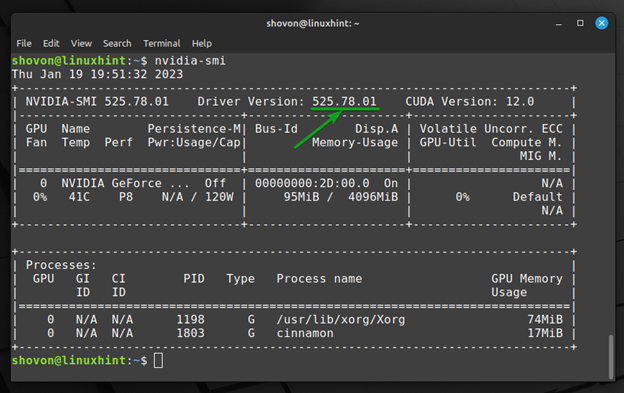
Also, check if the official NVIDIA GPU drivers are working with the following command:

If the official NVIDIA GPU drivers are working, you will see the following outputs. As you can see, we have the official NVIDIA GPU Driver version 525.78.01 installed on our Linux Mint 21 machine.
If you don’t have the official NVIDIA GPU drivers installed on your Linux Mint 21 machine and you need any assistance with that, please check the article on How to Install the NVIDIA Drivers on Linux Mint 21
Installing the Docker CE Dependencies on Linux Mint 21
Before you can install the Docker CE on Linux Mint 21, you need to install the required Docker CE dependency packages on Linux Mint 21.
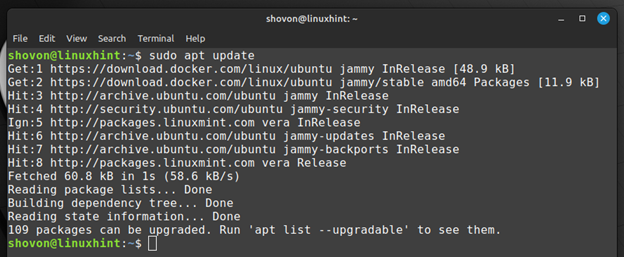
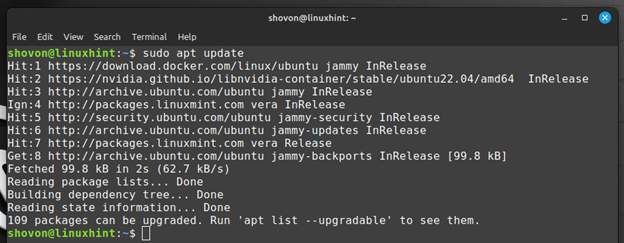
First, update the APT package repository cache with the following command:
The APT package repository cache should be updated.

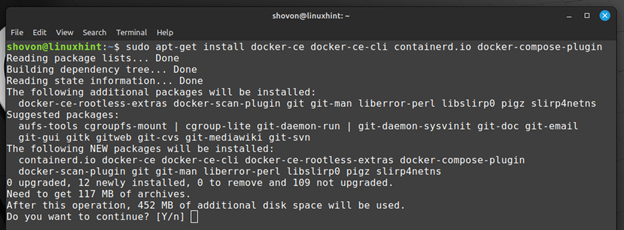
To install the required dependency packages of Docker CE, run the following command:

To confirm the installation, press Y and then press <Enter>.

The required Docker CE dependency packages should be installed.
Installing the Docker CE GPG Keys on Linux Mint 21
In this section, we will show you how to install the GPG key of the Docker CE package repository on Linux Mint 21.
First, create a new folder which is /etc/apt/keyrings with the following command:

To install the GPG key of the Docker CE package repository on Linux Mint 21, run the following command:

Installing the Docker CE Repository on Linux Mint 21
To install the Docker CE package repository on Linux Mint 21, run the following command:

Update the APT package repository cache for the changes to take effect.
Installing the Docker CE on Linux Mint 21
To install the latest version of Docker CE on Linux Mint 21, run the following command:

To confirm the installation, press Y and then press <Enter>.

Docker CE and the required dependency packages are being downloaded. It takes a while to complete.
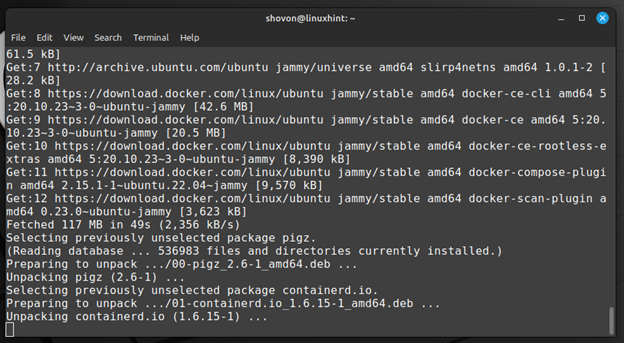
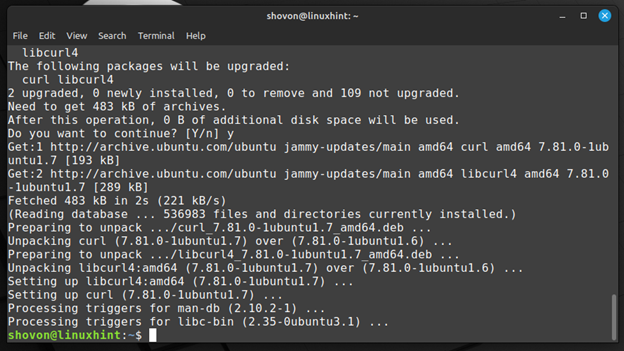
Docker CE and the required dependency packages are being installed. It takes a while to complete.
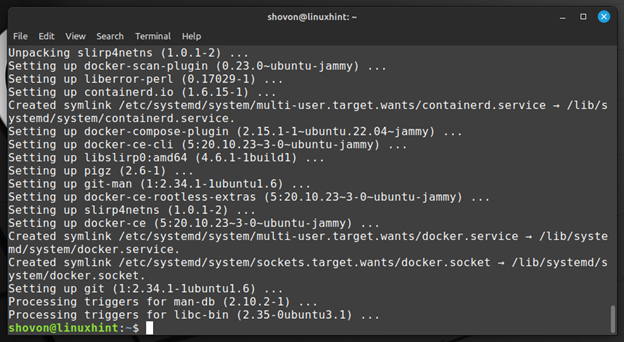
Docker CE and the required dependency packages should be installed at this point.

Adding the Linux Mint 21 Login User to the Docker Group
To create the Docker containers and manage them without using sudo or logged in as a root user, you have to add your login user to the docker group.
To add the login user of your Linux Mint 21 to the docker group, run the following command:
For the changes to take effect, restart your computer with the following command:
Checking If the Docker CE Is Installed Correctly on Linux Mint 21
Once your computer starts, run the following command to verify that you can access Docker without superuser privileges:

If everything works, you should see the following outputs.
As you can see, we are running the Docker version 20.10.23 – the latest version of Docker CE at the time of this writing.

Installing the NVIDIA Container Toolkit GPG Keys on Linux Mint 21
In this section, we will show you how to install the GPG key of the NVIDIA Container Toolkit package repository on Linux Mint 21.
To install the GPG key of the NVIDIA Container Toolkit package repository on Linux Mint 21, run the following command:

Installing the NVIDIA Container Toolkit Repository on Linux Mint 21
In this section, we will show you how to install the NVIDIA Container Toolkit package repository on Linux Mint 21.
First, create a new APT source file nvidia-container-toolkit.list in the /etc/apt/sources.list.d/ directory as follows:

Add the following line in the nvidia-container-toolkit.list file and press <Ctrl> + X followed by Y and <Enter> to save the file:
For the changes to take effect, update the APT package repository cache with the following command:

Installing the NVIDIA-DOCKER Drivers on Linux Mint 21
To install the NVIDIA Docker drivers on Linux Mint 21, run the following command:
To confirm the installation, press Y and then press <Enter>.

The NVIDIA docker drivers should be installed.

For the changes to take effect, restart your computer with the following command:
Checking If the NVIDIA GPU Is Accessible from the Docker Containers in Linux Mint 21
In this section, we will show you how to create an NVIDIA CUDA Docker container and verify that the container can access the NVIDIA GPU from your computer.
To create an NVIDIA CUDA 12 Docker container based on Ubuntu 20.04 LTS and run the nvidia-smi command in it once it’s created to verify whether it can access the NVIDIA GPU from your computer, run the following command:

Docker is pulling the nvidia/cuda:12.0.0-base-ubuntu20.04 image from Docker Hub. It takes a while to complete.

Once the NVIDIA CUDA docker image is pulled, a container is created. The nvidia-smi command runs on it and prints the output on the console as you can see in the following screenshot.
As you can see, the Docker container uses the NVIDIA GPU driver 525.78.01[1] and the CUDA version 12.0[2]. If you see similar outputs, the Docker container can access the NVIDIA GPU of your computer:

If you need to use the older versions of CUDA, check the nvidia/cuda image at the Docker Hub.
Conclusion
We showed you how to install the Docker CE package repository on Linux Mint 21. We also showed you how to install the latest version of Docker CE on Linux Mint 21. We showed you how to install the NVIDIA Container Toolkit package repository on Linux Mint 21 and how to install the NVIDIA Docker driver on Linux Mint 21 as well. Finally, we showed you how to access the NVIDIA GPU of your computer from a Docker container.