In this article, we will show you how to access the installed Linux WSL Development Environment on your Windows 10/11 computer from Visual Studio Code.
Topic of Contents:
- Connecting to the Linux WSL System from Visual Studio Code
- Opening a Project Folder of the Linux WSL System on Visual Studio Code
- Conclusion
Connecting to the Linux WSL System from Visual Studio Code
Open the Visual Studio Code from the “Start Menu” of your Windows 10/11 computer.
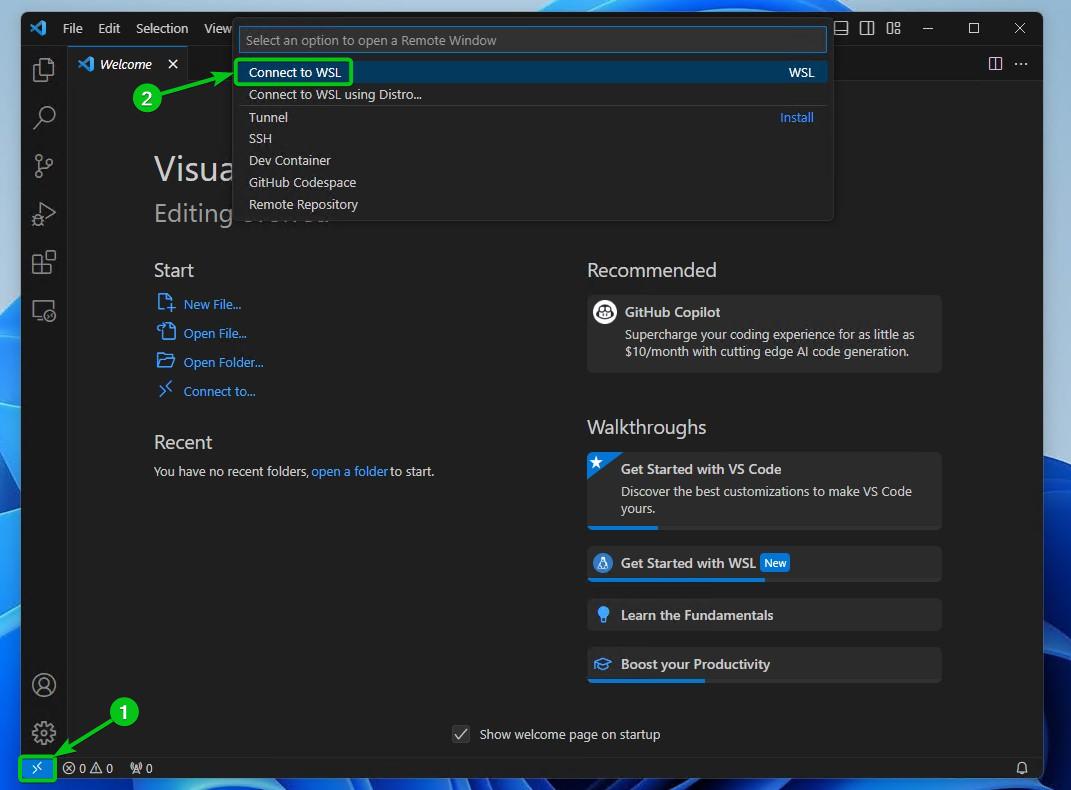
To connect to the Linux WSL system from Visual Studio Code, click on from the bottom-right corner[1] and then click on “Connect to WSL” from the top[2].
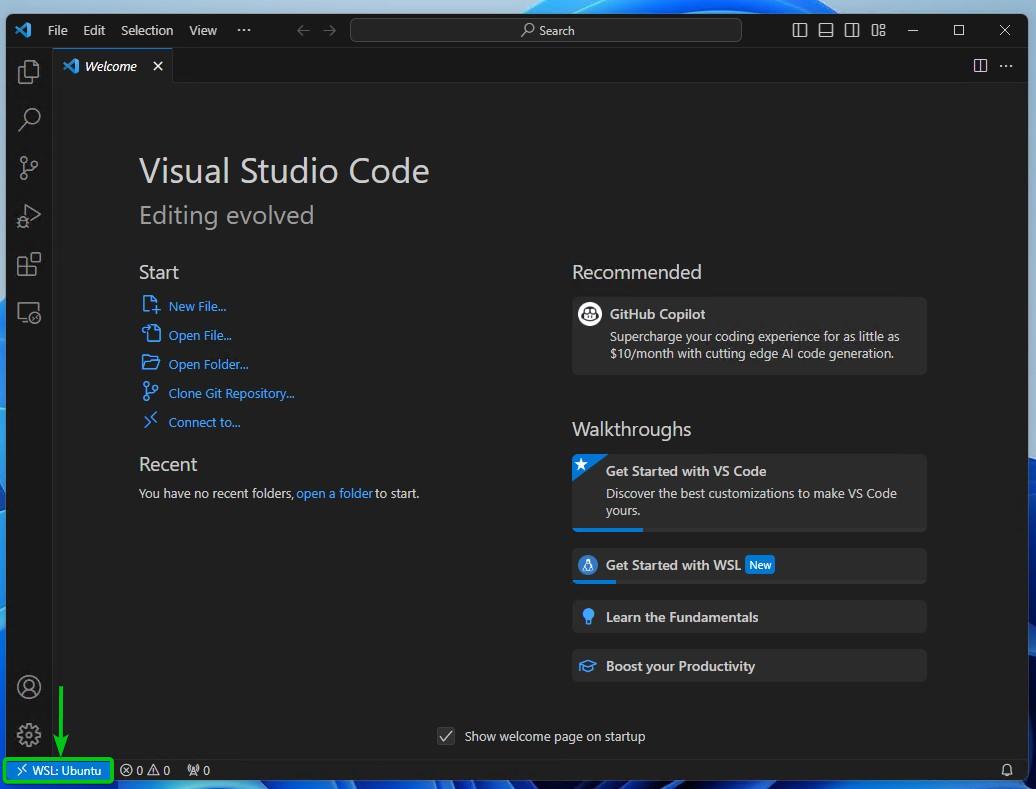
Visual Studio Code should be connected to the Linux WSL development environment of your Windows 10/11 computer.
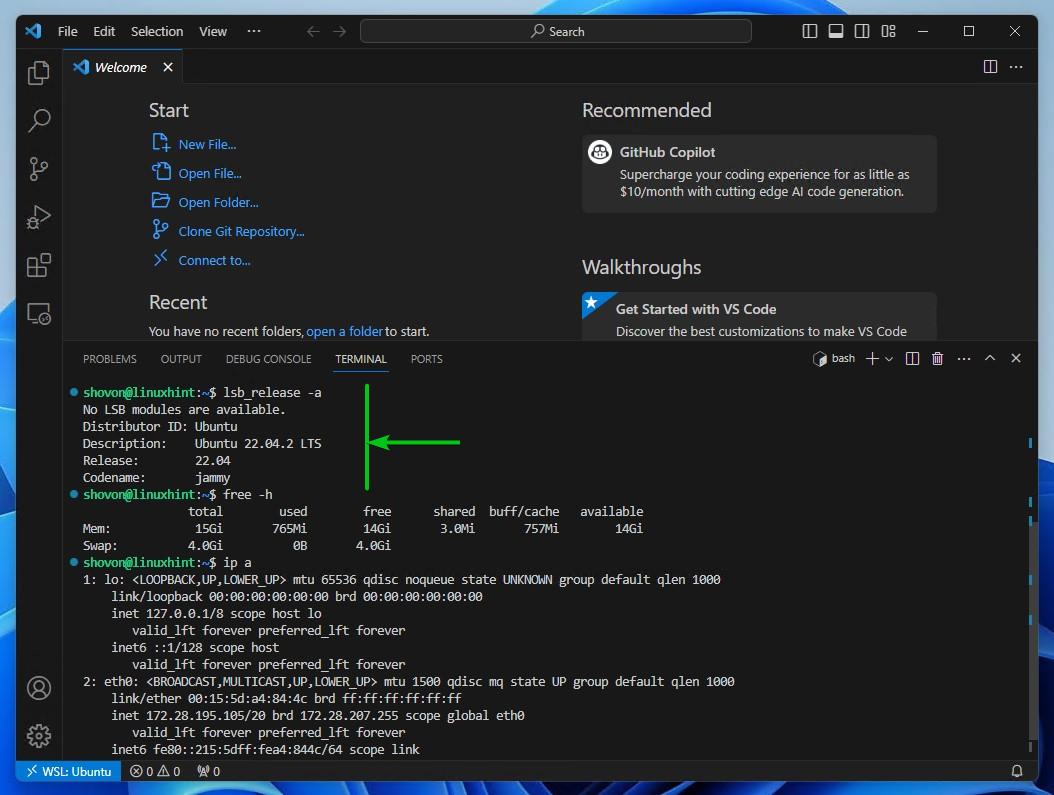
You can access the terminal of your Linux WSL development environment from Visual Studio Code by pressing <Ctrl> + `. You can run any command on the Linux WSL development environment from the terminal of Visual Studio Code as you can see in the following screenshot:
Opening a Project Folder of the Linux WSL System on Visual Studio Code
You can create a new project folder (in the path ~/projects/tf-demo, let’s say) on the Linux WSL development environment from the Visual Studio Code terminal with the following command:
$ mkdir -pv ~/projects/tf-demo/

Once you have a project folder, you can open it on Visual Studio Code.
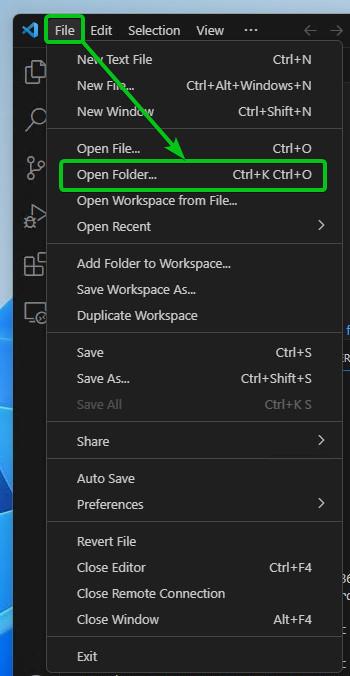
To open a project folder on Visual Studio Code, click on File > Open Folder.
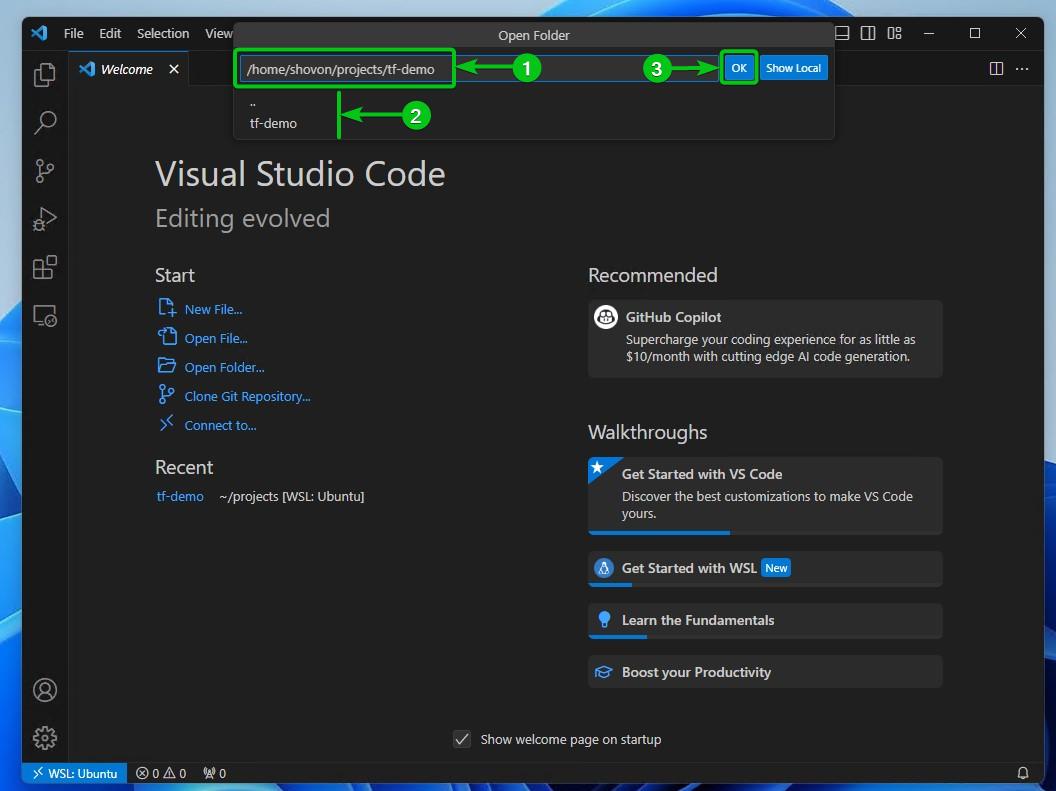
Type in a full path of your project folder[1] or select it from the folder browser of Visual Studio Code[2]. Once you’re done, click on “OK”[3].
Visual Studio Code should open the project folder from the Linux WSL development environment. We created a new Jupyter Notebook file “01-tf-chcek.ipynb” in the project folder[1].
To run the Jupyter Notebook on the Linux WSL development environment, click on “Run All”[2].
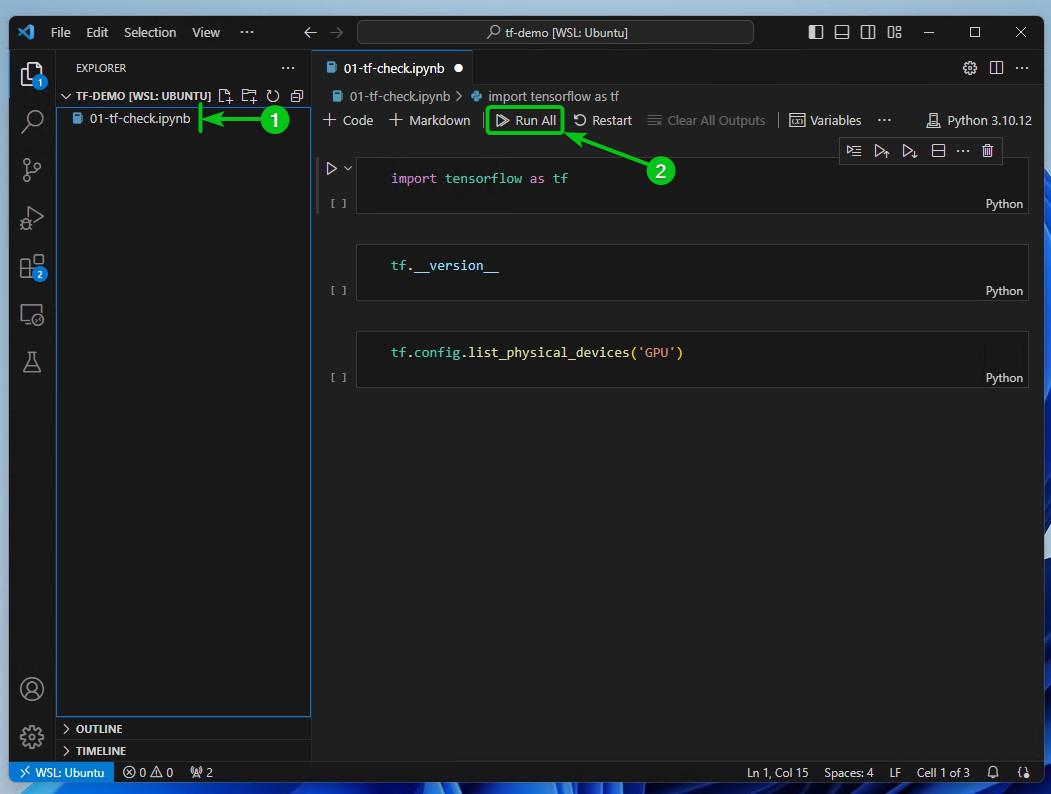
As you can see, the Jupyter Notebook file “01-tf-check.ipynb” ran successfully on the Linux WSL development environment and the output is displayed on the Visual Studio Code.
This is just a demonstration. You can learn, test, and develop your desired project on the Linux WSL development environment from Windows 10/11 using Visual Studio Code in the same way.

Conclusion
In this article, I showed you how to connect to the Linux WSL development environment from Visual Studio Code on Windows 10/11. I also showed you how to open a project folder of the Linux WSL development environment from Visual Studio Code on Windows 10/11.