In this post, we will guide you to:
- Make the USB bootable
- Install Windows 10 using a bootable USB
How to Make the USB Bootable
There are few measures that you must take to convert your USB to bootable mode:
First, you have to download the Disc or image (.ISO) file of the windows. You can use the following link to download the required version of Windows 10:
You have the option to use any third-party tools to load the image file and make the USB bootable. We have listed several tools here:
Rufus: It is an easy and one window operation, and it means you only have to customize settings on one window:
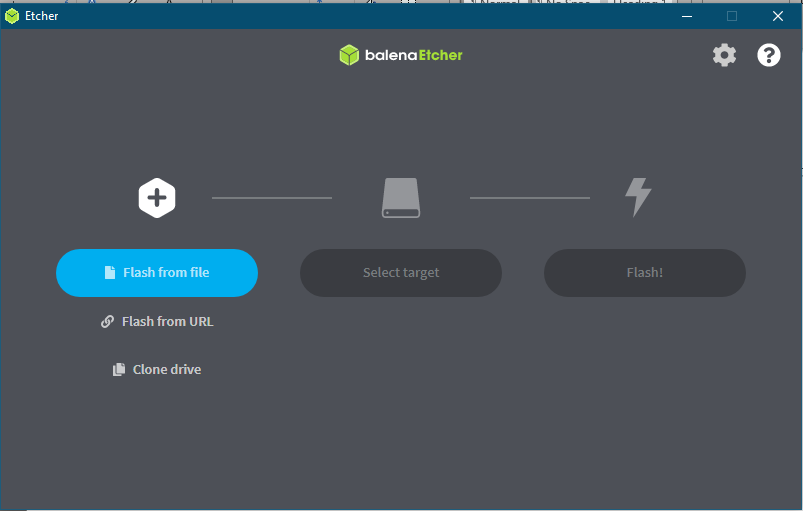
balenaEtcher: This tool also provides one window operation, but it does not have rich features as compared to Rufus:
We will use Rufus:
Prerequisites
Once you have decided to make the USB bootable for Windows 10, you need to have the following options:
- .ISO image of Windows 10
- USB drive of minimum 8 GB storage capacity
We have completed the requirements to process the next step.
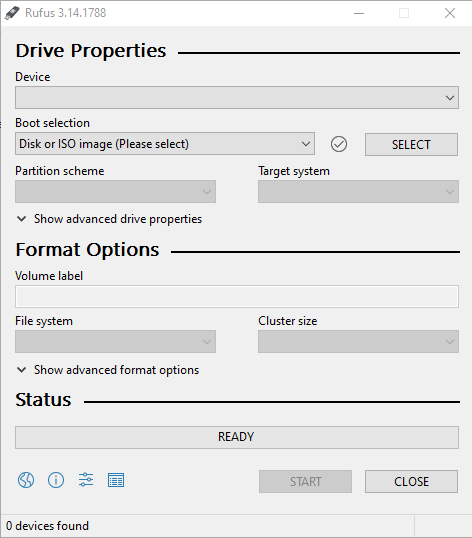
Open Rufus Software:
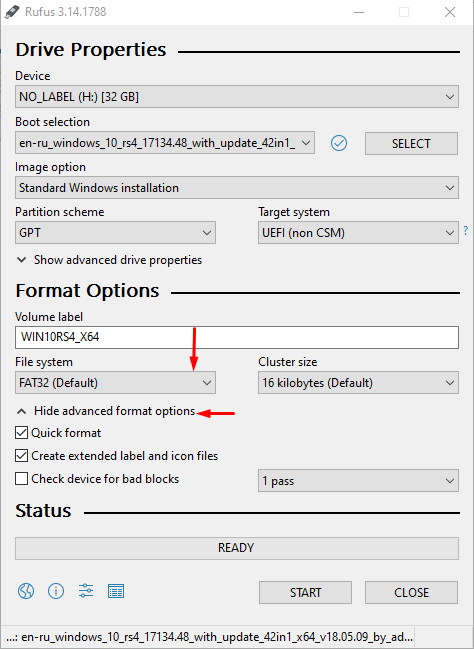
You will observe the following interface of Rufus software:
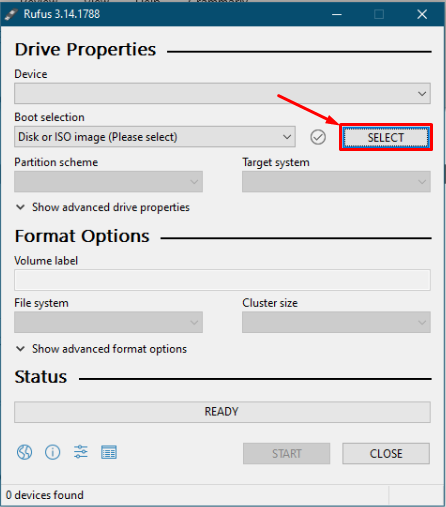
First, click on “SELECT” to choose the .ISO image of Windows 10 from your PC:
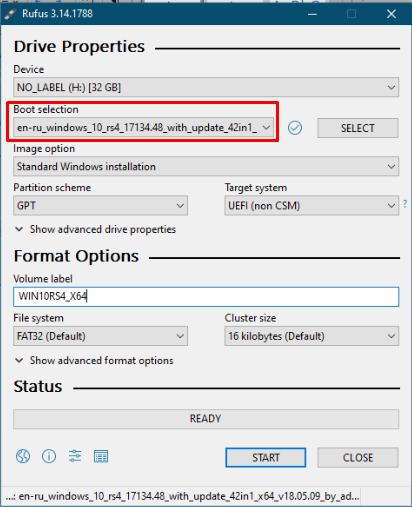
Once you have added the image file, notice that all the options are available for change:
For example, in Format Options:
You can change the file system to “FAT32” or “NTFS” for Format.
Or you can check the “Quick Format” to quickly wash out the data of USB:
Once you have customized the options, click on “START” to make the USB bootable.
It will show you a warning window that all your data from the USB will be removed:
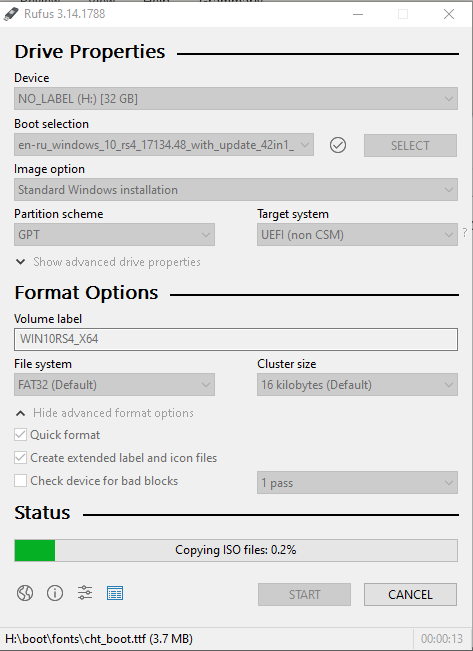
Click on “OK” to continue, then the process of making the USB bootable will start:
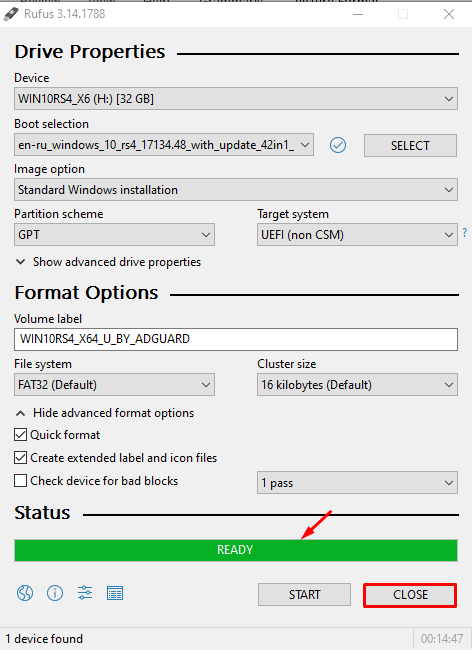
When the process is completed, the status bar will turn green, and you can close the window to finish.
Since the USB is ready, we will proceed to the installation of Windows.
How to Install Windows 10 Using Bootable USB
First, you have to insert the bootable USB and restart your machine. When it turns on, you have to navigate to the BIOS menu of the device. The different manufacturing companies have various keys to get the BIOS settings, and some of them are mentioned here:
- HP: Esc or F10
- DELL: F2 or F12
- ACER: F2
- LENOVO: F1 or F2
For instance, we are installing Windows on an HP machine. We will press Esc to get the BIOS options.
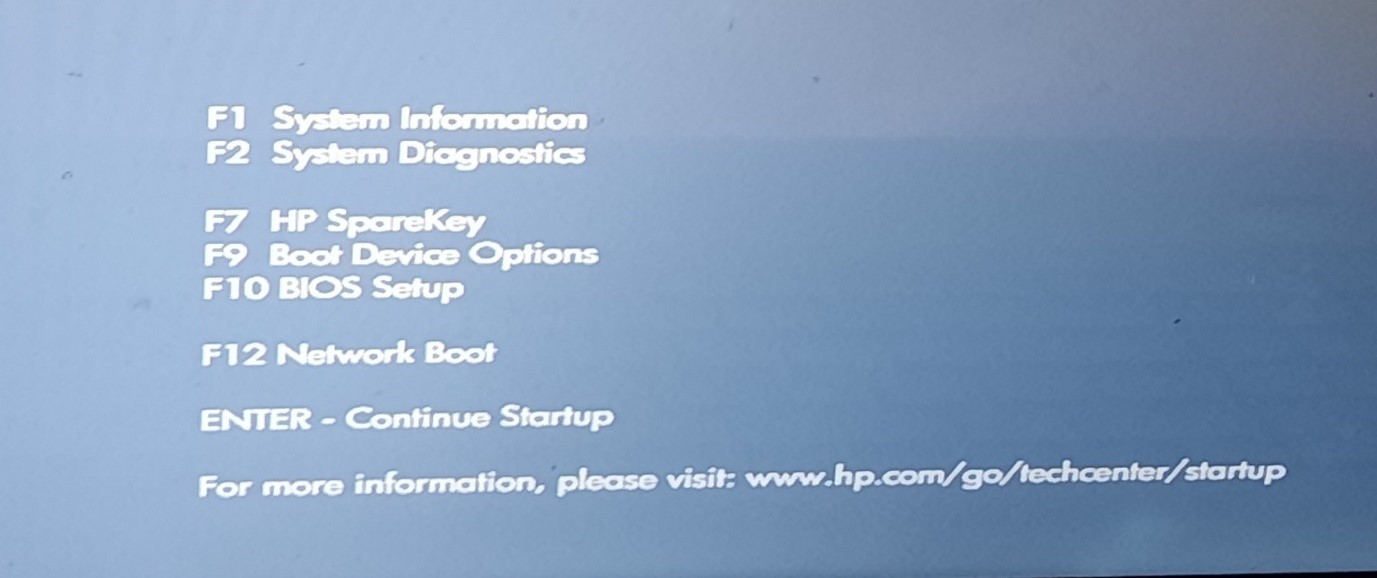
You will get the following interface:
Now, navigate to the Boot Device Options; You can directly go to the Boot menu by pressing “F9” when the system starts. You will get the devices available for boot, such as Notebook Hard Drive and Notebook Ethernet. We have to select the “USB Hard Drive 1- Flash USB Disk”:
Once you click on this, it will ask you to “Press any key to continue…” you can press any key on your keyboard to start the installation:
After that, a window will appear, and you have to choose the “Language to install”, “Keyboard or input method,” and “Time and Currency format”. Click “Next” to continue:
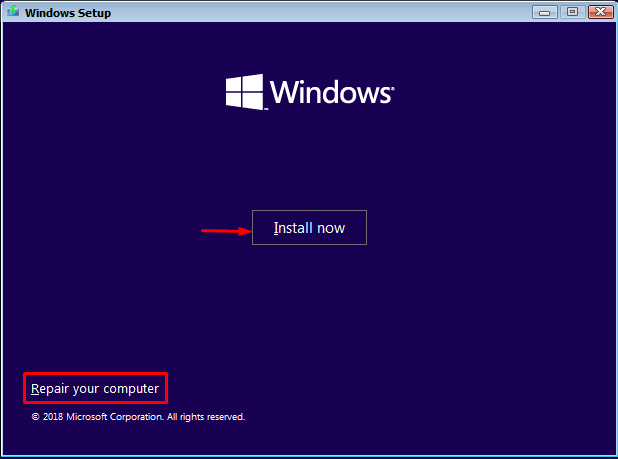
Click on “Install now” to proceed to the next step:
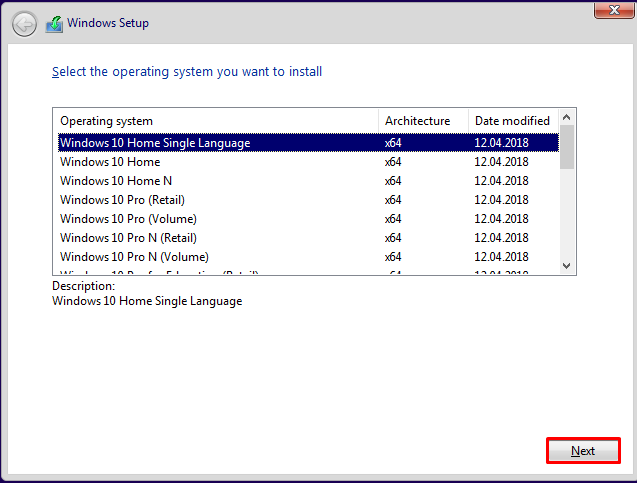
Now, a window will appear, and it will ask you to choose the variant of Windows 10. Select the version, and click “Next” to continue:
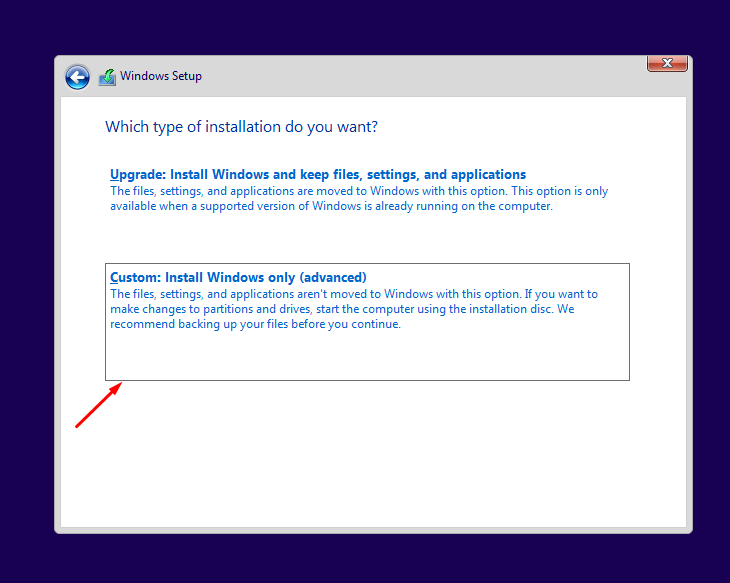
The following window will ask you to either install a new copy or upgrade the existing window:
Choose “Custom: Install Windows only (advanced)” to install a new copy of Windows 10.
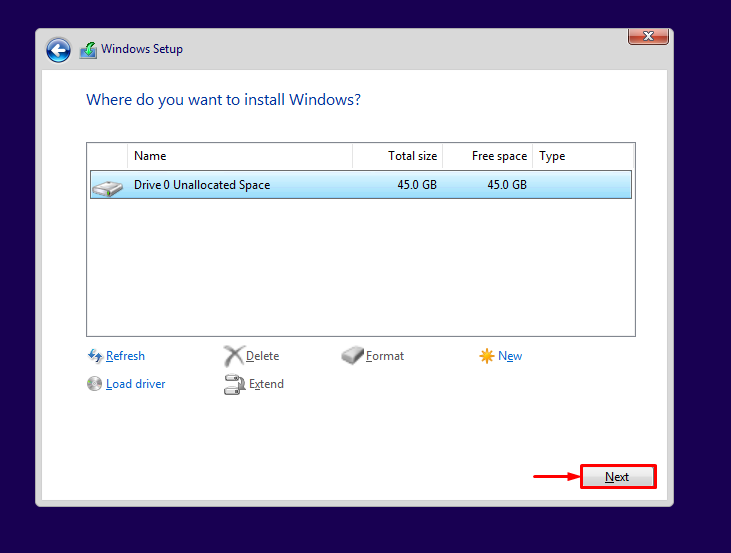
After that, it will give you an option to choose the drive for installation of Windows; select the drive, and click “Next” to continue.
Moreover, you can format or delete the selected drive from this option too:
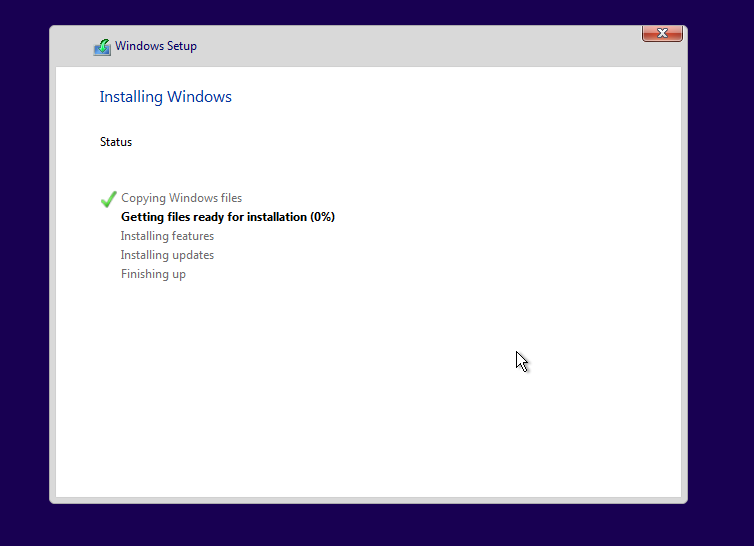
The installation will start, and a window will be displayed as shown in the image below:
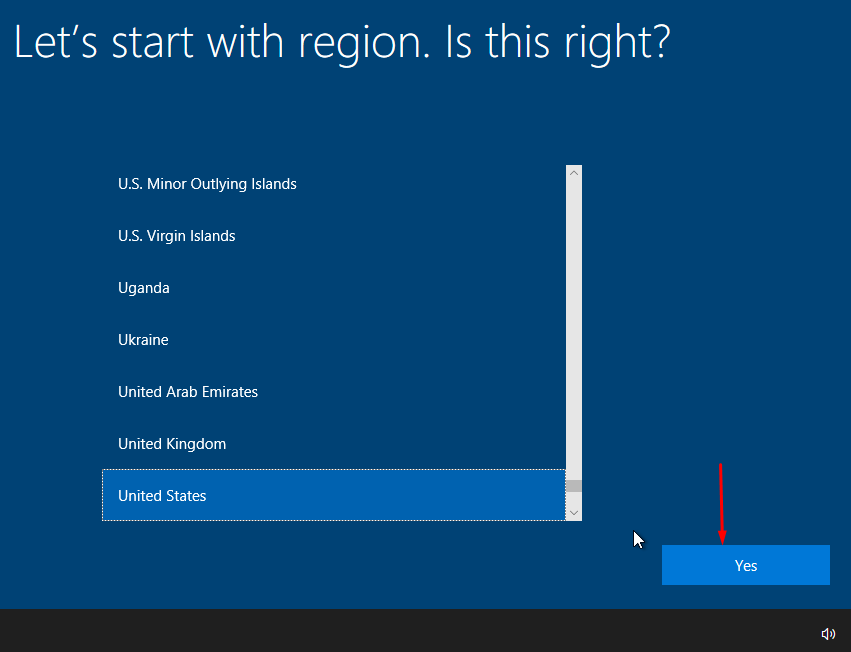
Once the installation is completed, it will ask you to choose your region. Select the region, and click on “Yes”:
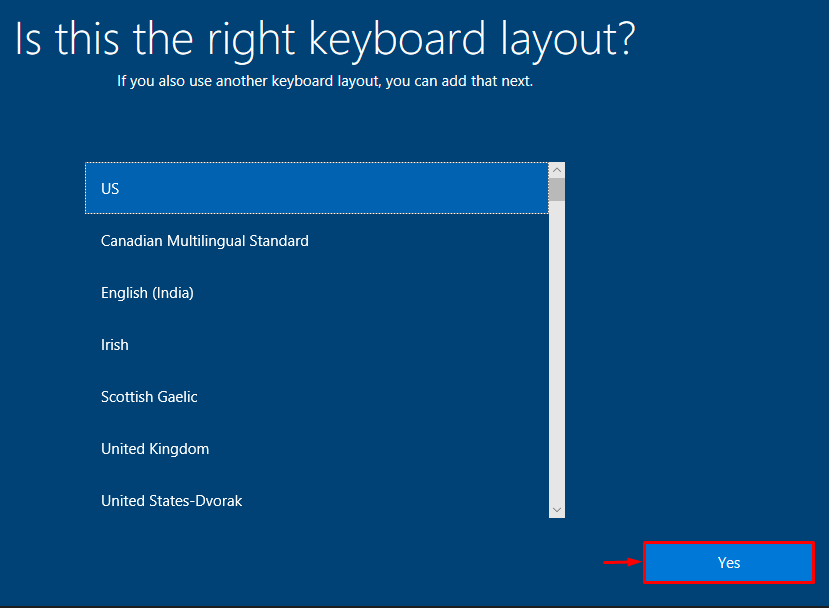
Choose the appropriate layout for the keyboard, and click on “Yes” to continue:
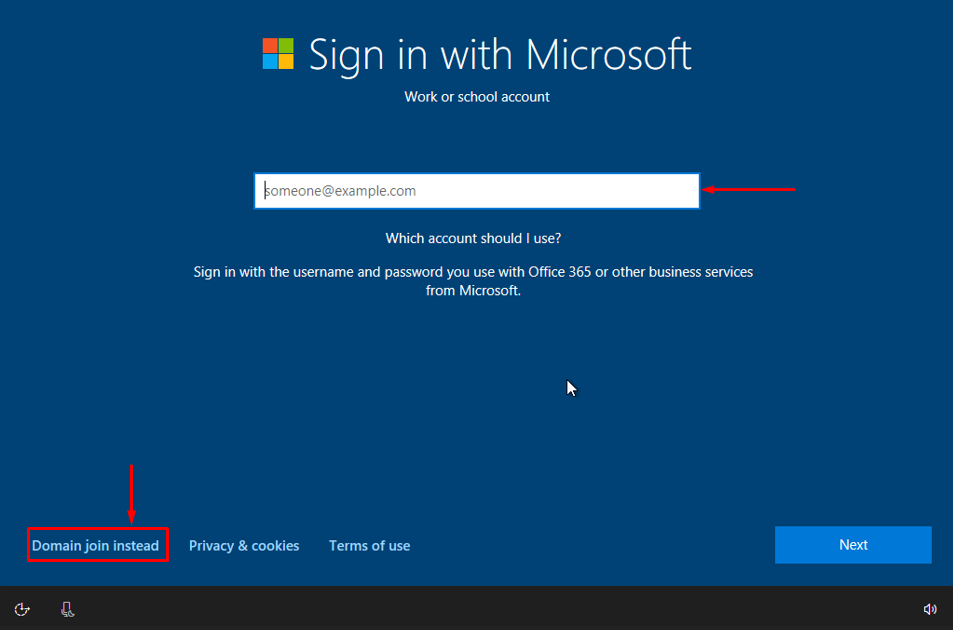
The following window will ask you to sign in using a Microsoft’s account. If you do not have a Microsoft Account, you can click on “Domain join instead” to continue. You can add a Microsoft account later:
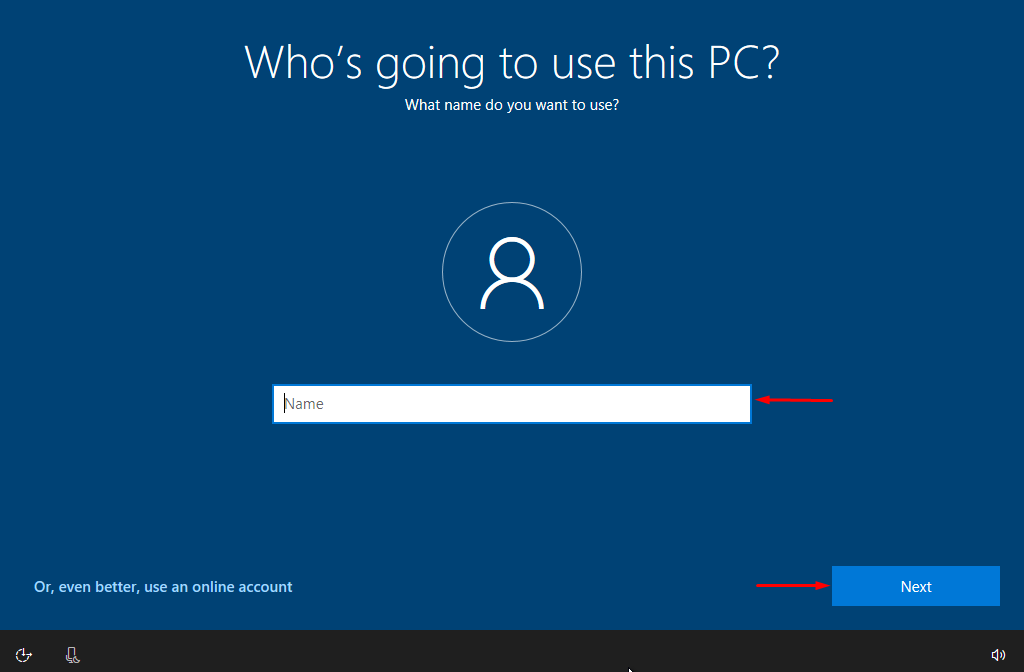
Once you click on “Domain join instead”, you will get the following interface. You have to enter a user name and click “Next” to continue.
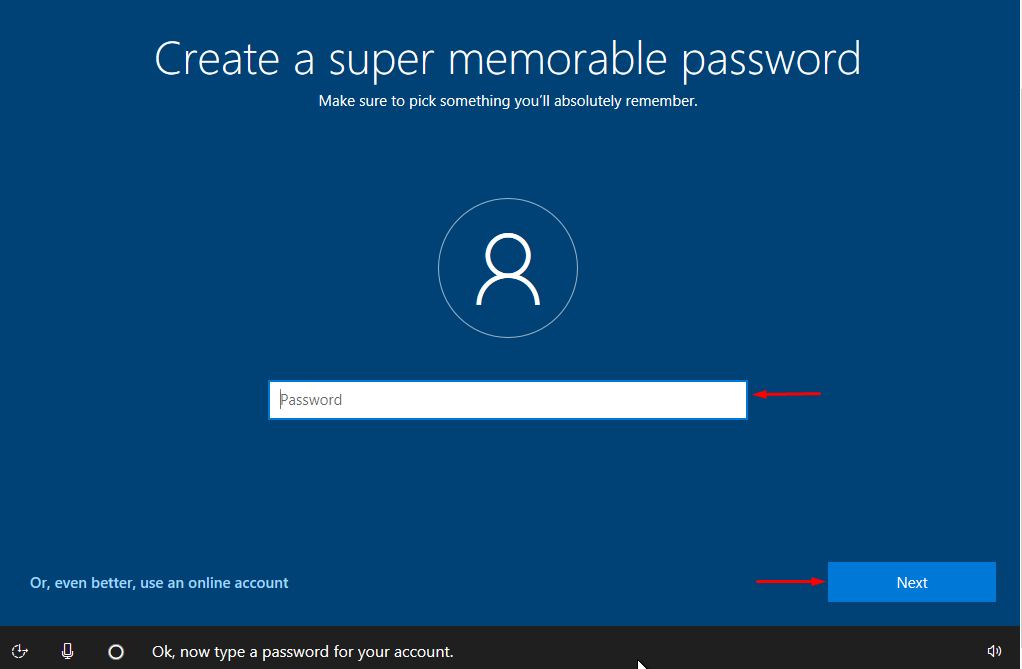
It will ask you to enter the password. Choose any password, and click on “Next” to continue:
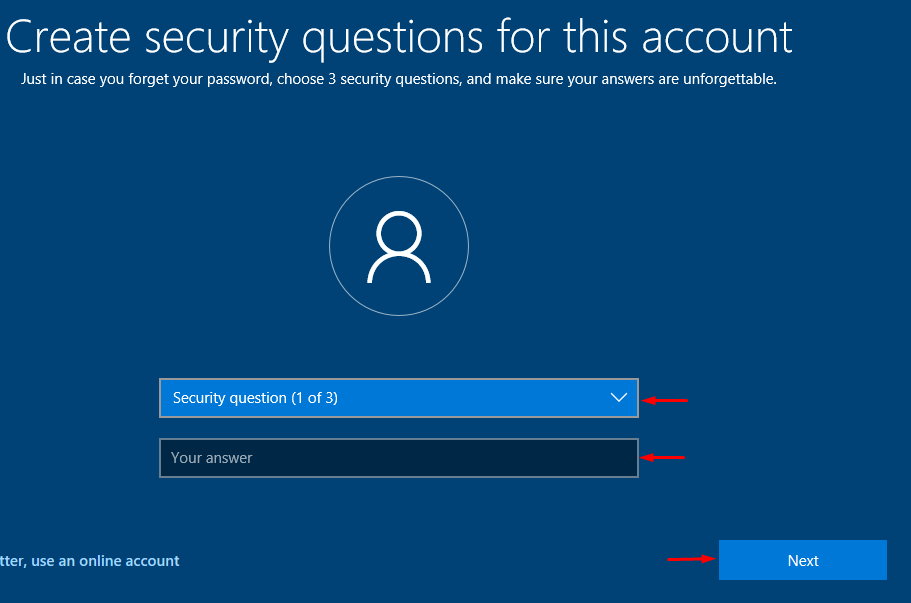
The next step will ask you to add “3” security questions and their relevant answers:
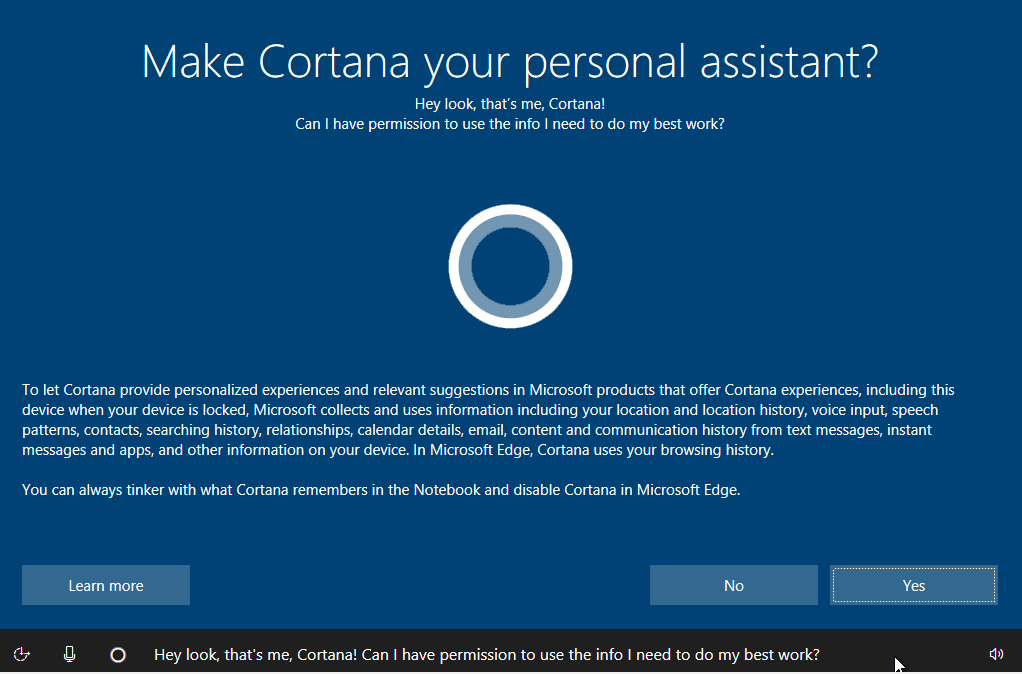
You can make Cortana your personal assistant in Windows 10. Click on “Yes” if you want to add it as your personal assistant. Otherwise, opt for “No”:
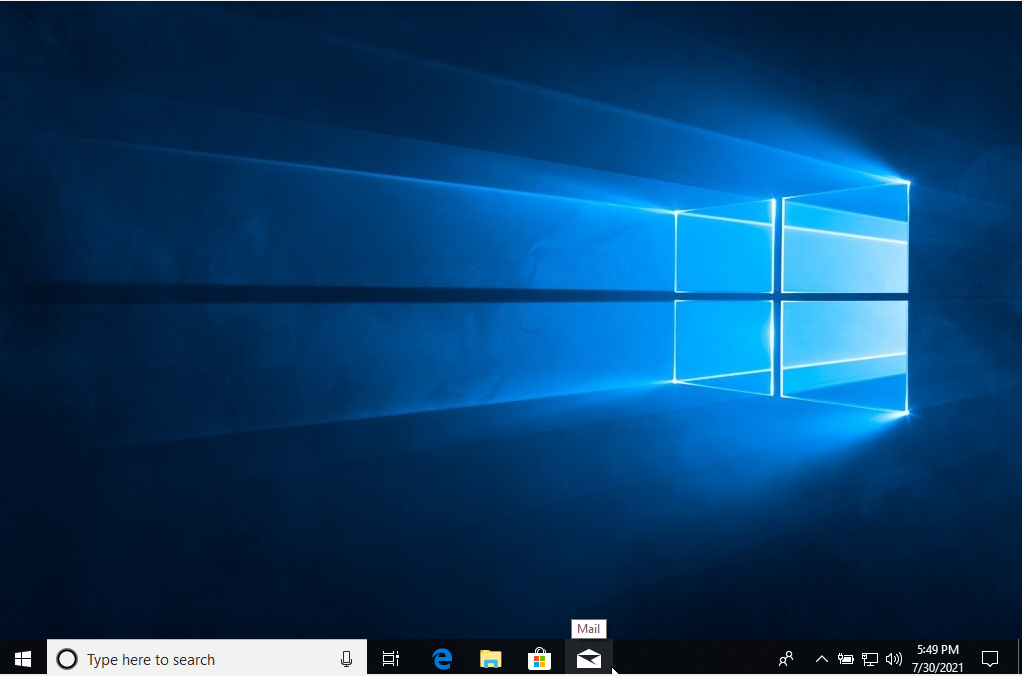
After that, it may take some time to process, and Windows desktop will be displayed as shown below:
That’s it. Windows 10 has been installed through a bootable USB drive.
Conclusion:
The Windows operating system is used by most computing devices globally. It is as essential in computing machines as breathing is to human bodies. If your operating system is going well, you will get accurate and in-time results of your commands. Contrary to this, if the OS is not functioning well, the whole machine can act up. In this guide, we briefly discussed installing Windows using bootable USB. We have also explained the process of making the USB bootable.

