Redis is an open source data structure store used for pops-up, caching, queueing, streaming engine, storing session variables, message broker, and many more operations. It provides data structures such as hashes, lists, sets, sorted sets, strings, bitmaps, and streams. Redis also enables the developers to write complex code into a few lines.
This guide will offer the procedure to install and run Redis on Windows.
How to Install Redis on Windows?
To install Redis on Windows, follow the below-given procedure.
Step 1: Download Redis Setup File
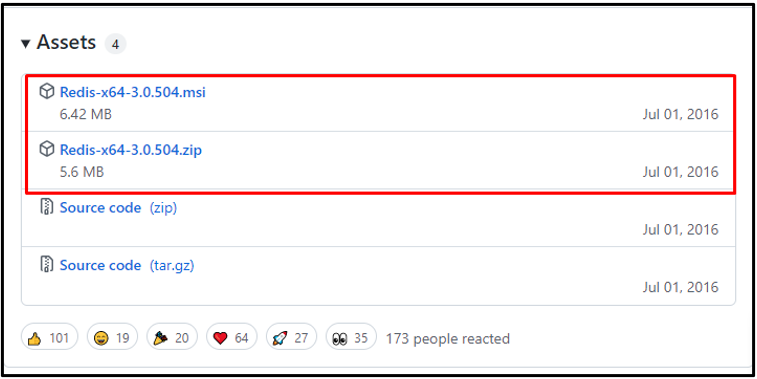
First, navigate to the below-mentioned link and download the latest Redis setup file:
You can download the .zip or .msi setup file:
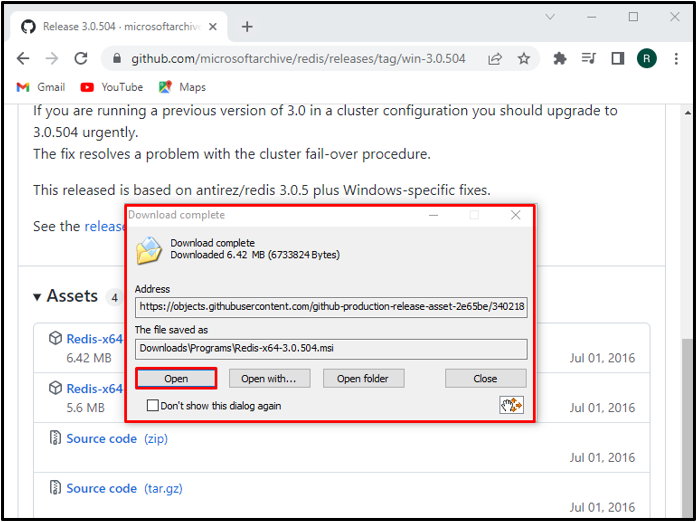
In our case, we have downloaded the “msi” setup file, which will be saved in the “Downloads” folder.
Now, click on the “Open” button to install Redis:
Step 2: Install Redis
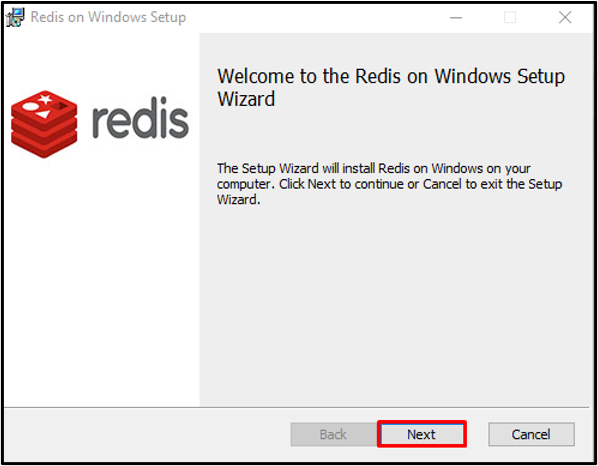
Upon doing so, the “Redis on Windows Setup” wizard will appear on the screen. Start Redis installation by clicking on the “Next” button:
Accept the “End-User License Agreement” and press the “Next” button:
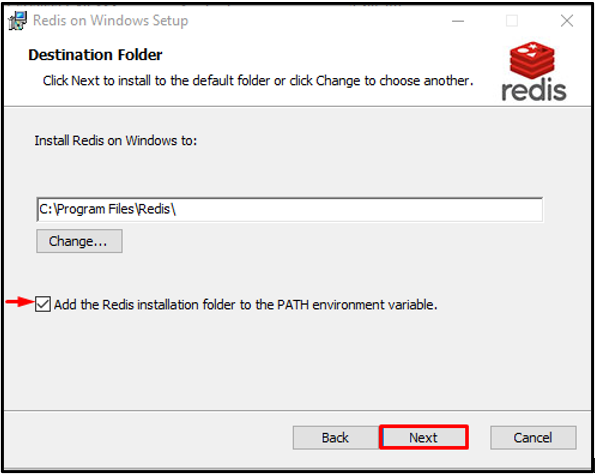
Set the location for Redis installation and mark the checkbox to add the path in environment variables.
Then, press the “Next” button:
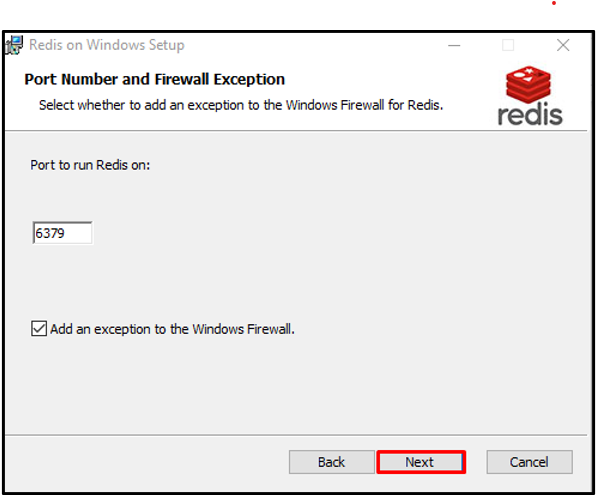
Specify the port on which the Redis will run or continue with the default port and hit the “Next” button:
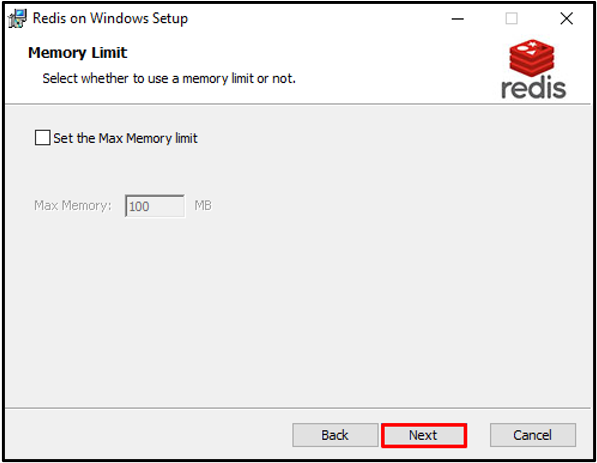
Additionally, you can also set the “Max Memory limit” and press the “Next” button:
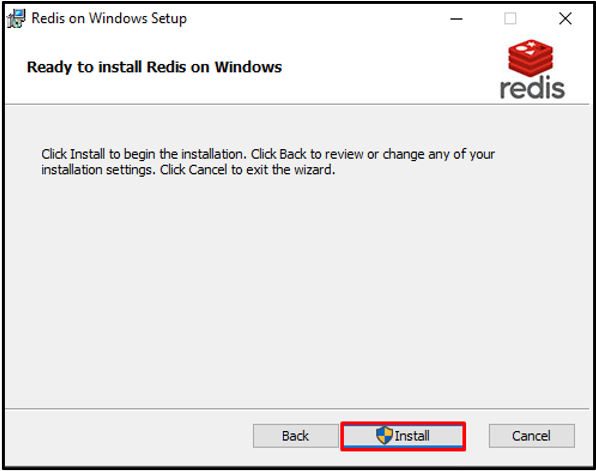
Finally, click on the “Install” button to begin the Redis installation:
After successfully installing Redis, press the “Finish” button and start using it:
Let’s move ahead to run Redis on Windows.
How to Run Redis on Windows?
To run Redis on the Windows command line, follow the below-listed steps.
Step 1: Open Command Prompt
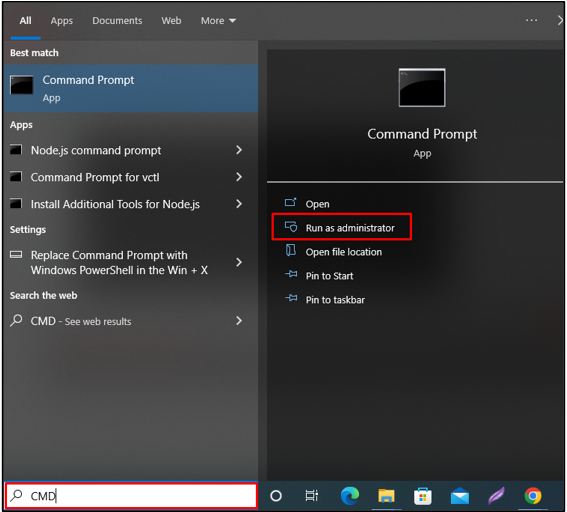
Firstly, search for “CMD” in the “Startup” menu and open the Command Prompt:
Step 2: Run Redis Server
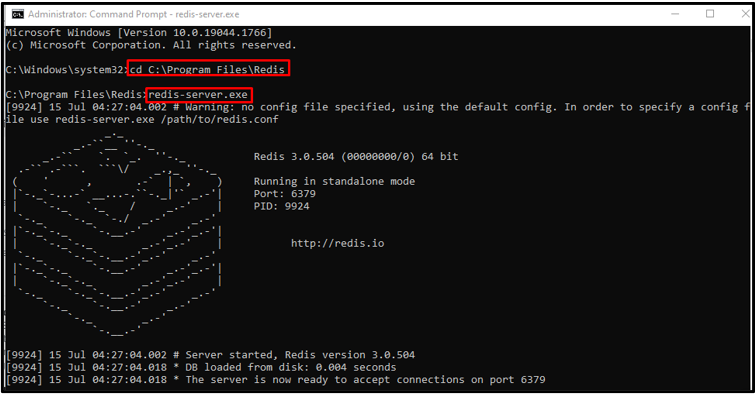
Move to the Redis setup folder and run the Redis Server using the below-provided command:
>redis-server.exe
Step 2: Start Redis Services
Start Redis server services by typing the following command:
Step 3: Run redis-cli
Execute the “redis-cli” command to run the Redis command-line interface:
Step 4: Set New Channel
After enabling Redis CLI, check out the working of Redis by setting a new channel name using the “set” command. Then, utilize the “get” command to view the channel name:
>get channelName
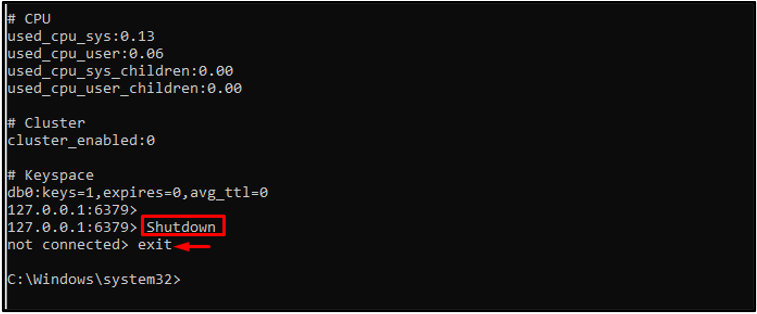
Execute the “info” command to check the complete details of the Redis server:
Step 5: Exit redis-cli
To exit or close the Redis command-line interface, write out the below-listed command:
> exit
We have checked out the working of Redis on Windows. Let’s move further toward the Redis uninstallation method.
How to Uninstall Redis From Windows?
To uninstall Redis from Windows, follow up on the below-given procedure.
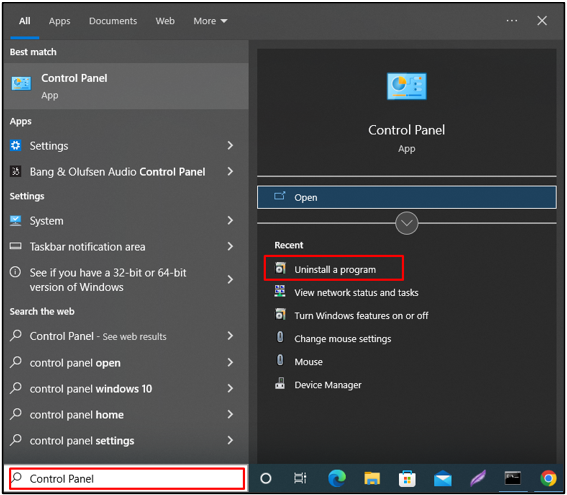
Step 1: Open Control Panel
Firstly, open up the “Uninstall a program” category of the Control Panel using the Start-up menu:
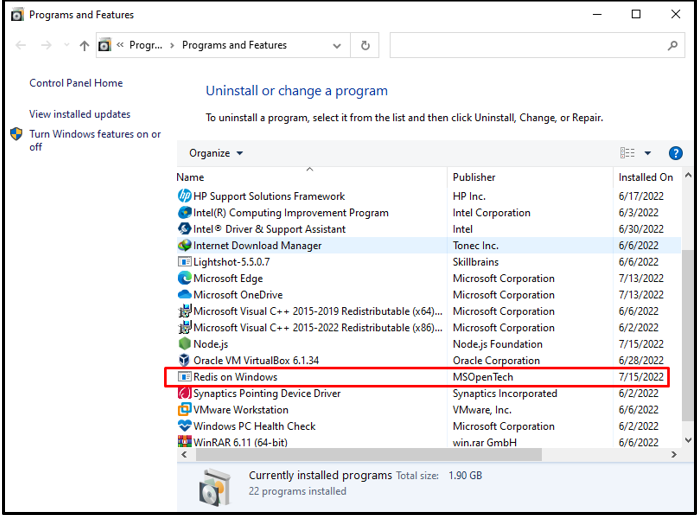
Step 2: Select Redis File
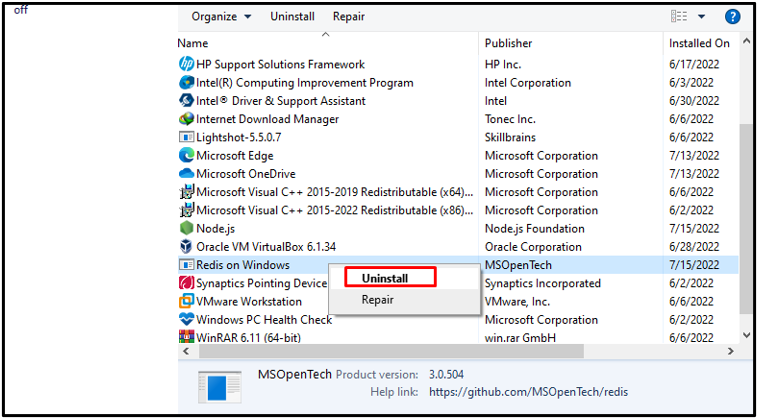
Right-click on the “Redis on Window” file:
Step 3: Uninstall Redis
Right-click on the selected file and select the “Uninstall” option from the context menu:
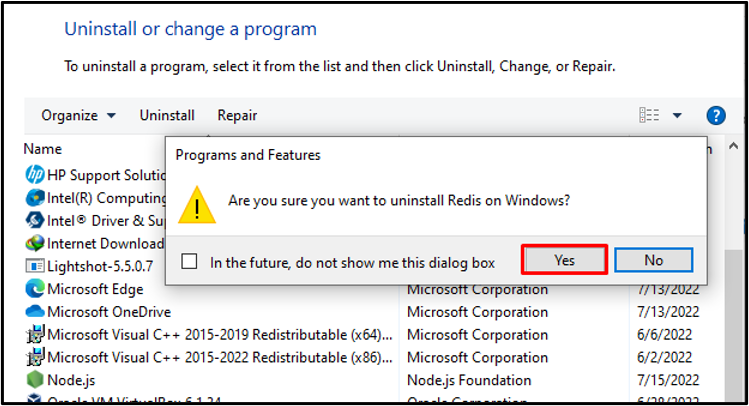
Upon doing so, an alert box will display on the screen for confirmation. Press the “Yes” button to uninstall Redis from Windows:
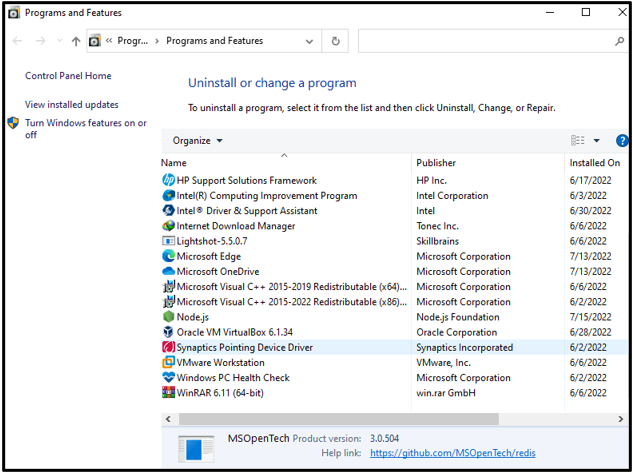
From the below-given output, it is clear that we have successfully uninstalled Redis from Windows:
We have effectively compiled the methods to install, run, and uninstall Redis on Windows.
Conclusion
To install Redis on Windows, first, download the Redis setup file for Windows from the provided link. Then, execute the downloaded Redis installer file for Redis Installation. To run Redis on Windows Command Prompt, utilize the “redis-server.exe” command. You can also activate the Redis command-line interface using the “redis-cli” command. This guide effectively elaborated the method to install, run, and uninstall Redis on Windows.


