React native is a product of Meta Platforms. It is not only free but also an open-source framework utilized to develop android apps. It enables the developers to build truly native apps with different capabilities. In this write-up, we will be demonstrating how to install react native framework on Windows 10.
In order to install React native on Windows 10, here are the steps that we are going to take:
-
- Install Chocolatey Package
- Install Node, Python2, and JDK8 Packages
- Install Android Studio
- Set up Android SDK
- Create New user variable
- Install React Native CLI
- Create React Native Application
- Run the React Native app
Let’s get started!
Prerequisites
Before installing React Native on the Windows system, follow the provided procedure to fulfill the prerequisites.
Step 1: Install Chocolatey Package
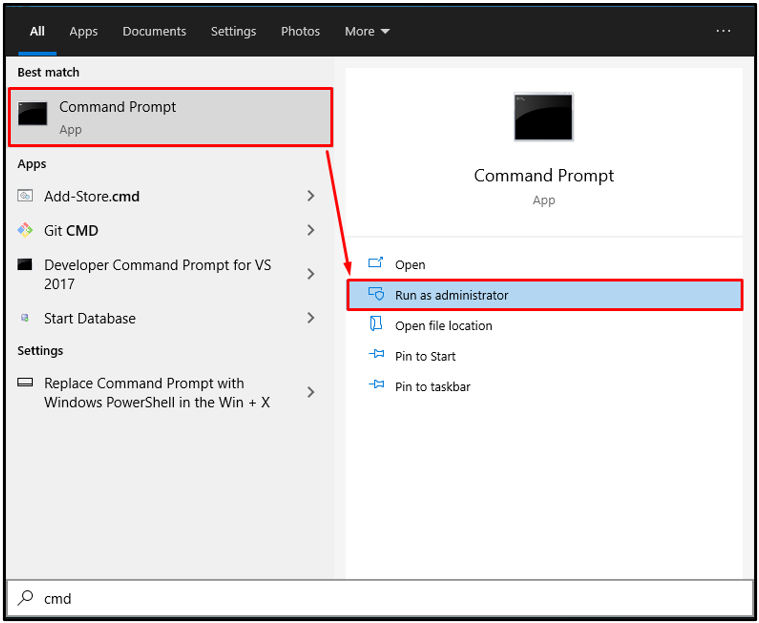
Firstly, you must install the Chocolatey package. For this purpose, open command prompt with administrator privileges:
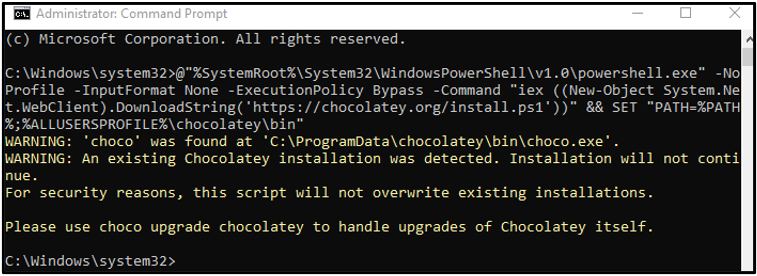
After you open the CMD, you need to write the below command in the console to install Chocolatey on Windows 10:
As you can see from the above screenshot, Chocolatey has already been installed on our system.
Step 2: Install Node, Python2, and JDK8 Packages
Next, install Node, Python2, and JDK8 with the help of the installed choco package manager:
Step 3: Install Android Studio
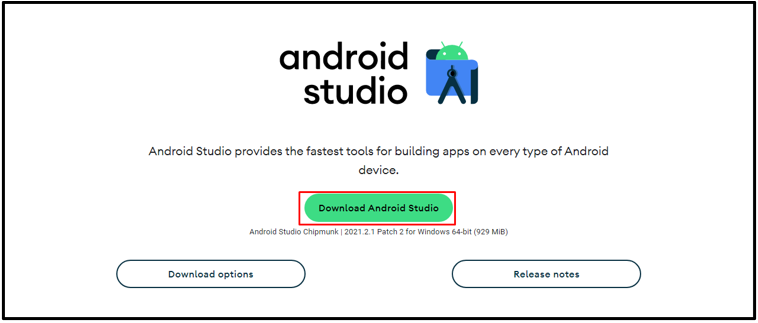
Follow the provided link to download Android Studio:
Step 4: Set up Android SDK
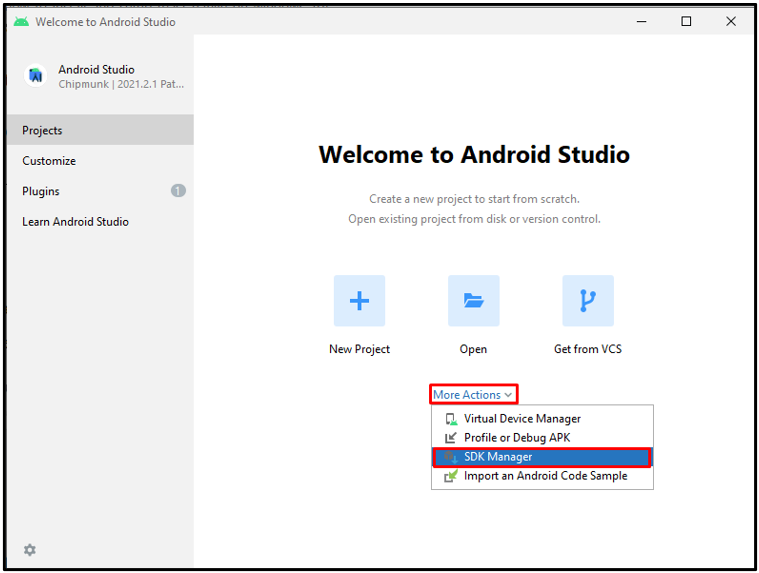
Set up the Android Studio on Windows 10. For this purpose, first of all, click on “More Actions” and select the “SDK Manager” from the drop-down menu:
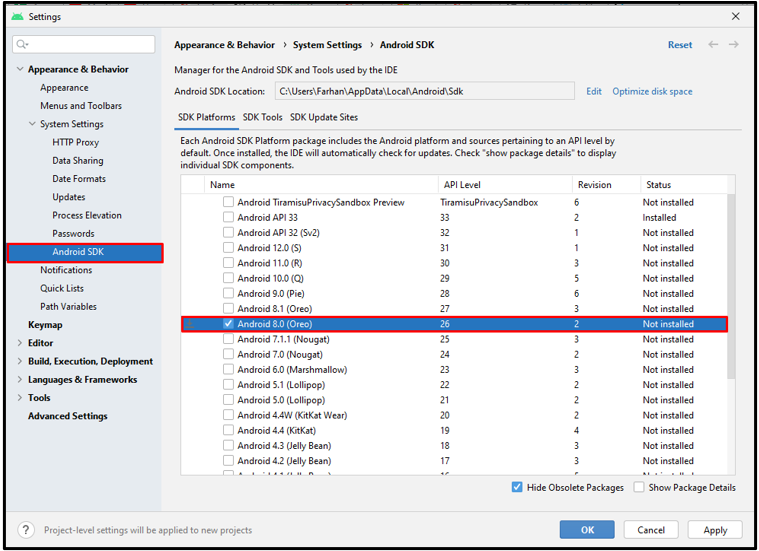
Then, click “Android SDK” > “SDK Platforms” > “Android 8.0 (Oreo)”, which has API level (26):
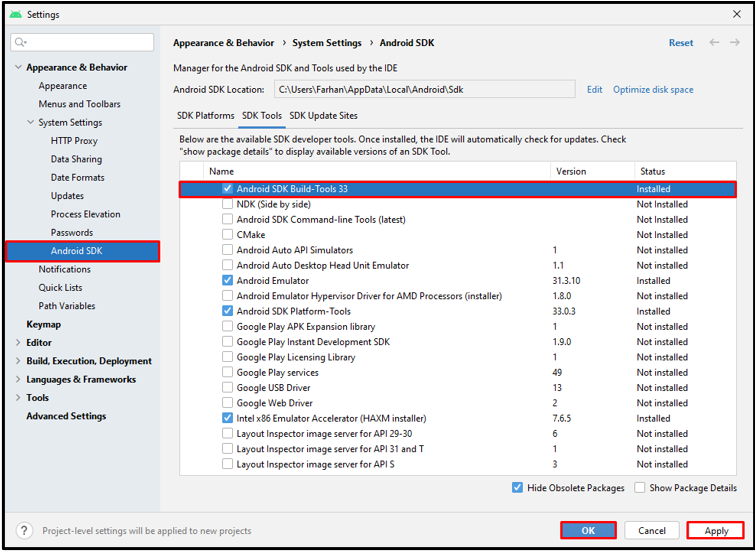
Mark the “Android SDK Build-Tools 33” checkbox in the “SDK Tools” tab, click on “Apply”, and hit “OK”:
The above procedure will install the selected components.
Step 5: Create New User Variable
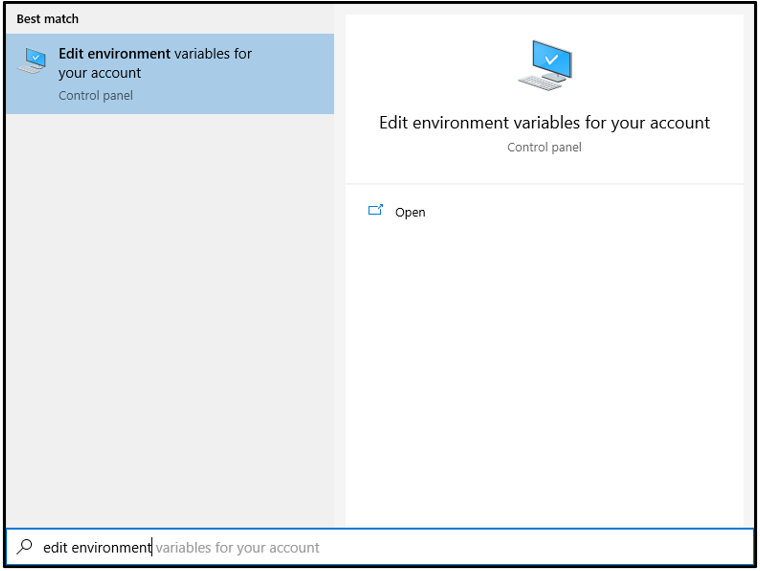
Now, create a new user variable. To do this, open up the “Edit environment variables for your account” application:
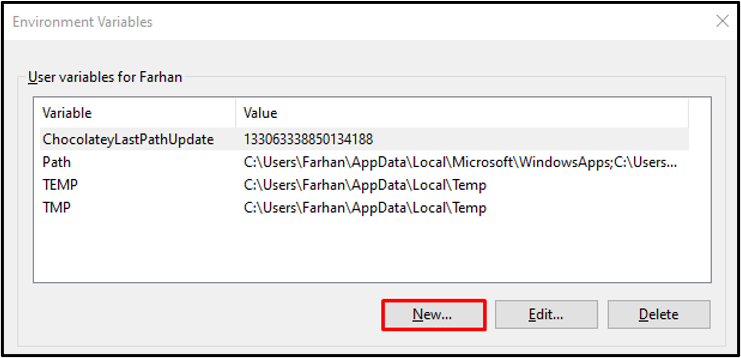
Then, click on the highlighted “New” button to add a new variable user:
Add the path of the Android SDK folder in it, set the variable name, and click “OK”:
All of the prerequisites are fulfilled. Now, move to the installation of React Native CLI tool.
How to Install React Native CLI on Windows 10?
We need to perform some steps to install React Native on Windows 10.
Step 1: Install React Native CLI
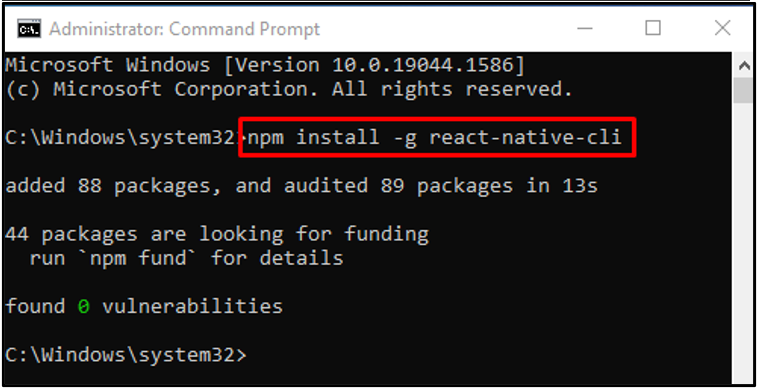
To install react native, first you need to open up Command Prompt with the administrative privileges and then write the given command for React Native CLI tool installation:
The reactive native has been installed successfully on Windows 10.
Step 2: Create React Native Application
For the testing purpose, create a react native application:
Step 3: Run React Native Application
Run the command below to launch the newly created application:
That’s it! We have successfully installed React native on our system.
How to Uninstall React Native from Windows 10?
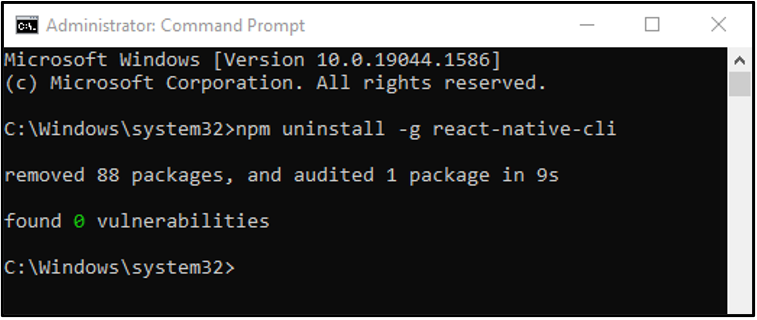
If you want to uninstall react native from Windows 10, open CMD with administrative privileges and execute the following command:
We have provided extensive information related to the installation of React Native on Windows 10.
Conclusion
To install React Native, you need to install Chocolatey, Node, Python2, JDK8, Android Studio, and Android SDK. Then, create a new variable, set the path of the Android SDK, and install React native with the “npm install -g react-native-cli” command. This manual offered the method of React Native CLI installation on Windows 10.

