OpenJDK is an acronym for “Open Java Development Kit“. It is a freely available, open-source version of the JDK for the Java Standard Edition (Java SE) and Java Platform. It provides a base using which all of the other Java versions are created. OpenJDK also assists developers in stepping up for Java development.
We will elaborate on the method to install, configure, and remove OpenJDK 8 in Windows.
How to Install OpenJDK 8 on Windows?
To install OpenJDK 8 on Windows, follow the below-listed steps.
Step 1: Download OpenJDK 8
Firstly, navigate to the below-given link and download the OpenJDK 8 setup folder for Windows:

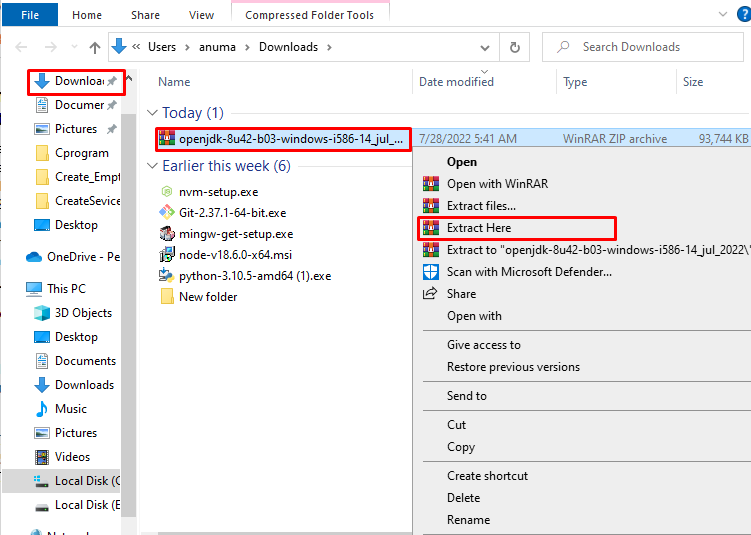
Step 2: Extract OpenJDK 8 Zipped Folder
Open the “Downloads” directory, right-click on the OpenJDK 8 zipped folder, and extract the folder by clicking on the “Extract here” option:
Step 3: Find java.exe File
Open the “bin” directory of the extracted folder and look for the “java.exe” file. We have used a compressed OpenJDK setup, so we do not need to launch Java or execute the Java installer:
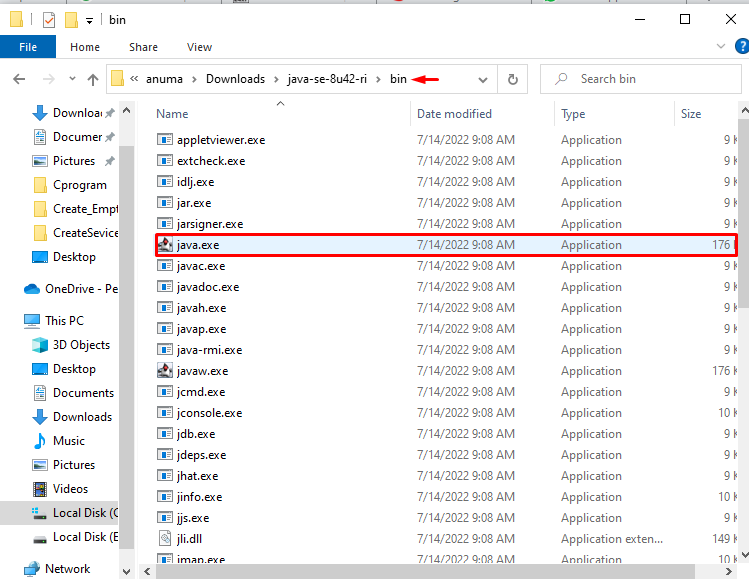
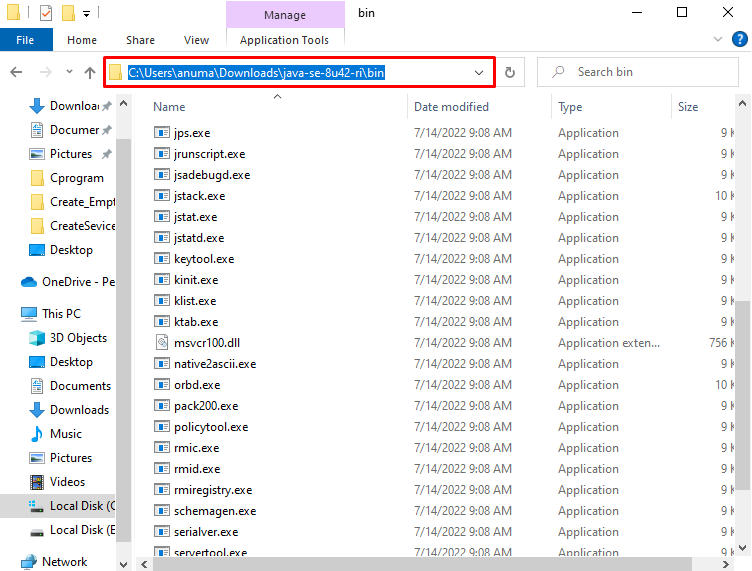
Go to the “Address” bar and copy the path where the “java.exe” file is found. This path will be used during the configuration:
We have successfully installed java by extracting the zip folder of OpenJDK 8. Now, let’s configure it on our Windows.
How to Configure OpenJDK 8 on Windows?
In order to configure OpenJDK 8 on Windows, check out the provided steps.
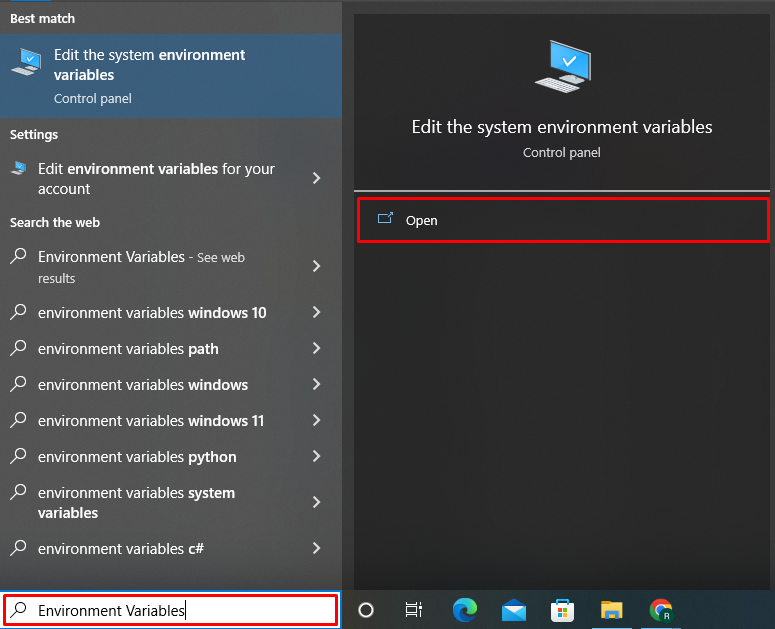
Step 1: Set Path Environment Variable
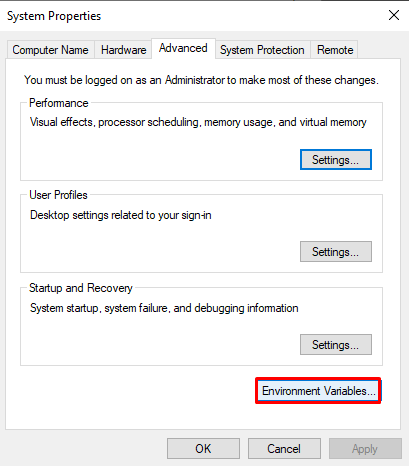
We can configure Java on Windows by setting a Path environment variable. For this purpose, search for “Environment Variables” in the “Startup” menu and open the “Edit the system environment variables” settings:
Then, hit the “Environment Variables” button:
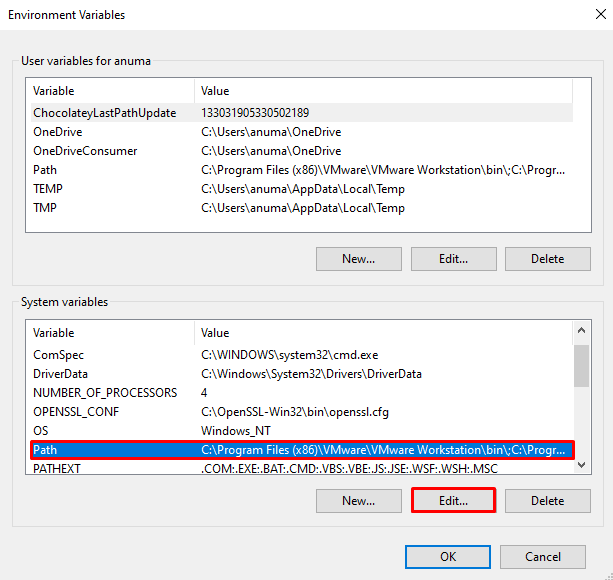
From the “Environment Variable” window, go to the “System variables” panel. Select the “Path” option and hit the “Edit” button:
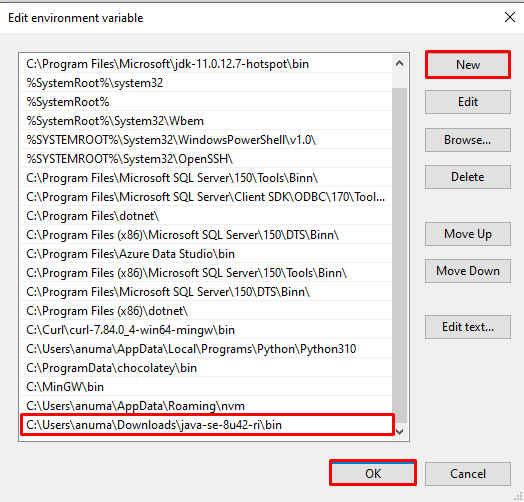
After that, click on the “New” button, paste the copied path, and press the “OK” button to save changes:
Step 2: Open Command Prompt
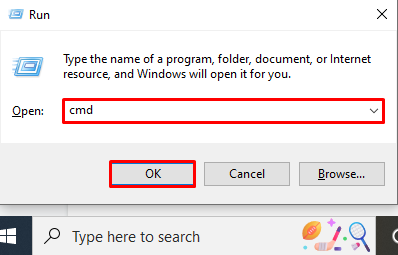
Press “Window+R” to launch the “Run” box, search for “cmd” here, and hit the “OK” button to open Command Prompt:
Step 3: Verify Java Installation and Configuration
Next, verify the Java installation and configuration on Windows by checking its version:
We have successfully installed and configured OpenJDK 8 on Windows:

Let’s check out how to remove OpenJDK from Windows.
How to Remove OpenJDK 8 on Windows?
To remove OpenJDK 8 from Windows, follow the below-mentioned instructions.
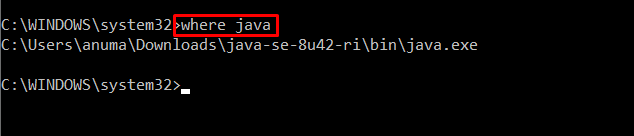
Step 1: Find OpenJDK 8 Directory
Firstly, find out the location where the extracted OpenJDK 8 folder is placed. For this purpose, follow the provided command:
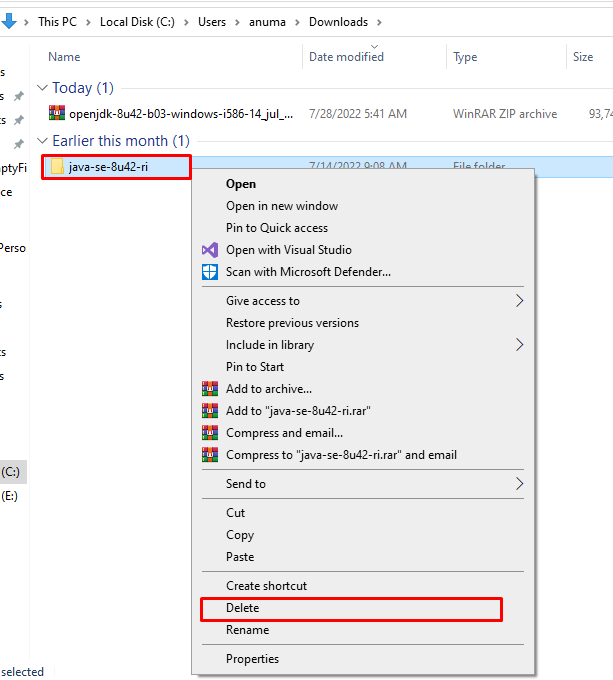
Step 2: Remove Java
As we know, we have used OpenJDK 8 compressed files to install and configure Java on Windows. Therefore, to remove Java, it is required to delete OpenJDK 8 extracted folder:
Note: If you have installed OpenJDK using the installer, then you have to uninstall it by visiting the Control Panel “Uninstall a program” settings.
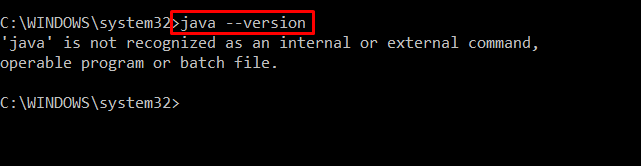
Step 3: Verify Java and OpenJDK 8 Uninstallation
In the last step, verify the uninstallation of OpenJDK 8 and Java with the help of the provided command:
We have demonstrated the methods to install, configure and remove OpenJDK on Windows.
Conclusion
To install OpenJDK 8 on Windows, it is necessary to download the Open JDK 8 Windows setup compressed file. After doing so, extract the setup file, and configure OpenJDK 8 on Windows by setting the Path environment variable. In order to remove OpenJDK 8, you only need to delete the extracted folder. We have compiled the methods to install, configure, and remove OpenJDK 8 on Windows.