In this article, we will show you how to download and install the latest NVIDIA cuDNN library (for CUDA 12 and CUDA 11) on the Windows 10 and Windows 11 operating systems.
Topic of Contents:
- Sign In/Log In to the NVIDIA Developer Website
- Downloading NVIDIA CuDNN for CUDA 12 and CUDA 11 on Windows 10/11
- Copying NVIDIA CuDNN for CUDA 12 Files to the Correct Path of Windows 10/11
- Copying NVIDIA CuDNN for CUDA 11 Files to the Correct Path of Windows 10/11
- Installing NVIDIA CuDNN for CUDA 12 and CUDA 11 on Windows 10/11
- Conclusion
Sign In/Log In to the NVIDIA Developer Website
To download NVIDIA cuDNN for Windows 10 and Windows 11 operating systems, you need an NVIDIA Developer account.
You can create an NVIDIA Developer account from https://developer.nvidia.com. Just visit the NVIDIA Developer website from your favorite web browser and click on “Join” from the top-right corner as marked in the following screenshot:

Type in your email address[1] and click on “Next”[2].
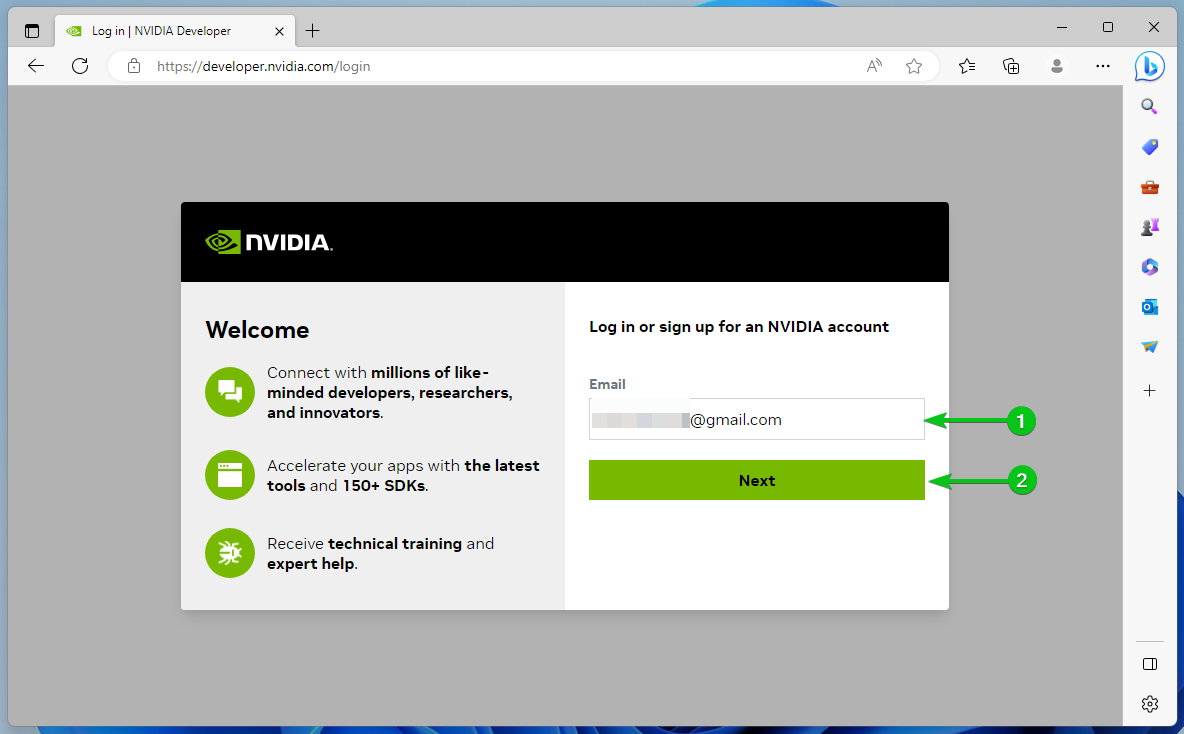
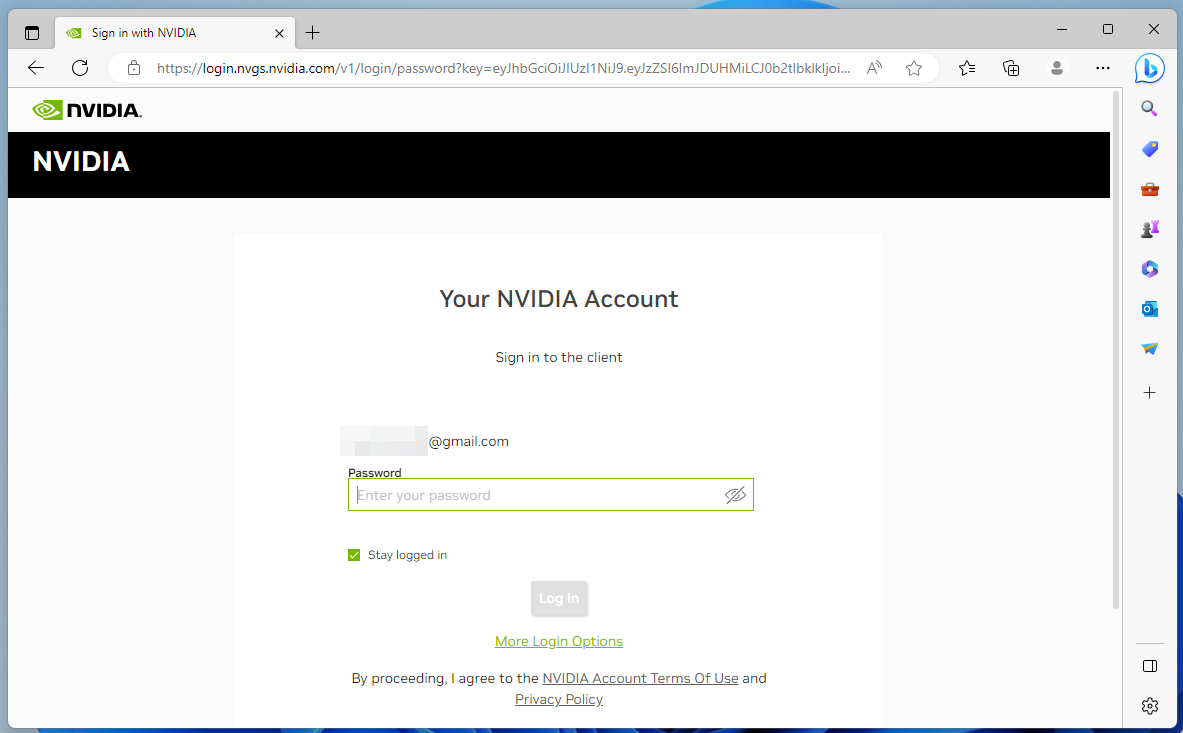
If your email address is registered with the NVIDIA developers program (you have an account), you will be asked to log in to your NVIDIA developer account.
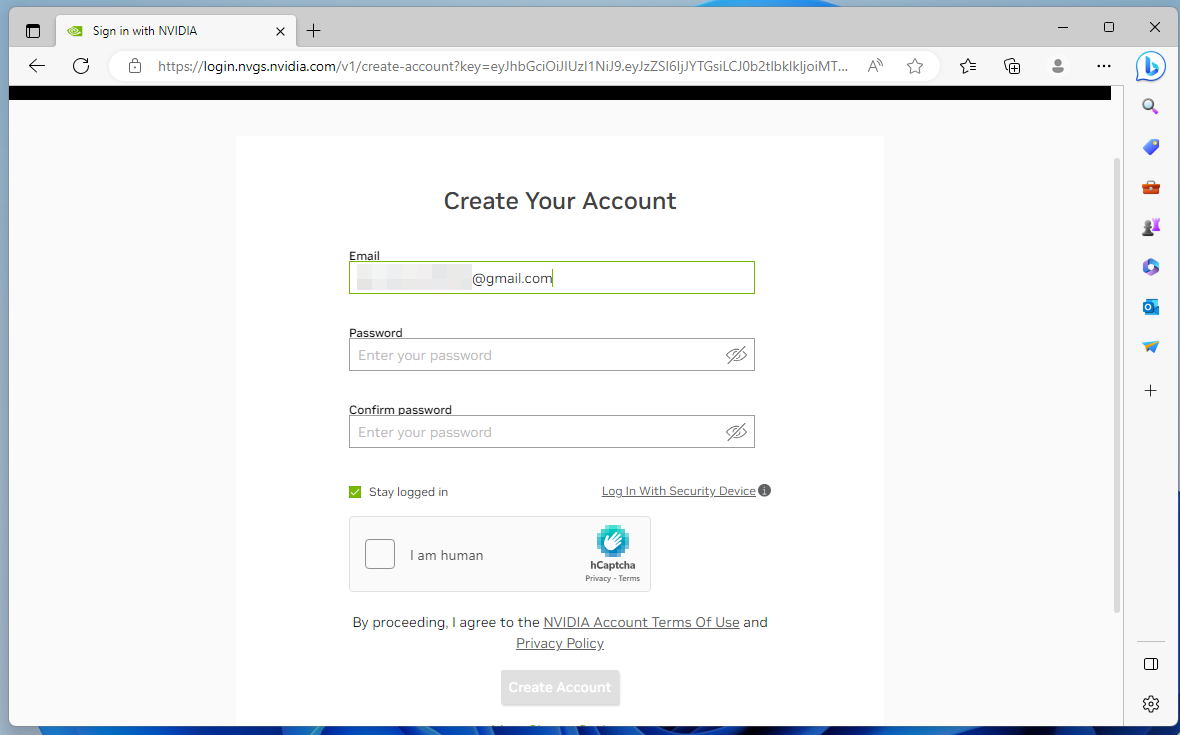
If you don’t have an NVIDIA Developer account, you will be asked to create a new NVIDIA Developer account. Just type in the required information and click on “Create Account”.
Downloading NVIDIA CuDNN for CUDA 12 and CUDA 11 on Windows 10/11
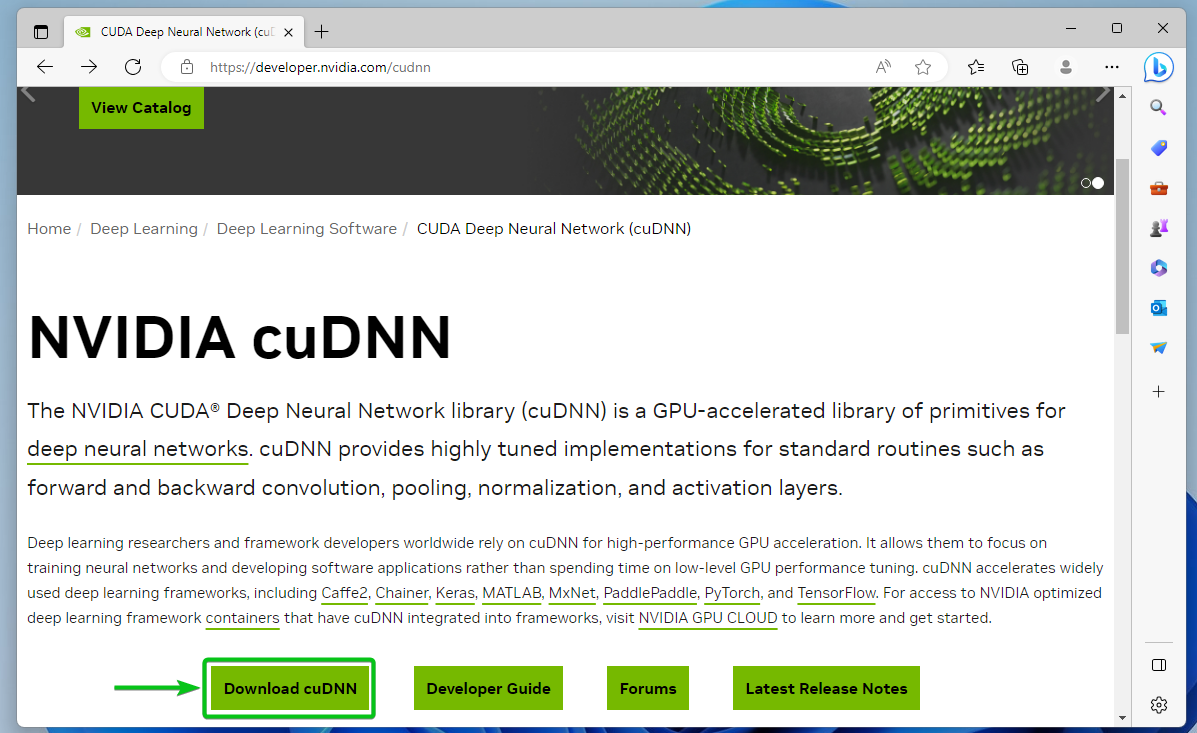
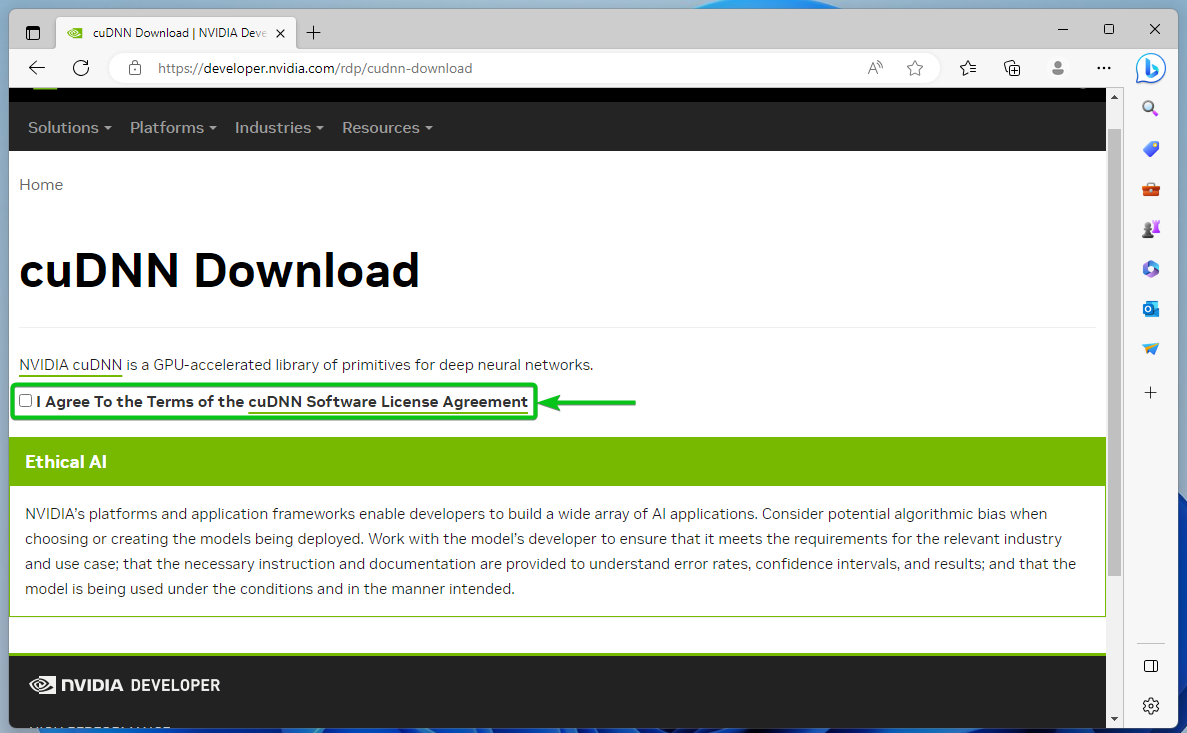
Once you log in to your NVIDIA Developer account, visit the NVIDIA cuDNN page and click on “Download cuDNN”.
Check “I Agree To the Terms of the cuDNN Software License Agreement”.
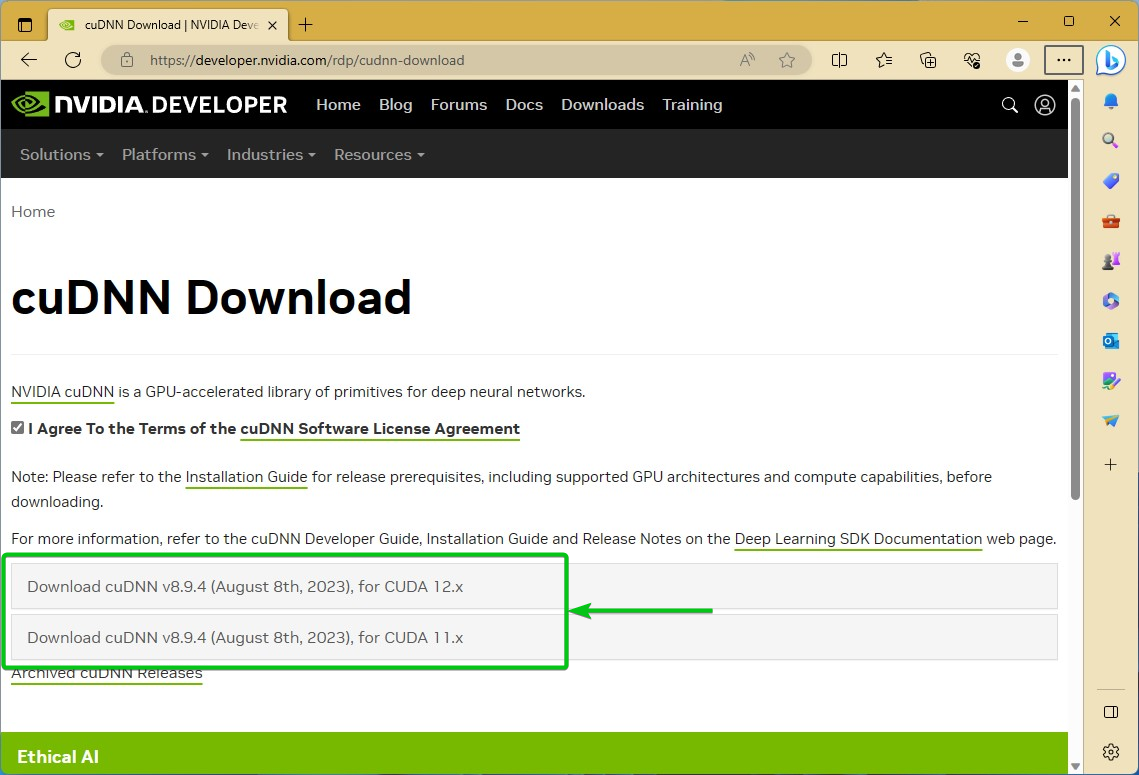
You will see the download options for cuDNN for CUDA 12 and CUDA 11. CuDNN 8.9.4 is the latest version at the time of this writing.
Click on the download link of the cuDNN version that you want to download.
NOTE: We download and install the latest version of the cuDNN library for both CUDA 12 and CUDA 11 in this article.
Click on “Local Installer for Windows (Zip)” as marked in the following screenshot:

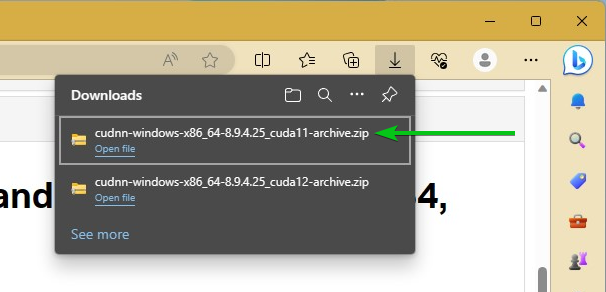
Your browser should start downloading the NVIDIA cuDNN library archive. It takes a while to complete.
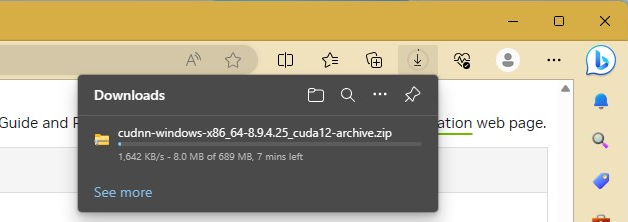
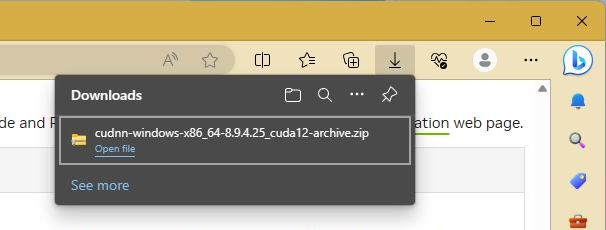
At this point, the NVIDIA cuDNN library archive (for CUDA 12 in this case) should be downloaded.
We downloaded the NVIDIA cuDNN library for CUDA 11 as well.
Copying NVIDIA CuDNN for CUDA 12 Files to the Correct Path of Windows 10/11
Before you can install the NVIDIA cuDNN for CUDA 12 library on Windows 10/11, you have to extract the NVIDIA cuDNN for CUDA 12 archive (that you just downloaded).
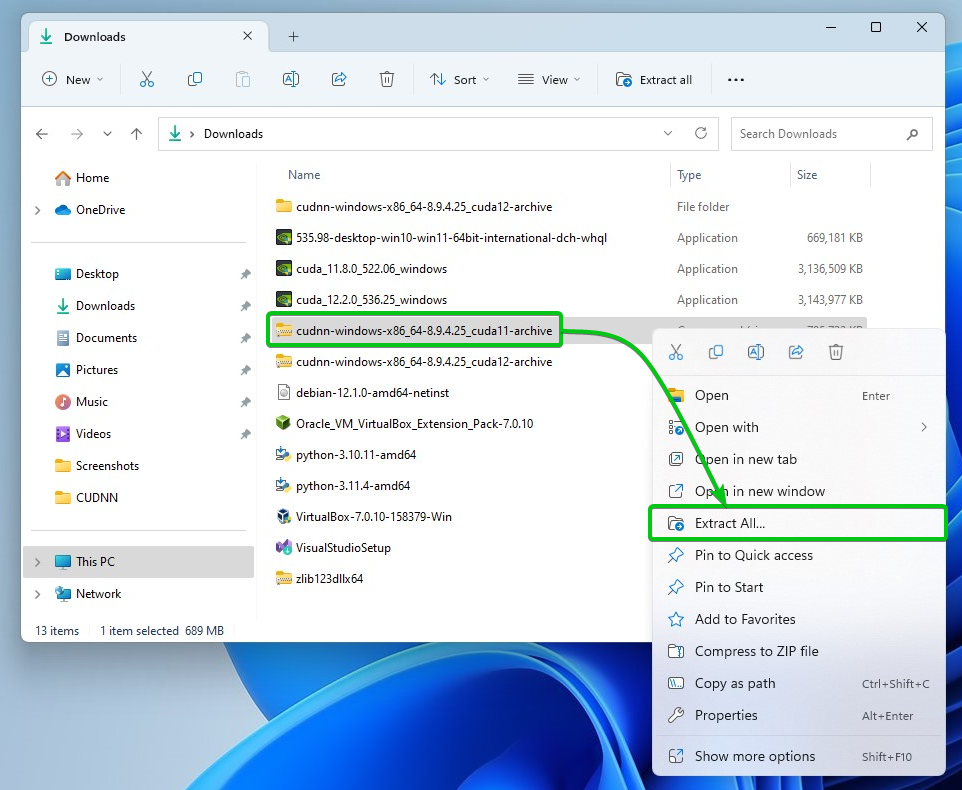
To extract the NVIDIA cuDNN for CUDA 12 archive, right-click on the archive from the “Downloads” folder of Windows 10/11 and click on “Extract All”.

Click on “Extract”.
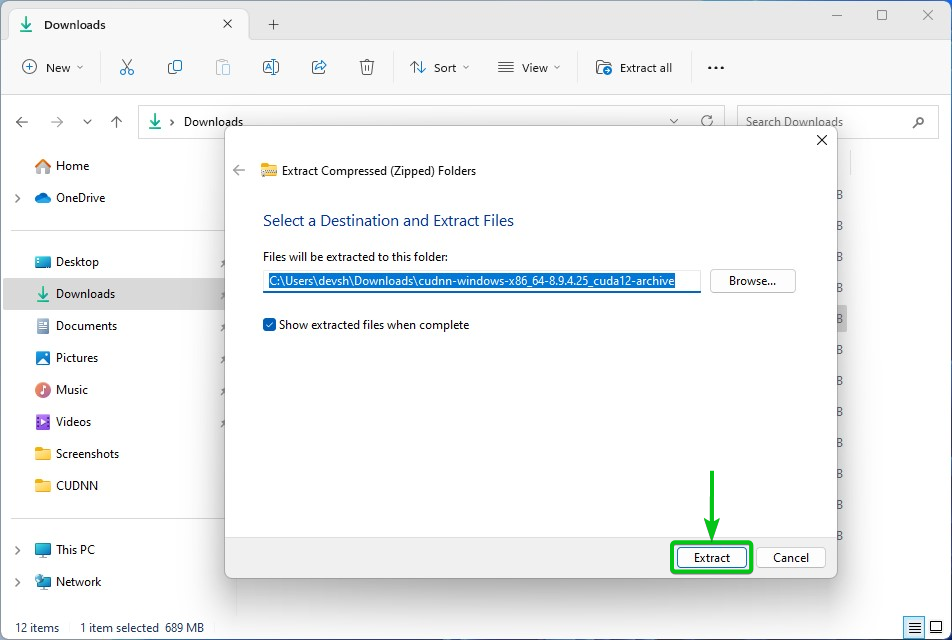
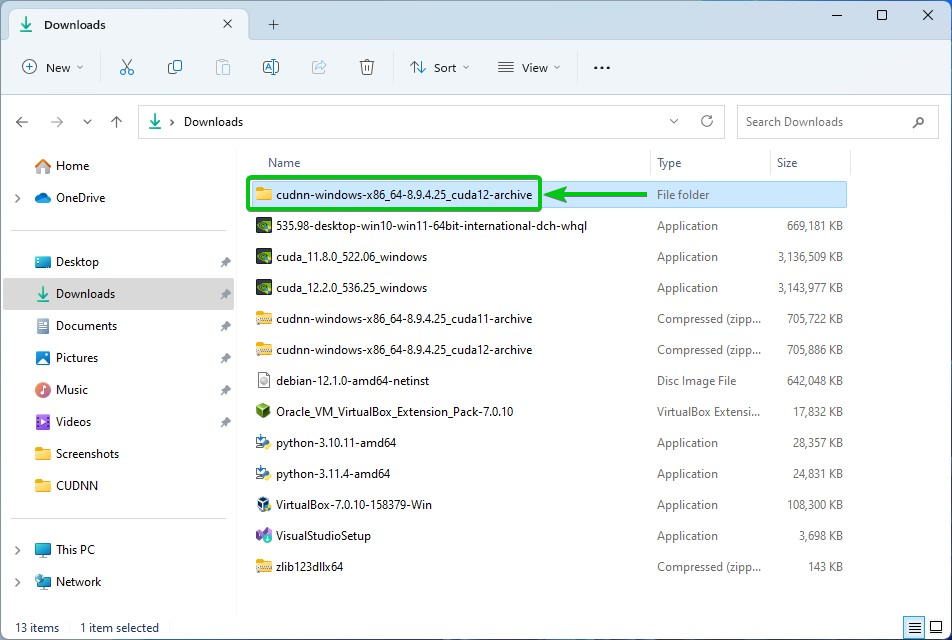
The NVIDIA cuDNN for CUDA 12 archive should be extracted in a new folder in the “Downloads” folder of Windows 10/11.
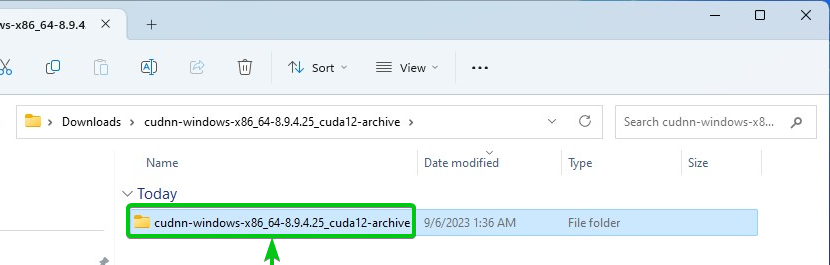
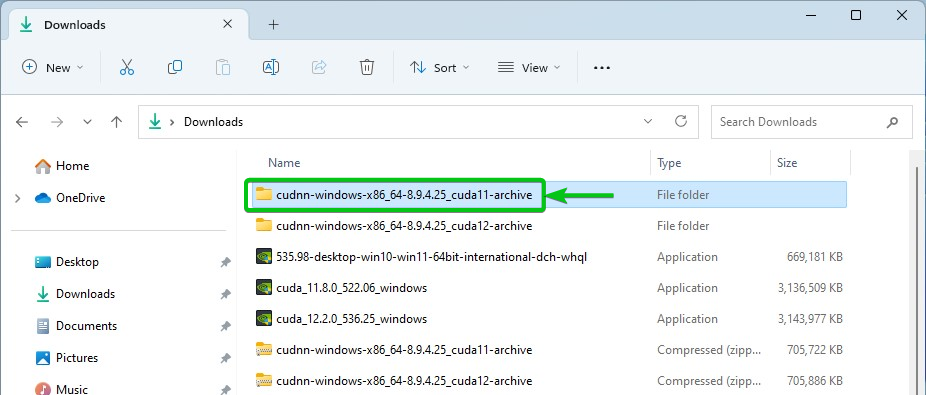
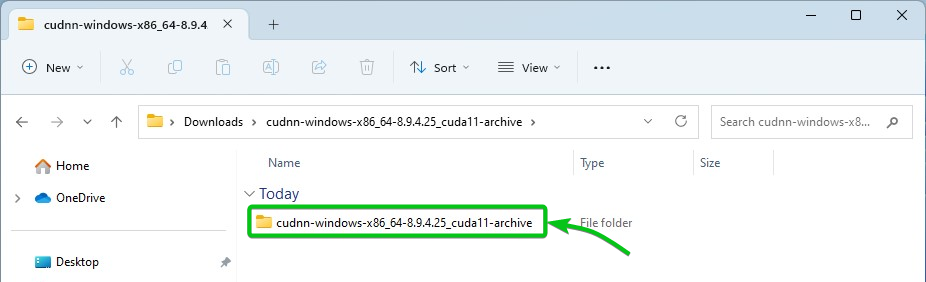
To navigate to NVIDIA cuDNN for the CUDA 12 folder, double-click (LMB) on it.
You will see another folder. Navigate to the folder.
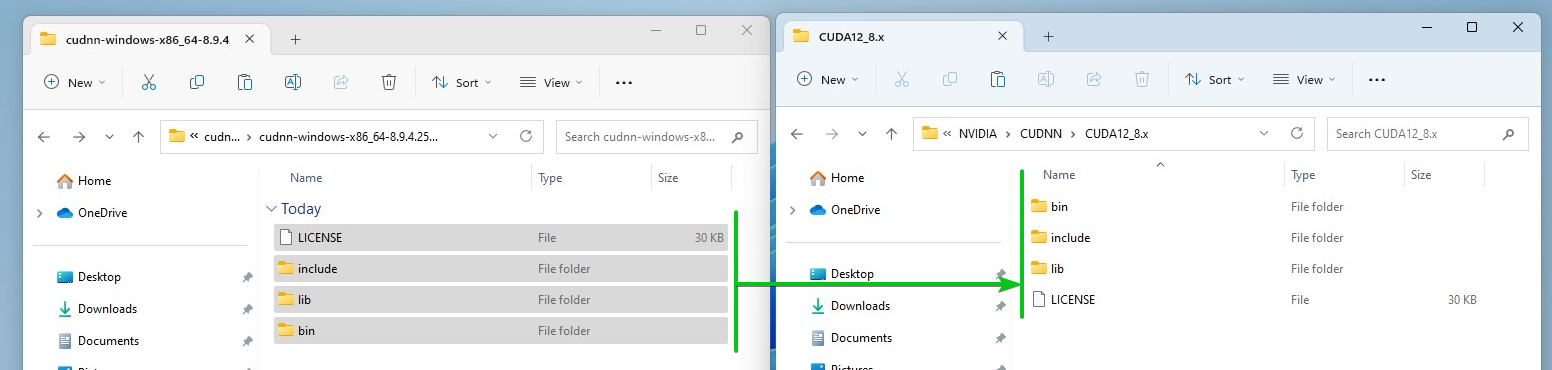
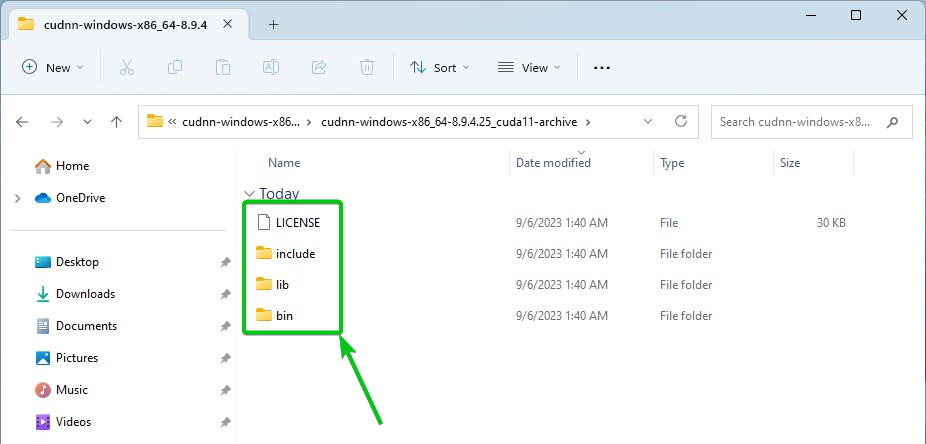
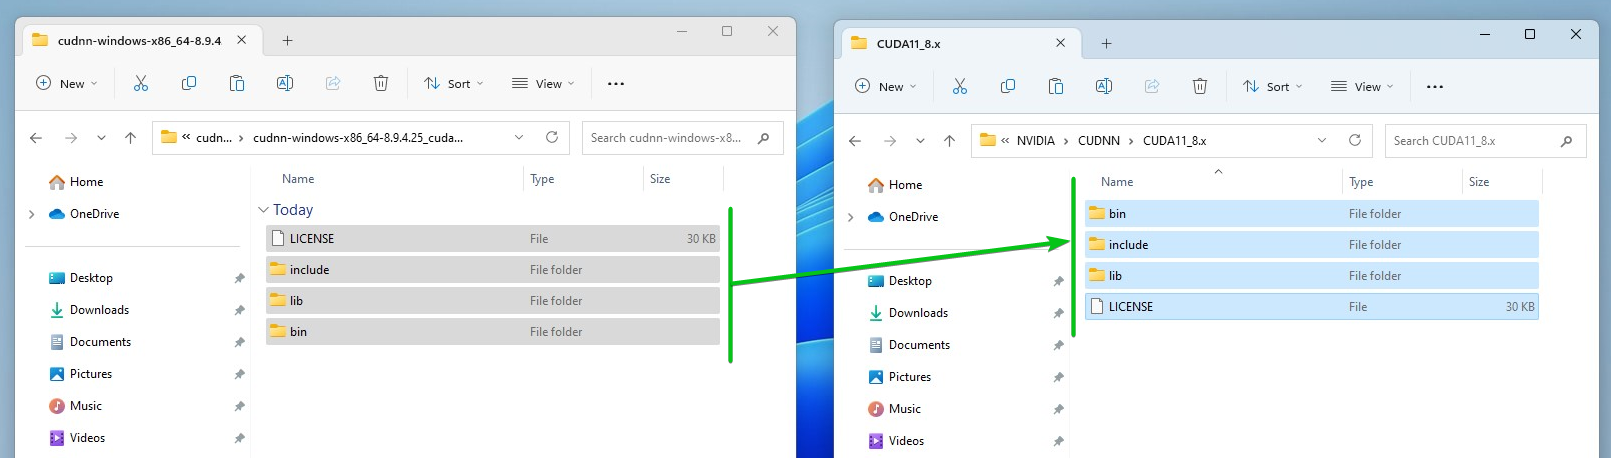
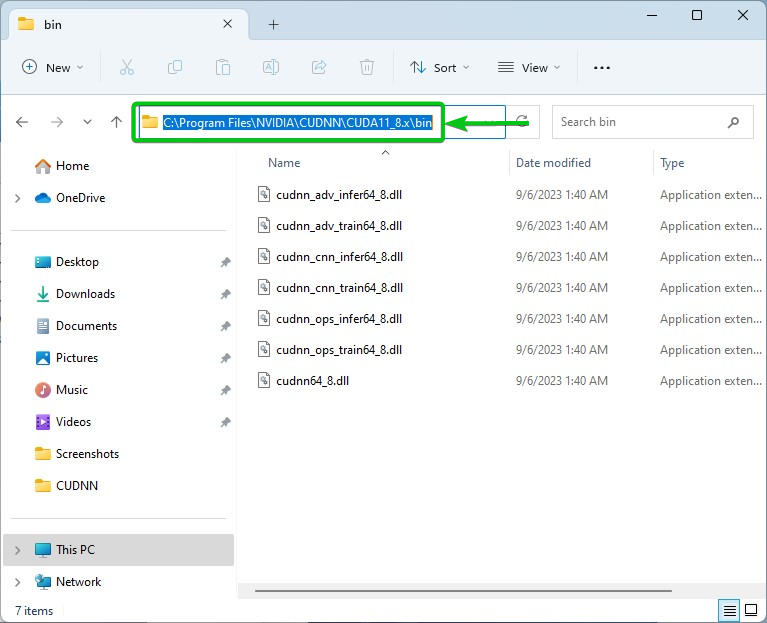
You will see the marked files and folders. You will have to copy them to the correct location of your Windows 10/11 operating system.
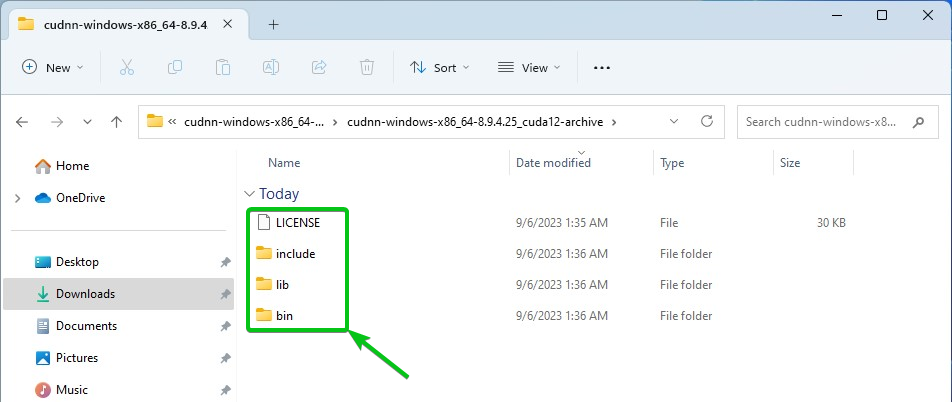
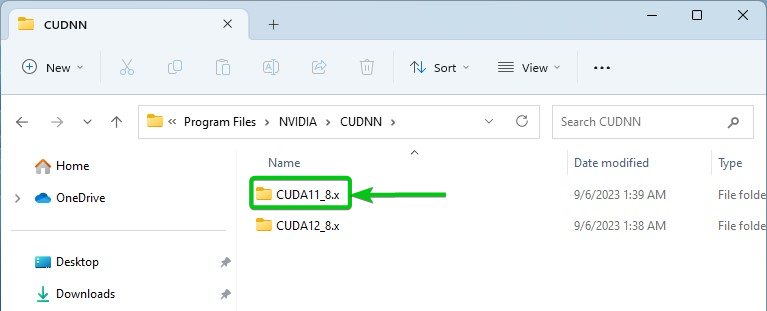
Create a new CUDNN folder in the C:\Program Files\NVIDIA folder if you don’t have it yet.

Create another folder CUDA12_8.x in the C:\Program Files\NVIDIA\CUDNN folder.
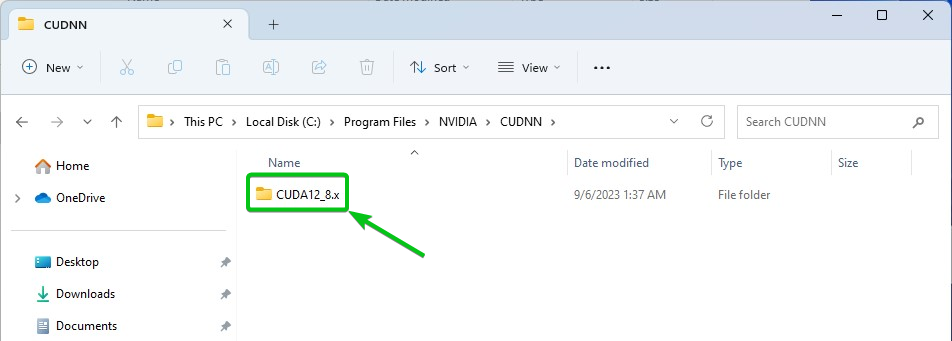
Copy the NVIDIA cuDNN for CUDA 12 files in the C:\Program Files\NVIDIA\CUDNN\CUDA12_8.x folder.
Copying NVIDIA CuDNN for CUDA 11 Files to the Correct Path of Windows 10/11
Before you can install the NVIDIA cuDNN for CUDA 11 library on Windows 10/11, you have to extract the NVIDIA cuDNN for CUDA 11 archive (that you just downloaded).
To extract the NVIDIA cuDNN for CUDA 11 archive, right-click on the archive from the “Downloads” folder of Windows 10/11 and click on “Extract All”.
Click on “Extract”.

The NVIDIA cuDNN for CUDA 11 archive should be extracted in a new folder in the “Downloads” folder of Windows 10/11.
To navigate to NVIDIA cuDNN for the CUDA 11 folder, double-click (LMB) on it.
You will see another folder. Navigate to the folder.
You will see the marked files and folders. You have to copy them to the correct location of your Windows 10/11 operating system.
Create a new CUDNN folder in the C:\Program Files\NVIDIA folder if you don’t have it yet.

Create another folder which is CUDA11_8.x in the C:\Program Files\NVIDIA\CUDNN folder.
Copy the NVIDIA cuDNN for CUDA 11 files in the C:\Program Files\NVIDIA\CUDNN\CUDA11_8.x folder.
Installing NVIDIA CuDNN for CUDA 12 and CUDA 11 on Windows 10/11
To install the NVIDIA cuDNN for CUDA 12 and NVIDIA cuDNN for CUDA 11 on the Windows 10/11 operating system, you have to add the NVIDIA cuDNN library folder to the “Path” environment variable of Windows 10/11.
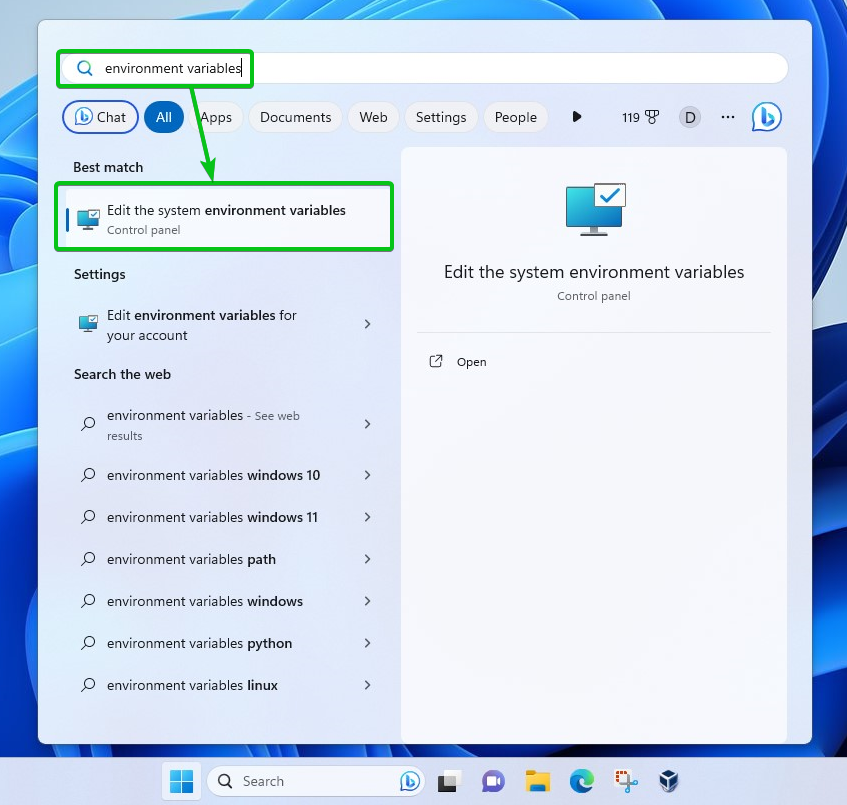
To modify the “Path” environment variable of Windows 10/11, search for the environment variables from the “Start” menu and click on the “Edit the system environment variables” settings as marked in the following screenshot:
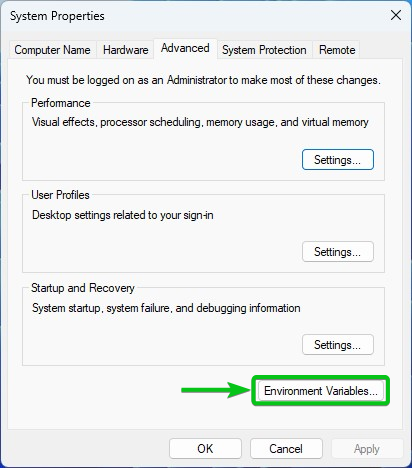
The System Properties window should be opened. Click on “Environment Variables”.
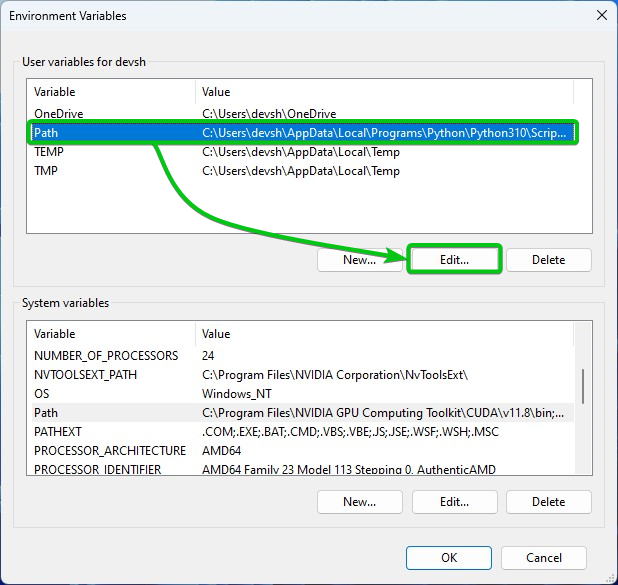
Select the “Path from the User variables” section and click on “Edit”.
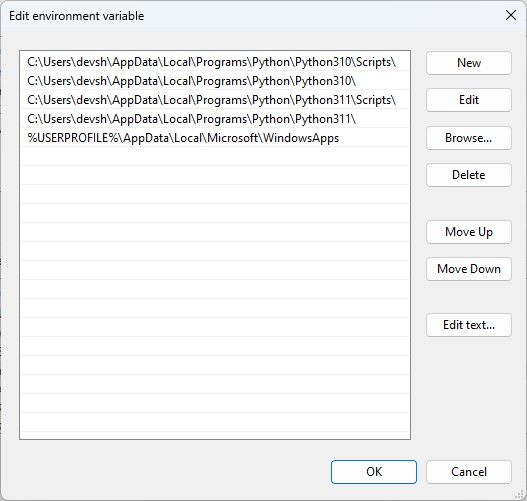
The “Edit environment variable” window should be opened. You can manage the environment variables on your Windows 10/11 operating system from here.
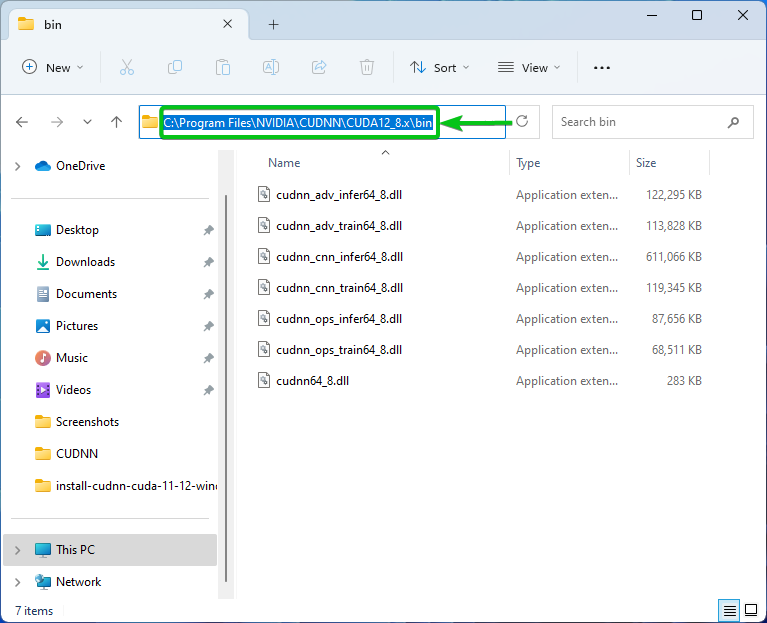
Let’s say, you want to add the NVIDIA cuDNN for the CUDA 12 library to the path of your Windows 10/11 operating system. To do that, you need to copy the full path of the “bin\” folder of your NVIDIA cuDNN for the CUDA 12 library folder.
In our case, the full path is C:\Program Files\NVIDIA\CUDNN\CUDA12_8.x\bin.
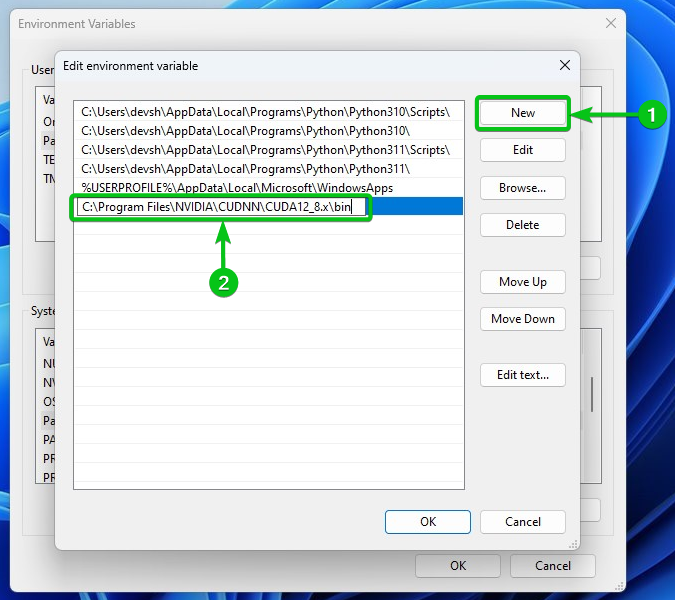
From the “Edit environment variable” window, click on “New”[1] and paste the full path of the NVIDIA cuDNN for the CUDA 12 library folder[2].
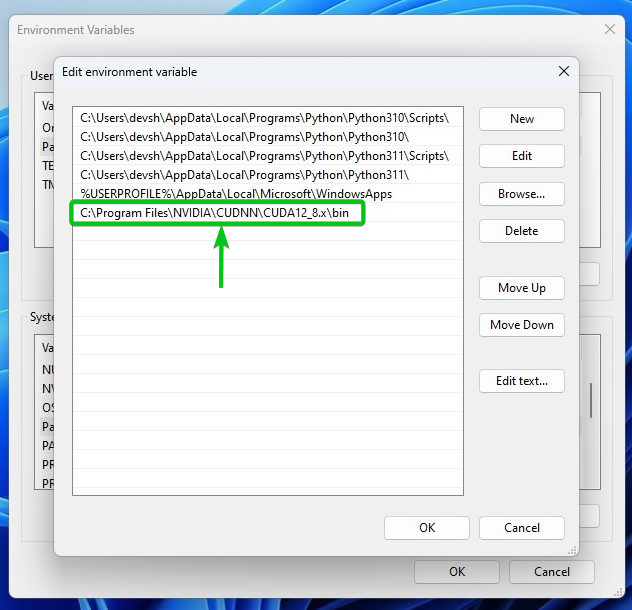
The full path of the NVIDIA cuDNN for the CUDA 12 library C:\Program Files\NVIDIA\CUDNN\CUDA12_8.x\bin folder should be added to the “Path” environment variable.
In the same way, you can add the NVIDIA cuDNN for the CUDA 11 library folder to the “Path” environment variable of Windows 10/11.
Just copy the full path of the NVIDIA cuDNN for the CUDA 11 library folder C:\Program Files\NVIDIA\CUDNN\CUDA11_8.x\bin.
From the “Edit environment variable” window, click on “New”[1] and paste the full path of the NVIDIA cuDNN for the CUDA 11 library folder[2].
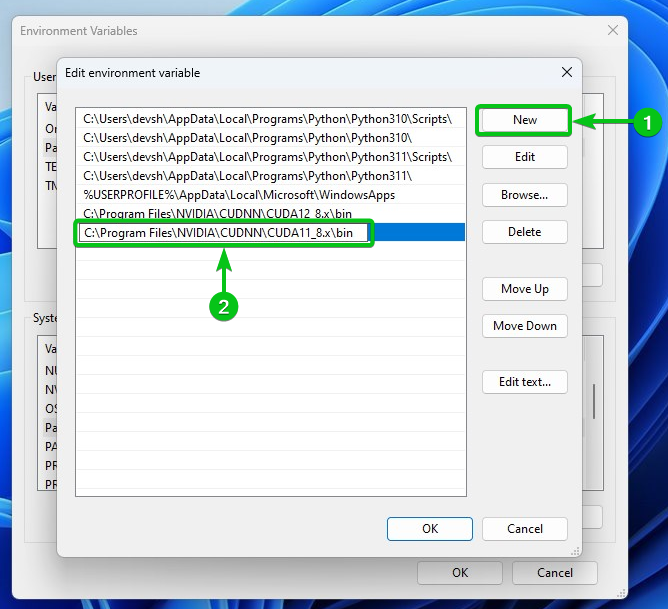
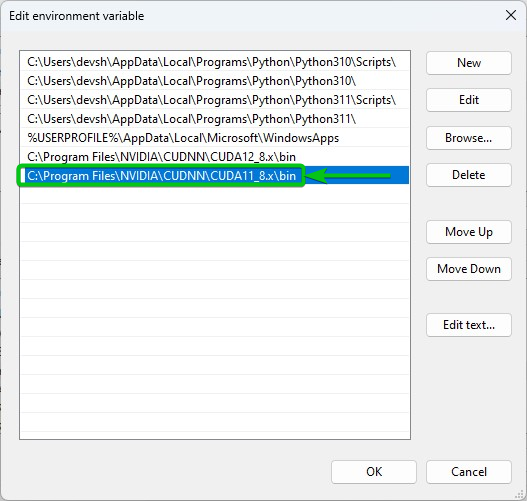
The full path of the NVIDIA cuDNN for the CUDA 11 library folder C:\Program Files\NVIDIA\CUDNN\CUDA11_8.x\bin should be added to the “Path” environment variable.
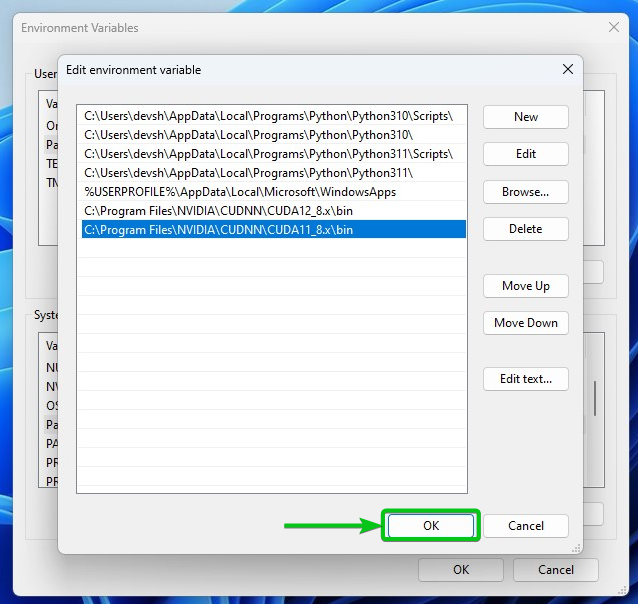
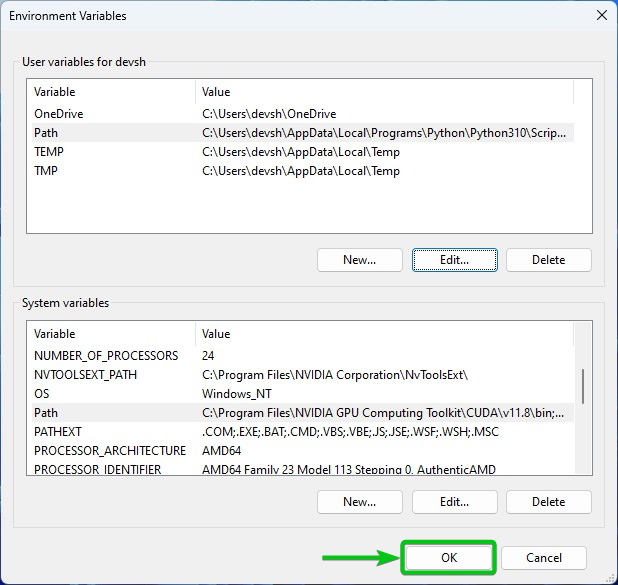
To save the changes, click on “OK”.
Click on “OK”.
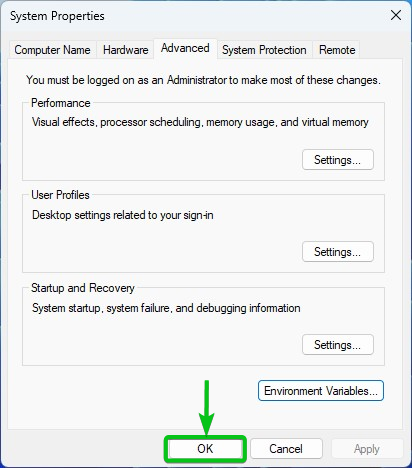
Click on “OK”.
Conclusion
In this article, we showed you how to download the latest version of the NVIDIA cuDNN library (for CUDA 12 and CUDA 11) for the Windows 10/11 operating systems. We also showed you how to extract the NVIDIA cuDNN library archive and copy the contents to the correct filesystem/folder path on Windows 10/11. We showed you how to install the NVIDIA cuDNN library for CUDA 12 and CUDA 11 on Windows 10/11 as well.