In this article, I am going to show you how to install the latest LTS (Long Term Support) version of Node.js on Raspberry Pi 4 running the Raspberry Pi OS. So, let’s get started.
Table of Contents:
- Downloading Node.js for Raspberry Pi 4
- Installing Node.js on Raspberry Pi 4
- Writing a Hello World Program in Node.js
- Conclusion
Downloading Node.js for Raspberry Pi 4
You can download the latest LTS version of Node.js for your Raspberry Pi 4 from the official website of Node.js.
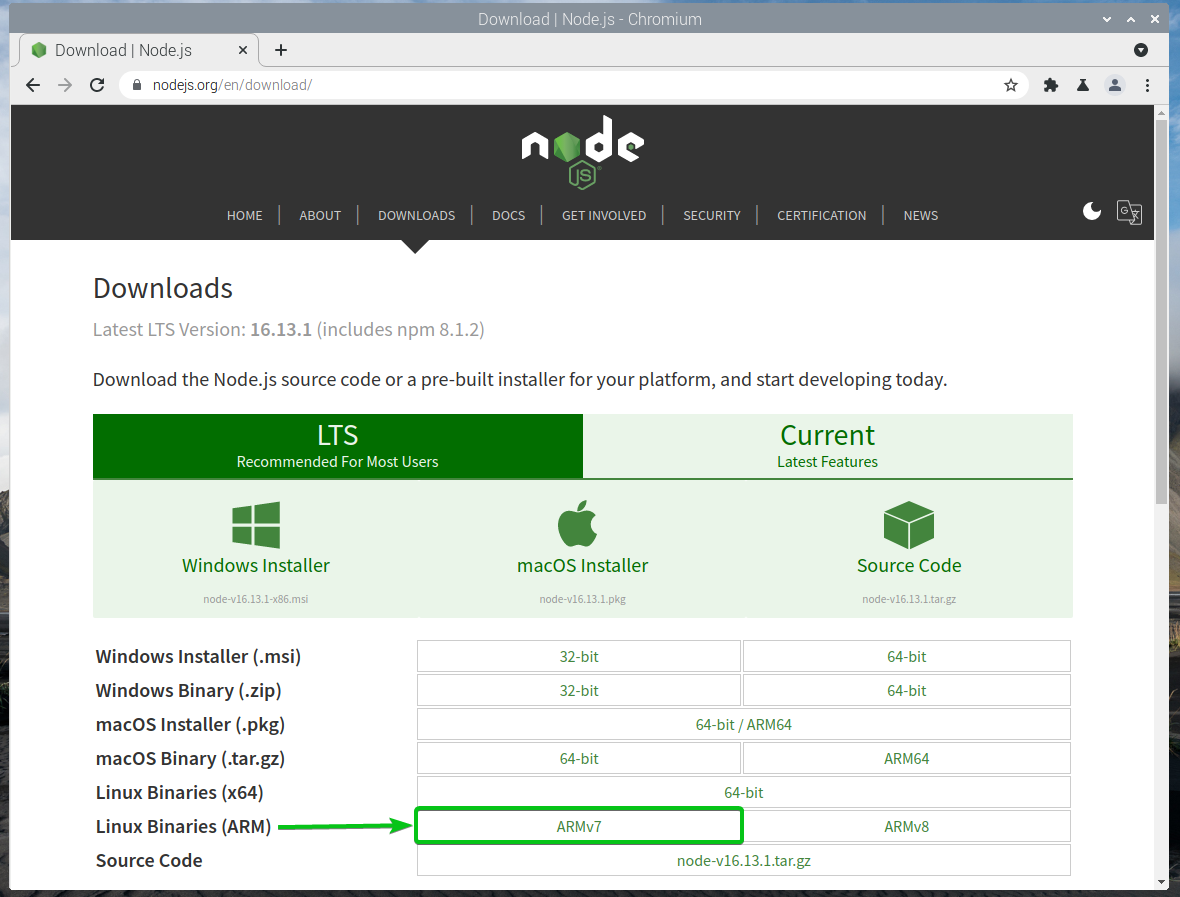
To do that, visit the URL https://nodejs.org/en/download/ from your favorite web browser. Once the page loads, click on the Linux ARMv7 ARM binary download link as marked in the screenshot below.
NOTE: At the time of this writing, the latest LTS version of Node.js is v16.13.1.

The Node.js ARM v7 binary archive should be downloaded.
Installing Node.js on Raspberry Pi 4
The Node.js ARM v7 binary archive should be downloaded in the ~/Downloads directory.
Navigate to the ~/Downloads directory as follows:
The latest LTS version of Node.js ARM v7 binary archive node-v16.13.1-linux-armv7l.tar.xz (in my case) should be available in the ~/Downloads directory as you can see in the screenshot below.
Extract the archive node-v16.13.1-linux-armv7l.tar.xz in the /opt directory with the following command:
The Node.js ARM v7 binary archive node-v16.13.1-linux-armv7l.tar.xz should be extracted in the /opt directory.
Navigate to the /opt directory as follows:
You should see a new directory (node-v16.13.1-linux-armv7l/ in this case) as marked in the screenshot below.
Rename the directory node-v16.13.1-linux-armv7l/ to node/ so that the commands in the next sections will be shorter and easier to write.
Notice that the node and npm binaries are in the /opt/node/bin/ directory.
To access and run the node and npm commands, you will have to make symbolic links of these binary files in the /usr/bin/ directory.
Run the following command to make a symbolic link of the /opt/node/bin/node binary in the path /usr/bin/node:
Run the following command to make a symbolic link of the /opt/node/bin/npm binary in the path /usr/bin/npm:
Restart your Raspberry Pi 4 with the following command:
Once your Raspberry Pi 4 starts, you should be able to run the node and npm commands as shown in the screenshot below.
$ npm --version
Writing a Hello World Program in Node.js:
In this section, I am going to show you how to write a Hello World Node.js program and run it on Raspberry Pi 4.
First, create a ~/project directory as follows:
Then, open your favorite text editor or IDE, create a new file app.js, type in the following lines of codes, and save the file in the ~/project/ directory.
Then, navigate to the ~/project directory as follows:
Run app.js with Node.js as follows:
The app.js script should run and print the correct output as you can see in the screenshot below.
Conclusion:
In this article, I have shown you how to install the latest LTS version of Node.js on Raspberry Pi 4 running the Raspberry Pi OS. I have also shown you how to write a simple Node.js program and run it with Node.js on Raspberry Pi 4.


