Similarly, this software gives you the opportunity to view your design in 3D which can give you a better illustration of how your circuit will look in actuality. For your ease we have explained three ways how to install the KiCad software on Ubuntu in a detailed way.
Installing KiCad on Ubuntu 22.04 (LTS)
The three methods to install the KiCad software on Ubuntu are:
- Installing KiCad using Ubuntu default repository
- Installing KiCad using KiCad developer’s repository
- Installing KiCad using Ubuntu Software Center
1 – Installing KiCad using Ubuntu default repository
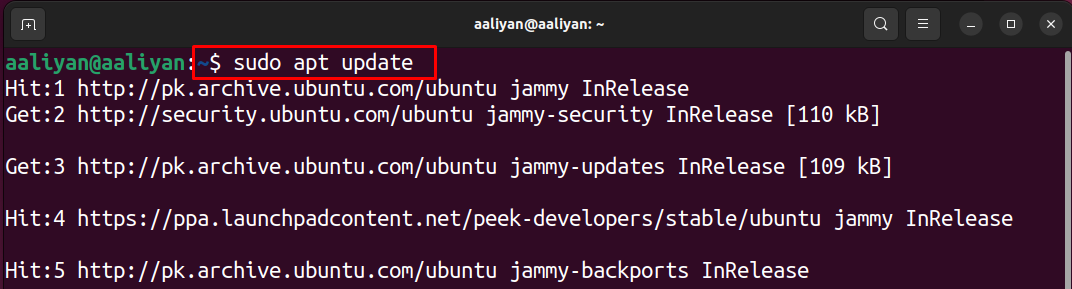
To install the KiCad using the Ubuntu default repository open the terminal by pressing ctrl +Alt and T, next before jumping installation it is a good practice to update your repository by executing the following command:
Next to install the KiCad simply execute the following command:

2 – Installing KiCad using KiCad developer’s repository
Another method by which KiCad software can be installed on Ubuntu is by using the KiCad developer’s repository. So first we will add the repository of KiCad by executing the following command:

Once you have saved the repository, update your repository by executing the update command:

Next to install the Kicad execute the following command:

3 – Installing KiCad using Ubuntu Software Center
The third and the last method for installing the KiCad on Ubuntu is using Ubuntu Software Center which you can open by clicking on the Ubuntu software icon and search for the KiCad in the search bar:

Next select the KiCad and click on the install icon and your installation will begin as shown in the image below:

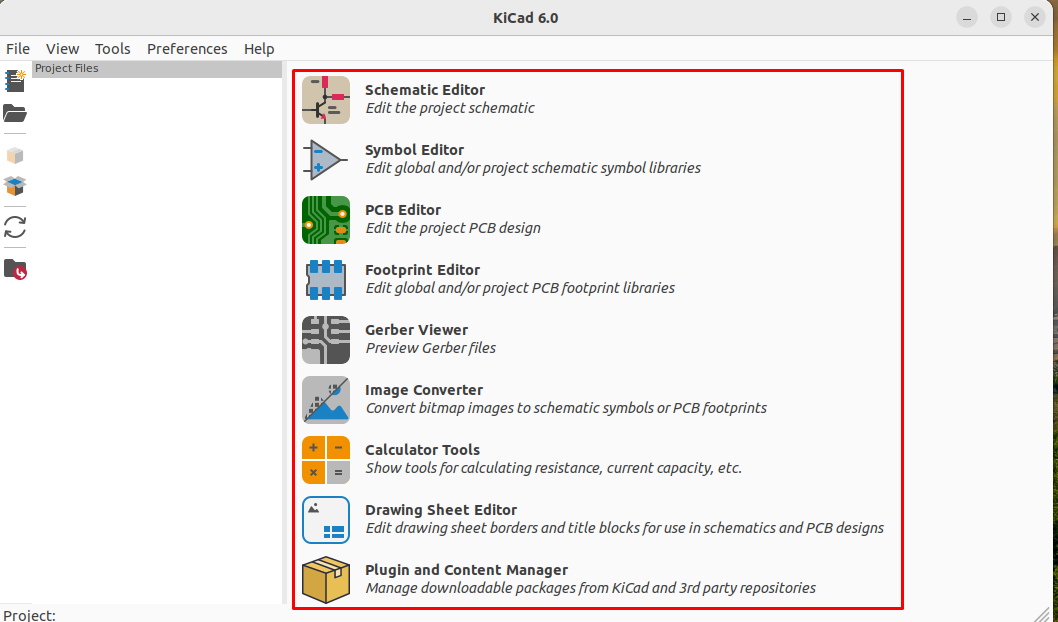
The KiCad is complete suite that comes with multiple editors and other applications which you can access by clicking on the KiCad in your application menu:
How to uninstall kiCad from Ubuntu
If you want to uninstall the KiCad software, you can do it in two ways, one by using the terminal and the other by using the Ubuntu Software Center:
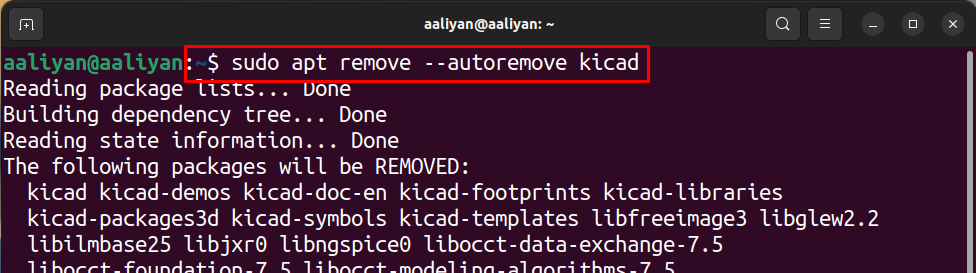
Uninstalling KiCad from Ubuntu using terminal: To uninstall the Ubuntu using the terminal just execute the following command and you are good to go:
Uninstalling KiCad software from Ubuntu from Software Center: To uninstall the KiCad software open the Ubuntu Software Center and from there go to the installation tab and search for KiCad software. Click on the remove button to uninstall the KiCad software as in the image below:

Conclusion
For the users who want to make circuits, schematics, PCB designs and want to enjoy premium features for free then the KiCad can be the one that you are looking for. Using this software you can make your own symbols that can be used in the circuit schematics and KiCad provides you with its big library from where you can choose different customized symbols as well. Keeping in view of its features we have explained the three ways to install KiCad on Ubuntu.