The disk space of the volumes of your Synology NAS may run out at any time. Luckily, you can increase the size of the volumes of your Synology NAS anytime.
If you have some free space available on a storage pool of your Synology NAS, you can increase the size of any of the volumes you have created on that storage pool.
If you don’t have any free space available on your desired storage pool, you can always add more drives to the storage pool and increase the size of the storage pool.
In this article, I will show you how to increase the size of the volumes of your Synology NAS. So, let’s get started.
Table of Contents:
- Increasing Size of Volumes When Space is Available in Storage Pools
- Increasing Size of Volumes When No Space is Available in Storage Pools
- Conclusion
- References
Increasing Size of Volumes When Space is Available in Storage Pools:
You can increase the size of a volume very easily if you have free disk space available in the storage pool.
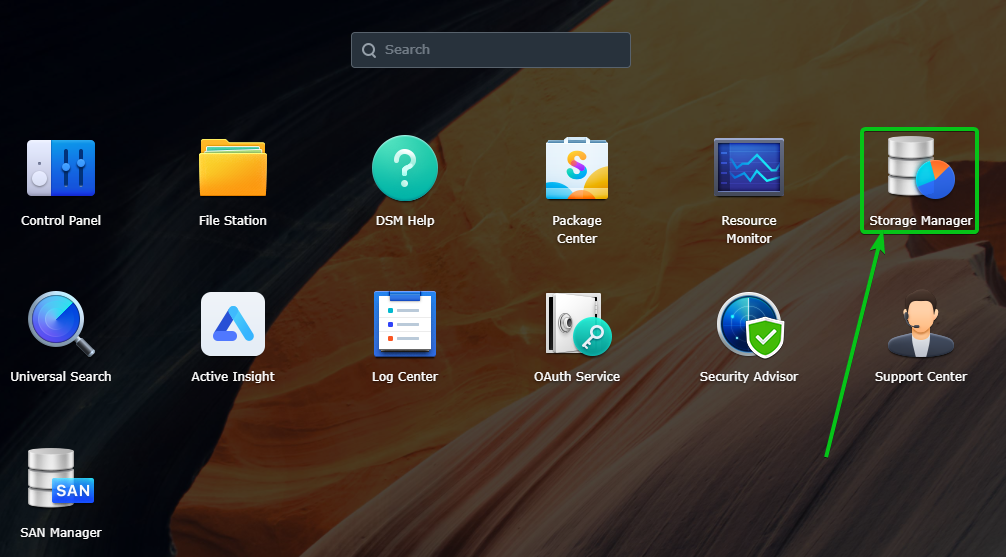
To do that, open the Storage Manager app from the Application Menu of the DSM web management interface.
Navigate to the Storage section.
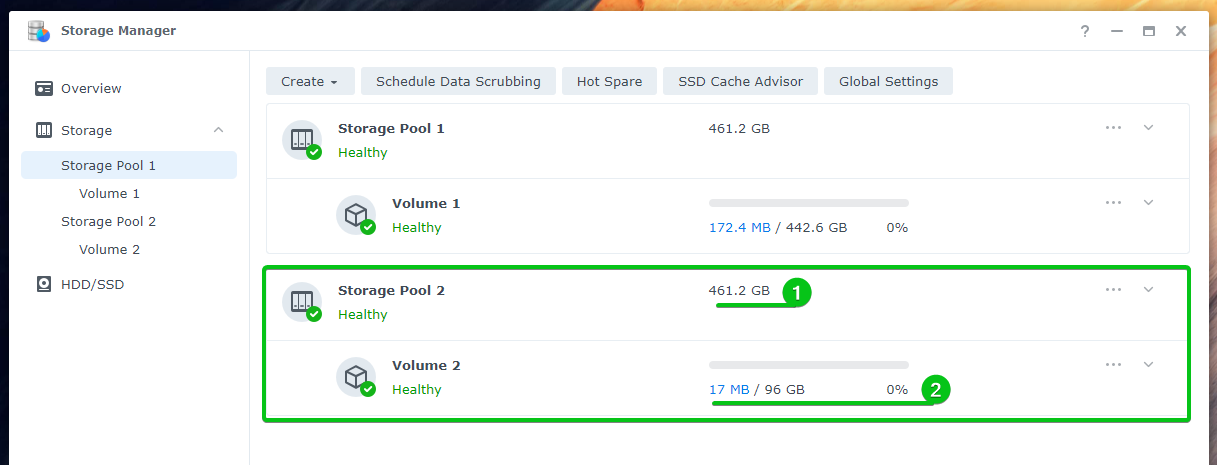
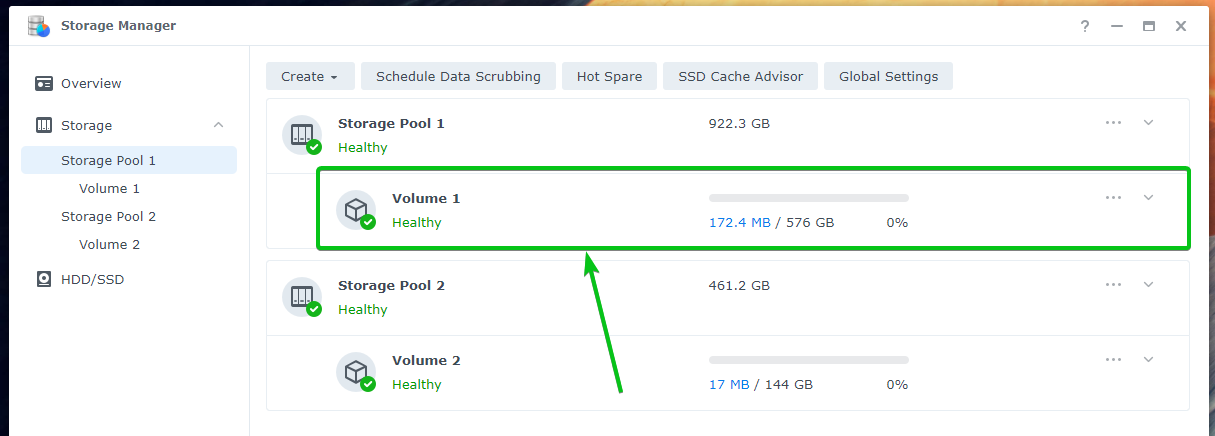
As you can see, I have a volume Volume 2 created on Storage Pool 2. Storage Pool 2 is 461.2 GB in size, and the size of Volume 2 is about 96 GB. So, there’s a lot of free disk space on Storage Pool 2.
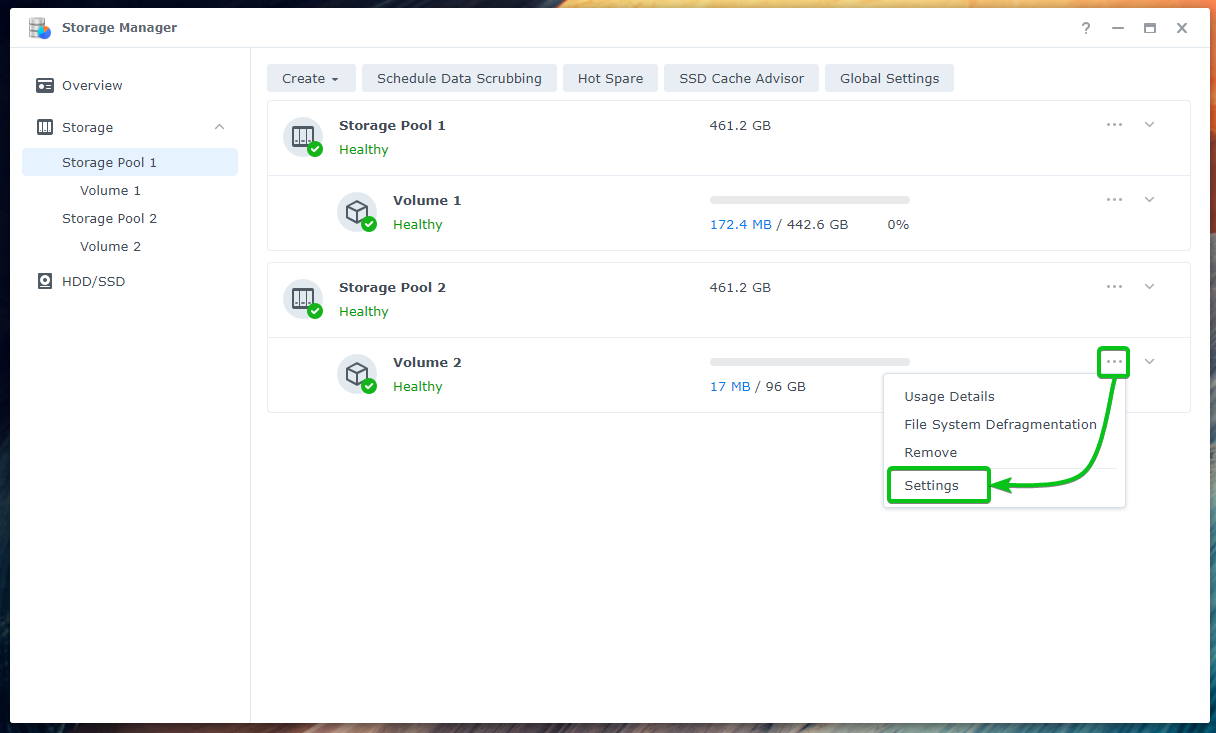
To increase the capacity/size of Volume 2, click on the icon from the right and click on Settings as marked in the screenshot below.
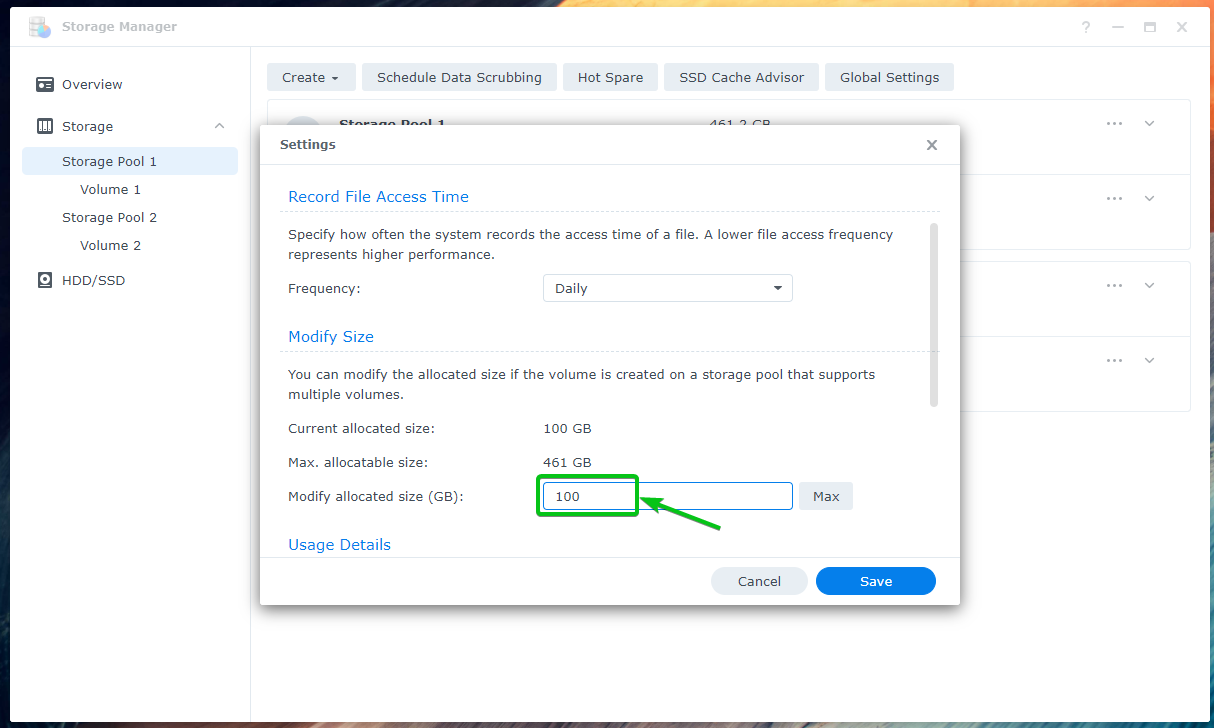
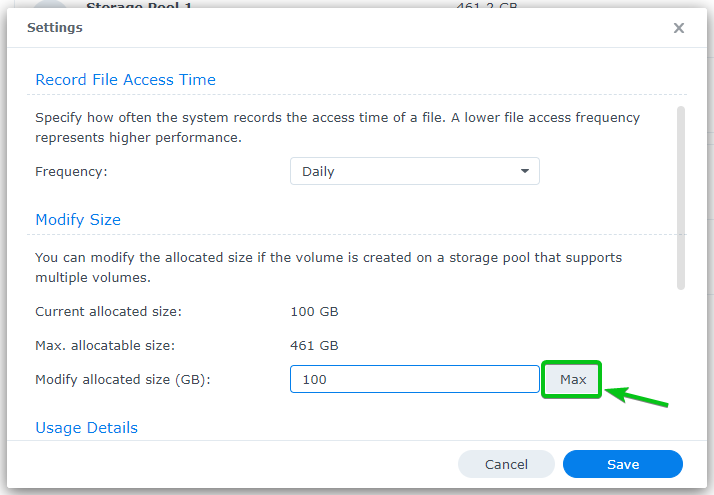
Currently, 100 GB of disk space is allocated for Volume 2 from Storage Pool 2.
If you want to increase the capacity of the volume to the maximum available disk space of Storage Pool 2, click on Max.
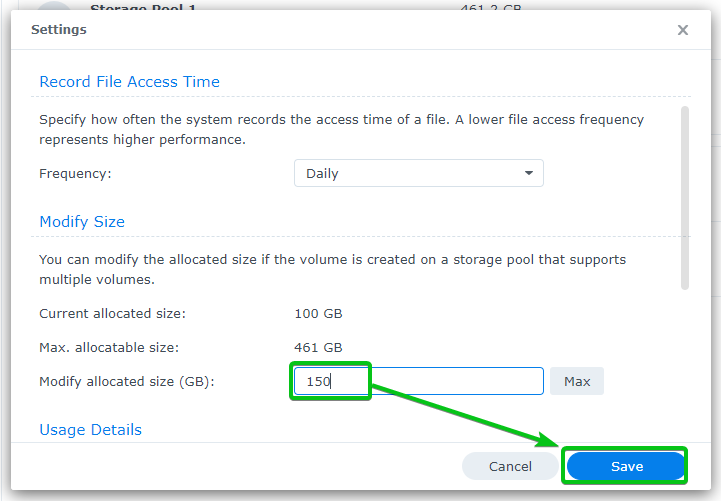
You can also type in the new size of the volume (in GB). Once you’re done, click on Save for the changes to take effect.
The volume is being expanded. Depending on the amount of data you have on the volume, it will take a while to complete.
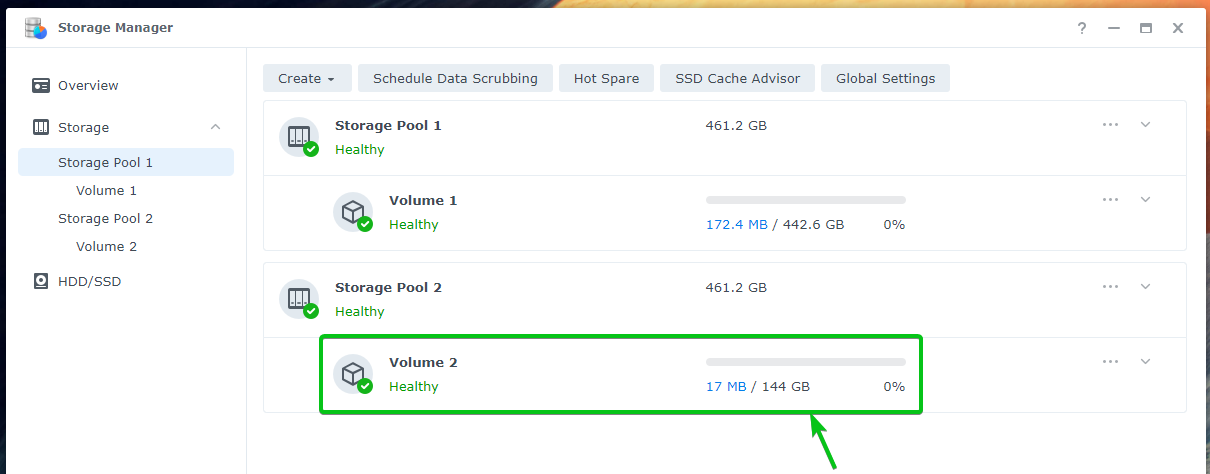
As you can see in the screenshot below, the volume size should be increased.
Increasing Size of Volumes When No Space is Available in Storage Pools:
If you want to expand or increase the size of a volume that is in a storage pool that does not have free space available, you will have to add more disk/disks to the storage pool first to increase the capacity of the storage pool.
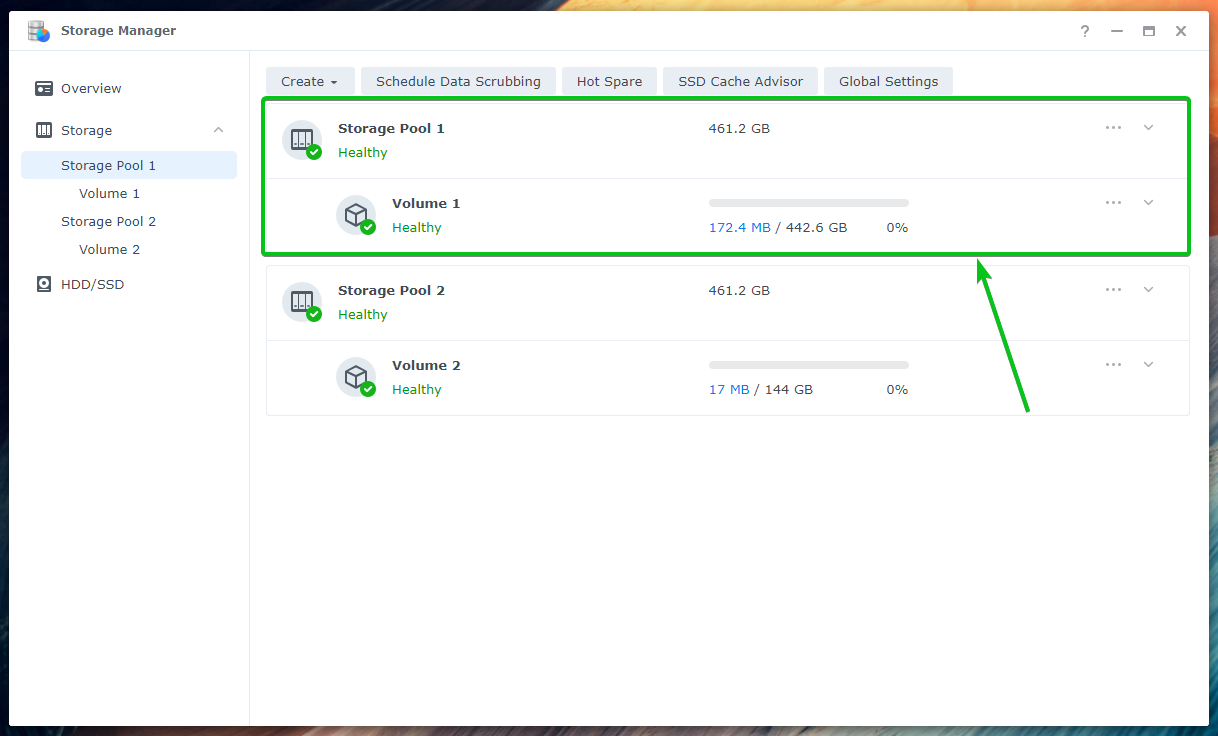
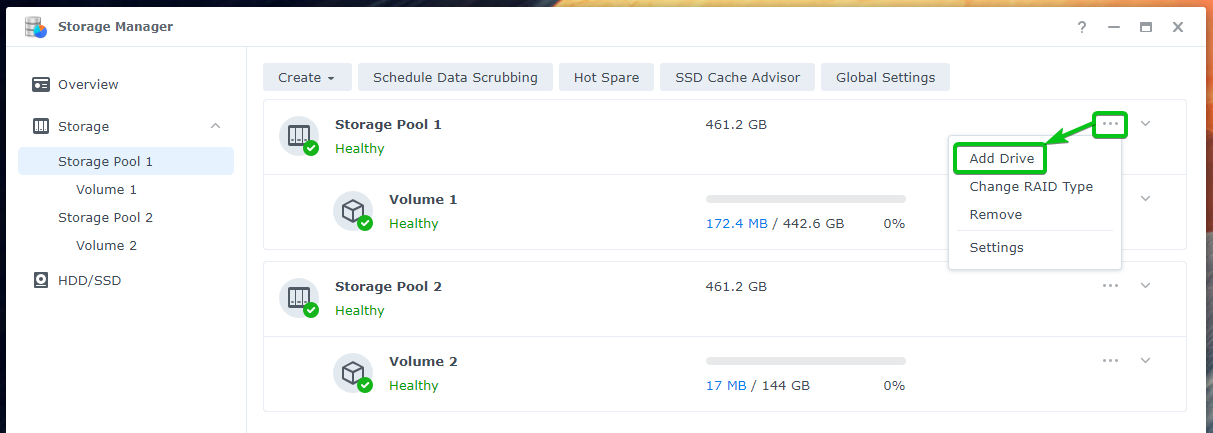
Here, Storage Pool 1 is about 461.2 GB in size. Volume 1 allocated the entire disk space of Storage Pool 1.
To add more disks to Storage Pool 1, click on the icon from the right and click on Add Drive as marked in the screenshot below.
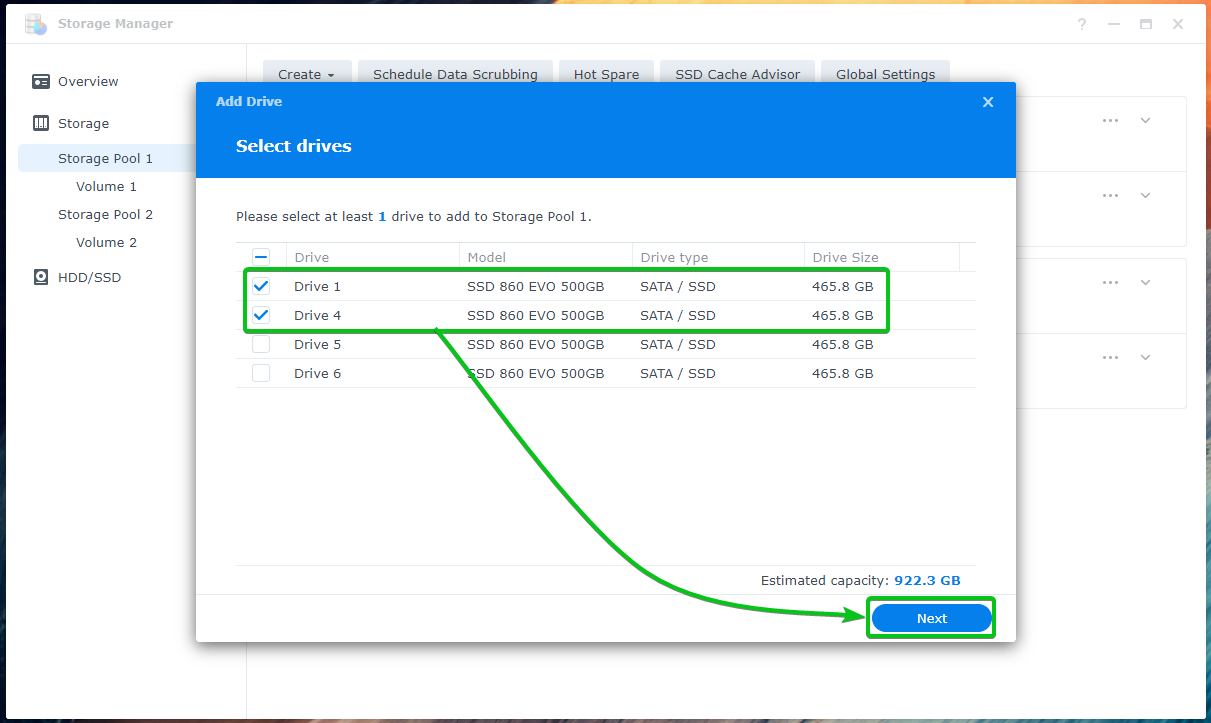
Select the drives you want to add to the storage pool from the list and click on Next.
Click on Continue if you see the following prompt.
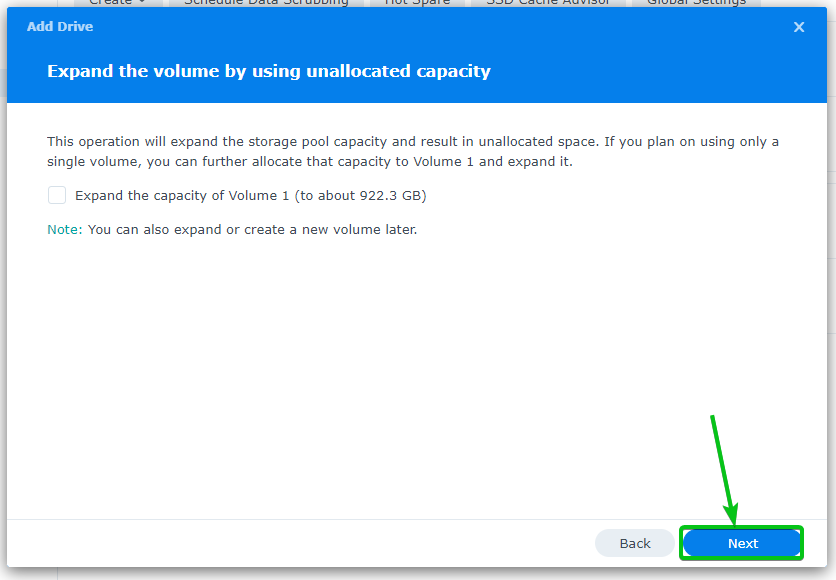
Click on Next.
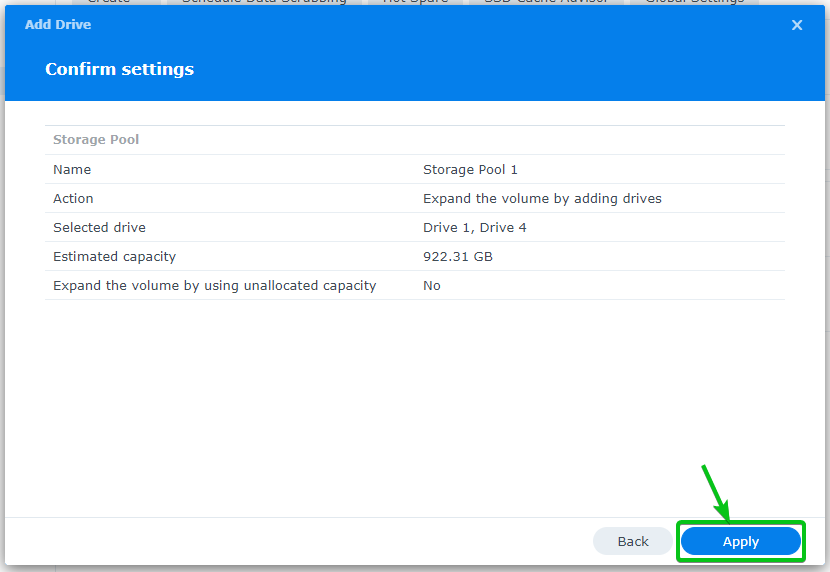
Click on Apply.
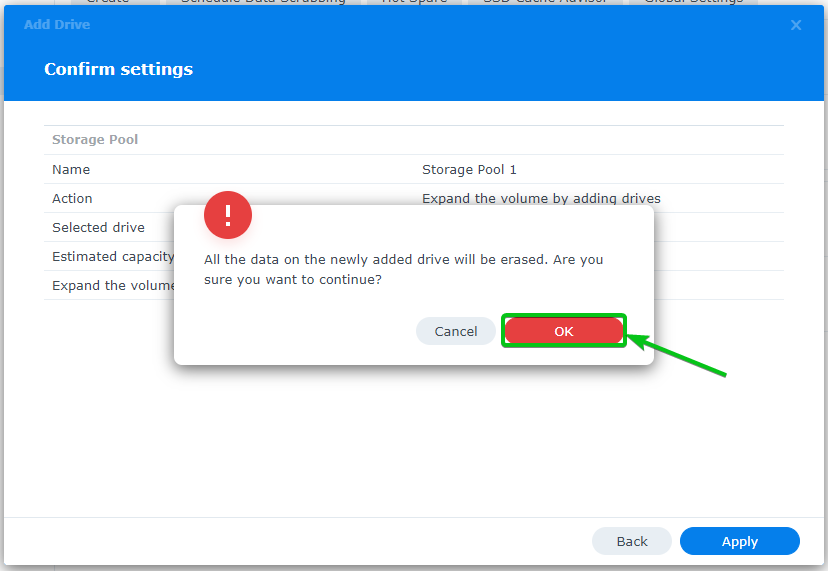
Click on OK.
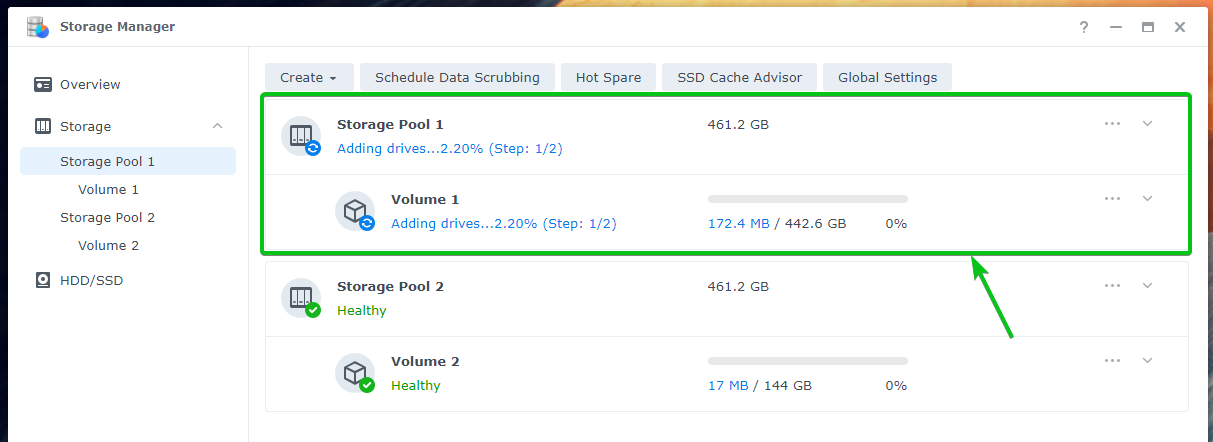
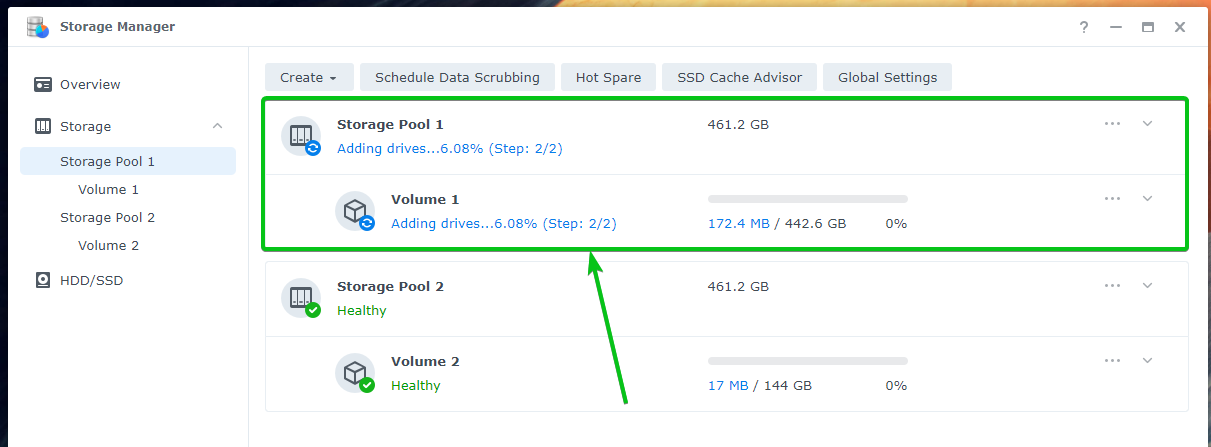
Your desired drive/drives will be added to the storage pool. Depending on how much data you already have on the storage pool, it will take a while to complete.
The drive/drives are being added to the storage pool.
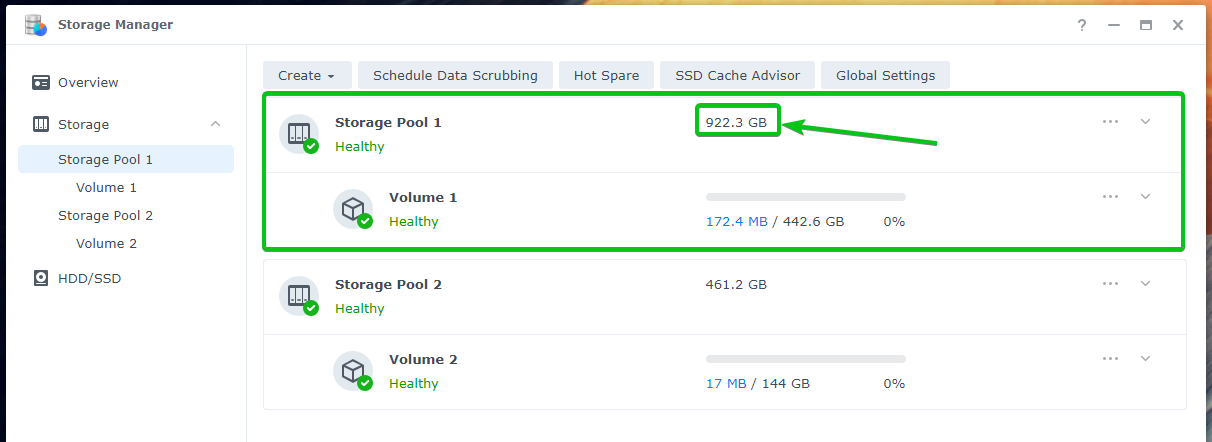
At this point, the drive/drives should be added to the storage pool, and the capacity of the storage pool should be increased.
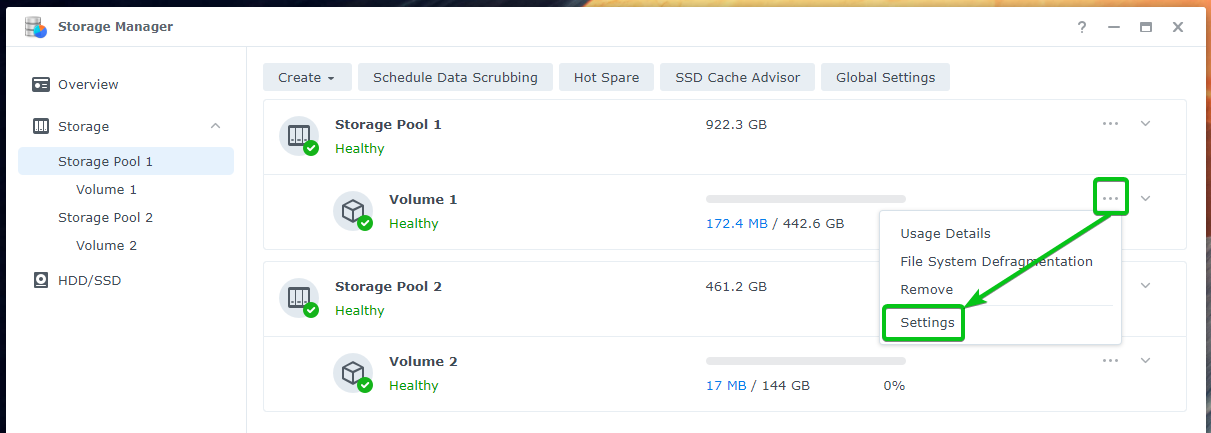
To increase the capacity/size of Volume 1, click on the icon from the right and click on Settings as marked in the screenshot below.
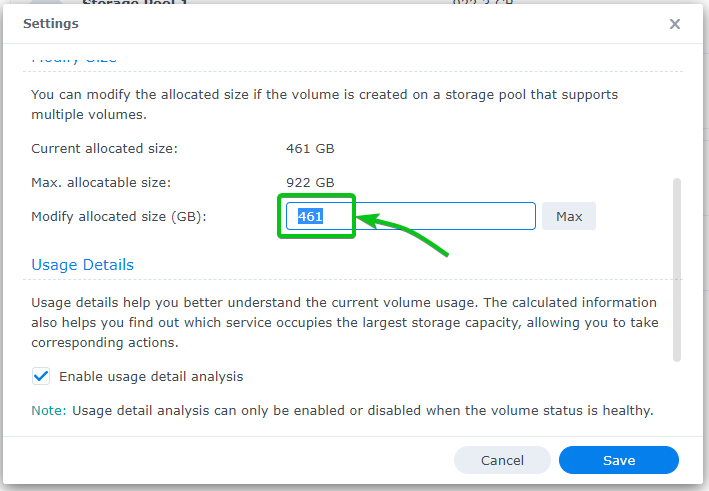
Currently, 461 GB of disk space is allocated for Volume 1 from Storage Pool 1.
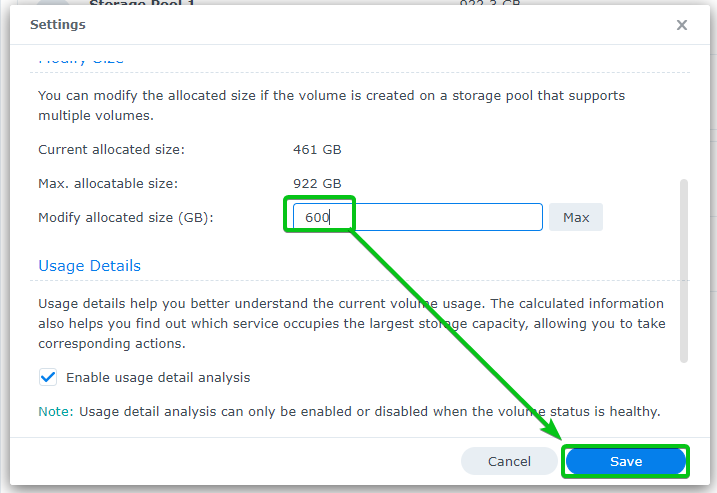
Type in a new size for the volume and click on Save for the changes to take effect.
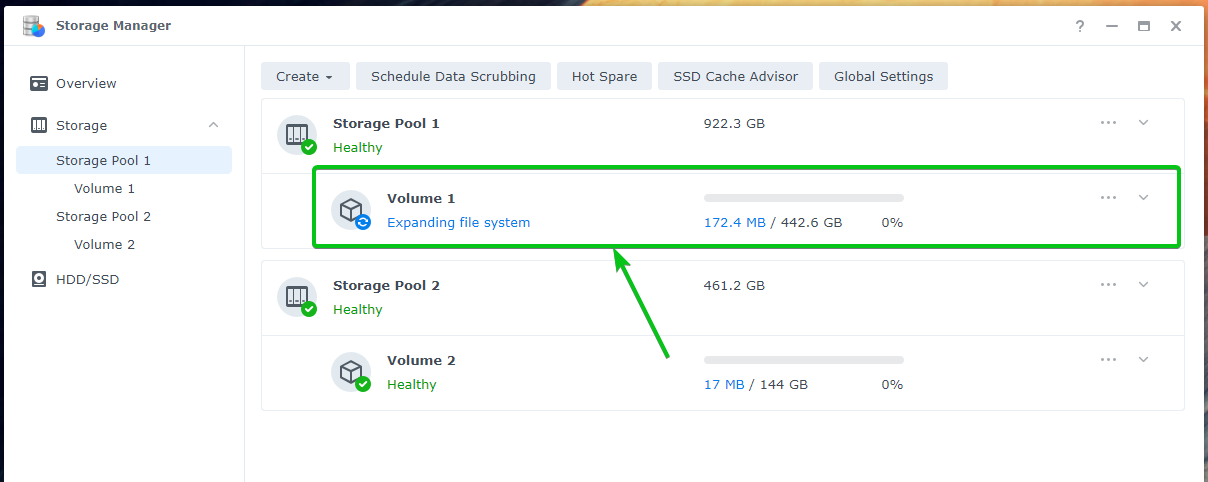
The volume is being expanded. Depending on the amount of data you have on the volume, it will take a while to complete.
As you can see in the screenshot below, the volume size should be increased.
Conclusion:
In this article, I have shown you how to increase a volume’s allocated size (or disk space) when free space is available on its storage pool. I have also shown you how to add new drives to increase the size of a storage pool. This way, even if you don’t have free space in your storage pool, you will still be able to increase the size of your desired volume.
References:
[1] Expand the Volume Size | DSM – Synology Knowledge Center

