VRam plays an intermediate role between the computer processor and your display machine: VRam tries to show you the same graphics as the computer processor forwarded it. Here comes the problem of VRam: it gets input from the processor and tries to display with the exact resolution. Suppose the resolution of the original frame is not mapped accurately on your display screen. In that case, there is a high probability that you are trying to display a high-resolution object, which your VRam may not support. In this condition, the following possibilities may occur:
- First, you must check that your system meets the minimum requirements of the application/game/video you want to run.
- If your system meets system requirements, you have to diagnose where the problem is: to do that; you may try to free some space on your RAM to be utilized or go for a third-party repair tool to ensure your operating system is working fine.
- If you have gone through the above processes, then it seems that you are short of the minimum VRam required.
So it is recommended to repair your Operating System(OS) to ensure that the VRAM problem is not due to the OS.
How to check the available VRam of your GPU
There are multiple ways to check how much amount of VRam your system has:
Firstly, navigate to “Settings” by right-clicking on the “Start” icon, or you can directly open it by using the keyboard shortcut (Windows key + I). Now, look for “System” here:
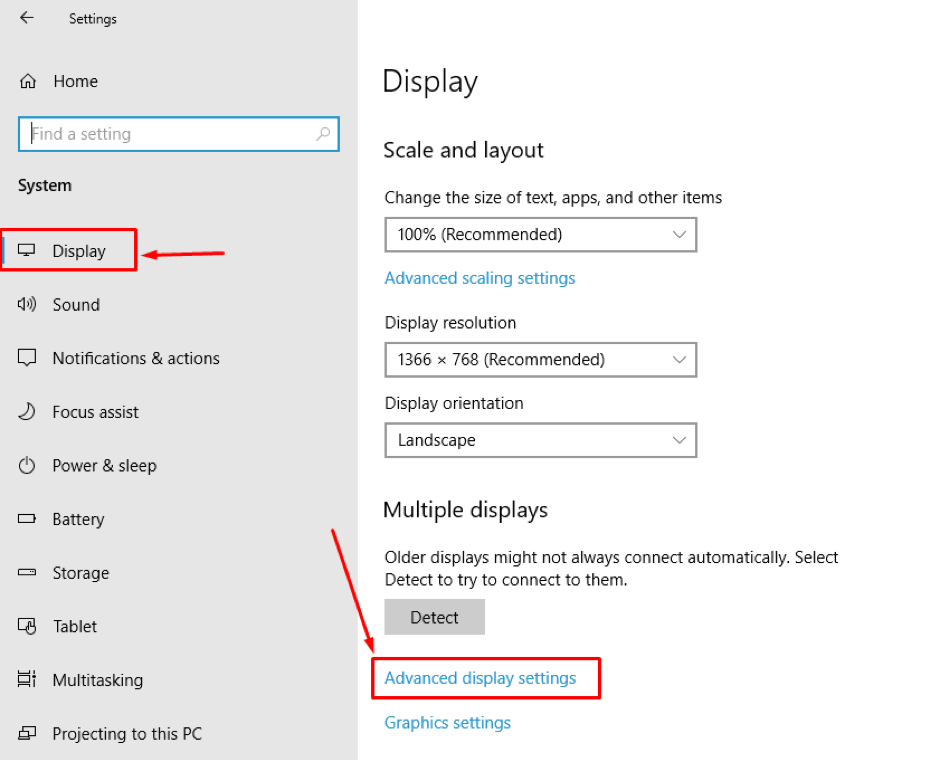
Open the system settings and search for the “Display” option here, click on the “Display“, scroll down till you get “Advanced display settings“:
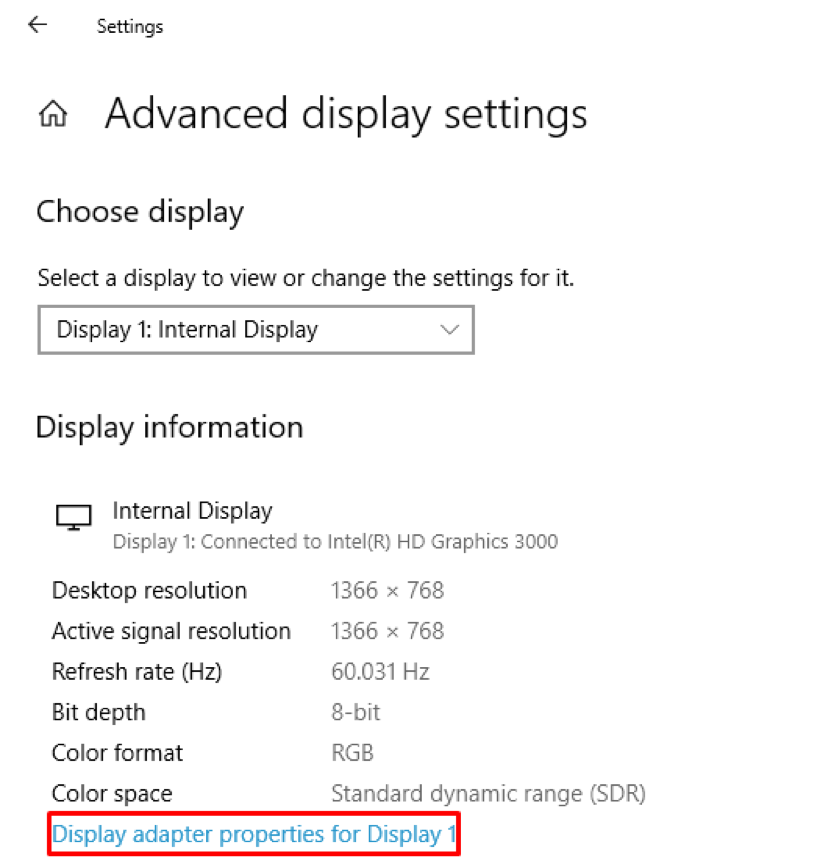
Open the “Advanced display settings”, and you can see display adapter properties at the end.
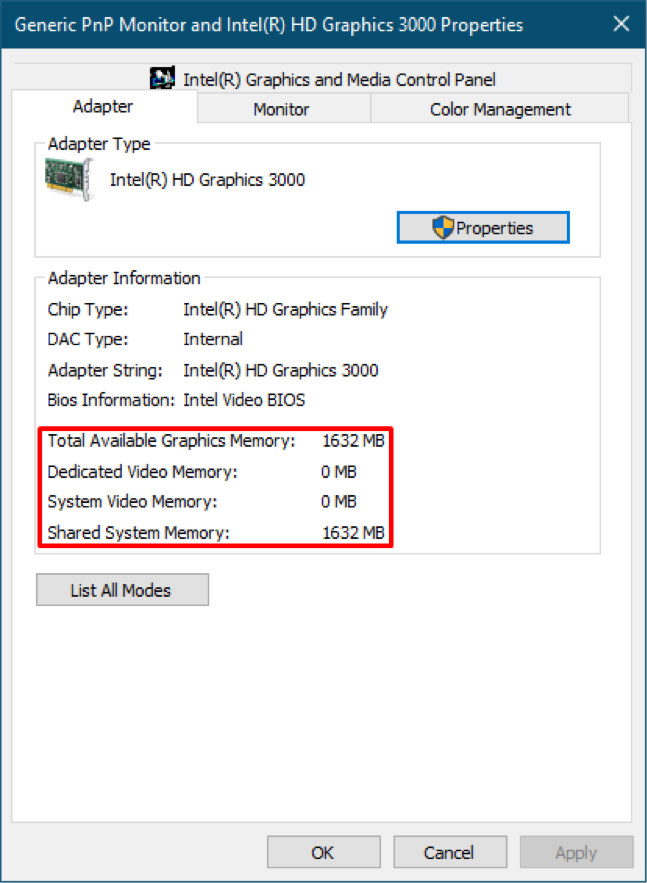
Once you go into properties, you can check various information related to VRAM, such as “Total Available Graphics Memory“, which shows total installed memory; as you can see in our case, the dedicated video memory is 0MB.
How to increase VRAM in Windows
The better practice to improve your VRam is to purchase it: But somehow, if it is not possible, you can increase it by keeping the same VRam. There are ways to improve it for better performance: the critical thing to notice here is that an increase in VRAM will not increase graphics card strength nor boost its performance. However, it will just add up fake value to your available memory. Moreover, due to this phony increment, let us say you want to play a game. Still, the VRAM memory of your PC does not meet the minimum requirement of the game; your game will check the minimum memory of VRAM required to run, it will get dummy values, and your game will be started. It does not mean that you have increased your PC’s memory, but the game runs on low graphics.
Sometimes this increment works fine when the minimum requirement of the application and your computer’s memory slightly differs:
Here we will discuss how this fake change can be incorporated into our original memory:
This guide provides a step-by-step process to increase the VRAM using “Registry Editor“:
Step 1:
You have to do this increment with the help of “Registry Editor“.
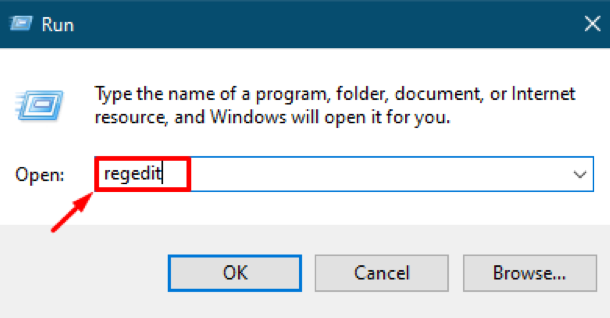
To open “Run“, execute the following keyboard shortcut (Windows key + R)
or you can navigate to the “Start” icon” and search for “Run“:
Step 2:
Once it is opened, run the following command to access “Registry Editor“:
You will get the “Registry Editor” interface, only authorized users can make changes to it. However, Windows “Registry Editor” does not need frequent changes, and if in need, only experts are recommended to make changes. If you are making a change, make it carefully, as a single mistake can halt your machine’s processing, and you may not be able to work smoothly.
Step 3:
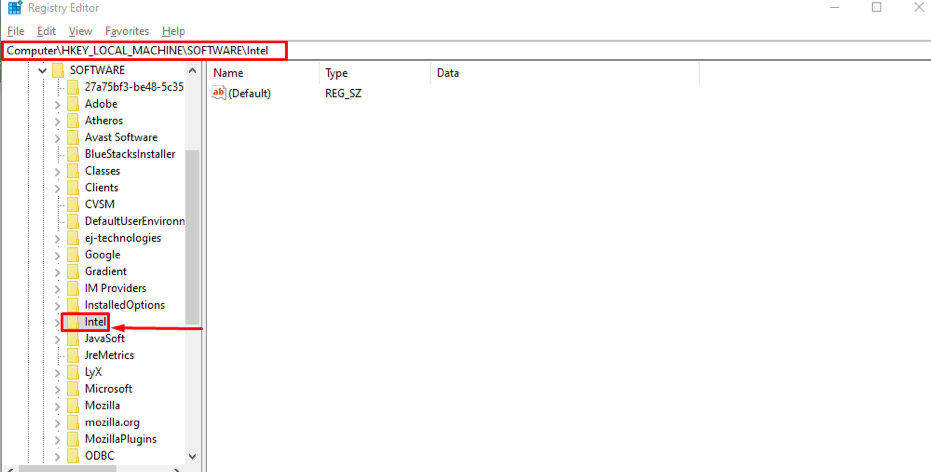
Firstly, navigate to the folder location given below by using the following address:
“Computer\HKEY_LOCAL_MACHINE\SOFTWARE\intel”
Or you can manually move to the “intel” folder:
“Computer > HKEY_LOCAL_MACHINE > SOFTWARE > intel”
Now, whatever changes you are going to make will be inside this “intel” folder.
Step 4:
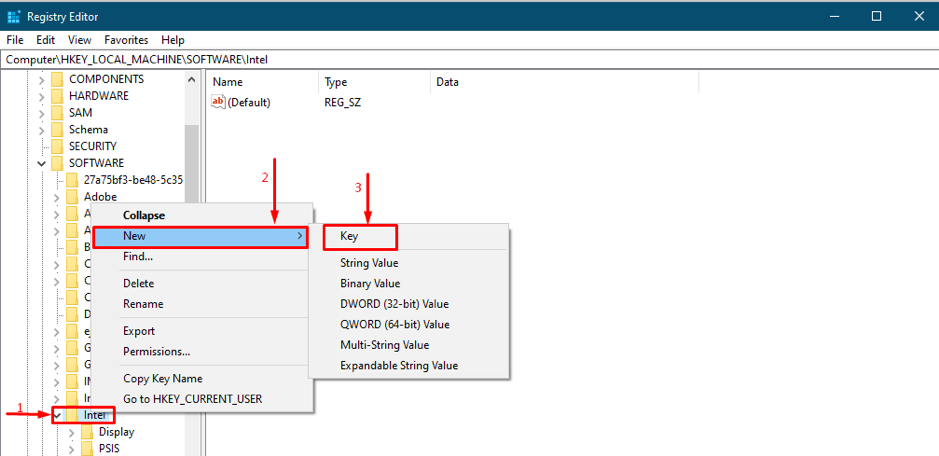
Now, create a new key inside this folder: to do that, right-click on the “intel” folder, you will see here a field named “New“, once you hover the mouse over this “New,” it will open a dropdown menu showing different areas in it, you have to select “Key“:
Step 5:
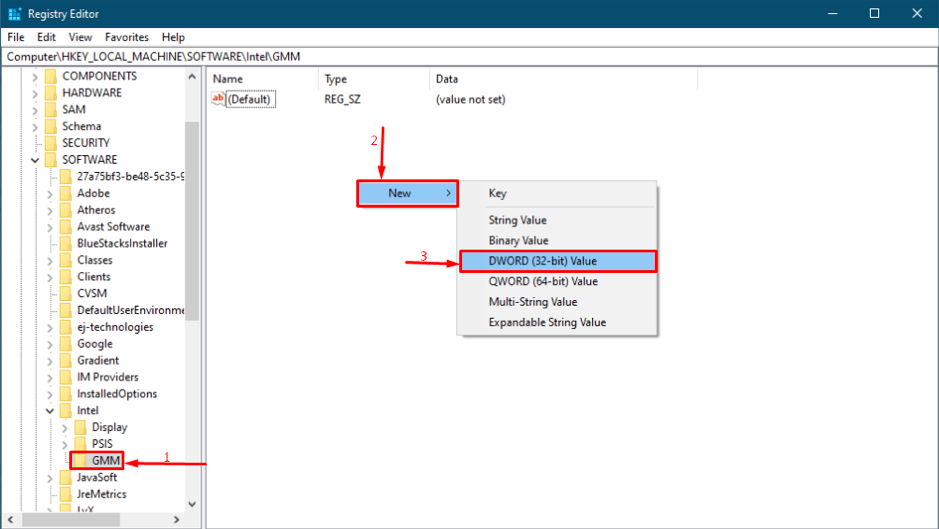
After selecting “Key“, it will ask you to name it, set the name of the new key as “GMM“: this action will create a new directory, where you can add new keys:
Open the “GMM” folder and right-click in the directory, hover over “New,” and then select the value “DWORD (32-bit) Value“, as shown in the figure below:
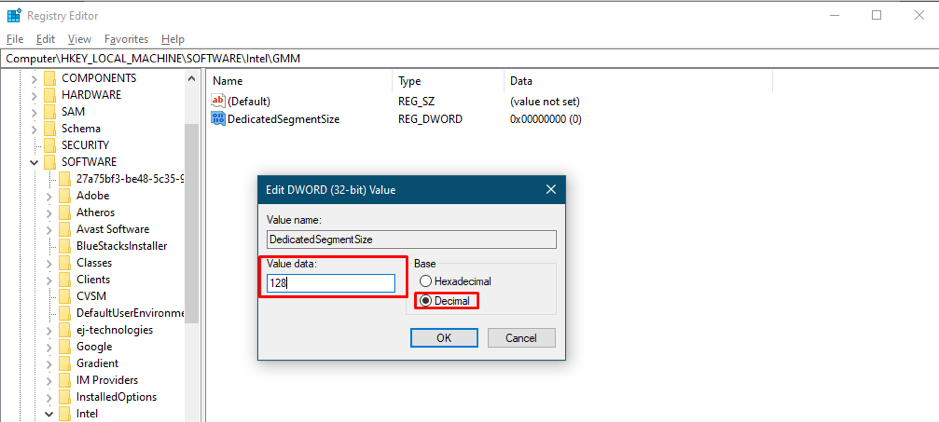
Once it is created, rename it as “DedicatedSegmentSize“: right click on “DedicatedSegementSize” and choose “Modify” to assign values:
Next, you must configure it, so do it carefully: set the number format in the “Base” section to “Decimal,” and you can choose “Value data“; the value range may fall between ‘0’ to ‘512’.
A system restart is mandatory to incorporate all the changes successfully.
If you still think that the dummy increase did not improve the performance, it means you want to get the output of an object with far higher graphics requirements. So, to encounter this issue, one must install the minimum memory required for that application.
How to find and fix your system issues
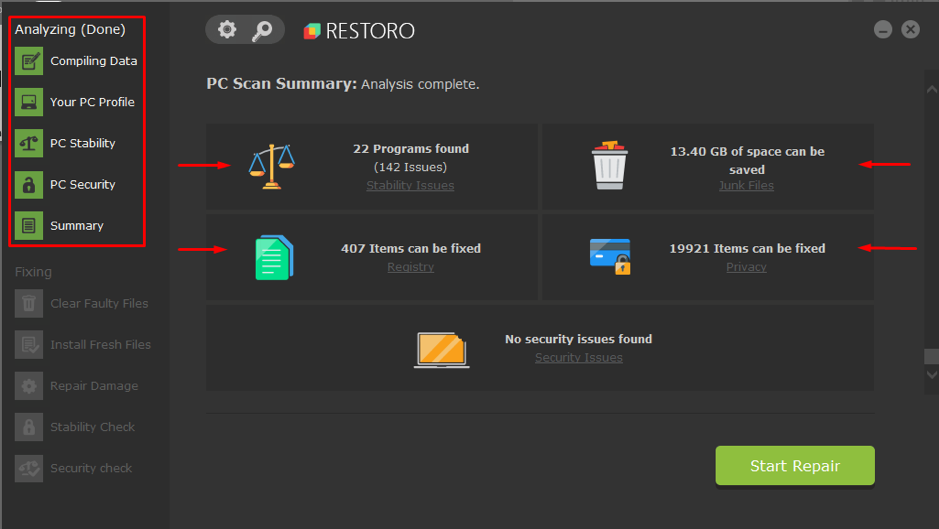
There may exist a problem that you have VRAM, but it is not running applications. So, in this case, you may use RESTORO (tool) to help you find and fix problems related to your overall system. This tool will analyze your whole system from different angles, and at the end, it will generate a summary telling; how many issues are found, how many cases can be fixed: how much hard disk space can be saved.
Conclusion
VRAM is a specific type of RAM used to accomplish graphics-related tasks or watch a high-resolution video. When it comes to graphics-related content, VRAM is preferred over simple RAM. In this article, we have enlisted some points to increase VRAM; but the dummy increase will not actually increase the memory, so it is recommended to increase your VRAM memory to meet the minimum requirements of your daily tasks. Still, sometimes due to some minor issues, your system interrupts the execution of a few applications, so for that, we have explained a third-party tool that will help search and repair the issues related to your system.


