Developing an effortless and secure file upload feature is crucial to web application development. Flask, recognized as a widely used Python web framework, provides the most amicable solution for its implementation. In this guide, we will set on a journey to explore the complex process of including the file upload functionality into Flask. We will explore how to create an intuitive user interface for file submissions, manage the server-side file handling complexities, and establish the robust security measures to remove potential errors.
In web development, activating the file upload functionality is a common requirement for various applications, ranging from social media platforms to document management systems. The flexible Python web framework which is Flask offers a great and effective way to quickly deploy this feature. This example digs deeper into the complexities of integrating the file upload functionality into Flask applications.
We will discuss every single detail of the code, explaining the entire process from configuring the app to handling the user input and ensuring security. Whether we are a beginner who are working our way into Flask or an experienced developers who seek to refine our file upload skills, this guide is valuable.
The initial step in implementing the file upload functionality in Flask is to import the necessary packages and dependencies. We import three essential modules in the provided code: “Flask”, “request”, and “render_template”.
from flask import Flask, request, render_template_string
import os
import tempfile
import shutil
“Flask” is a primary web framework that allows us to create the web applications in Python. It offers resources like tools and frameworks to manage the routes and HTTP requests and build the online applications. The “request” module is integral to Flask and enables us to access and process the incoming HTTP requests.
We use it in our code to get the data from the client side. Flask also allows us to serve the HTML templates, and its “render_template” feature is essential to render the HTML interface of our file upload form.
Now, let’s move to the configuration of the Flask app. The configuration stage is important to specify the settings and variables needed for the application to function correctly. In our example, the upload folder and allowable file extensions are two essential elements that we set up. We now create a Flask application instance named “app” as “app = Flask(__name__)”. This instance serves as the foundation of our web application.
The upload folder where the files that are uploaded is kept is configured in the “app.config[‘UPLOAD_FOLDER’]” line. It is set to “uploads”, but we can specify any desired directory path.
app.config['UPLOAD_FOLDER'] = 'uploads'
app.config['ALLOWED_EXTENSIONS'] = {'txt', 'pdf', 'jpg', 'jpeg', 'png', 'gif'}
Here, we define the allowed file extensions as a set that contains the common file types like “txt”, “pdf”, “jpg”, “jpeg”, “png”, and “gif”. This list helps us validate the file uploads to ensure that they are according to these extensions. This can be done using “app.config[‘ALLOWED_EXTENSIONS’]”.
return '.' in filename and filename.rsplit('.', 1)[1].lower() in app.config['ALLOWED_EXTENSIONS']
Next, we define a custom function called “allowed_file”. This function plays a crucial role in our file upload implementation by cross-checking whether the uploaded file has an allowed file extension. In this code, we first use the “def allowed_file(filename)” which defines a Python function named “allowed_file” which accepts a filename as its parameter.
The function returns “.” in the filename and the filename.rsplit(‘.’, 1)[1].lower() in app.config[‘ALLOWED_EXTENSIONS’]` returns a Boolean value, indicating whether the provided filename has an allowed file extension. The “.” part in the filename checks if a dot (.) exists in the filename. The dot is a common separator between the filename and its extension. Then, we use the “filename.rsplit(‘.’, 1)[1]” to extract the file extension by splitting the filename at the last dot (.), and “[1]” selects the second part of the split which is the extension.
Finally, with “.lower() in app.config[‘ALLOWED_EXTENSIONS’]”, we check if the lowercase version of the extracted file extension exists in the set of allowed extensions as specified in “app.config[‘ALLOWED_EXTENSIONS’]”. If it does, the function returns “True”, indicating that the file extension is allowed. Otherwise, it returns “False”.
With the configuration and utility function done, we create the “upload_file” route. This route handles both the GET and POST requests that are related to file uploads. This is shown in the Python script as follows:
def upload_file():
if request.method == 'POST':
# Check if a file was submitted
if 'file' not in request.files:
return "No file part"
file = request.files['file']
if file.filename == '':
return "No selected file"
# Check if the file has an allowed file extension
if not allowed_file(file.filename):
return "File type not allowed"
# Create a temporary directory
temp_dir = tempfile.mkdtemp()
temp_file_path = os.path.join(temp_dir, file.filename)
# Save the uploaded file to the temporary directory
file.save(temp_file_path)
# Display the file content (for demonstration purposes)
with open(temp_file_path, 'r') as uploaded_file:
file_content = uploaded_file.read()
# we can process the file content here as needed
# Clean up the temporary directory
shutil.rmtree(temp_dir)
return "File successfully uploaded!<br><br>File Content:<br>" + file_content
In the previous code, the “@app.route(‘/’, methods=[‘GET’, ‘POST’])” decorator marks the function below it as the handler for requests to the root URL (/). It specifies that this function should respond to both GET and POST HTTP methods.
The information is retrieved using the GET requests, whereas the data is submitted using the POST requests. This “def upload_file()” function defines the behavior of our route. It is executed when a user accesses the root URL. Then, to determine whether the request that comes in is a POST request, the “if request.method == ‘POST’:” conditional phrase is used. If it is, it signifies that the user has used the form to submit a file.
The next condition is the “file not in request.files”. With this, we check if the “file” field is present in the request’s files. When a file is uploaded via a form, it’s typically associated with a field name which, in our case, is “file”. If “file” is not found in “request.files”, it means that no file is submitted and we return a “No file part” message.
The “file = request.files[‘file’]`:” checks if the “file” is present in “request.files”. We obtain the uploaded file using “request.files[‘file’]” and assign it to the “file” variable for further processing. The “file.filename == ”:” checks if the “filename” attribute of the uploaded file is empty. An empty “filename” indicates that the user did not choose a file for upload. If the “file.filename” is empty, we return a “No selected file” message.
The “if not allowed_file(file.filename):” conditional statement employs our “allowed_file” function to verify if the uploaded file has an allowed file extension. If the file extension is not allowed, we return a “File type not allowed” message. Then, the “if not os.path.exists(app.config[‘UPLOAD_FOLDER’]):” checks if the designated upload folder that is specified in “app.config[‘UPLOAD_FOLDER’]” exists. If it doesn’t, we create it.
Finally, with the “file.save(os.path.join(app.config[‘UPLOAD_FOLDER’], file.filename))`:” condition, we save the uploaded file to the upload folder. We use the “os.path.join” function to create the complete path to save the file. After successfully saving the file, we return a “File successfully uploaded” message to inform the user about completing the upload process.
The code block that handles the GET requests is as follows:
# HTML template for file upload form
upload_html_template = """
<!DOCTYPE html>
<html>
<head>
<title>File Upload</title>
</head>
<body>
<h1>Select file(s) to Upload</h1>
<form method="POST" enctype="multipart/form-data">
<p>Please select a file to upload:</p>
<input type="file" name="file">
<input type="submit" value="Upload">
</form>
</body>
</html>
"""
# Set the host and port for Colab's built-in port forwarding
host = "localhost"
port = 5000
# Run the Flask app with host and port
app.run(host=host, port=port)
This “return render_template(‘upload.html’)” line in the case of a GET request when the user accesses the root URL without submitting a file renders an HTML template named “upload.html”. This HTML template is responsible for providing the user interface for file uploads.
HTML template for file upload form:
<!DOCTYPE html>
<html>
<head>
<title>File Upload</title>
</head>
<body>
<h1>Select file(s) to Upload</h1>
<form method="POST" enctype="multipart/form-data">
<p>Please select a file to upload:</p>
<input type="file" name="file">
<input type="submit" value="Upload">
</form>
</body>
</html>
The final part of our code ensures that the Flask application runs when this script is executed directly. We use the host = “localhost” and port = 5000. This runs the script directly with the “app.run(host=host, port=port)”. If the script is being run directly, the app.run() method starts the Flask development server.
Full code:
from flask import Flask, request, render_template_string
import os
import tempfile
import shutil
app = Flask(__name__)
# Define the upload folder and allowed file extensions
app.config['UPLOAD_FOLDER'] = 'uploads'
app.config['ALLOWED_EXTENSIONS'] = {'txt', 'pdf', 'jpg', 'jpeg', 'png', 'gif'}
# Function to check if a filename has an allowed file extension
def allowed_file(filename):
return '.' in filename and filename.rsplit('.', 1)[1].lower() in app.config['ALLOWED_EXTENSIONS']
@app.route('/', methods=['GET', 'POST'])
def upload_file():
if request.method == 'POST':
if 'file' not in request.files:
return "No file part"
file = request.files['file']
if file.filename == '':
return "No selected file"
# Check if the file has an allowed file extension
if not allowed_file(file.filename):
return "File type not allowed"
# Create a temporary directory
temp_dir = tempfile.mkdtemp()
temp_file_path = os.path.join(temp_dir, file.filename)
# Save the uploaded file to the temporary directory
file.save(temp_file_path)
# Display the file content (for demonstration purposes)
with open(temp_file_path, 'r') as uploaded_file:
file_content = uploaded_file.read()
# we can process the file content here as needed
# Clean up the temporary directory
shutil.rmtree(temp_dir)
return "File successfully uploaded!<br><br>File Content:<br>" + file_content
return render_template_string(upload_html_template) # Render HTML template from a string
# HTML template for file upload form
upload_html_template = """
<!DOCTYPE html>
<html>
<head>
<title>File Upload</title>
</head>
<body>
<h1>Select file(s) to Upload</h1>
<form method="POST" enctype="multipart/form-data">
<p>Please select a file to upload:</p>
<input type="file" name="file">
<input type="submit" value="Upload">
</form>
</body>
</html>
"""
# Set the host and port for Colab's built-in port forwarding
host = "localhost"
port = 5000
# Run the Flask app with host and port
app.run(host=host, port=port)
Output:
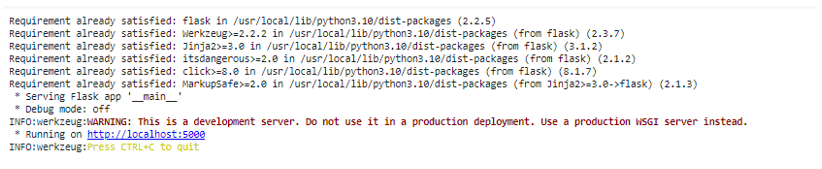
Running the code installs Flask successfully, and our Flask application will run on http://localhost:5000. Clicking on the https://localhost:5000 link in the output opens a new window.
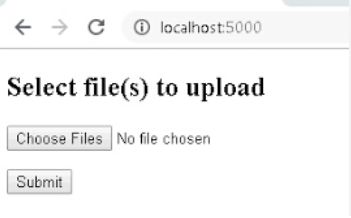
Choose a file to upload and it returns a successful upload message.

Conclusion
In this comprehensive guide, we discovered the process of implementing the file upload functionality in Flask. Each line of code is explained in detail to provide a clear understanding of the key components that are involved in this process.