Securing our Flask applications through authentication is vital in safeguarding a sensitive user data and ensuring a secure access control. Authentication serves as the guard which verifies the identity of the users and provides access only to authorized people. This comprehensive guide profoundly examines the complexities of implementing authentication in Flask apps and emphasizes originality and ethical development practices.
Implementing Authentication in Flask Applications
This example provides a comprehensive guide on implementing authentication in Flask applications and code explanations. We will be able to run the code in Google Colab after executing this code. We provided the code and explained each step.
To setup the Flask application, we import the necessary Flask libraries in this step to create the web application, SQLAlchemy for database management, and Flask-Login to handle the user sessions.
from flask_sqlalchemy import SQLAlchemy
from flask_login import LoginManager, UserMixin, login_user, login_required, logout_user, current_user
To initialize the Flask app, we create a Flask app, set a secret key for session security, and configure the SQLite database to store the user data.
app.config['SECRET_KEY'] = 'your_secret_key'
app.config['SQLALCHEMY_DATABASE_URI'] = 'sqlite:///users.db'
db = SQLAlchemy(app)
The next step involves creating a user model. We define a user model using SQLAlchemy which represents the users in our application. It includes the user’s ID, hashed password, and username fields.
id = db.Column(db.Integer, primary_key=True)
username = db.Column(db.String(80), unique=True, nullable=False)
password = db.Column(db.String(120), nullable=False)
Initialization of the Login Manager
We create and initialize a “LoginManager” instance to manage the user sessions.
login_manager.init_app(app)
The following step is to create the routes for registration and login which involves creating routes for user registration and login, and explaining each part of the code in more detail. In this step, we define two routes: one route for the user registration and the other one for the user login. These routes are responsible to handle the user input, process it, and manage the user sessions.
For the registration route, we use the @app.route(‘/register’, methods=[‘GET’, ‘POST’]). This line decorates the “/register” URL with a Flask route. It specifies that this route should handle both GET and POST requests. The GET requests are used to serve the registration form while the POST requests are used to submit the form data. The “if request. method == ‘POST’:” are the conditional checks if an incoming request is the POST request and indicates that the user is submitting the registration form.
Then, we use the “username = request.form[‘username’]” and “password = request.form[‘password’]”. These lines use the “request.form” command to get the username and password that the user submitted in the registration form. The form fields are accessed by their “name” attributes.
After that comes the “hashed_password = generate_password_hash(password, method=’sha256′)”. Here, we use the “generate_password_hash” function (typically from the “werkzeug.security” module) to securely hash the user’s password before even storing it in the specified database.
Hashing the password adds an extra layer of security, ensuring that the plain text passwords are not stored. We then create a new instance of the “User” model with the provided username and hashed password, e.g., “new_user = User(username=username, password=hashed_password)”.
To add the new user to the database session and commit the changes to the database to effectively register the user, we utilize the db.session.add(new_user) and db.session.commit() functions. Then, the flash(‘Registration successful. Please log in.’, ‘success’). A success message is shown using the flash feature. This message can be displayed on the redirected page (in this case, the login page) to inform the user that the registration was successful.
After successful registration, the user is redirected to the login page using “edirect(url_for(‘login’))”. Unless the request method is POST (i.e., it’s a GET request), the registration form is given by returning the “register.html” template. This allows the users to access the registration form initially.
def register():
if request.method == 'POST':
username = request.form['username']
password = request.form['password']
hashed_password = generate_password_hash(password, method='sha256')
new_user = User(username=username, password=hashed_password)
db.session.add(new_user)
db.session.commit()
flash('Registration successful. Please log in.', 'success')
return redirect(url_for('login'))
return render_template('register.html')
To create the login route, we use the @app.route(‘/login’, methods=[‘GET’, ‘POST’]) again. The “/login” URL with a Flask route specifies that it should handle both the GET and POST requests. The “if request.method == ‘POST’:” conditional check, as demonstrated in the previous example, indicates that the user is submitting the login form if an incoming request is the POST request.
Then, we retrieve the username and passwords that are entered by the user login form by username equal to request.form[‘username’] and the password that is assigned as request.form[‘password’]. We query the database to find a user with the provided username using SQLAlchemy. If a matching user is found, it is stored in the “user” variable as “User.query.filter_by(username=username).first()”.
Then, the “if user and check_password_hash(user.password, password):” is used to check if a user with the provided username exists (user) and if the entered password matches the hashed password that is stored in the database.
The “check_password_hash” function compares the entered password with the stored hash securely. Using “login_user(user)” from the Flask-Login, the user is logged in if the username and password are accurate.
Then, using a “flash(‘Login successful.’, ‘success’)”, a success message is flashed to inform the user of a successful login. The “return redirect(url_for(‘dashboard’)”)” function call directs the user towards the dashboard page upon their successful login. The login form can be provided by returning the “login.html” template when the request method does not include POST (i.e., it is a GET request).
def login():
if request.method == 'POST':
username = request.form['username']
password = request.form['password']
user = User.query.filter_by(username=username).first()
if user and check_password_hash(user.password, password):
login_user(user)
flash('Login successful.', 'success')
return redirect(url_for('dashboard'))
else:
flash('Login failed. Please check your username and password.', 'danger')
return render_template('login.html')
After the previous login and the creation of the routes, we create a dashboard route. This route is protected with “@login_required”, ensuring that only the authenticated ones can have access to the dashboard. It displays a personalized welcome message.
@login_required
def dashboard():
return f'Welcome, {current_user.username}!'
We also need to create a logout route. The logout route logs the user out and redirects them to the login page.
@login_required
def logout():
logout_user()
return redirect(url_for('login'))
To create templates (HTML files), we need to create the HTML templates for registration and login forms. These templates should include the form fields for username and password. Then, we test the code by running the application.
db.create_all()
app.run(debug=True)
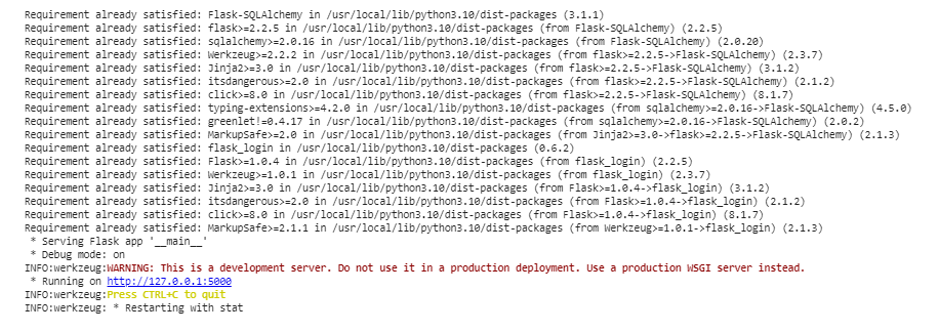
This code block initializes the database and starts a Flask application in the debug mode. We set up the Flask app and configure it with a secret key and a database URI. A user model is created using SQLAlchemy to represent the users in the database.
We then initialize the Flask-Login manager. The routes for registration and login are defined which handle the user input, validation, and session management. Then, the dashboard route is protected with “@login_required”, ensuring that only the authenticated users can access it. We also create the logout route that logs the users out and redirects them to the login page. The HTML templates for registration and login forms are required. The application is used to run with “debug=True”, and the database is created if it doesn’t exist.
Output:
Full code:
!pip install flask_login
from flask import Flask, request, redirect, url_for, render_template, flash
from flask_sqlalchemy import SQLAlchemy
from flask_login import LoginManager, UserMixin, login_user, login_required, logout_user, current_user
app = Flask(__name__)
app.config['SECRET_KEY'] = 'your_secret_key'
app.config['SQLALCHEMY_DATABASE_URI'] = 'sqlite:///users.db'
db = SQLAlchemy(app)
class User(UserMixin, db.Model):
id = db.Column(db.Integer, primary_key=True)
username = db.Column(db.String(80), unique=True, nullable=False)
password = db.Column(db.String(120), nullable=False)
login_manager = LoginManager()
login_manager.init_app(app)
@app.route('/register', methods=['GET', 'POST'])
def register():
if request.method == 'POST':
username = request.form['username']
password = request.form['password']
hashed_password = generate_password_hash(password, method='sha256')
new_user = User(username=username, password=hashed_password)
db.session.add(new_user)
db.session.commit()
flash('Registration successful. Please log in.', 'success')
return redirect(url_for('login'))
return render_template('register.html')
@app.route('/login', methods=['GET', 'POST'])
def login():
if request.method == 'POST':
username = request.form['username']
password = request.form['password']
user = User.query.filter_by(username=username).first()
if user and check_password_hash(user.password, password):
login_user(user)
flash('Login successful.', 'success')
return redirect(url_for('dashboard'))
else:
flash('Login failed. Please check your username and password.', 'danger')
return render_template('login.html')
@app.route('/dashboard')
@login_required
def dashboard():
return f'Welcome, {current_user.username}!'
@app.route('/logout')
@login_required
def logout():
logout_user()
return redirect(url_for('login'))
if __name__ == '__main__':
app.app_context()
app.run(debug=True)
Conclusion
The example that is discussed in this guide provides a foundation to implement the authentication in Flask applications. We can build upon it by adding features like password reset, user profile management, and more to create a robust authentication system for our web application. We explored every topic, from establishing the user registration and login systems to effortlessly integrating the authentication providers.