- What is the Purpose of Stable Diffusion Inpainting?
- How Does Stable Diffusion inpainting Work?
- How to Use Stable Diffusion Inpainting?
What is the Purpose of Stable Diffusion Inpainting?
The goal of stable diffusion inpainting is to generate visually plausible and coherent content in the missing regions of an image while preserving the overall structure and appearance of the original image. It achieves this by leveraging the concept of image diffusion, which is the process of spreading information or color from known areas to unknown areas.
How Does Stable Diffusion Inpainting Work?
The inpainting process typically involves two main steps: propagation and diffusion. The known regions surrounding the missing area are analyzed in the propagation step to estimate the missing information. This estimation can be based on various methods, such as texture synthesis, patch matching, or edge propagation.
Once the missing information is estimated, the diffusion step takes place. Diffusion involves the gradual spreading of color and texture information from the known regions to the unknown regions. The diffusion process aims to create a smooth transition between the inpainted regions and the original content, ensuring that the generated image remains visually consistent.
How to Use Stable Diffusion Inpainting?
Inpainting is a feature that allows you to edit existing images with text prompts using a mask. A mask is a black-and-white image that indicates which parts of the image you want to regenerate with the AI model. You can use inpainting to fix defects, add or remove objects, change colors or styles, etc. Users can install it locally by following the official link or can utilize its functionalities via the web user interface.
Let us explore the practical implementation by following the given steps:
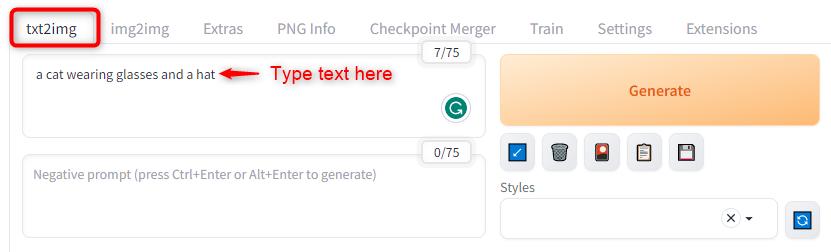
Step 1: Select the ‘txt2img’ Tab
Select the “txt2img” tab and enter the text prompt in the text box. Users can use any words or phrases that they want, but make sure they are descriptive and specific enough for the AI model to understand. Users can also use modifiers like ‘:’, ‘+’, ‘-‘, ‘(‘, ‘)’, etc. to fine-tune the prompt. For example, generate an image of “a cat wearing glasses and a hat” as below:
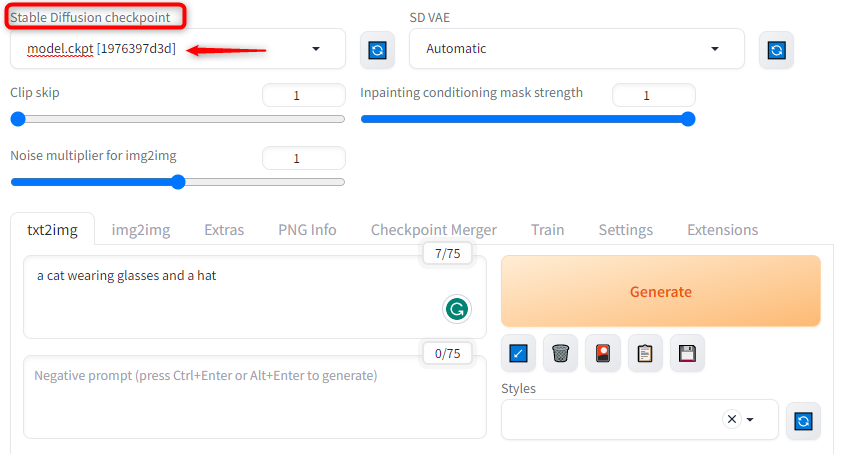
Step 2: Select the Model Checkpoint
Users can choose the model checkpoint from the drop-down at the top left corner. The model checkpoint determines the style and quality of the image generation. There are several checkpoints available, such as “model.ckpt”, “sd-v1-5-inpainting”, “sd-v1-5-256”, “sd-v1-5-512”, etc.:
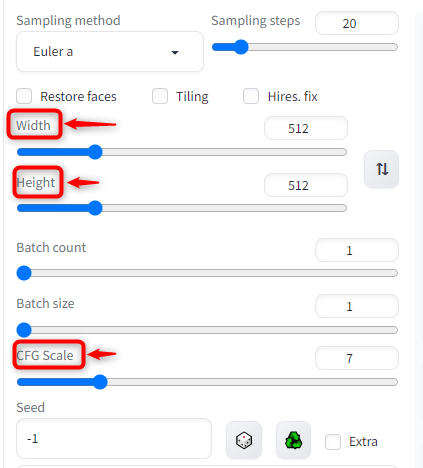
Step 3: Adjust the Image Size
Adjust the image size and other settings according to your preference. The size of the image computes the resolution of the output image. The other settings include denoising strength, CFG scale, batch size, etc., which affect the speed and quality of image generation:
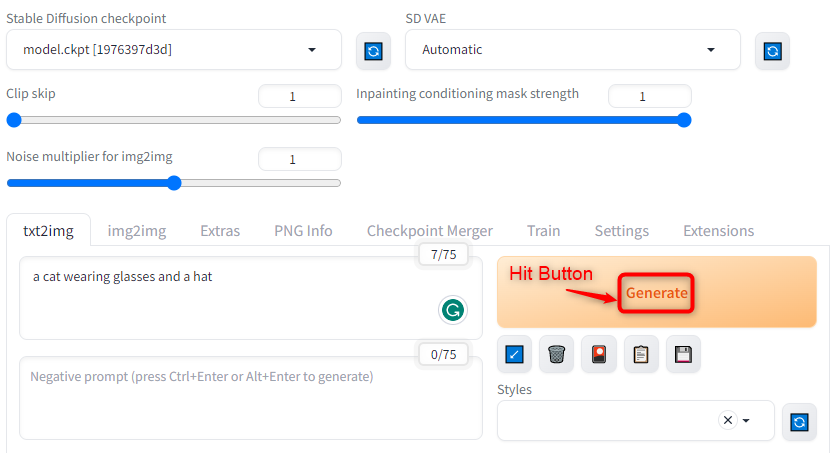
Step 4: Click on the “Generate” Button
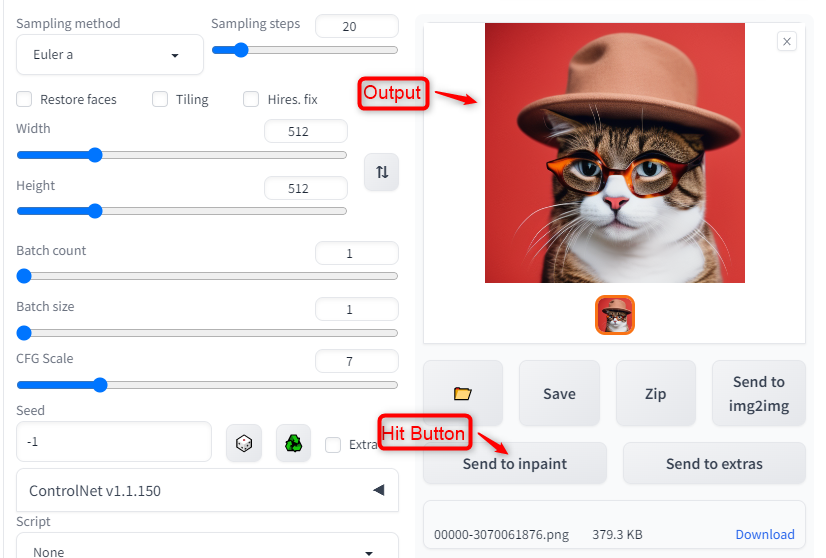
Hit on the “Generate” button for starting the generation process of the image. Depending on the user’s prompt, model checkpoint, and settings, it may take a few minutes or longer to generate the image:
Step 5: Hit the “Send to inpaint” Button
Once the image is generated, users can save it or modify it further using inpainting:
Step 6: Create a Mask
To use inpainting, select the “img2img” tab and select the “Inpaint” sub-tab. Use the paintbrush instrument for creating a mask on the image. The black areas are where you want the AI model to regenerate the image based on your text prompt as below:
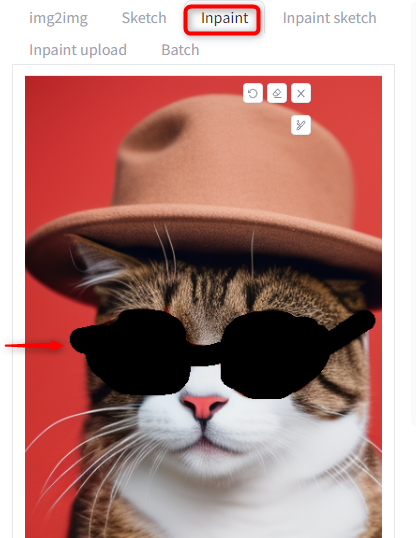
Note: Users can also upload the image to the inpainting canvas by clicking on the “Inpaint upload” button or using the existing image.
Step 7: Click on the “Generate” Button
Select and apply the same model checkpoint and settings as you used for generating the original image and click on the “Generate” button:
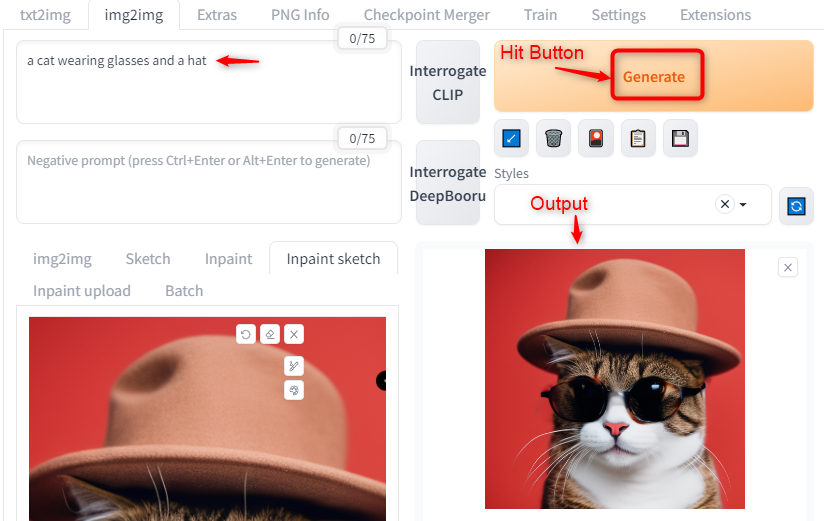
The output shows that the stable diffusion inpainting feature has been applied.
Stable Diffusion Advantages and Usage
Stable Diffusion inpainting has several advantages over other inpainting methods, such as:
- It can manage large regions of missing pixels and complex textures.
- It can preserve sharp edges and fine details in the image.
- It can avoid artifacts such as blurring, ringing, or over-smoothing.
- It can be easily implemented and parallelized using standard numerical methods.
Stable Diffusion Inpainting can be utilized for different applications, such as:
- Image restoration: repairing damaged or degraded images, such as old photos, paintings, or documents.
- Image editing: removing unwanted objects or regions from images, such as logos, watermarks, or blemishes.
- Image completion: filling in missing regions in images, such as occlusions, holes, or gaps.
Conclusion
Stable Diffusion inpainting offers a powerful and user-friendly solution for restoring missing or damaged regions in images. By using the concept of image diffusion, users integrate inpainted content with the original image, ensuring visual coherence and minimizing artifacts. With its intuitive GUI and adjustable parameters, users can easily mark the inpainting regions and control the inpainting process. This article has explained the main steps and advantages of using stable diffusion inpainting and some of its applications.