In this article, a step-by-step guide will provide on how to use Stable Diffusion img2img to perform image-to-image translation tasks.
How to Use Stable Diffusion Img2Img in Easy Diffusion (GUI)?
Easy Diffusion is a GUI-based interface for using Stable Diffusion img2img. Users can download Easy Diffusion through the official GitHub link and install it. It is provided for Windows, Linux, and macOS.
Here are the steps to use Stable Diffusion img2img:
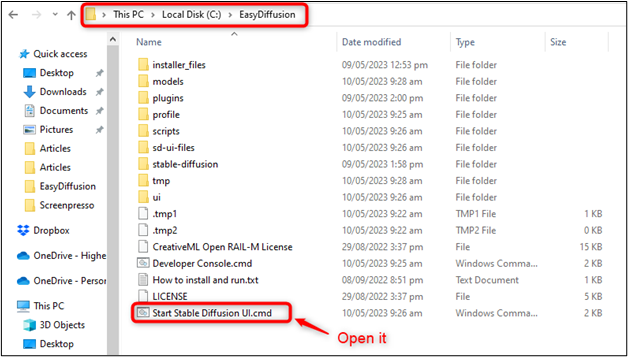
Step 1: Open Easy Diffusion
Once users have installed Easy Diffusion, open it, and start using it. Also, users can open the “Start Stable Diffusion UI.cmd” file in the “EasyDiffusion” folder. In this way, a simple and intuitive interface is seen that allows users to select the task to perform:
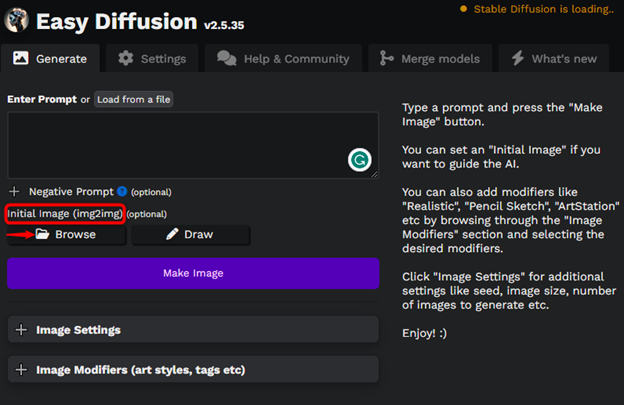
Step 2: Select “img2img” Option
Easy Diffusion supports various image-to-image translation tasks, such as colorization, denoising, super-resolution, and inpainting. Users can select the task to perform from the list of available tasks. In our case, choose the “img2img” task and hit the “Browse” button:
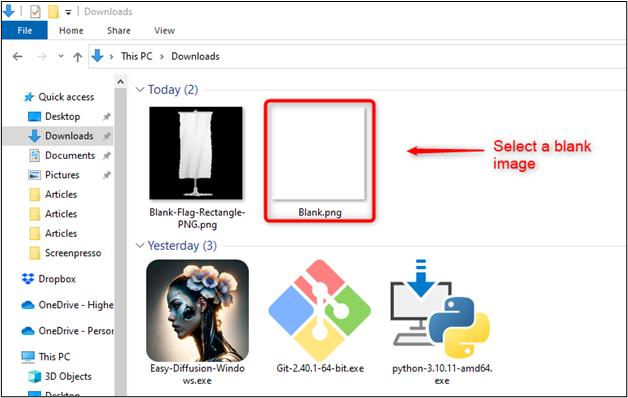
Step 3: Select and Upload the Image from Local Directory
In this step, specify the image from the local directory for processing. For instance, select the “Blank” image in a PNG format and upload it:
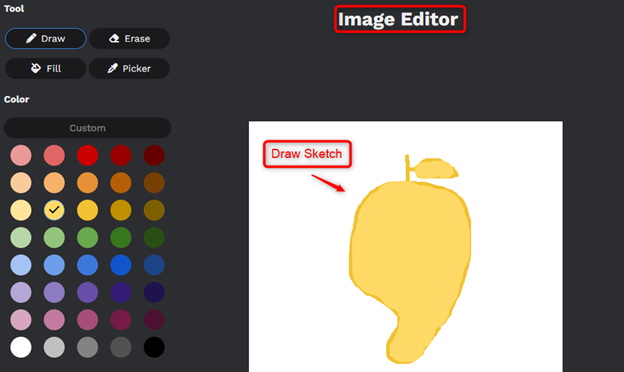
Step 4: Draw a Sketch
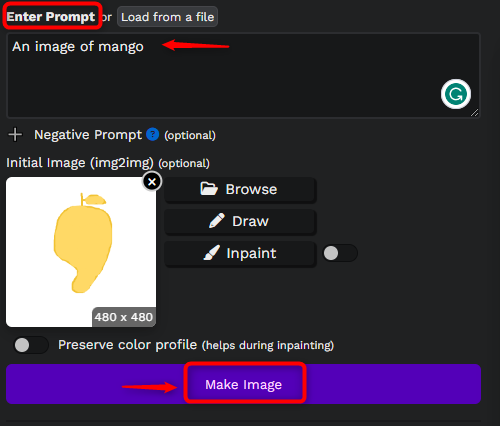
After uploading the image, users can draw a sketch or anything in a blank uploaded document. In our case, draw the shape of the mango as below:
Step 5: Configure the Options
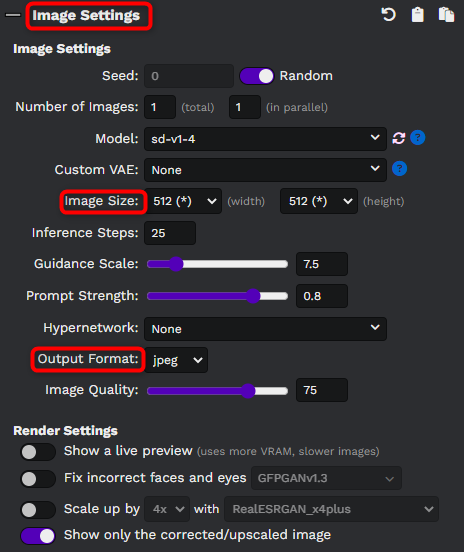
Easy Diffusion allows users to configure various options for each task, such as the model to use, the batch size, and the number of iterations. Users can also specify the size of the input and output images, the number of channels, and the image format. For instance, specify an image size of width and height “512px”, output format “jpeg”, and model “sd-v1-4” as below:
Step 6: Start the Processing
Once users have configured the options and written text in “Enter Prompt”. Let us initiate the processing by hitting on the “Start” button. Easy Diffusion automatically performs the image-to-image translation task and displays the progress and results in the interface:
Step 7: Evaluate the Results
Once the processing is complete, evaluate the quality of the results to ensure that they are of sufficient quality for needs. Users can use various metrics to evaluate the quality of the generated images, such as the structural similarity index (SSIM) and peak signal-to-noise ratio (PSNR). Users can also compare the generated images to the original images to ensure that they are faithful to the original content:
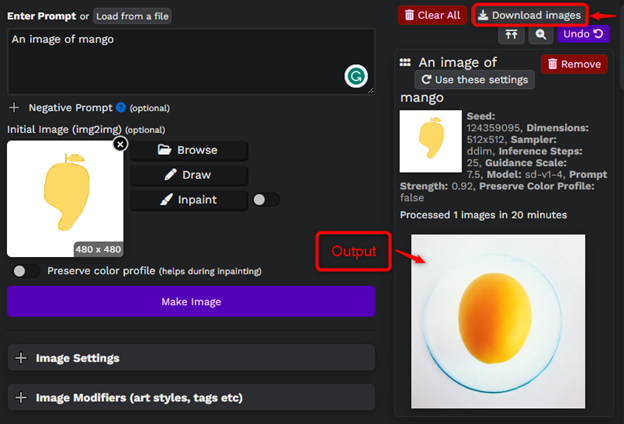
In Easy Diffusion, users can download the image in the specified directory by pressing “Download images”.
Conclusion
Stable Diffusion img2img is a state-of-the-art method that uses a diffusion approach to generate quality images with high resolution. It performs various image-to-image translation tasks without the need for programming. Users can also specify the size of the input and output images, the number of channels, and the image format to generate high-quality images.