This post will describe the method to install and update the npm version in Windows.
How to Install npm in Windows?
If you do not already have npm on your Windows system, then install the latest version of Node.js as it comprises the npm. For doing so, follow the below-provided steps.
Step 1: Download Node.js Setup File
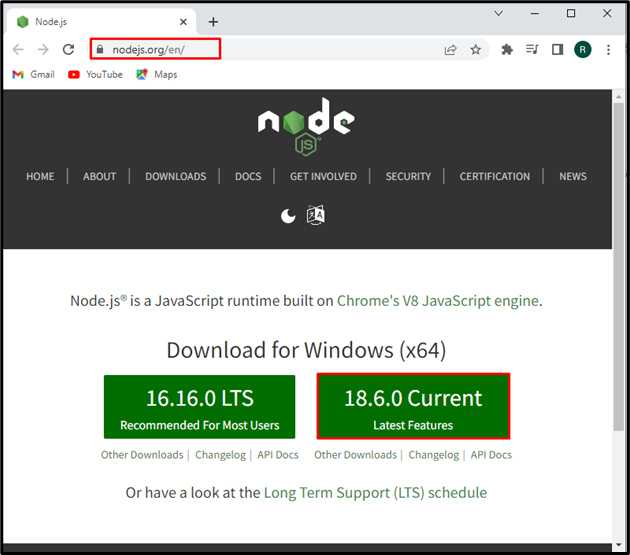
First, navigate to the official website of Node.js with the help of the given link and download its latest version:
After downloading the Node.js setup file, click on the “Open” button for its execution:
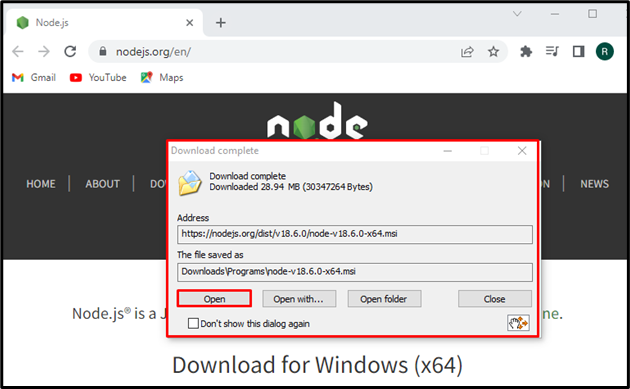
Step 2: Install Node.js and npm
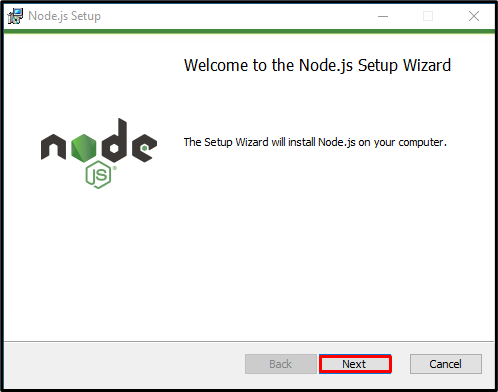
The “Node.js” wizard will appear on the screen. Hit the “Next” button to start the Node.js installation process:
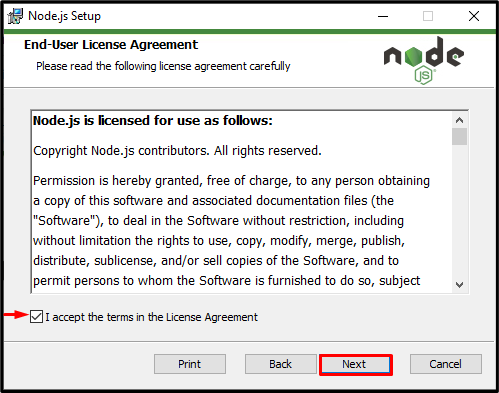
Accept the License Agreement terms and press the “Next” button:
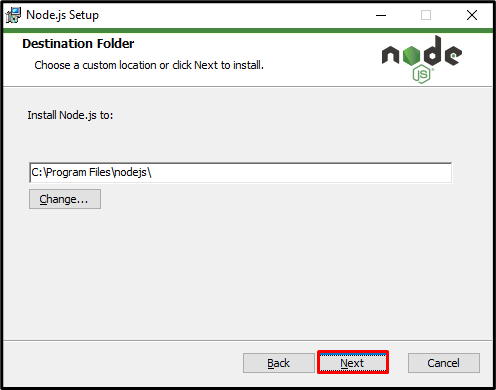
Set the location to install Node.js or go with the default location and press the “Next” button:
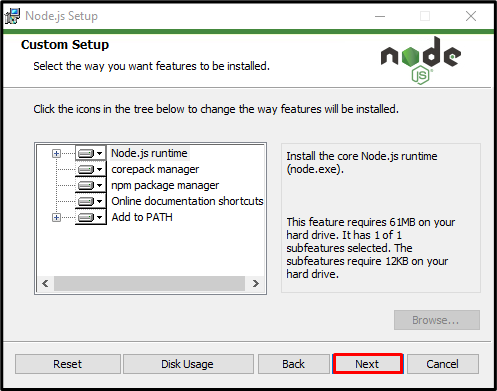
Click on the “Next” button to continue Node.js installation:
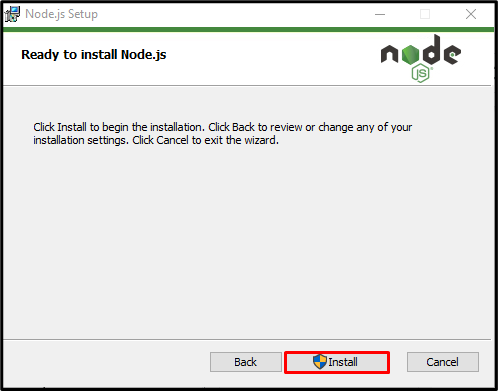
Click on the “Install” button to start Node.js installation:
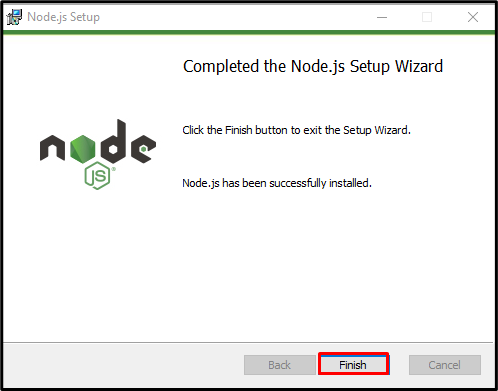
After successfully installing Node.js, press the “Finish” button to exit the setup wizard:
Step 3: Verify npm Installation
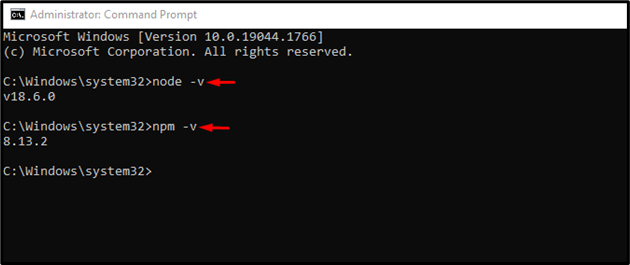
Now, open the “Command Prompt” and check out the Node.js and npm version with the help of the below provided commands:
>npm -v
You can see that we have successfully installed the npm version “8.13.2” on Windows.
How to Upgrade Version of npm in Windows?
To upgrade the npm version in Windows, follow up on the below-listed steps.
Step 1: Open PowerShell Command Prompt
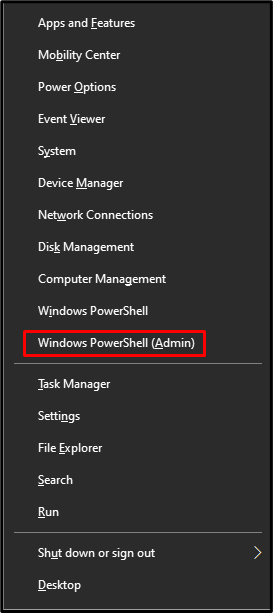
Press the “Window+X” key to open the Power User menu and click on the “Windows PowerShell(Admin)” from the displayed options to open PowerShell:
Step 2: Set PowerShell Execution Policy
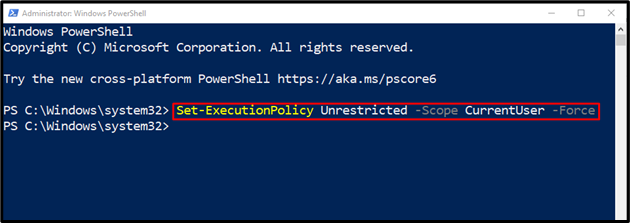
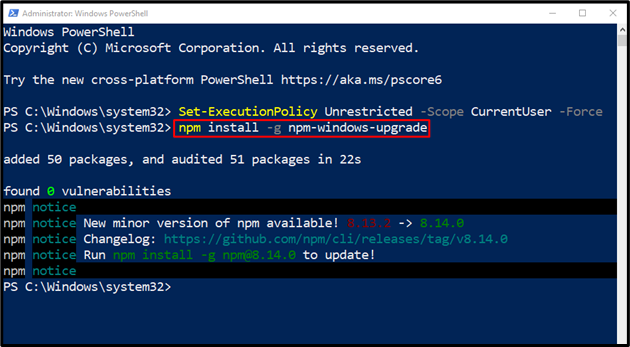
By default, the PowerShell execution policy is set as “Restricted”. Modify the policy to “Unrestricted” by using the provided command. This operation will permit you to execute the downloaded script without any restrictions:
Step 3: Install npm Upgrader Tool
Install the “npm-windows-upgrade” tool to upgrade the npm version on Windows:
Step 4: Upgrade npm Version
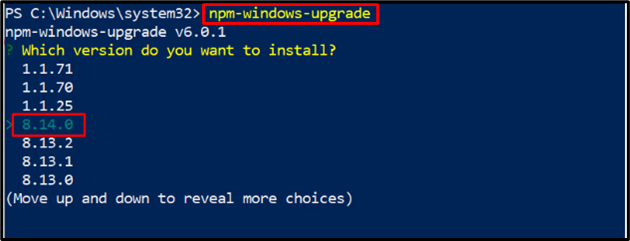
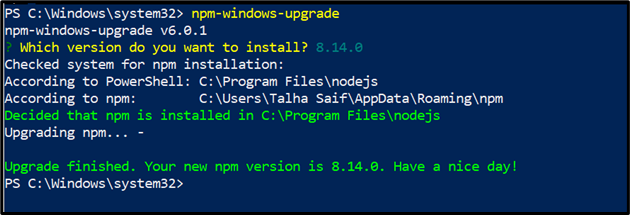
Finally, upgrade the npm version by executing the given command on the Powershell:
Use the “Down arrow” key to select the latest npm version, as we have selected “8.14.0”, and press “Enter”:
From the below-given output, you can see we have successfully upgraded the npm version from “6.0.1” to “8.14.0”:
We have effectively illustrated the method to install and upgrade npm in Windows.
Conclusion
To install the latest version of npm on Windows, firstly install Node.js as it comprises npm. If you already have npm on Windows and only need to upgrade its version, open the PowerShell command prompt, modify the execution policy, and install the npm upgrader tool. After that, upgrade the npm version using the “npm-windows-upgrade” command. This blog illustrated the method to install and update the npm version in Windows.

