Each user of your Synology NAS can have their own Synology Drive and the files they create on their own Synology Drive are not accessible to other users by default. Each user can use Synology Drive from a web browser. Users can also sync and back up files using the Synology Drive Client desktop app.
To use Synology Drive, you will have to install the Synology Drive Server package on your Synology NAS. Once installed, your NAS will become a productivity and collaboration powerhouse.
In this article, I will show you how to set up and configure Synology Drive Server on your Synology NAS, install Synology Drive Client on Windows and Ubuntu operating systems, and use Synology Drive Client to sync and back up files. So, let’s get started.
Table of Contents:
- Installing the Synology Drive Server on the NAS
- Enabling the User Home Service
- Accessing the Synology Drive From a Web Browser
- Downloading the Synology Drive Client Desktop App
- Installing the Synology Drive Client on Windows
- Installing the Synology Drive Client on Ubuntu
- Using the Synology Drive Client Desktop App
- Configuring the Synology Drive Server
- Conclusion
- References
Installing the Synology Drive Server on the NAS:
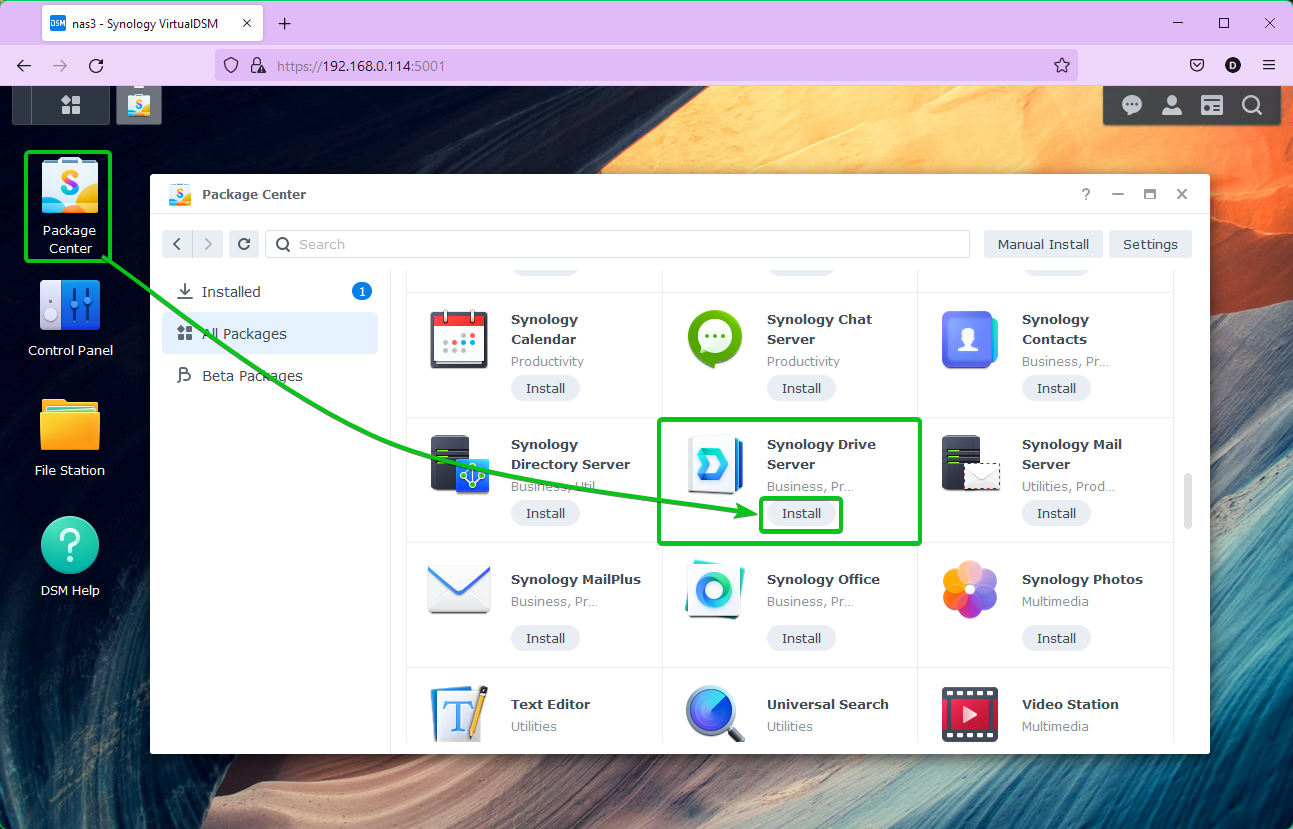
To use Synology Drive, install the Synology Drive Server package on the NAS from the Package Center app.
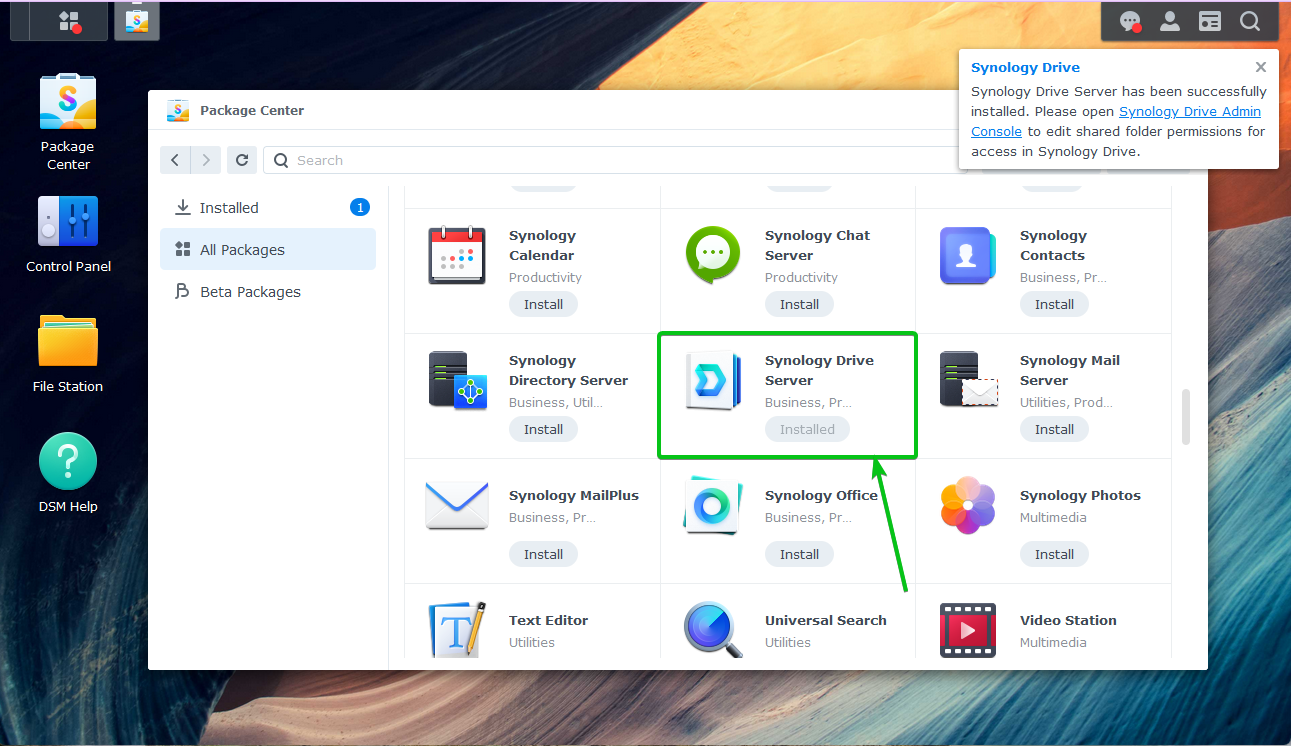
Open the Package Center app, search for the Synology Drive Server package, and click on the Install button of the Synology Drive Server package.
Click on Yes.
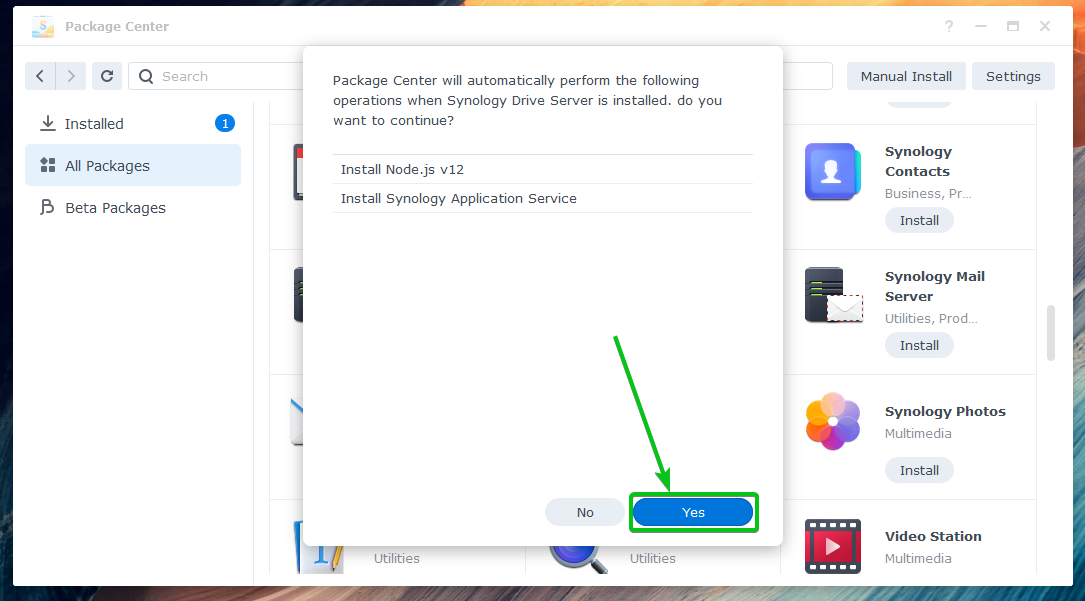
The Synology Drive Server package, along with all the dependencies, should be downloaded from the Internet and installed on the NAS one by one. It may take a while to complete.

Synology Drive Server is being installed.
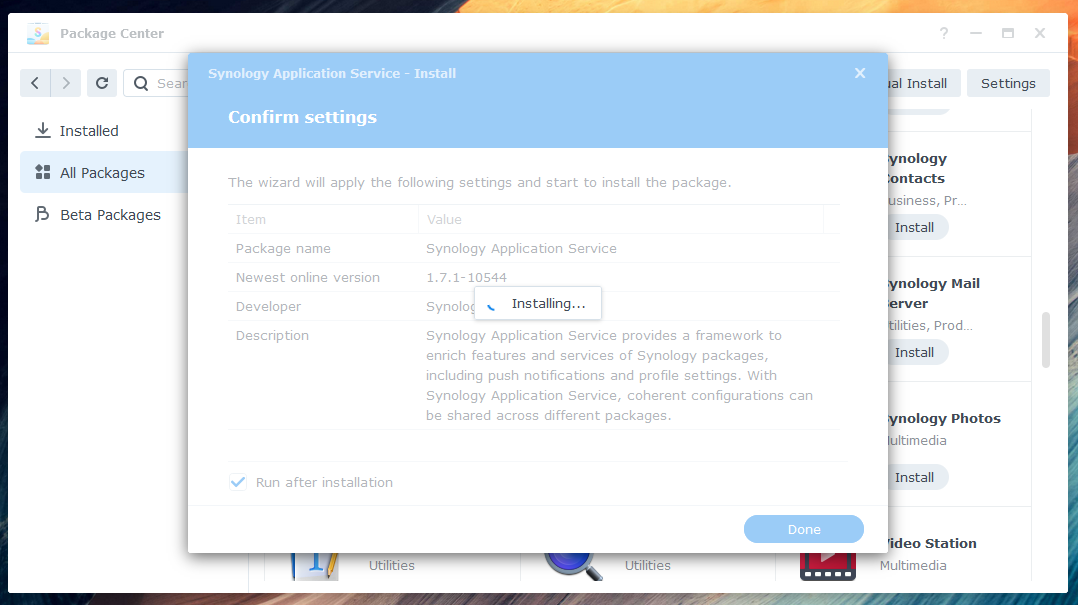
At this point, the Synology Drive Server package should be installed.
Enabling the User Home Service:
For each NAS user to store files on the Synology Drive, you must enable the user home service on your Synology NAS. Once the user home service is enabled, each NAS user access their home directory from the Synology Drive web interface and Synology Drive Client desktop app.
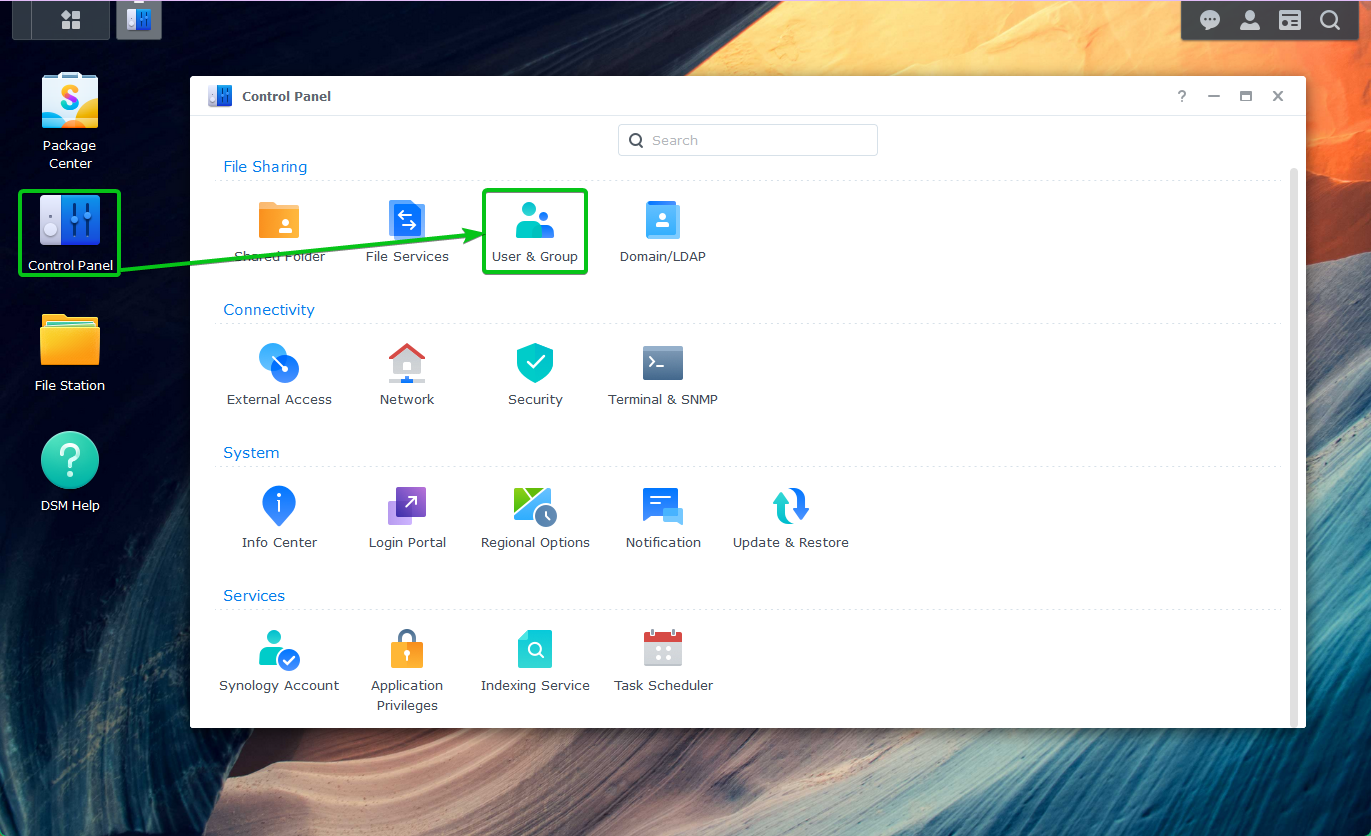
To enable the user home service, navigate to Control Panel > User & Group, as marked in the screenshot below:
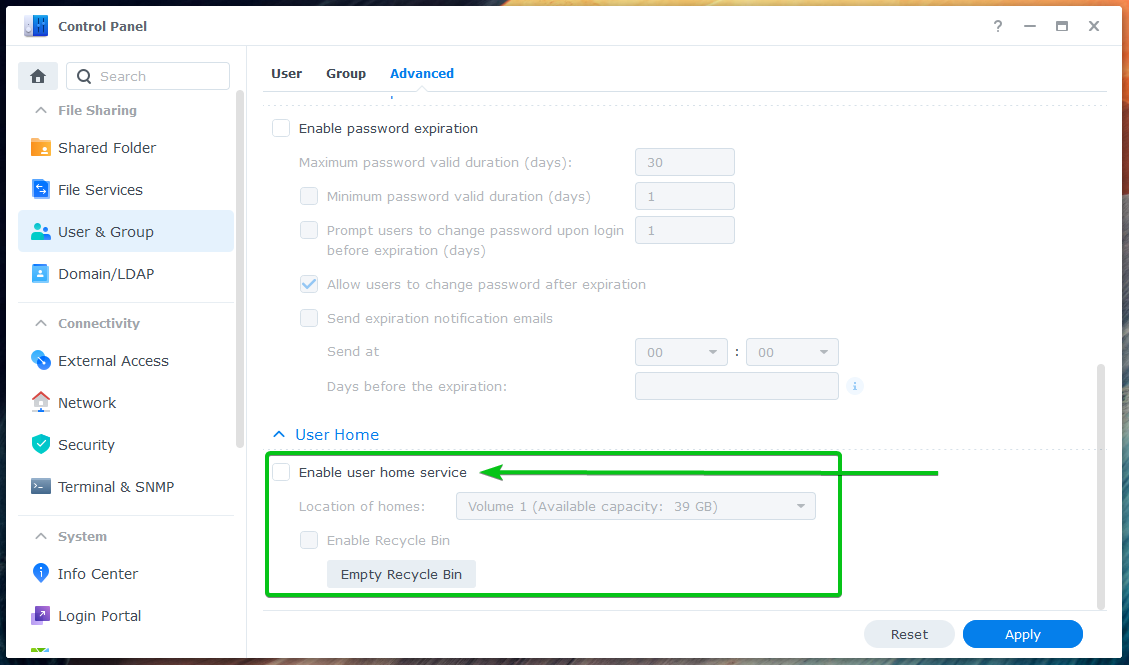
From the User Home section of the Advanced tab, check the Enable user home service checkbox as marked in the screenshot below:
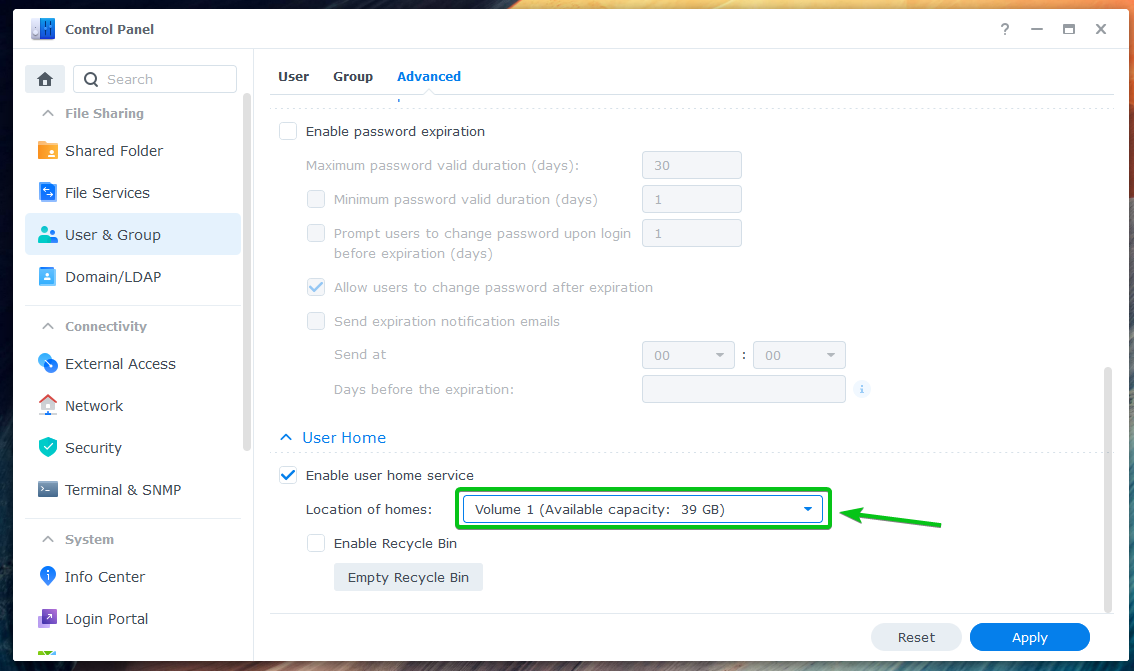
Once the user home service is enabled, you can select the volume you want to store the Synology Drive user files from the Location of homes drop-down menu.
Once you’re done, click on Apply.

The changes should be applied.

Accessing the Synology Drive From a Web Browser:
Once Synology Drive Server is installed on the NAS and user home service is enabled, you can access Synology Drive from your favorite web browser.
To access Synology Drive from a web browser, click on the Synology Drive app from the DSM web interface as marked in the screenshot below:

Synology Drive web app should be opened in a new browser tab. You can use Synology Drive in the same way as Google Drive or OneDrive.

Downloading the Synology Drive Client Desktop App:
To sync files between your computer and Synology Drive and back up files from your computer to Synology Drive, you need to install the Synology Drive Client app on your computer. At the time of this writing, Synology Drive Client is available for Windows, Mac, and Ubuntu Linux distribution.
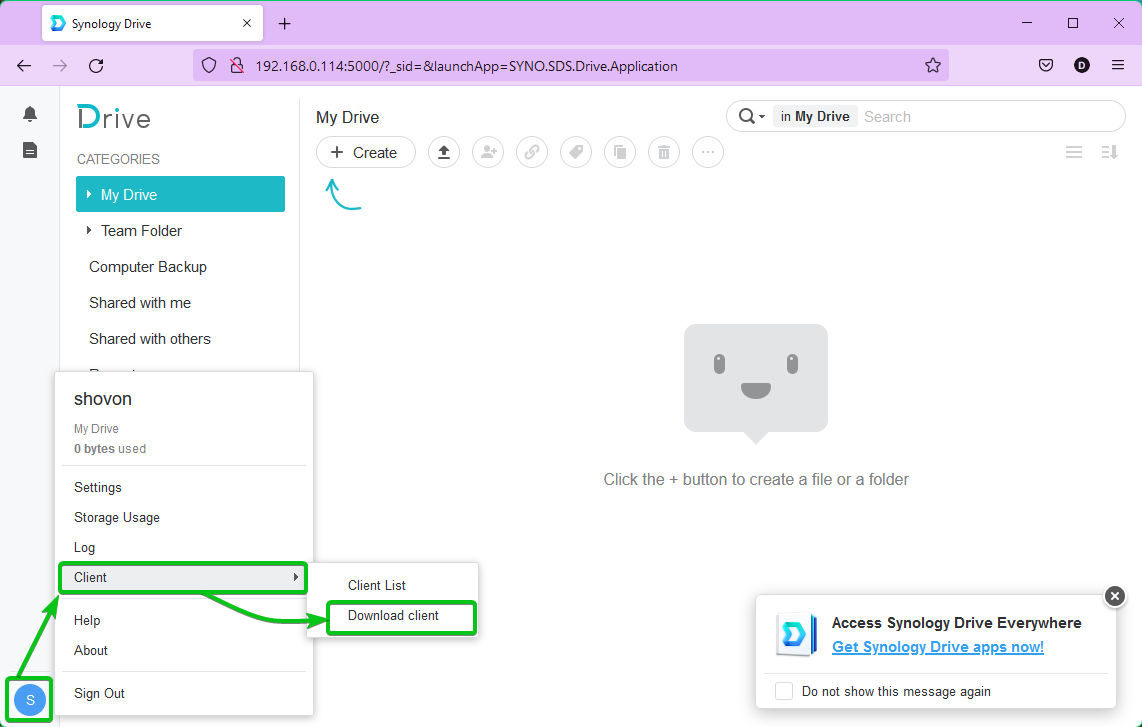
The easiest way to download the Synology Drive Client desktop app is to log in to your Synology Drive web application and click on Client > Download client from the user menu as marked in the screenshot below:
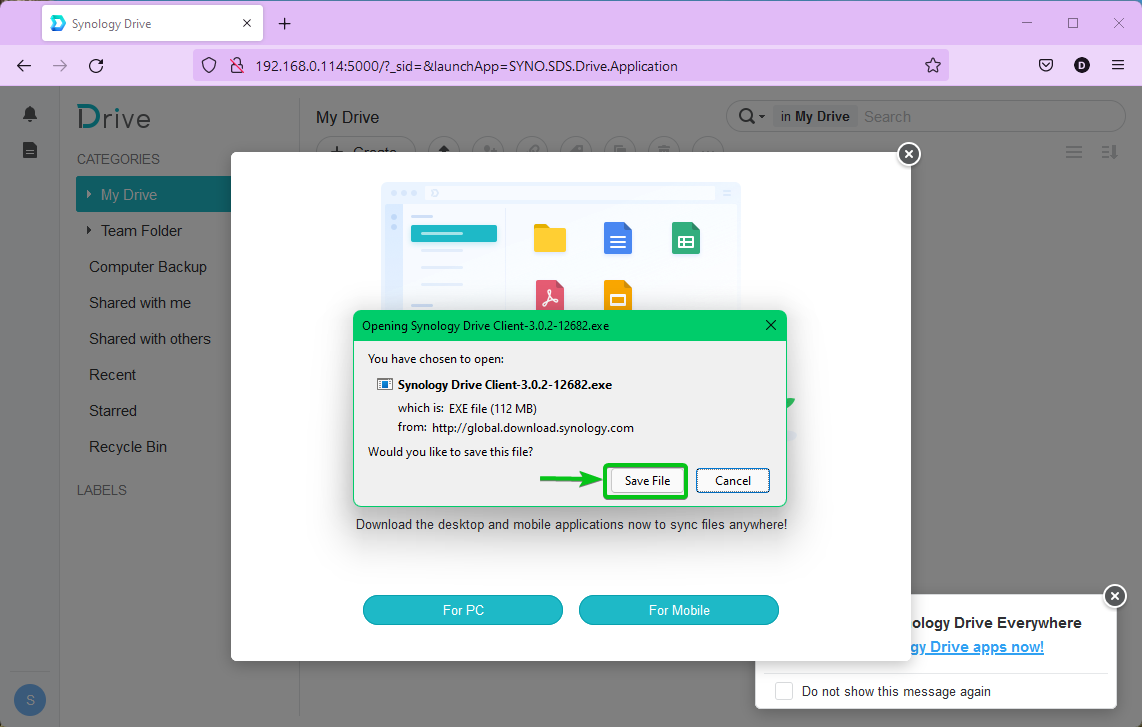
Click on For PC.

Synology Drive will offer you the appropriate Synology Drive Client installer file depending on the operating system you’re using.
Once your browser prompts you to save the file, click on Save File.
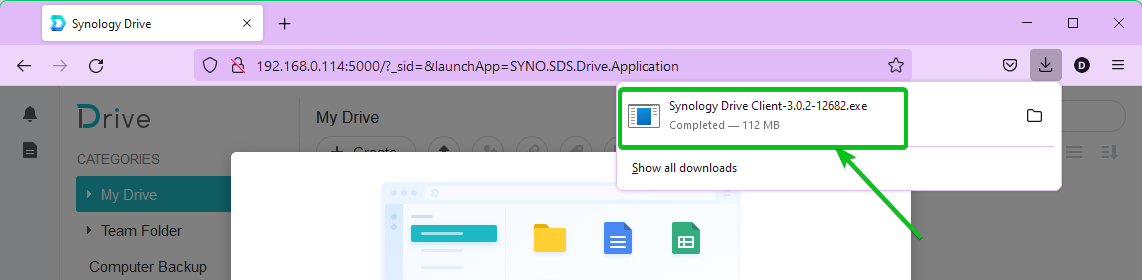
Your browser should start downloading the Synology Drive Client installer file for your operating system. It may take a while to complete the download.

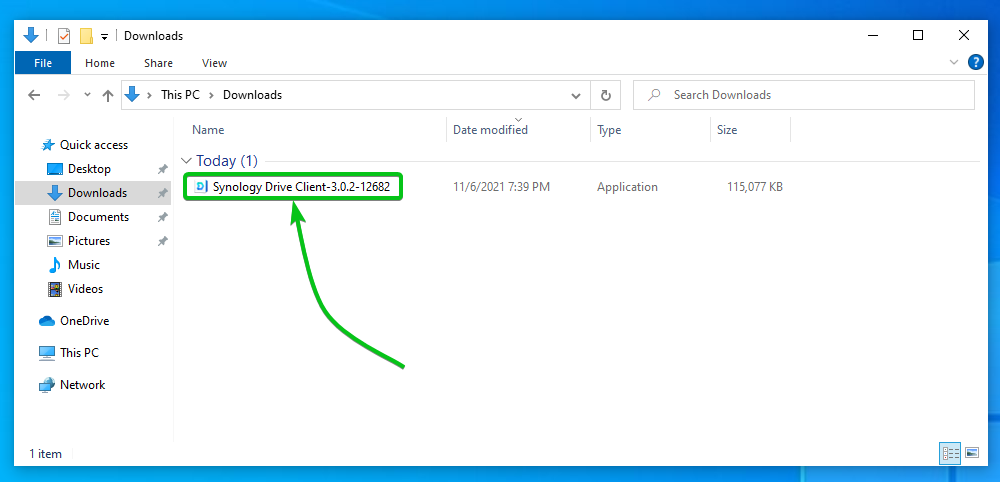
At this point, the Synology Drive Client installer file should be downloaded.
Installing the Synology Drive Client on Windows:
Once the Synology Drive Client installer is downloaded, run the installer.
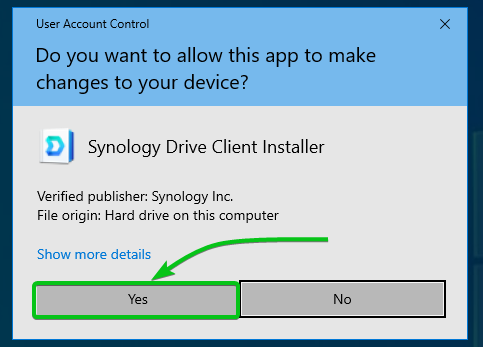
Click on Yes.
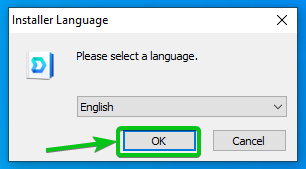
Click on OK.
Click on Next.

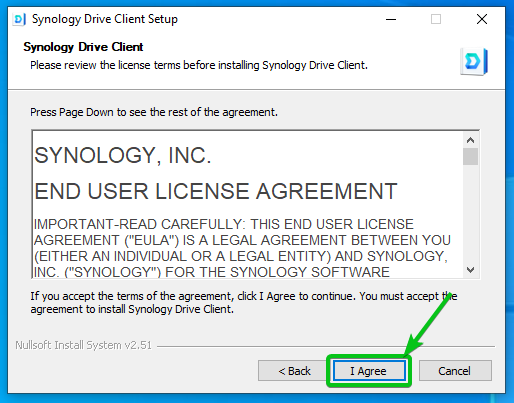
Click on I Agree.
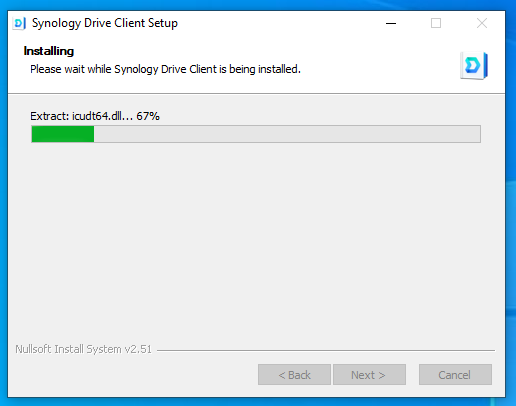
Synology Drive Client is being installed. It may take a while to complete.
At this point, Synology Drive Client should be installed.
Check the Run Synology Drive Client checkbox, and click on Finish as marked in the screenshot below:
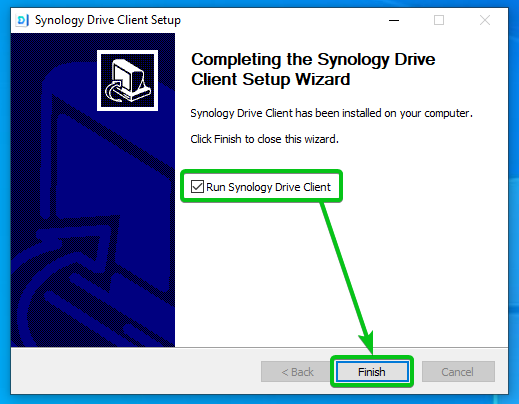
The Synology Drive Client should start.
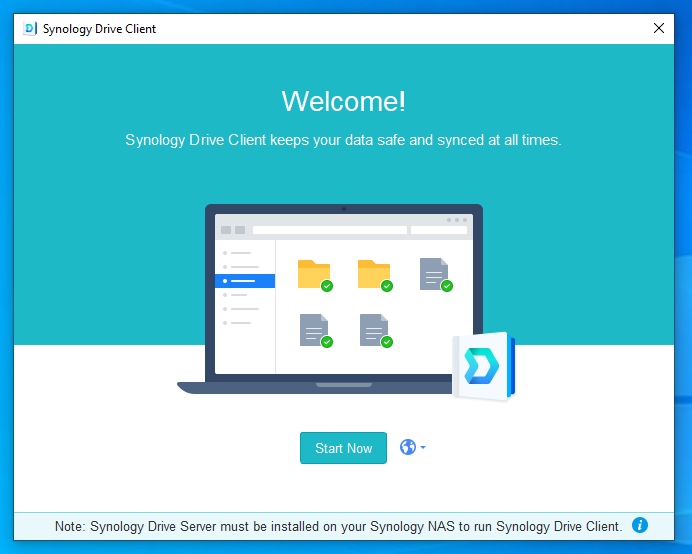
I will show you how to use Synology Drive Client in a later section of this article.
Installing Synology Drive Client on Ubuntu:
Once the Synology Drive Client installer package synology-drive-client-*.deb is downloaded, it should be saved in the ~/Downloads directory:

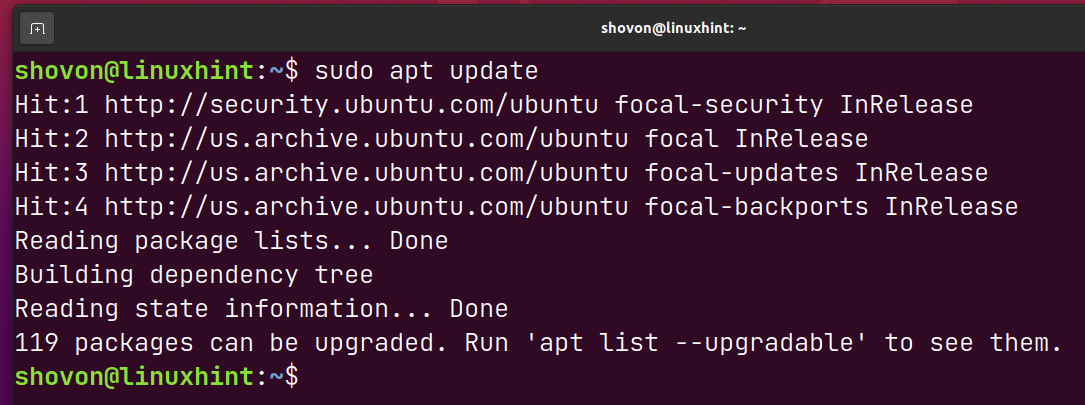
Update the APT package repository cache as follows:
To install the Synology Drive Client installer package synology-drive-client-*.deb, run the following command:

Synology Drive Client is being installed. It may take a few seconds to complete.

At this point, Synology Drive Client should be installed.

Once Synology Drive Client is installed, you can find it in the following Application Menu.
Click on the Synology Drive Client icon:
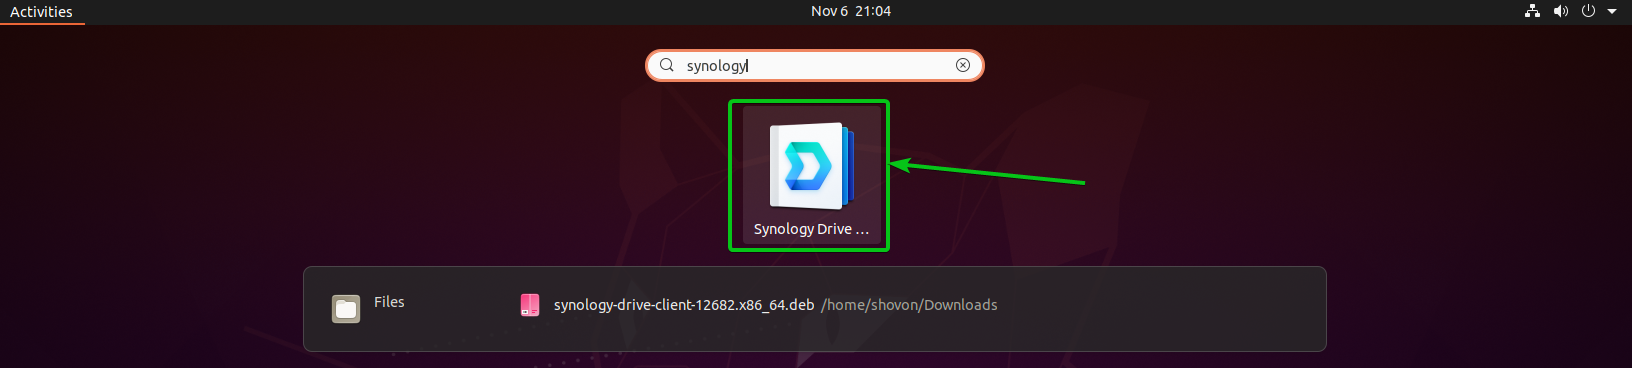
Synology Drive Client should start.
I will show you how to use Synology Drive Client in the next section of this article.
Using the Synology Drive Client Desktop App:
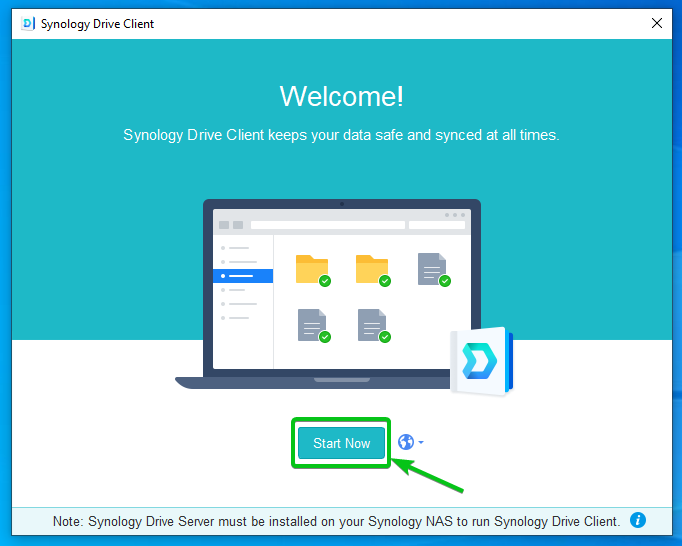
To set up the Synology Drive on your computer, open the Synology Drive Client app and click on Start Now.
Type in the IP address, DNS name, or QuickConnect ID of your Synology NAS in the Synology NAS section1.
Type in your login username in the Username section2 and password in the Password section3.
To use SSL encryption, make sure to check the Enable SSL data transmission encryption checkbox4.
Once you’re done, click on Next5.

Click on Proceed Anyway.

Synology Drive Client will ask you whether you want to set up a Sync Task or a Backup Task.
Sync Task will sync files between your computer and the Synology Drive Server running on the NAS in real-time (as changes are made).
Backup Task will back up files from your computer to the Synology Drive Server running on the NAS in scheduled time.

First, I will show you how to set up a Sync Task. I will also show you how to set up a Backup Task later in this section.
To set up a Sync Task, select Sync Task and click on Next.

You have to configure your Sync Task from here.
By default, the /home/Drive folder of your Synology Drive will be synced with the folder C:\Users\<Username>\SynologyDrive of your computer. You can change it if you want.
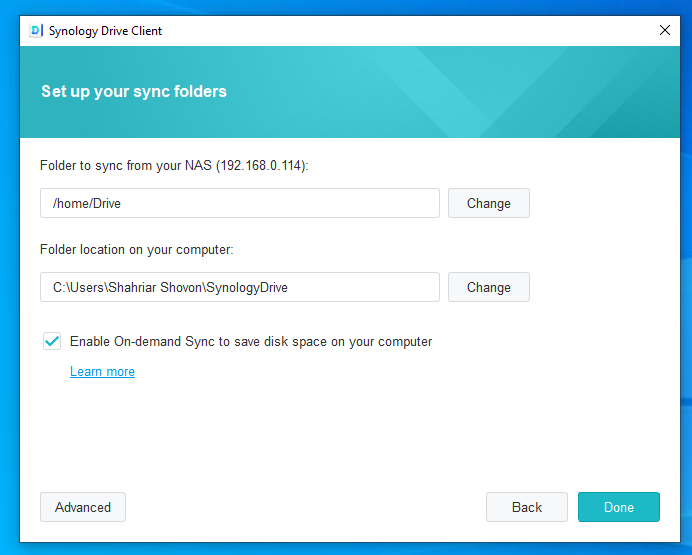
To change the sync folder of the Synology Drive, click on the Change button as marked in the screenshot below:

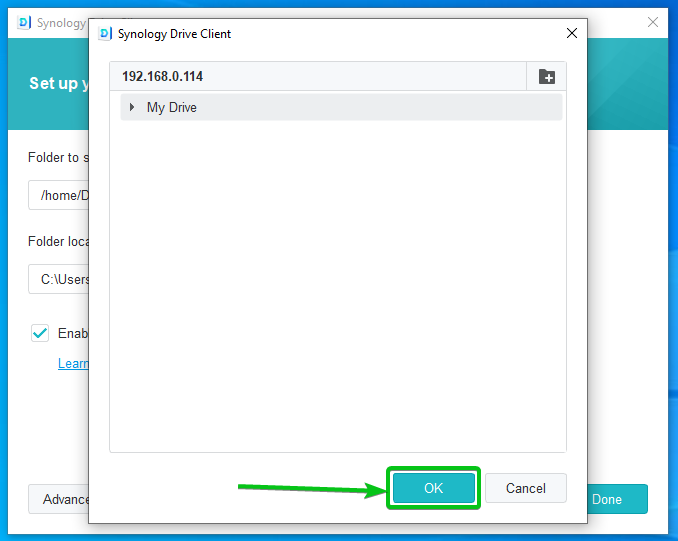
All the available folders of your Synology Drive should be listed. You can select a folder to sync from here.
NOTE: I don’t have any folders in my Synology Drive right now. So, it shows nothing.
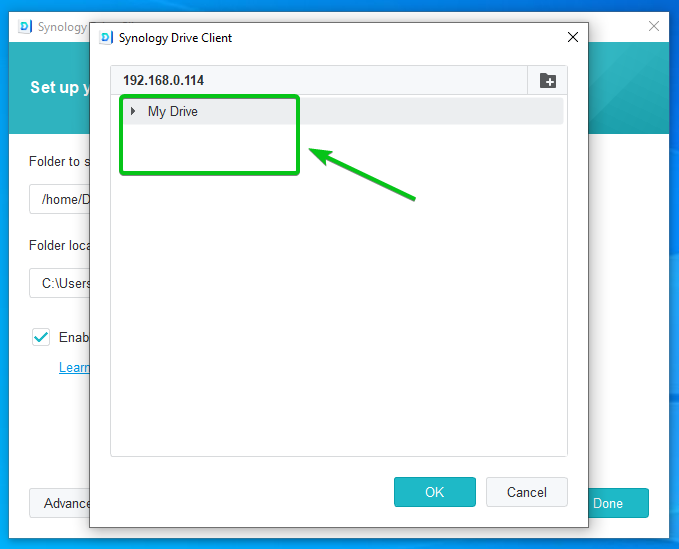
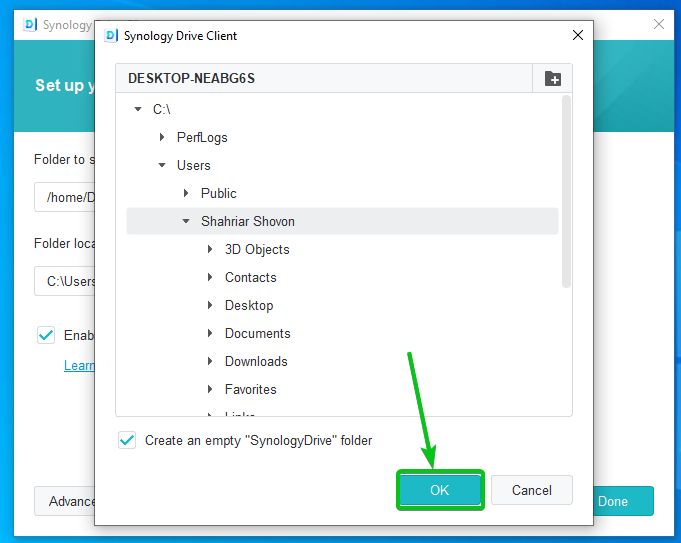
If you want to create a new folder in your Synology Drive, click on the new folder icon (
![]()
) as marked in the screenshot below:
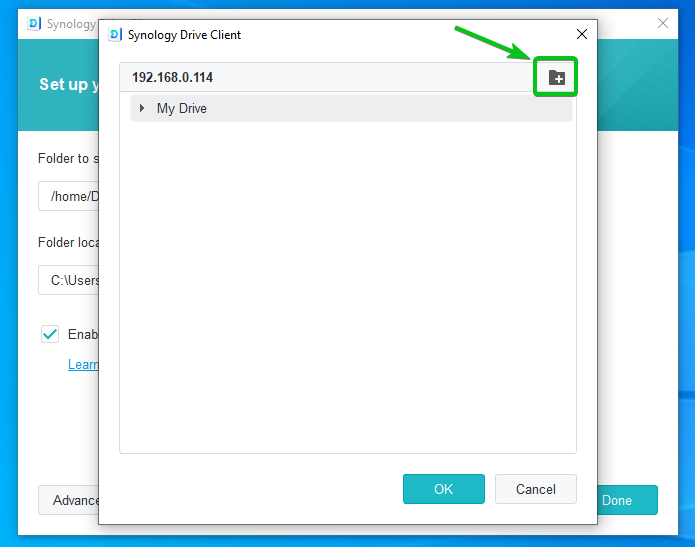
Once you’re done, click on OK.
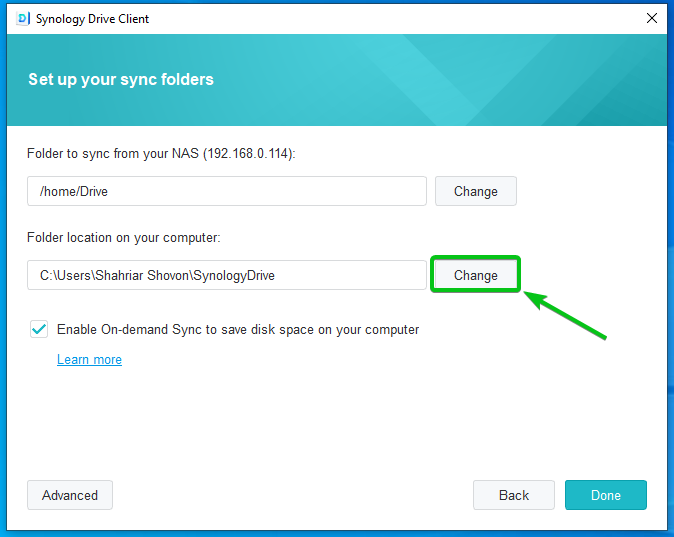
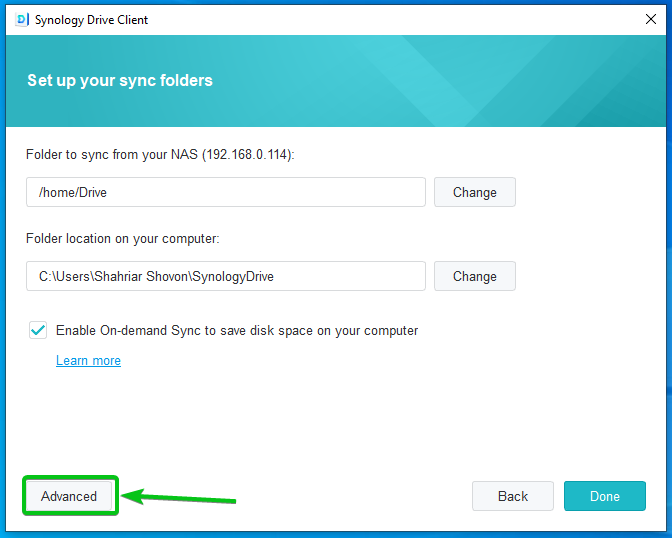
You can also change the folder on your computer that will be synced with your Synology Drive folder.
To change the Folder location on your computer, click on Change as marked in the screenshot below:
The files ystem of your computer should be displayed. You can select a folder that you want to sync with Synology Drive from here:
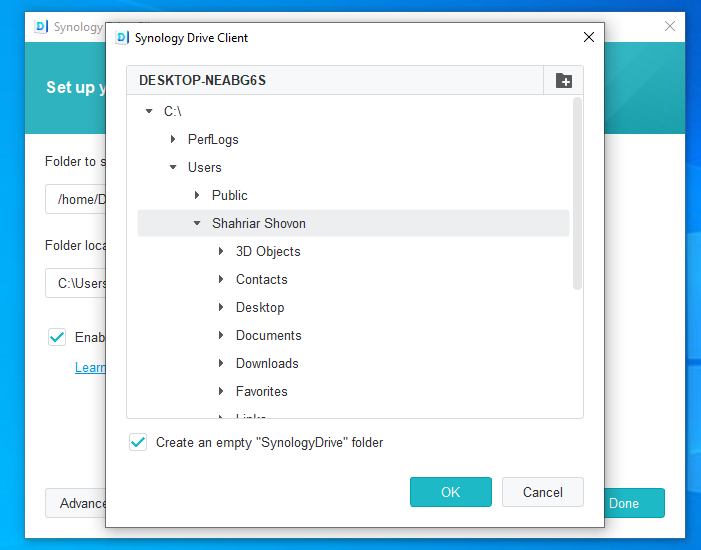
If you need, you can create a new folder on your computer as well. Click on the new folder icon (
![]()
) as marked in the following screenshot to create a new folder:

By default, a new empty folder SynologyDrive will be created in the selected folder of your computer, and the Synology Drive files will be synced with this folder.
If you don’t want Synology Drive Client to create a SynologyDrive folder in your selected folder, then sync the folder you have selected with Synology Drive, uncheck the Create an empty “SynologyDrive” folder checkbox.

Once you’re done, click on OK.
On-demand sync will not download files from the Synology Drive Server that you have not accessed from your computer to save disk space. Files will be downloaded from the Synology Drive Server to your computer only when you access them.
You can check or uncheck the Enable On-demand Sync to save disk space on your computer checkbox to enable or disable on-demand sync, respectively.

To configure advanced sync settings, click on Advanced as marked in the screenshot below:
From the Folder tab, you can check the Sync files and folders with the prefix “.” checkbox to sync files and folders with the . prefix (or in other words hidden files).
You can also check the Sync temporary files and folders checkbox to sync temporary files and folders.
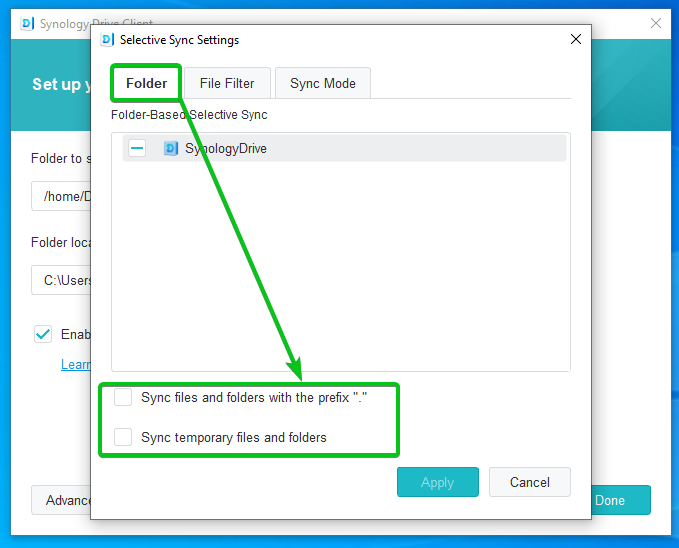
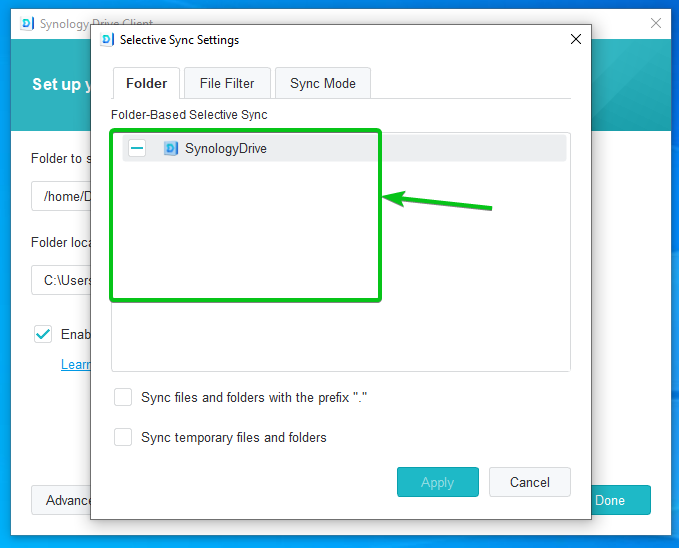
You can select specific folders that you want to sync from your Synology Drive from the Folder-Based Selective Sync section as marked in the screenshot below:
NOTE: I don’t have any folders in my Synology Drive right now. So, it shows nothing.
From the File Filter tab, you can exclude the files you don’t want to sync based on the file size and file name or file extension filters.
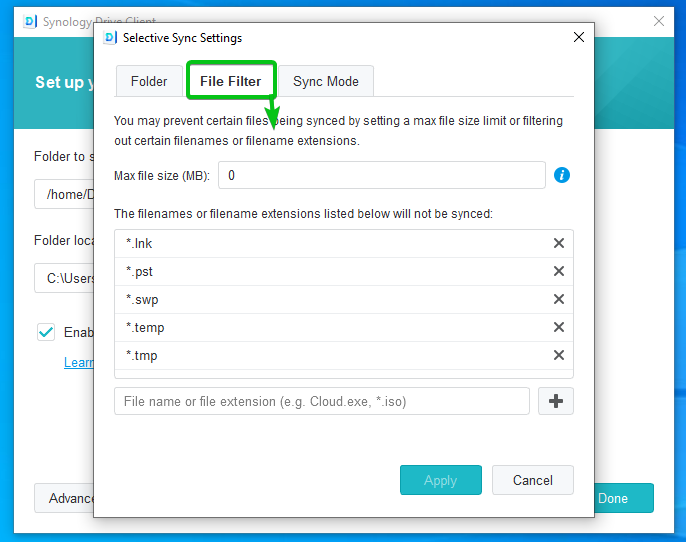
You can exclude files from being synced if it exceeds a certain file size limit. To do that, set your desired max file size (in megabyte unit) in the Max file size (MB) section as marked in the following screenshot:

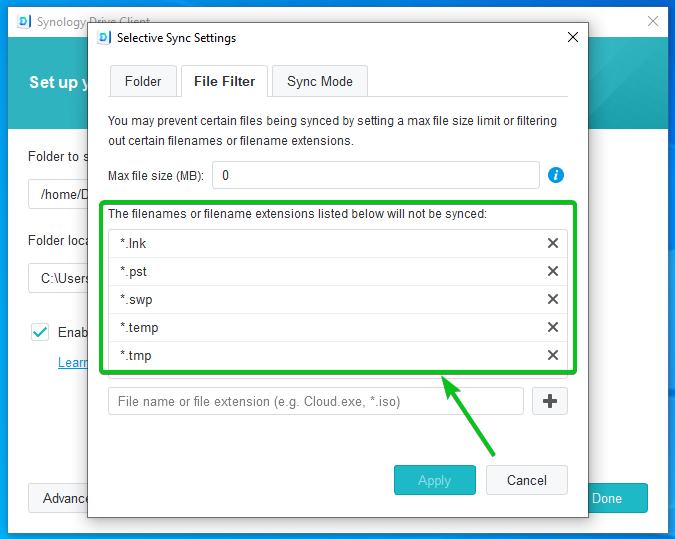
The marked section of the following screenshot displays a list (or blacklist) of filenames or filename extensions that will not be synced:
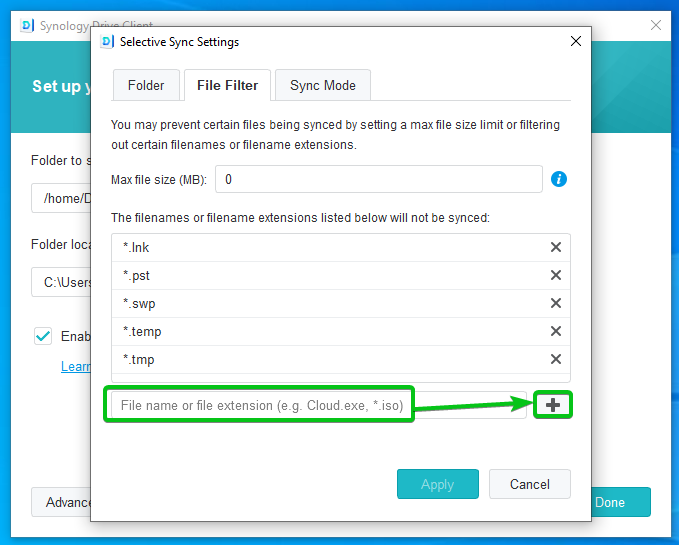
You can add a new filename or filename extension to the blacklist, as shown in the screenshot below. The newly added filename or filename extension will not be synced with your Synology Drive:
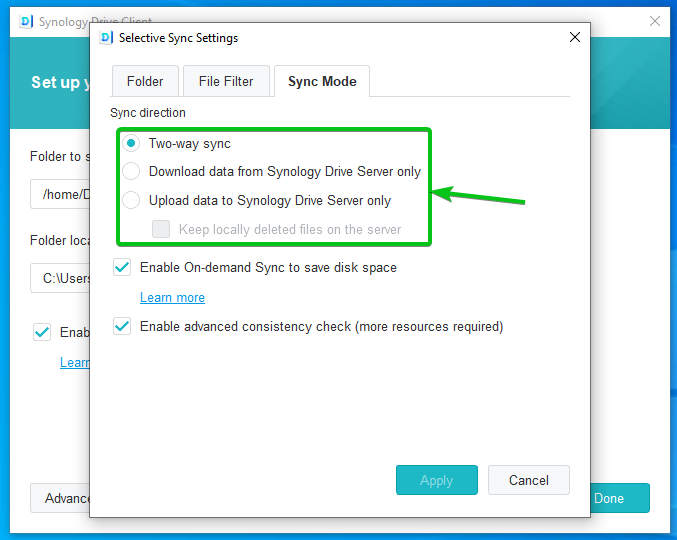
In the Sync Mode tab, you can configure the sync direction and other sync settings.
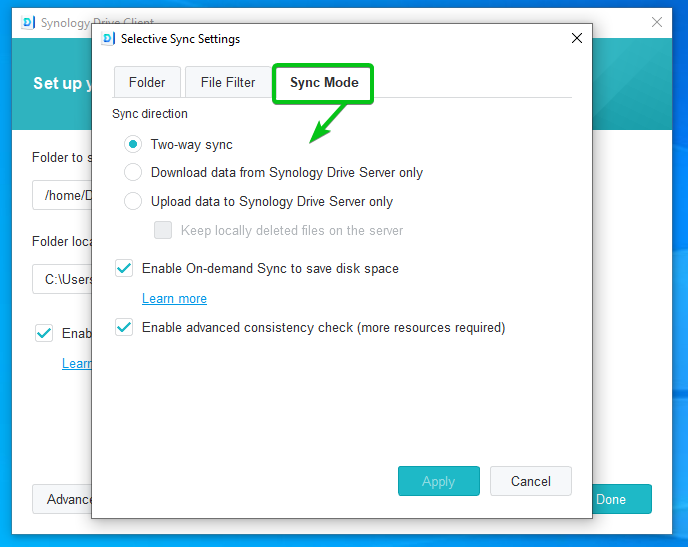
The supported Sync directions are:
Two-way sync: New files from your computer will be synced with Synology Drive. New files from your Synology Drive will be synced with your computer.
Download data from Synology Drive Server only: Only the files from your Synology Drive will be synced with your computer. New files from your computer will not be synced with Synology Drive.
Upload data to Synology Drive Server only: Only the files from your computer will be synced with Synology Drive. Files from your Synology Drive will not be synced with your computer.
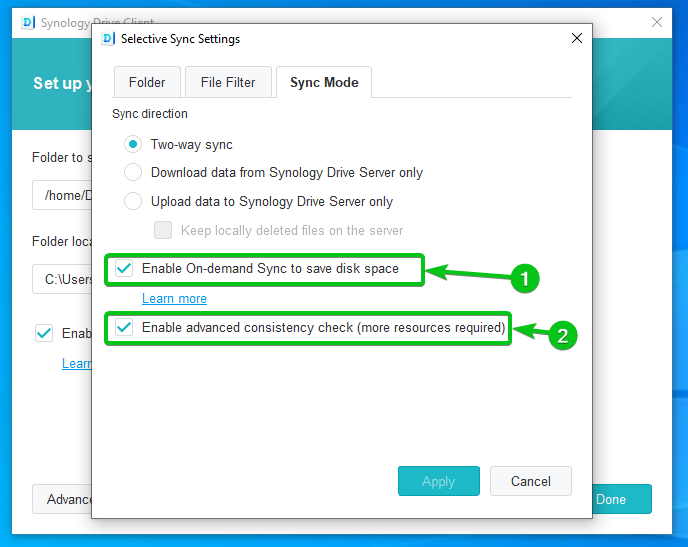
You can check or uncheck the Enable on-demand Sync to save disk space checkbox to enable or disable on-demand sync respectively from here as well1.
You can use the Enable advanced consistency check (more resources required) checkbox to enable or disable consistency checking for the files being synced respectively2. Enabling advanced consistency checks will improve the accuracy of the sync task. It will also require more system resources to complete the sync task.
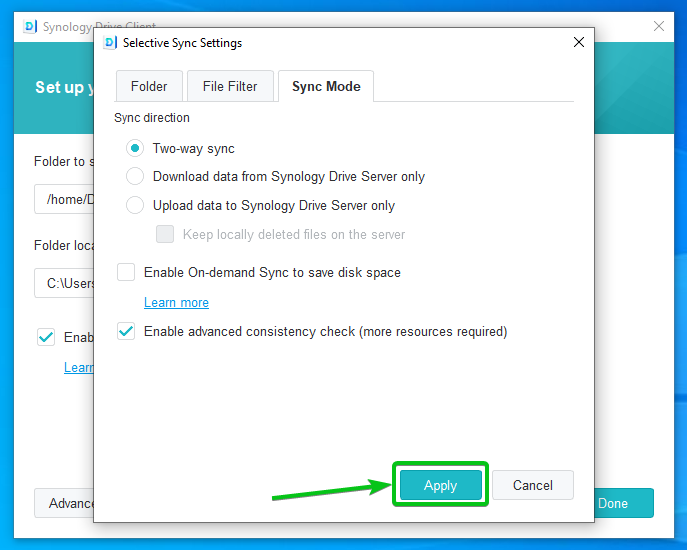
Once you’re done, click on Apply for the changes to take effect.
Once you’re done configuring the Sync Task, click on Done.

Click on the
![]()
icon as marked on the screenshot below:

A new Sync Task should be created.

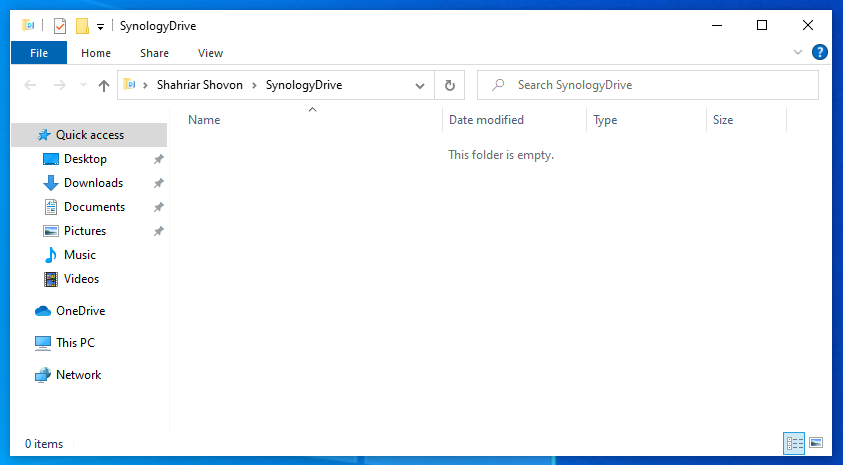
The location of the folder of your computer that will be synced with Synology Drive should be displayed as marked in the screenshot below. Click on the folder path to open the folder with the file manager app:

The synced folder should be opened with the file manager app. It should be empty by default.
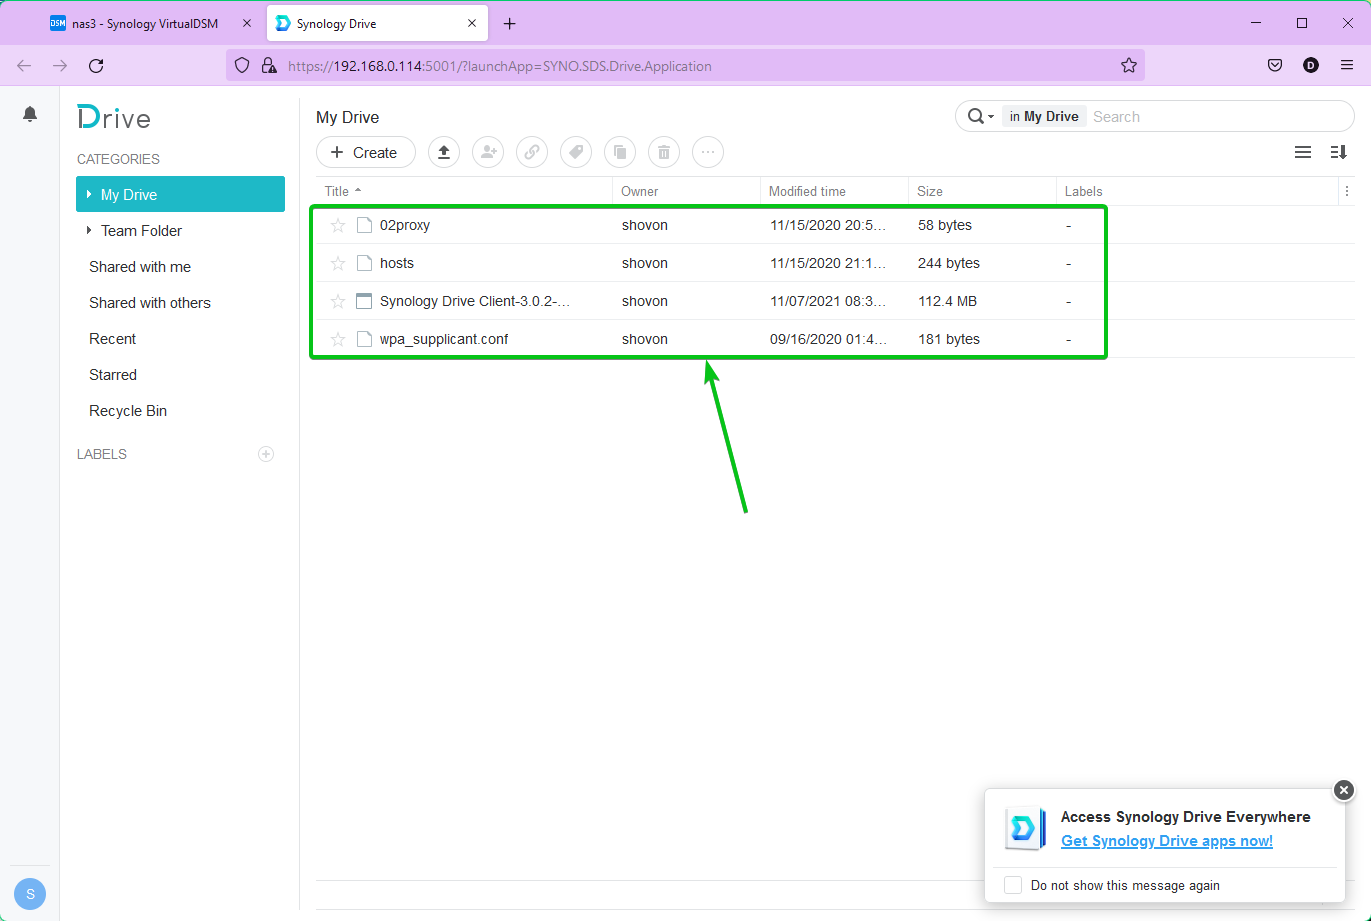
As you can see, I have copied some files on the Synology Drive’s sync folder. The files are synced instantly.
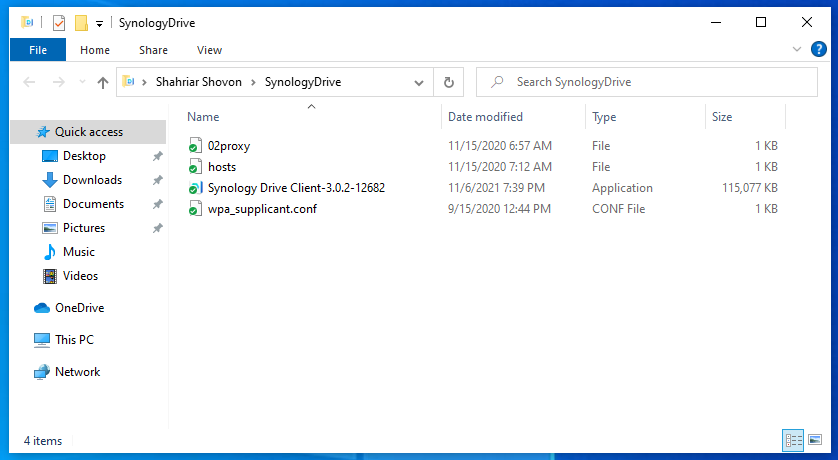
Note, the files are accessible from the Synology Drive web interface. It means that the sync task is working just fine.
You can click on Create from the Sync Tasks section to create multiple sync tasks.
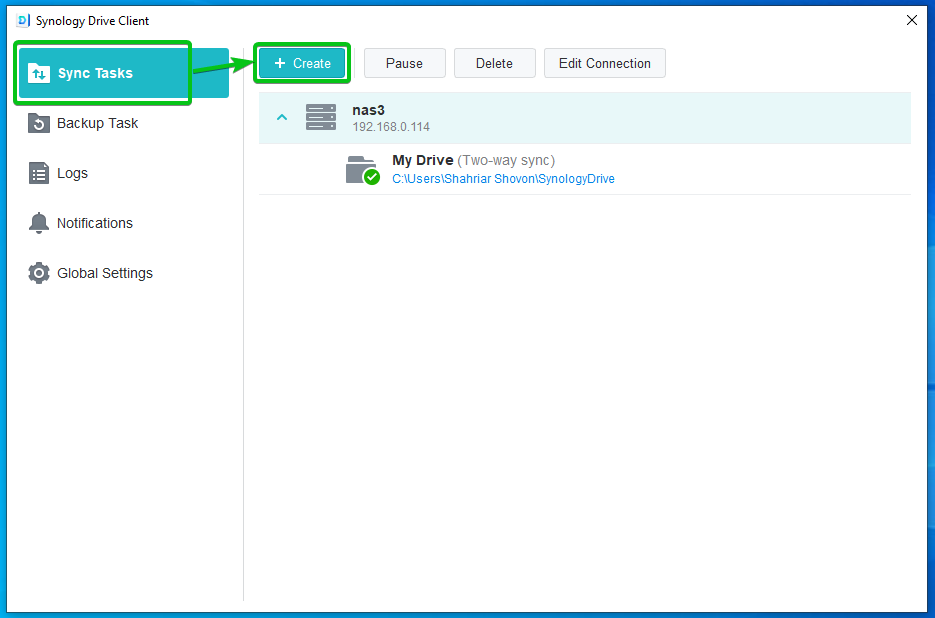
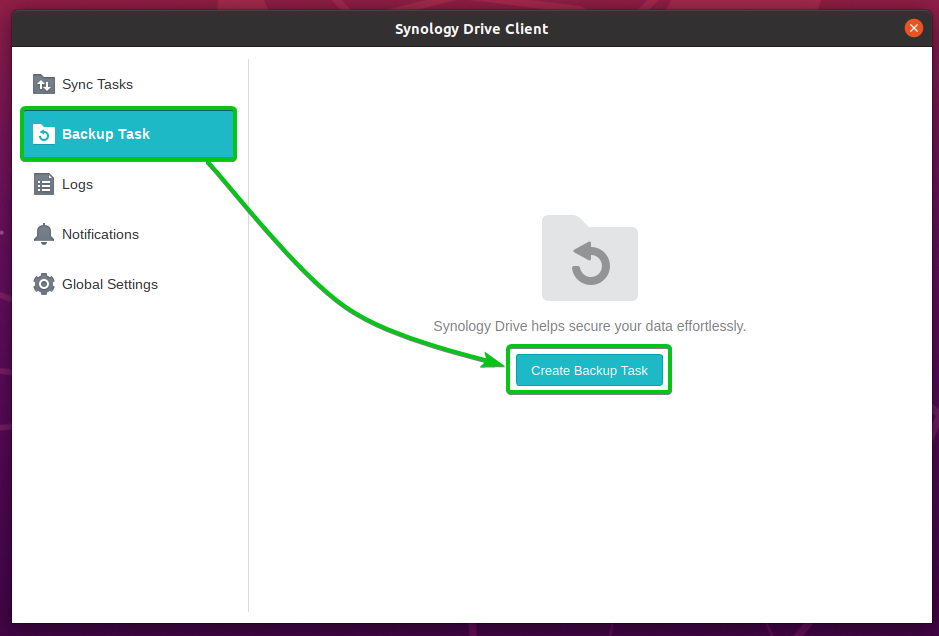
Now, let’s create a Backup Task.
To create a new backup task, navigate to the Backup Task section and click on Create Backup Task as marked in the screenshot below:
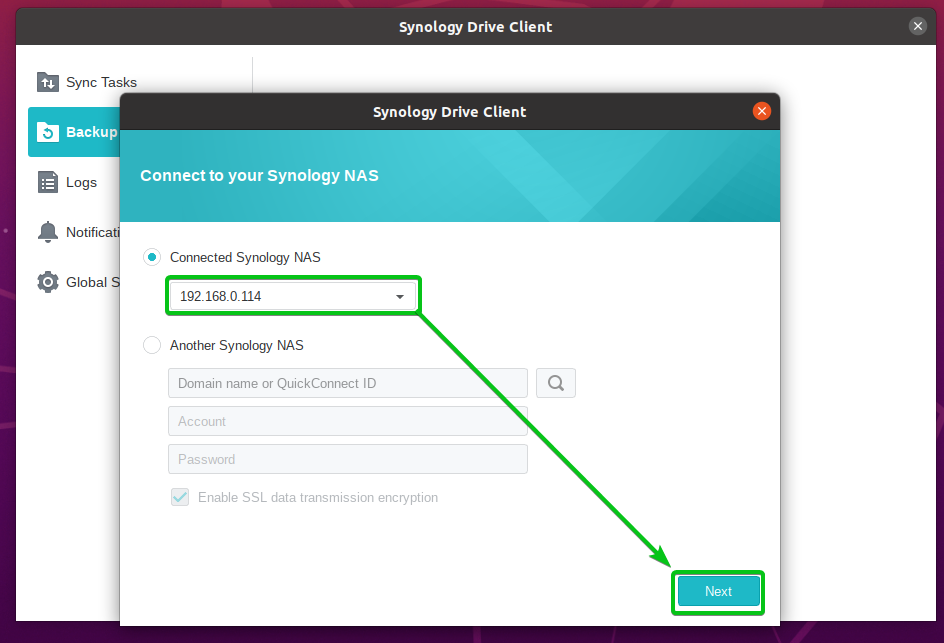
Select Connected Synology NAS and make sure that your NAS is selected from the drop-down menu. Once you’re done, click on Next.
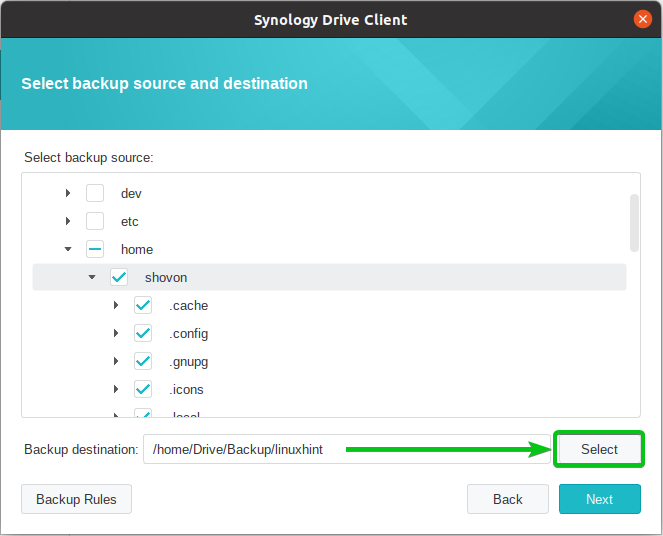
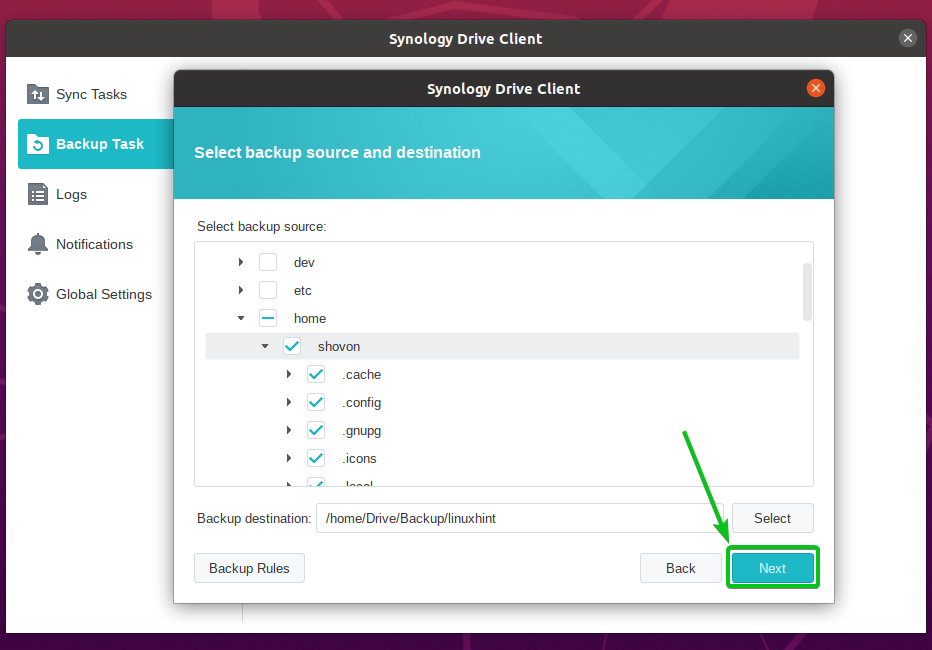
Select the folders that you want to back up from your computer as marked in the screenshot below:

To change the Backup destination of your Synology Drive, click on Select as marked in the screenshot below:
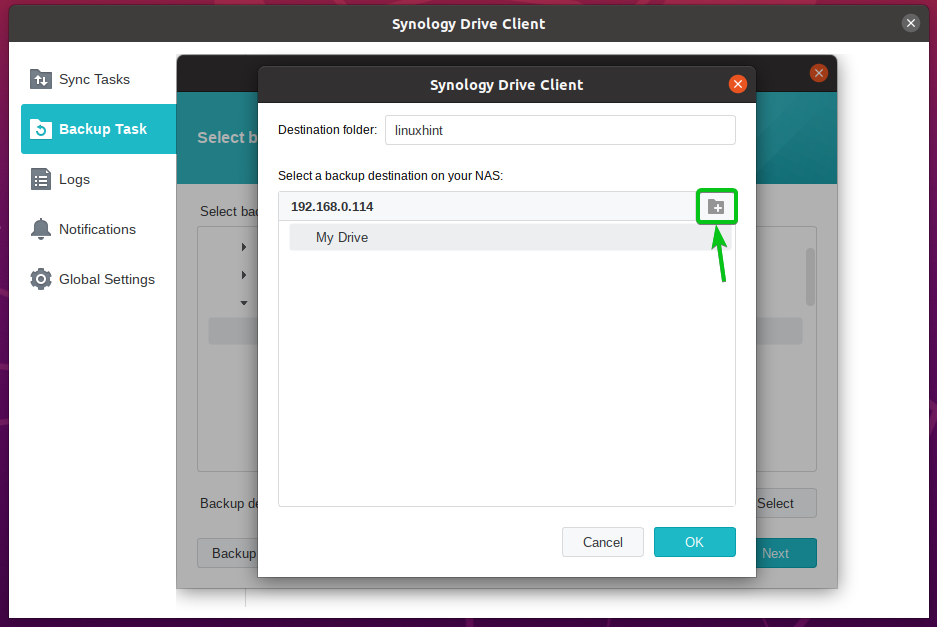
You can select a folder from your Synology Drive where the destination folder will be created. Then, type in a name for the Destination folder. The backup task will keep all the backup data in that folder.

You can also create a new folder on your Synology Drive and select where the destination folder will be created.
To create a new folder on your Synology Drive, click on the add folder icon
![]()
as marked in the screenshot below:
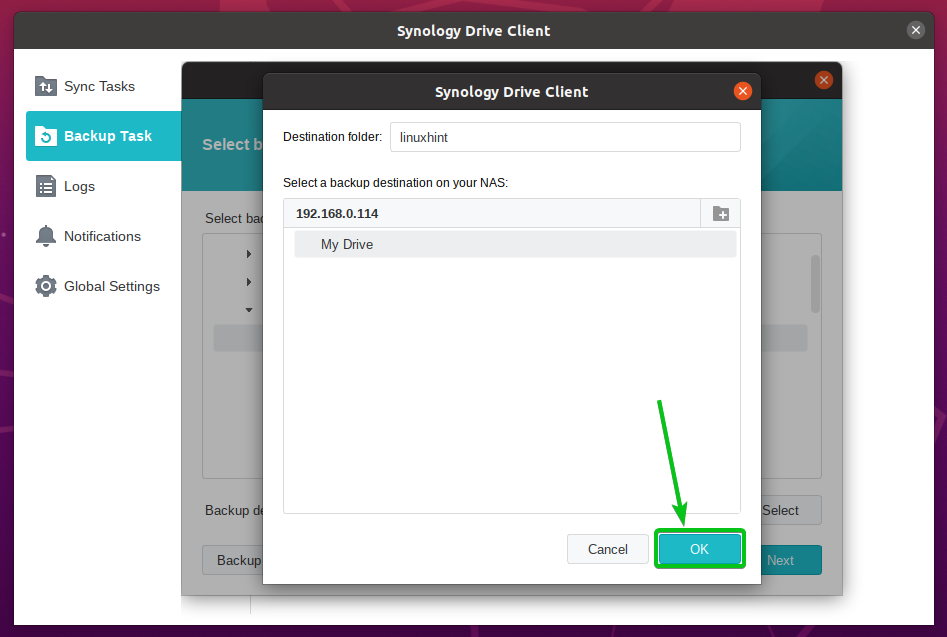
Once you’re done, click on OK.
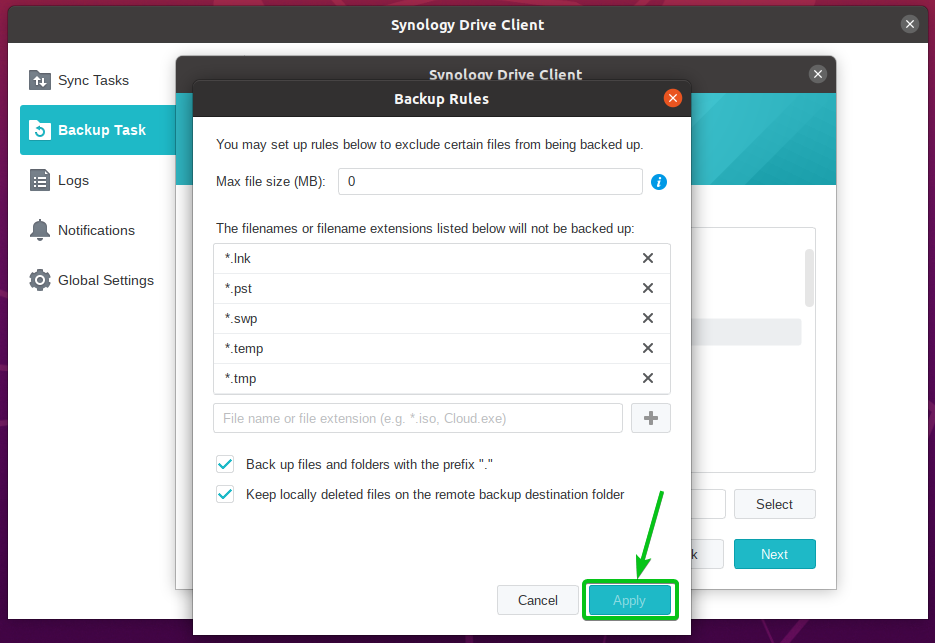
To configure the backup task, click on Backup Rules.

Type in a Max file size (MB) to exclude files exceeding a certain file size from the backup1.
You can add filenames or filename extensions that you don’t want to back up to the blacklist as well. Some filename extensions like *.lnk, *.temp, *.tmp. and so on are blacklisted by default. So, files with these extensions won’t be included in the backup2.
You can check or uncheck the Back up files and folders with the prefix “.” checkbox to enable or disable backing up hidden folders/files (folders/files starting with . like .htaccess, .git/, etc.) respectively3.
You can check the Keep locally deleted files on the remote backup destination folder checkbox to keep the files you’ve deleted from your computer on the Synology Drive4.

Once you’re done configuring the backup task, click on Apply.
Click on Next.
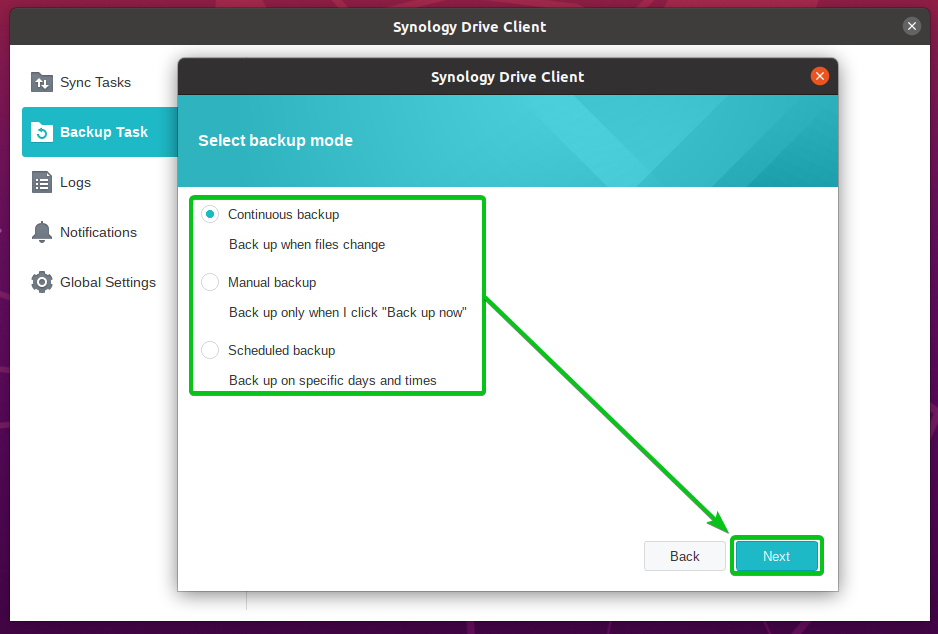
Now, you have to select a backup mode from the list.
Continuous backup: In this backup mode, files will be backed up instantly when changes are available.
Manual backup: In this backup mode, you will have to use the Synology Drive Client app to manually run the backup task to back up your files.
Scheduled backup: In this backup mode, the backup task will only run at the scheduled time that you’ve set up.
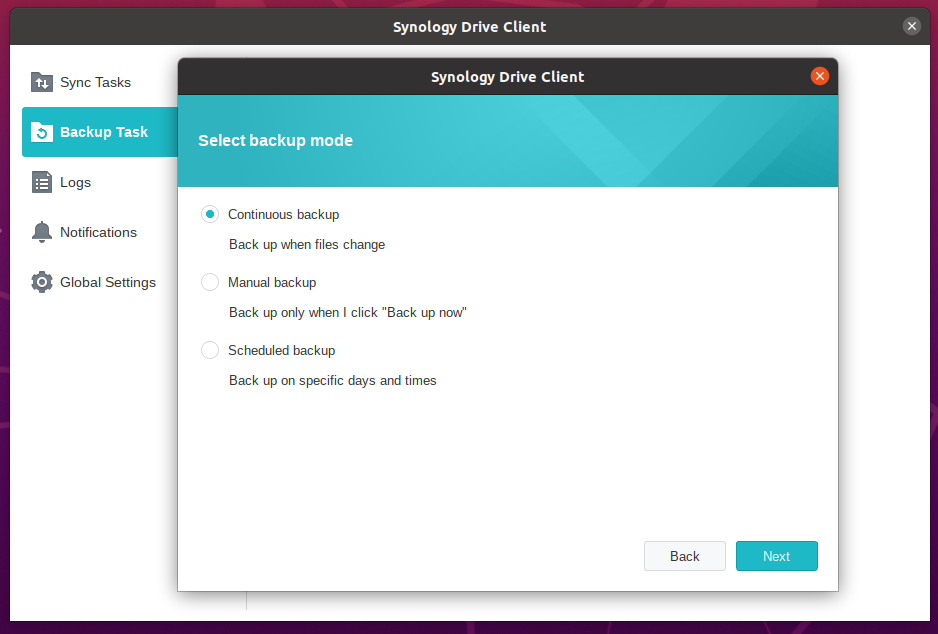
In this article, I will show you how to set up a continuous backup task.
Select Continuous backup and click on Next.
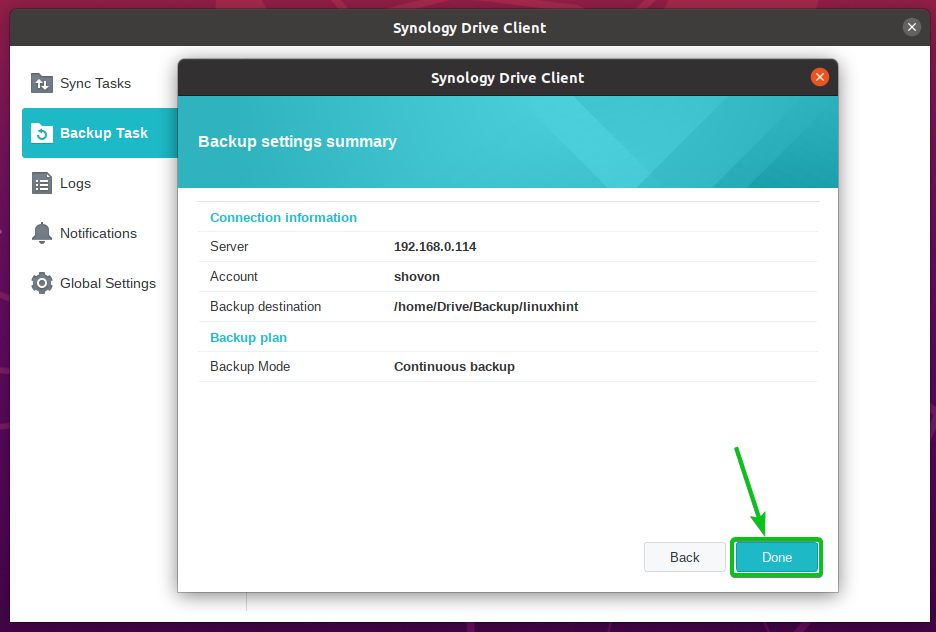
A summary of the backup task that will be created should be displayed. If everything looks good, click on Done.
Synology Drive Client should run the backup task automatically for the first time. It may take a while to complete.
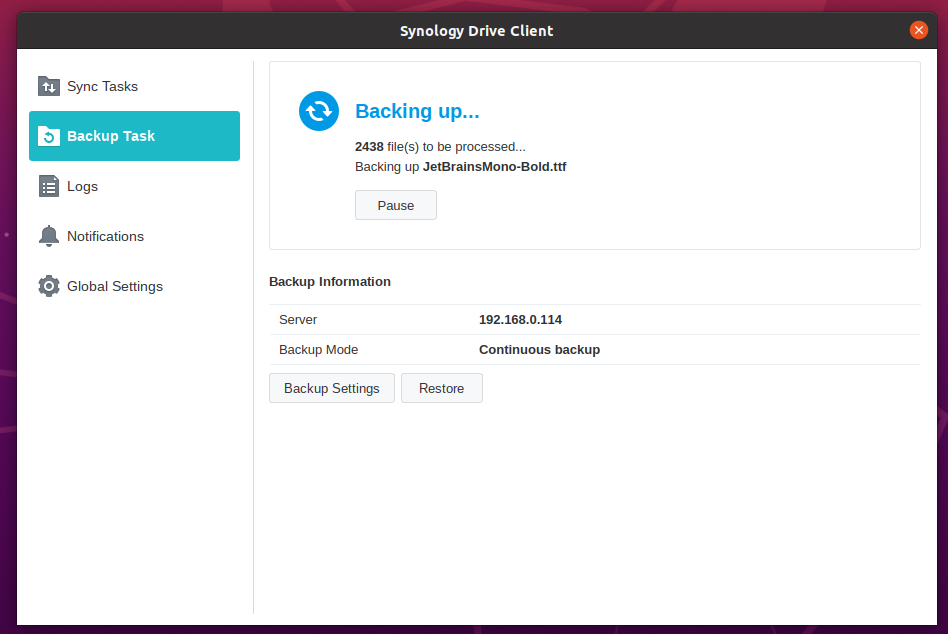
At this point, the backup task should be completed.

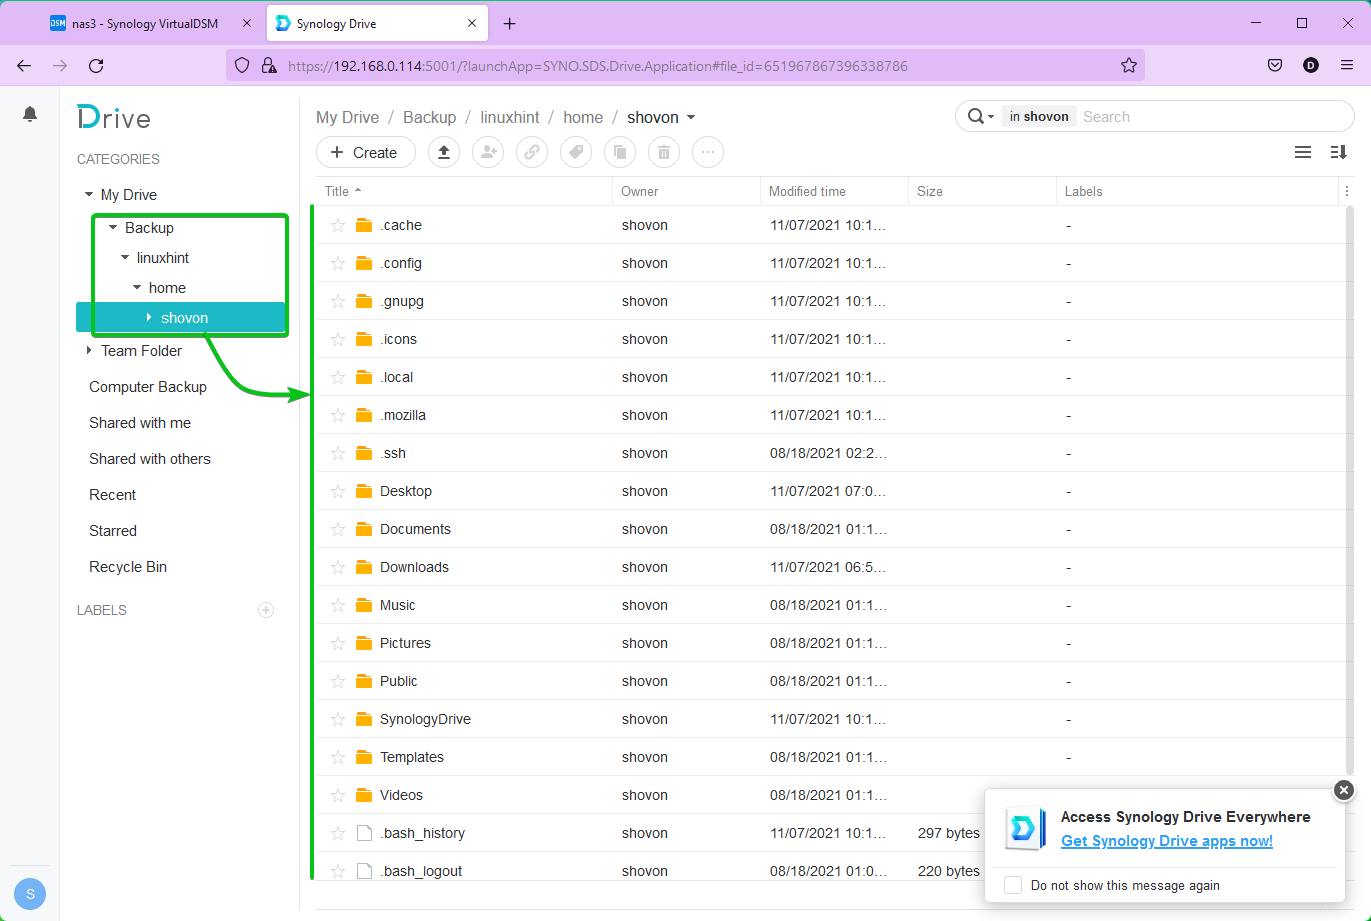
Once the backup task is completed, you can see the backed-up folders and files in the Synology Drive web interface.
Configuring the Synology Drive Server:
In this section, I am going to show you how to configure the Synology Drive Server on your Synology NAS.
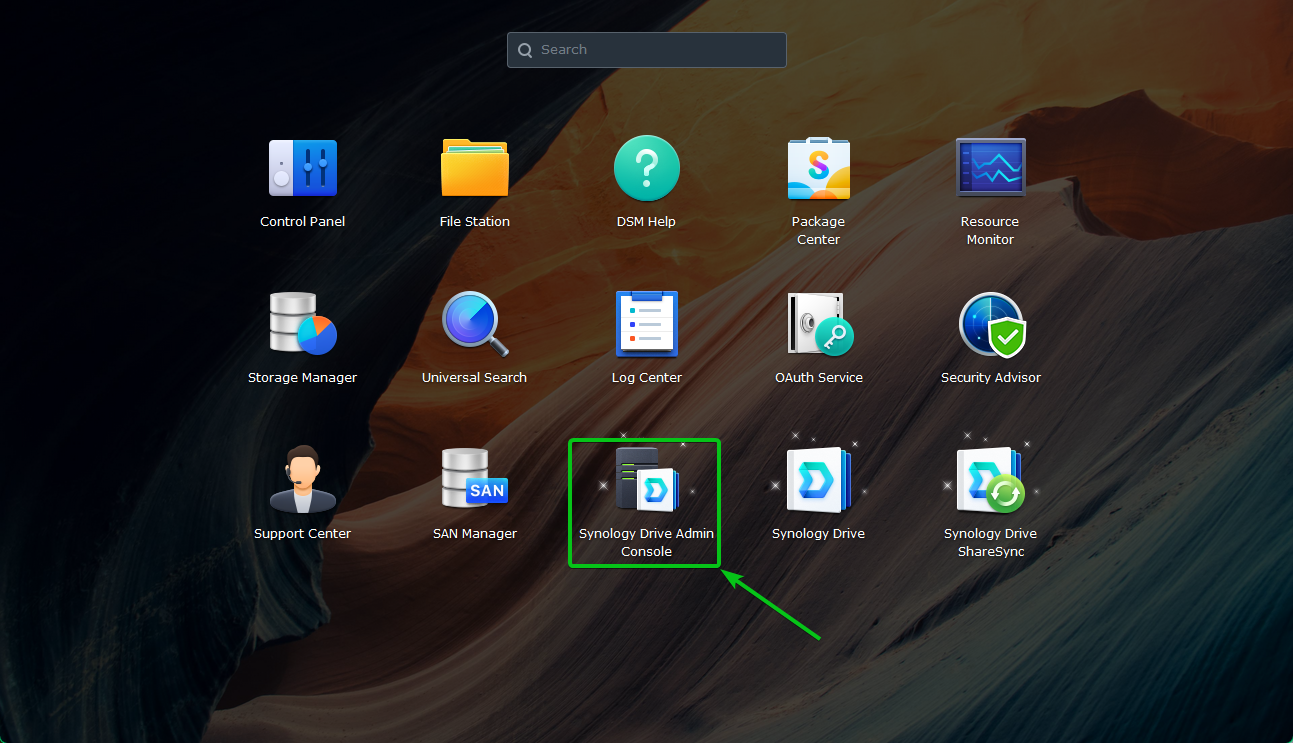
To configure the Synology Drive Server, click on the Synology Drive Admin Console app icon from the DSM web interface as marked in the screenshot below:
Click on Next.

Click on Next.
Click on Proceed.
Synology Drive Admin Console should be ready to use.
In the Overview section, you will see an overview of the Synology Drive Clients connected to the Synology Drive Server.

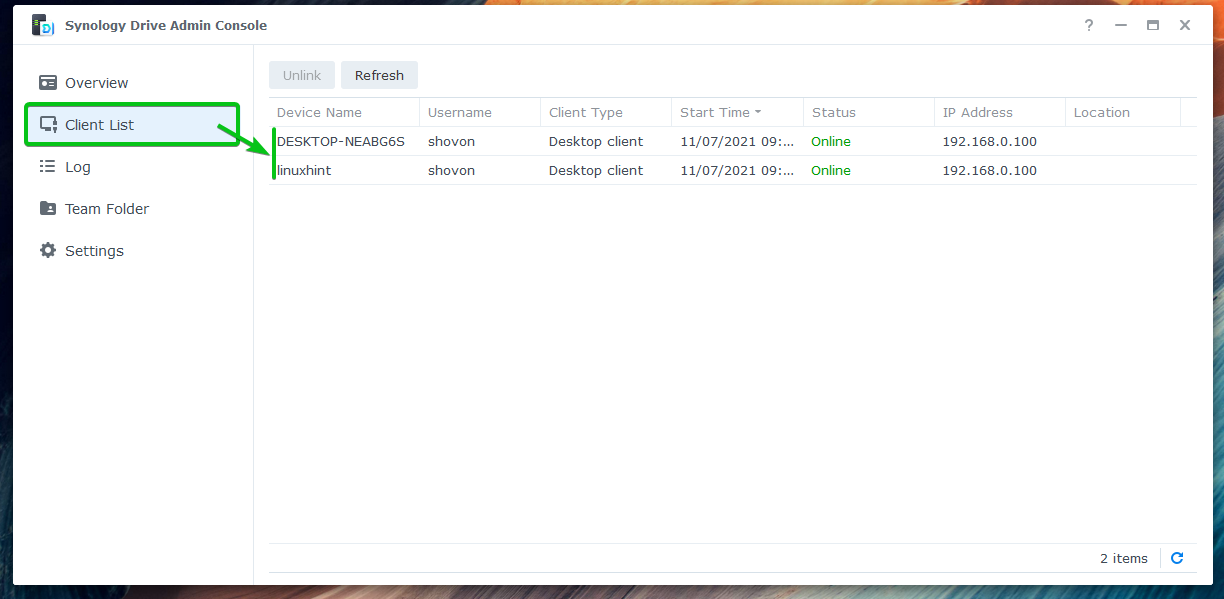
In the Client List section, you will see information about the users currently logged in to the Synology Drive Server using Synology Drive Client desktop and Synology Drive mobile app.
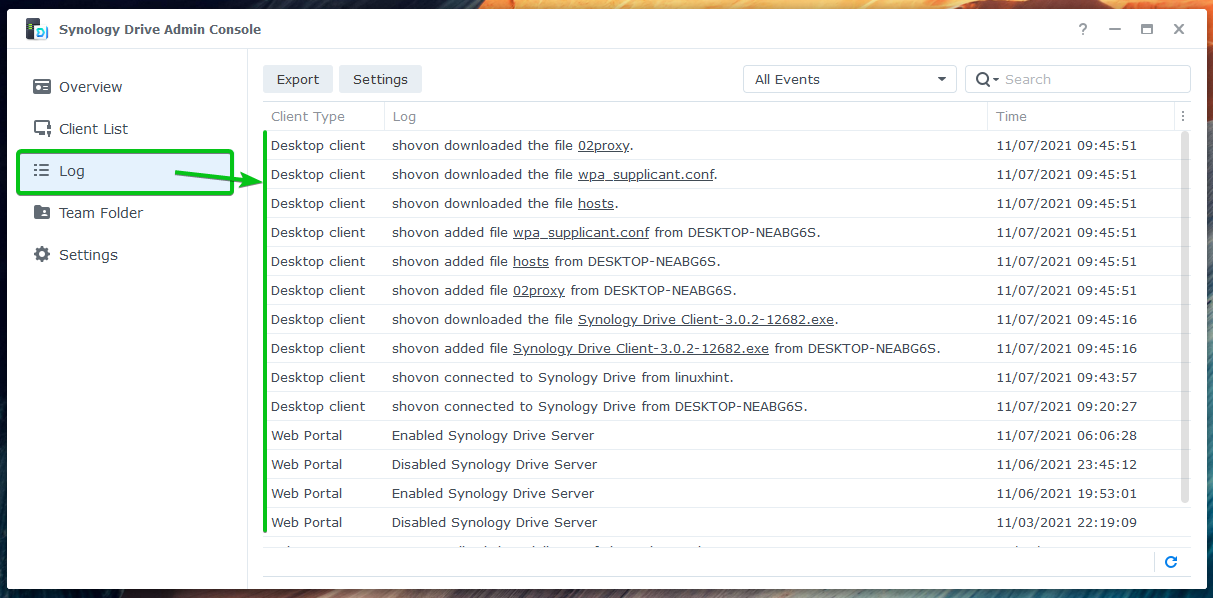
In the Log section, you will see Synology Drive Server logs.
From the Team Folder section, you can allow access to the shared folders of your NAS from the Synology Drive web interface, Synology Drive Client desktop app, and Synology Drive mobile app.
By default, Synology Drive Server only allows each NAS user to access their home directory. Here, the user home directory is listed as the team folder My Drive.
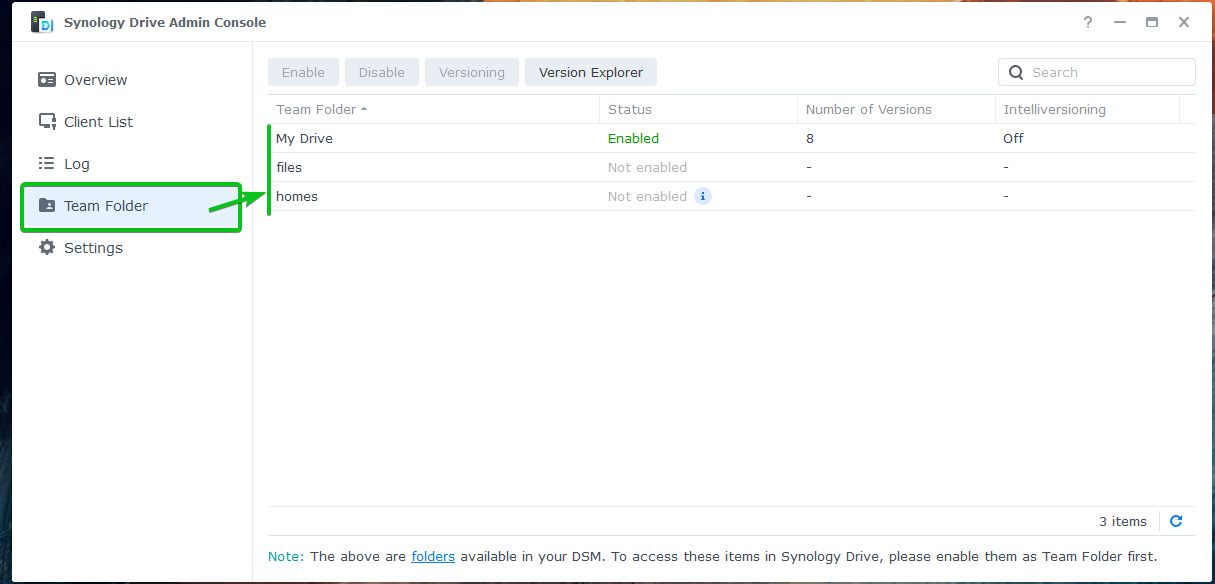
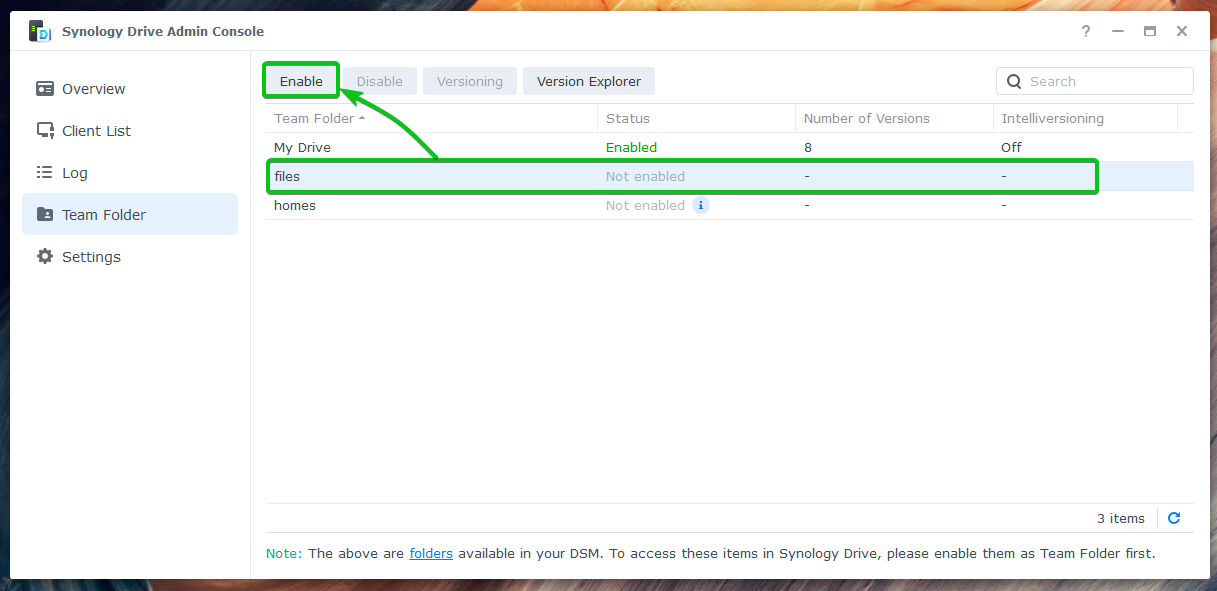
To allow the Synology Drive users access to the files shared folder, select it, and click on Enable as marked in the screenshot below:
You will be asked to configure Versioning settings for the shared folder.
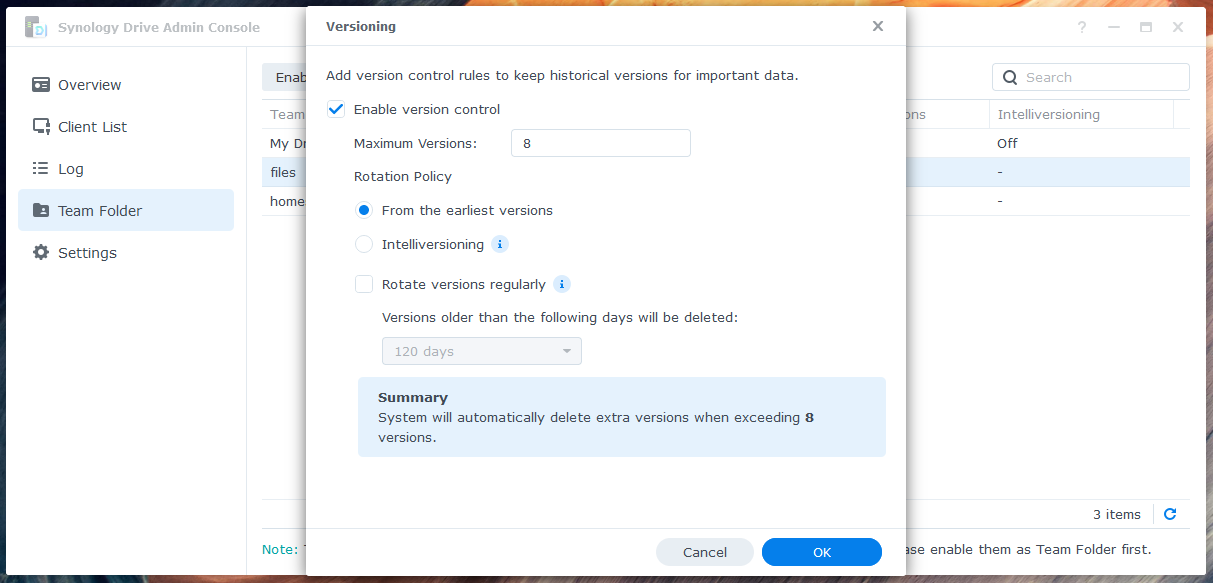
To enable version control for the files stored on this shared folder, check the Enable version control checkbox and specify the number of versions you want to keep in the Maximum Versions section as marked in the following screenshot:
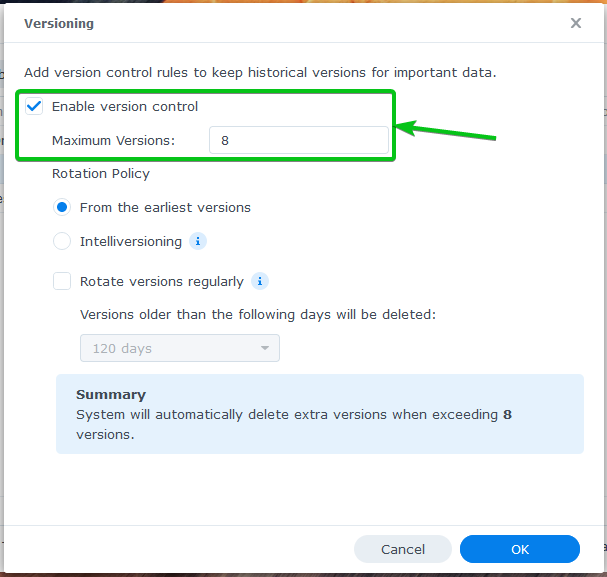
The Rotation Policy is used to determine which file versions are kept and which file versions are deleted.
From the earliest versions: This option is used to keep the last N numbers of file versions.
Intelliversioning: Synology Drive Server will determine the best N numbers of file versions to keep.
NOTE: Here, N is the maximum version of each file (you’ve set it in the Maximum Versions section) that you can keep.

You can check the Rotate versions regularly checkbox and select the number of days after which you want to delete older file versions.
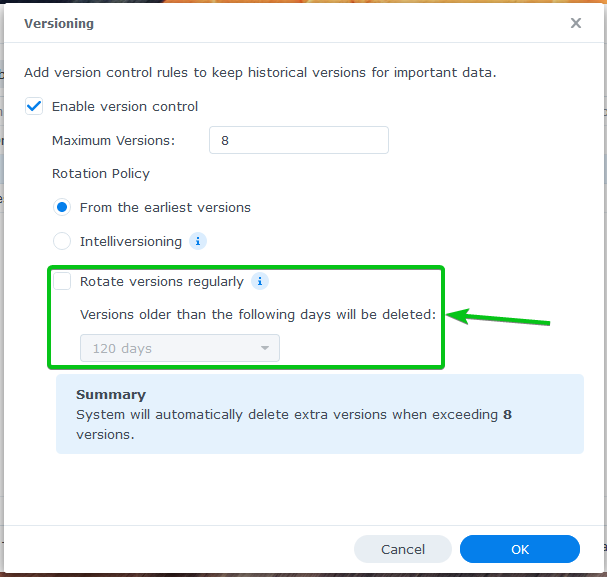
For the changes to take effect, click on OK.

Click on OK.

The shared folder should be available in the Synology Drive’s Team Folder section. The users who have permission to access the shared folder files should be able to access them from the Synology Drive web interface, Synology Drive Client desktop app, and Synology Drive mobile app from now on.
NOTE: You can configure user and group access permissions for a shared folder from Control Panel > Shared Folder.

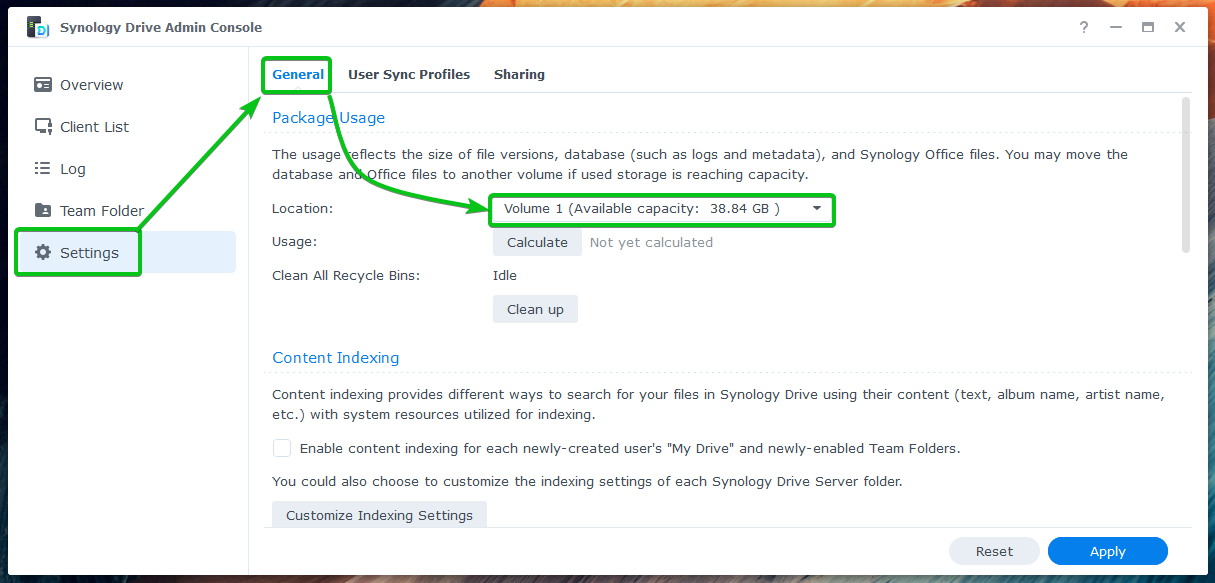
From the Settings > General > Location drop-down menu, you can change the volume where Synology Drive Server stores its logs, metadata, office files, file versions, etc.
From the Settings > Sharing > Sharing Permissions section, you can configure file-sharing permissions.
Allow users to share files publicly and internally: This option will allow Synology Drive users to share files privately and publicly.
Only allow users to share files internally: This option will only allow Synology Drive users to share files privately.
Disallow users to share files: This option will disable file sharing for Synology Drive users.
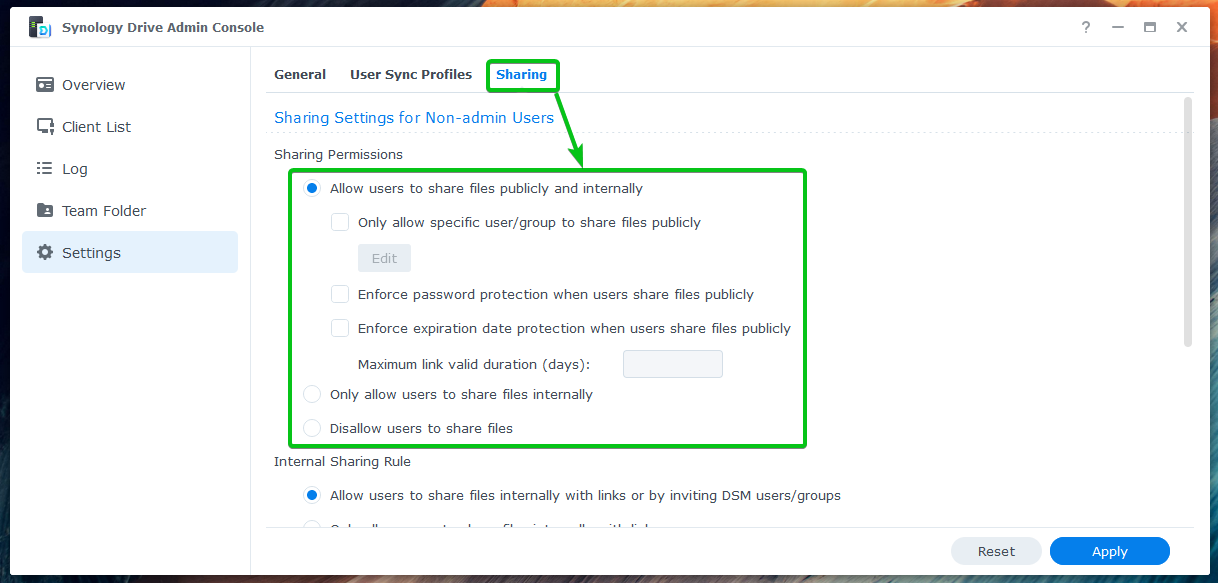
You can check the Only allow specific user/group to share files publicly checkbox to allow only specific users or groups to share files publicly1. Other users or groups won’t be able to share files publicly.
You can check the Enforce password protection when users share files publicly checkbox to force users to password protect the files they share publicly2.
You can check the Enforce expiration date protection when users share files publicly checkbox to force users to set an expiration date for the publicly shared files3. You can also set a max number of days the users can set as expiration date in the Maximum link valid duration (days) section to ensure that they don’t go crazy when setting expiration dates for the shared files. You don’t want any users to set an expiration date of 999 days, right?

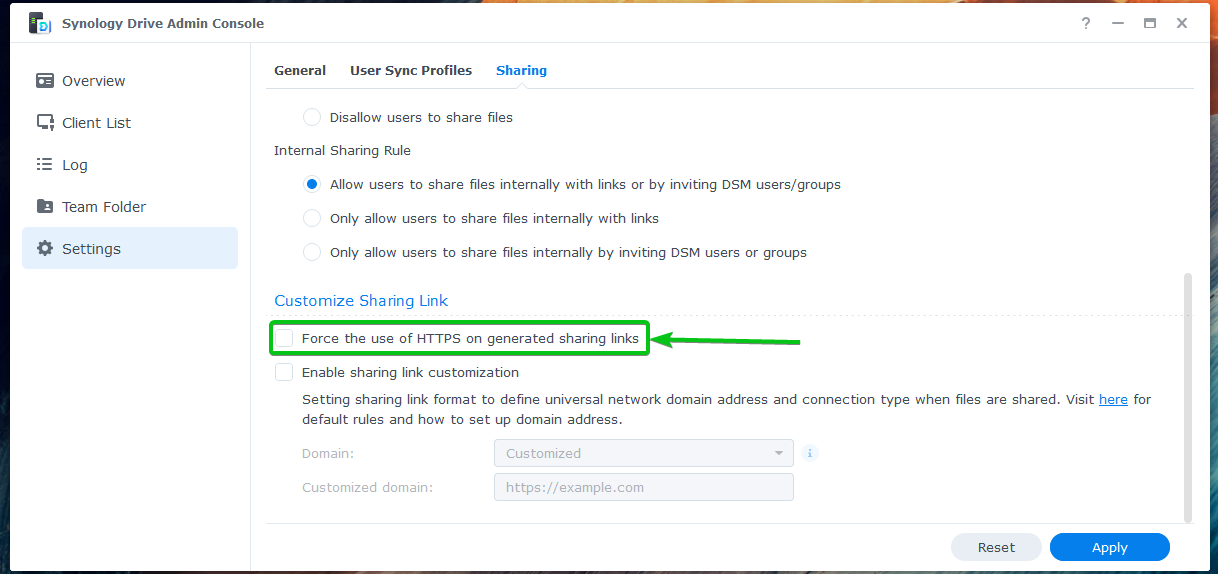
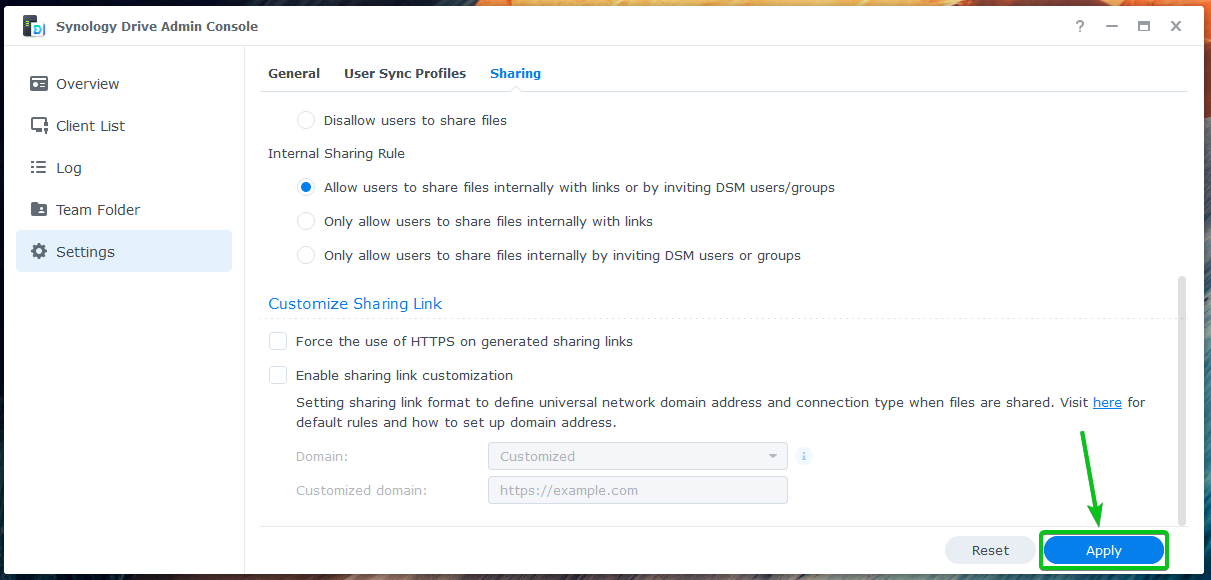
From the Settings > Sharing > Internal Sharing Rule section, you can configure how files are shared privately.
Allow users to share files internally with links or by inviting DSM users/groups: This option will allow DSM users to share files privately with other DSM users and groups via links or invites.
Only allow users to share files internally with links: This option will allow DSM users to share files privately with other DSM users and groups via links only.
Only allow users to share files internally by inviting DSM users or groups: This option will allow DSM users to share files privately with other DSM users and groups via invites only.

From the Settings > Sharing > Customize Sharing Link section, you can check the Force the use of HTTPS on generated sharing links checkbox to force the generation of HTTPS links when Synology Drive users generate share links for files.
Once you’re done, click on Apply for the changes to take effect.
Conclusion:
In this article, I have shown you how to install Synology Drive Server on your Synology NAS, enable user home service, and access Synology Drive from web browsers. I have also shown you how to download the Synology Drive Client desktop application and install it on Windows and Ubuntu operating systems. In addition, I have shown you how to use the Synology Drive Client desktop application to create Sync and Backup Tasks. Finally, I have shown you how to configure the Synology Drive Server. I hope you found this article helpful. Please check out Linux Hint for more informative articles.
References:
[1] Synology Drive Admin Console – Synology Drive Server – Synology Knowledge Center