In this write-up, we will discuss the methods for checking the RAM manufacturer’s model, brand, and many specs in Windows 10.
How to Check/Investigate RAM Manufacturer Brand, Model, and Other Specs in Windows 10?
To check/investigate the RAM manufacturer’s model, brand, and other specs in Windows 10, try the following approaches:
Method 1: Use Command Prompt
We can run different commands in the Command Prompt to see different information about the RAM. For the practical demonstration, check out the provided instructions.
Step 1: Run Command Prompt
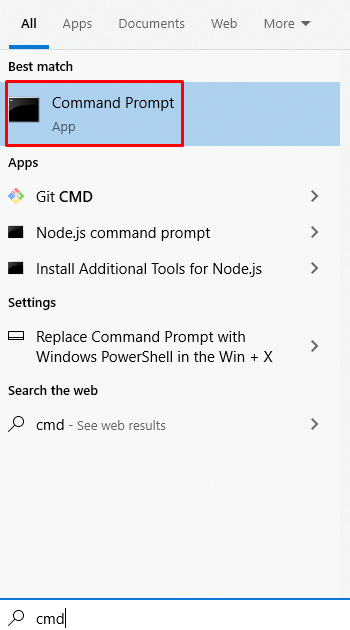
Type “cmd” in the startup menu search box and press enter to launch “Command Prompt”:
Step 2: Check the RAM Manufacturer
Type the below-given command to check the manufacturer of the RAM installed on your system:
Step 3: Check RAM Part Number
To check the number of the part of a RAM, execute the command stated below:
Step 4: Check RAM Serial Number
To check RAM serial number, follow the given command:
Step 5: Check RAM Size per Module
Execute the below-given command to see what the size per module of the RAM is:
Step 6: Check the Total System Memory Size
The total memory size of your system can be checked by writing out the provided command:
Step 7: Check the RAM Speed
The speed of the RAM can be checked with the following “wmic” command:
Step 8: Check the Memory Type
Check the type of memory installed onto your system:
Step 9: Check the Memory Form Factor
The form factor of the RAM can be checked as follows:
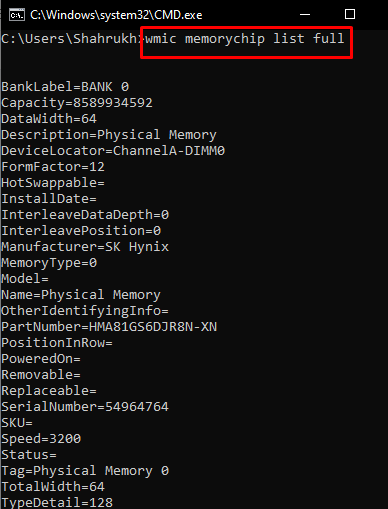
Step 10: Check Complete Memory Details
In the Command Prompt terminal, run the command which is given below to check the complete details of the memory installed onto your system:
Method 2: Use CPU-Z
“CPU-Z” is free-to-use software that lets us see the information of almost all the hardware that our computer has connected to it. You can utilize this software by following the step-by-step instructions provided below.
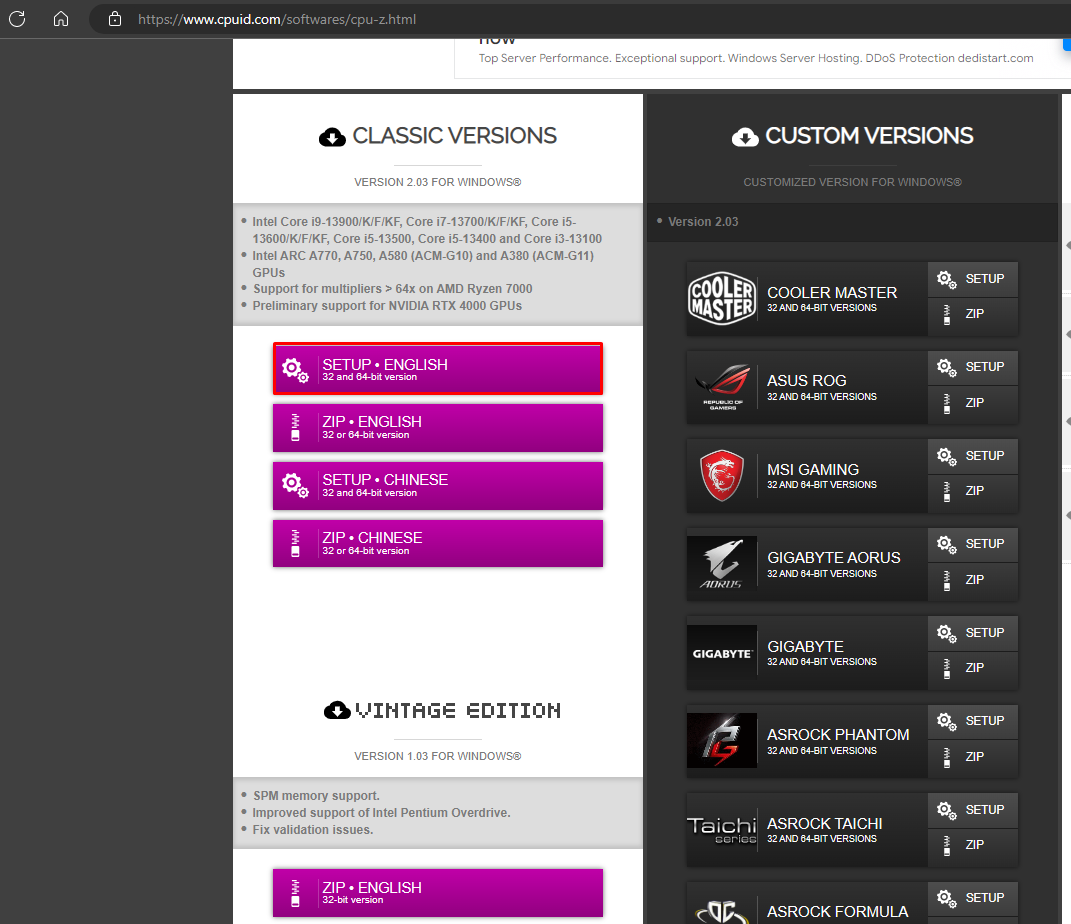
Step 1: Download CPU-Z
Go to CPU-Z’s official website to download the software on your system:
After the download is complete, install this app by following the onscreen instructions.
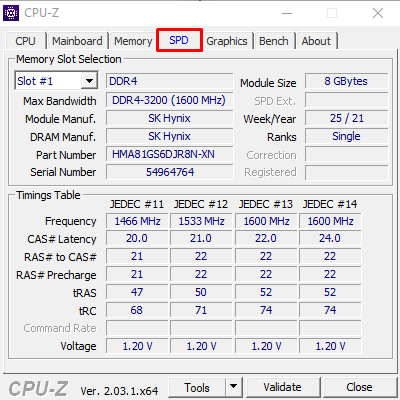
Step 2: Launch CPU-Z
Start “CPU-Z” and switch to the “SPD” tab which is highlighted in the image below to see the details of “RAM”:
That was all about viewing the RAM-related information in Windows 10.
Conclusion
The RAM manufacturer’s model, brand, and many other specs in Windows 10 can be checked by executing various methods. These methods include using the command prompt of your system or installing and utilizing the third-party software called CPU-Z. This post offered different approaches for checking the information related to RAM.


