On Windows systems, the “Specified Module Could Not Be Found USB” error prevents you from accessing the files and data on your USB drive which can be very irritating and annoying. More specifically, this error can be caused by corrupt system files, damaged System Registry files, or issues with the USB drive.
In this write-up, we will discuss multiple solutions to the discussed module not found issue.
How to Fix the “Specified Module Could Not Be Found USB” Error?
To fix the mentioned error, try the following fixes:
Method 1: Perform Clean Boot
Disabling all the programs, applications, and services that start at the time of the system bootup process might fix the “Specified Module Could Not Be Found USB” error. To perform a clean boot, follow the below-provided instructions.
Step 1: Open System Configuration
Type “msconfig” in the startup menu’s search box to open “System Configuration” and press the “Enter” key:
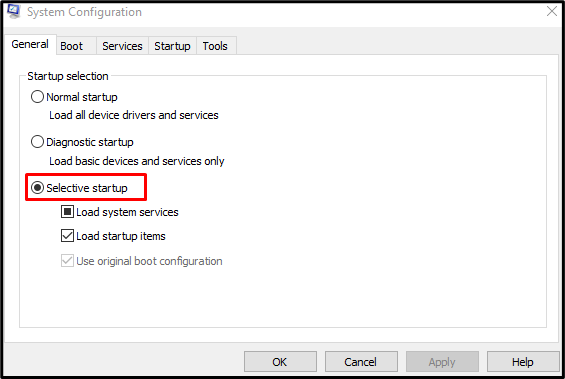
Step 2: Choose Selective Startup
Choose the “Selective startup” radio button in the “General” tab as shown below:
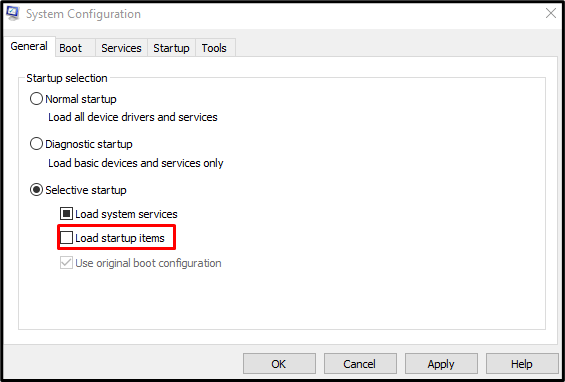
Step 3: Disable Load Startup Items Function
Untick the “Load Startup Items” checkbox under the “Selective startup” section:
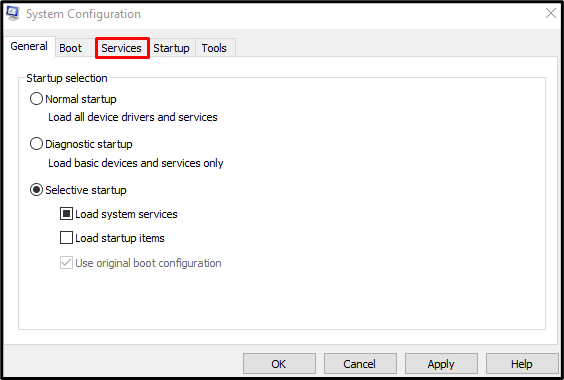
Step 4: Go to Services
Navigate to the “Services” tab in the “System Configuration” box:
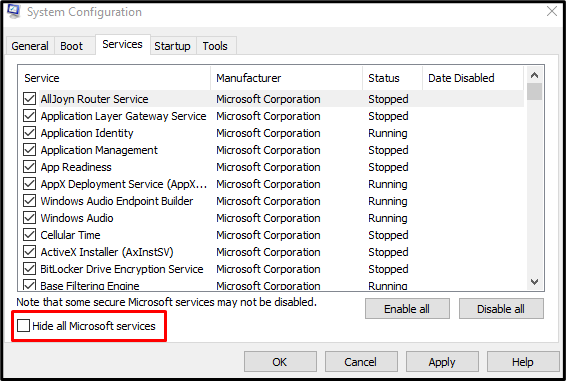
Step 5: Hide all Microsoft Services
Uncheck the “Hide all Microsoft services” checkbox:
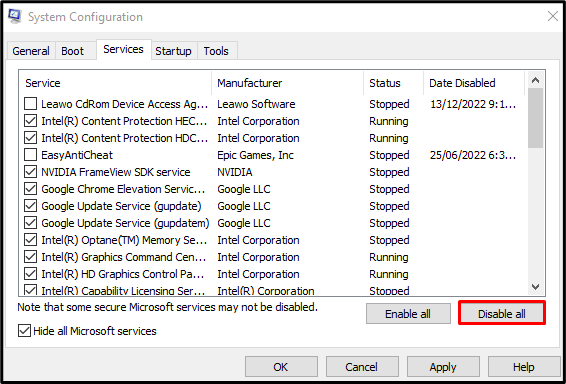
Step 6: Disable All Services
Press the “Disable all” button to disable all the services which are not from Microsoft:
Method 2: Use Registry Editor
Deleting NextLive and clearing the temporary files can also assist in fixing this issue. To use “Registry Editor” for the corresponding purpose, follow the instructions provided below.
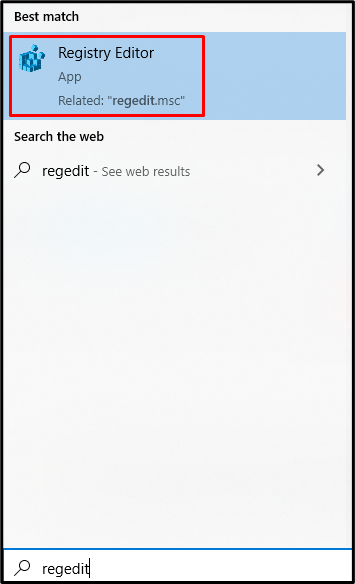
Step 1: Open Registry Editor
Open “Regedit” from the Startup menu as shown below:
Step 2: Navigate to Location
Navigate to “HKEY_CURRENT_USER\Software\Microsoft\Windows\CurrentVersion\Run” in the “Registry Editor” path:
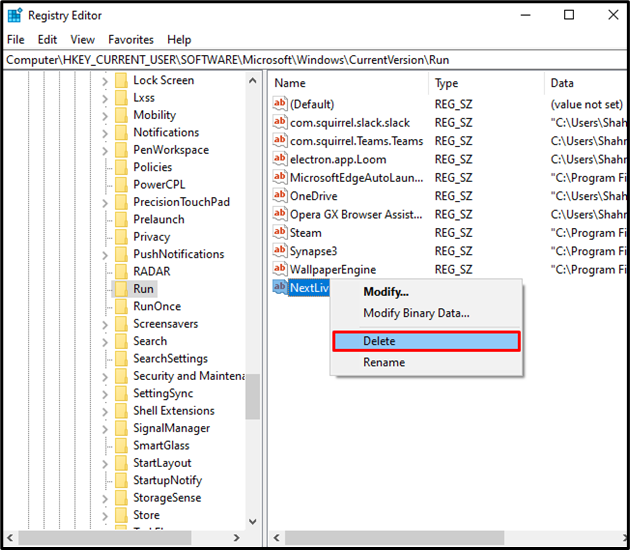
Step 3: Delete NextLive
Locate and delete “NextLive”:
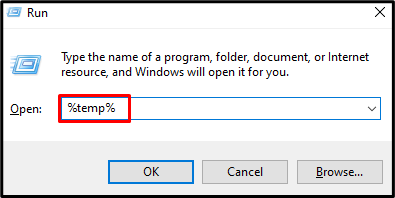
Step 4: Clear Temp Folder
Type “%temp%” in the Run box to open the folder which holds temporary files:
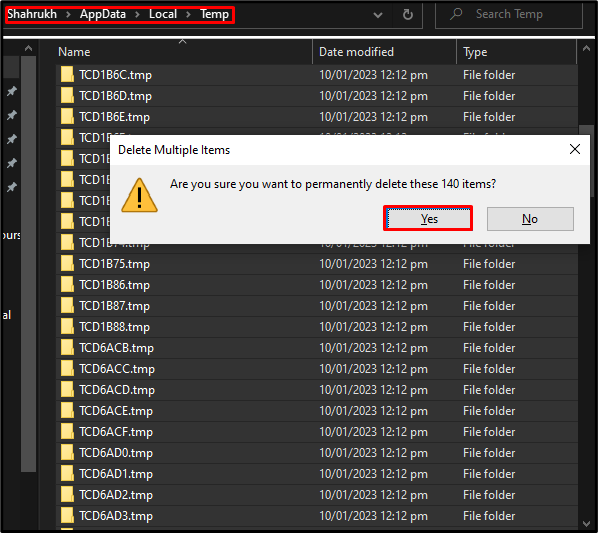
Press the “Ctrl+A” keys to select everything and hit “Shift+Delete” to permanently delete everything:
Method 3: Check Corrupted Files
Files get corrupted when their “Save” or “Write” function is interrupted unexpectedly like an internet outage or power cut. Therefore, check for corrupted files using the system file checker command and fix them by following the instructions provided below.
Step 1: Start Command Prompt as Administrator
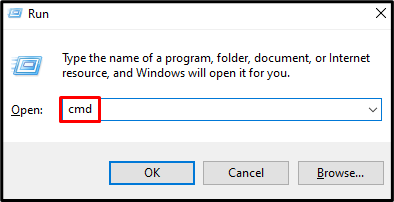
Type “cmd” in the Run box and press the “CTRL+SHIFT+ENTER” keys for running Command Prompt as an administrator:
Step 2: Run System File Checker Scan
Then, start the system file check scan to repair the corrupted files:
As soon as the scan gets completed, reboot your system and the stated module issue will get fixed.
Conclusion
The “Specified Module Could Not Be Found USB” error can be fixed by following different methods. These methods include performing a clean boot, using the Registry Editor, or checking corrupted files. This blog offered multiple solutions for fixing the mentioned module did not find the issue on Windows.


