“This app can’t run on your PC” error occurs when the app is not compatible with the system. Moreover, it could also happen due to corrupt system files, lack of permissions, enabled SmartScreen, or an app being infected with a malicious virus. This could sometimes be frustrating and annoying because it does not let you install your desired apps.
This write-up will overview various methods to fix the stated error.
How to Fix/Rectify the “This App Can’t Run on Your PC” Issue?
For fixing the app cannot run error, check out the enlisted methods:
Fix 1: Check System Specifications
If you have downloaded the app and it is not installed due to the “This app can’t run on your PC” error, then check your system specifications and then download the app according to the system specifications. This approach will probably fix the mentioned error.
Fix 2: Create an Administrator Account
Sometimes, a corrupt and infected user profile creates such problems to prevent the installation of the apps. So, creating a new administrator account can fix it.
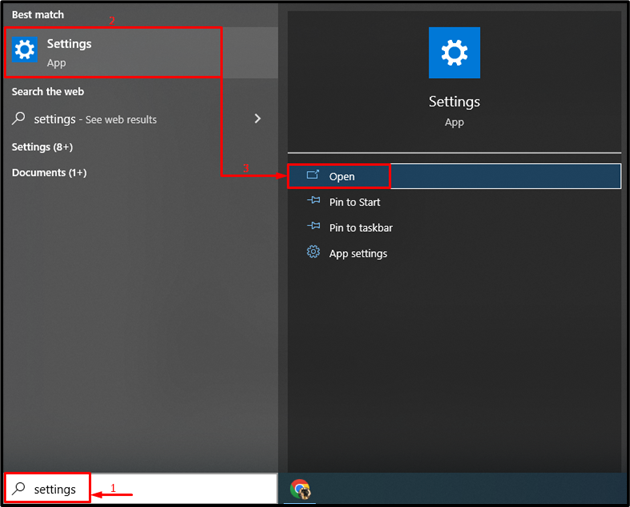
Step 1: Launch Settings
Firstly, open “Settings” via the Windows Start menu:
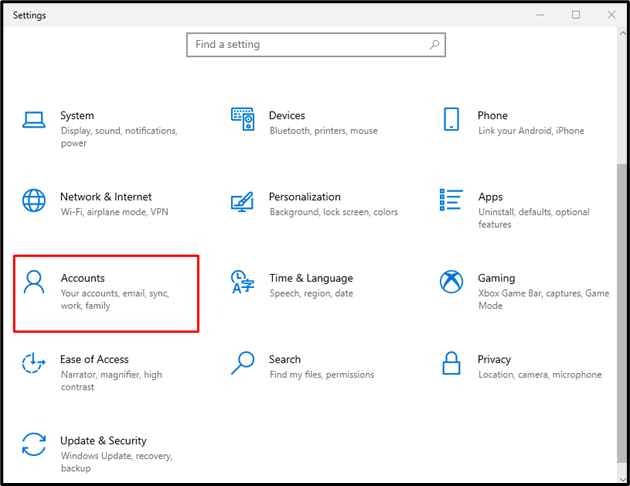
Step 2: Launch Account Settings
Click on the “Accounts” settings:
Step 3: Add New User
-
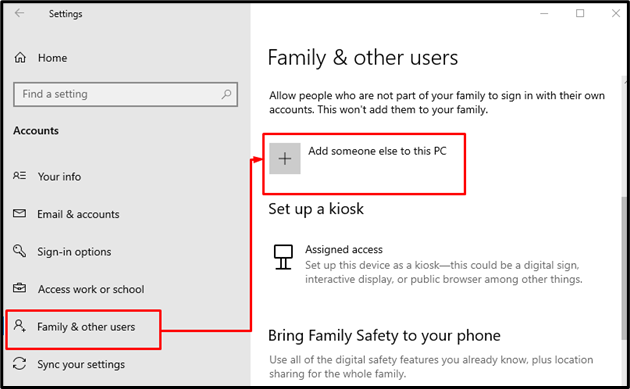
- Click on the “Family & other users” section.
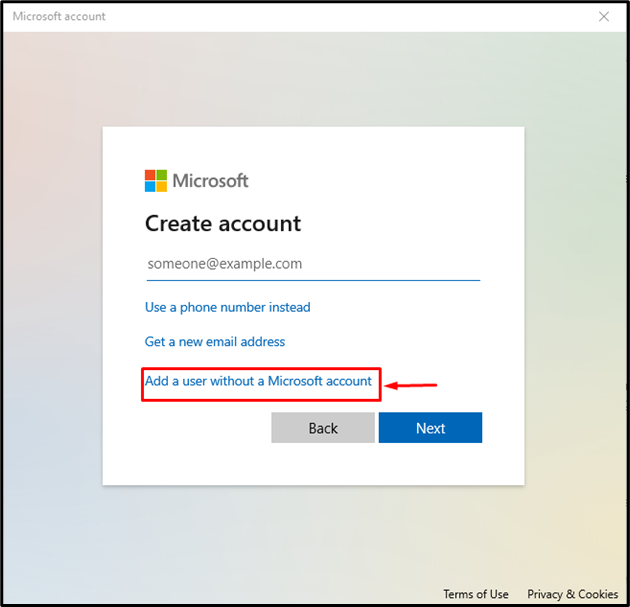
- Choose the highlighted option to create a new user account:
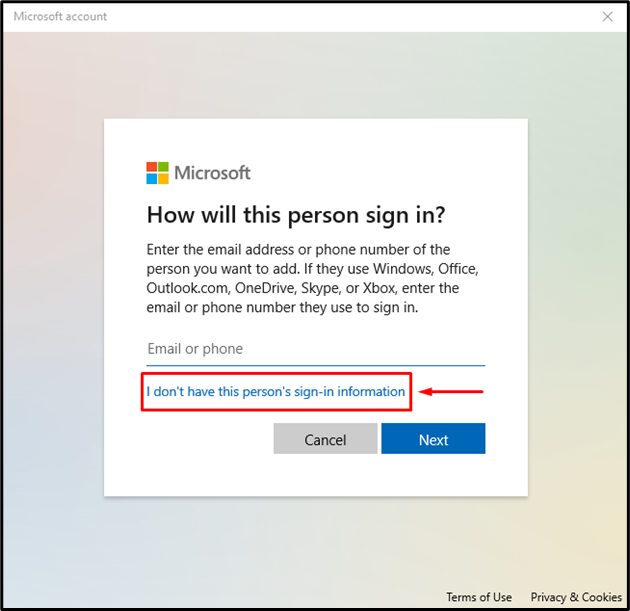
Trigger the highlighted option:
Select the highlighted option to add a new user:
Step 4: Enter User Credentials
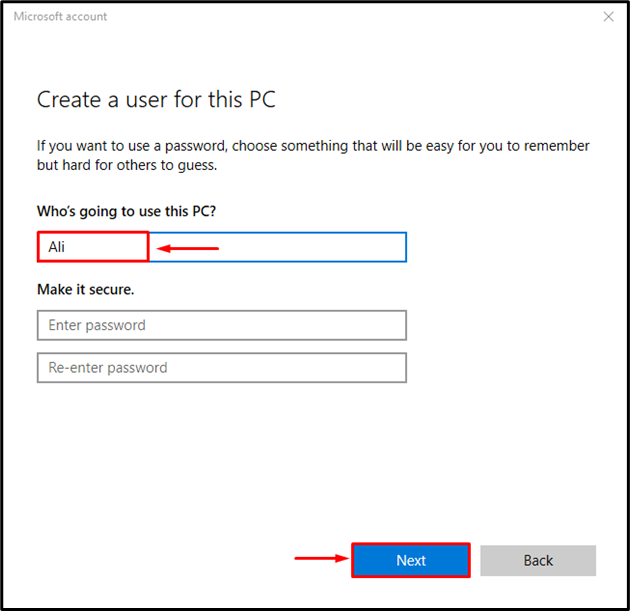
Enter the username and password and hit “Next” to complete the new user profile:
Step 5: Change Account Type to Administrator
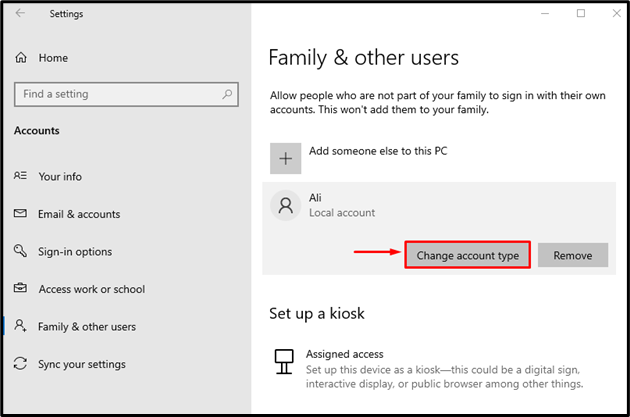
Select the “Change account type” option to change the account type:
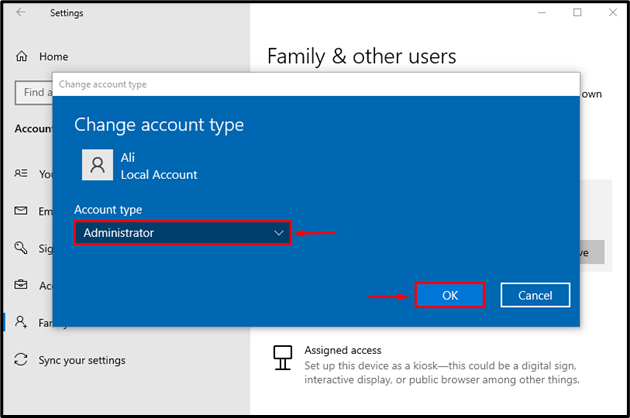
Click on the “Administrator” account type, and press the “OK” button:
Now, sign in to the newly created user profile and check if it resolves the stated issue.
Fix 3: Disable SmartScreen
The SmartScreen can prevent Windows from running malicious software and restricts applications to open up. Therefore, disabling the SmartScreen will assist in fixing the “This app can’t run on your PC” problem.
Step 1: Launch Windows Security
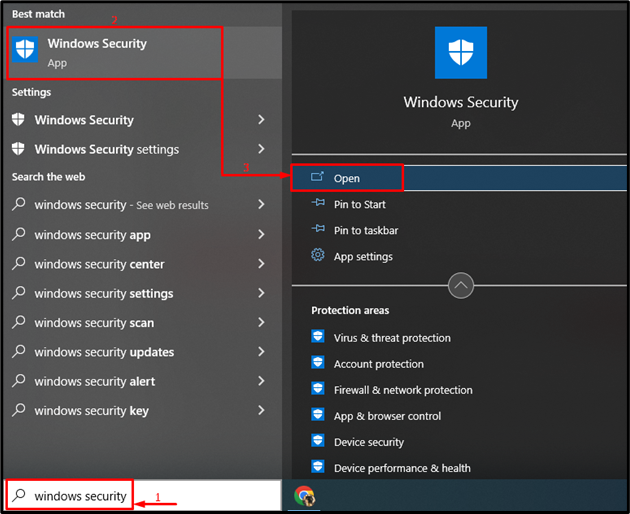
First up, open “Windows Security” via the Start menu:
Step 2: Launch App & Browser Control
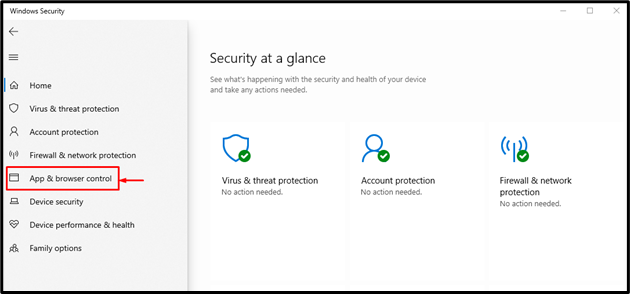
Now, click on “Launch app & browser control” to open it:
Step 3: Open Reputation-Based Protection
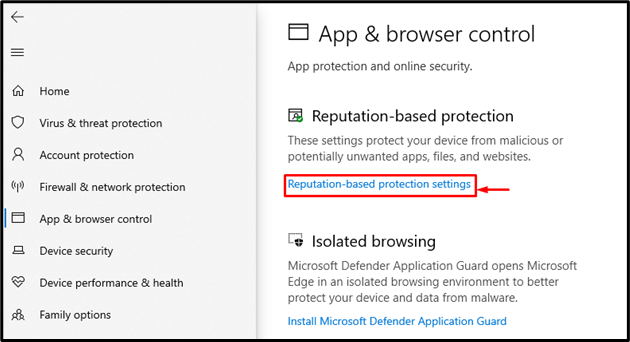
Select “Reputation-based protection settings” to open it:
Step 4: Disable Smart Screen
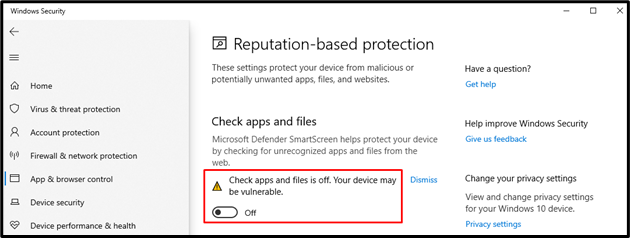
Turn off the “Check apps & files” toggle:
Fix 4: Enable Side-Loading Apps
Enabling “Developer mode” will ultimately enable the side-loading apps. Doing so will help Windows users to run side-load apps. Moreover, enabling side-loading apps will assist in resolving the mentioned problem.
Step 1: Open Settings App
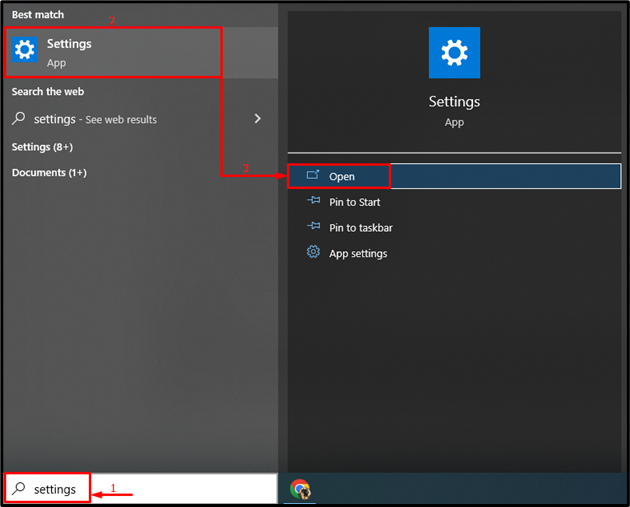
As the first step, launch “Settings” via the Start menu:
Step 2: Open Updates & Security Settings
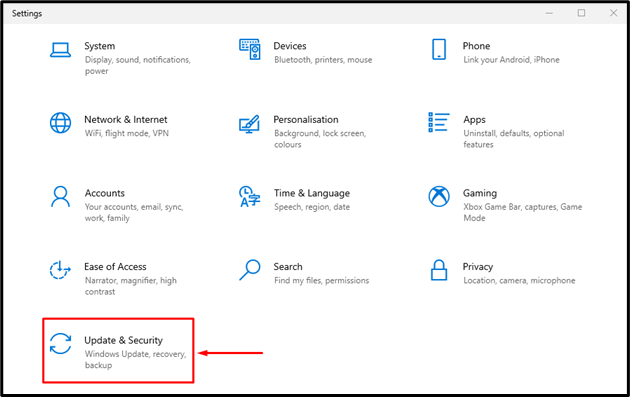
Click on the “Updates & Security” category:
Step 3: Launch Developer Settings
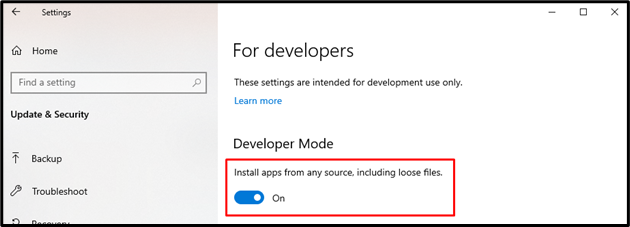
Move to the “For Developers” section:
Step 2: Enable Developer Mode
Turn on the “Developer Mode” toggle:
Select “Yes” to confirm the operation of enabling the developer mode:
As you can see, the developer mode has been enabled:
Fix 5: Run SFC Scan
The SFC scan is used to repair corrupt and missing system files. Running an SFC scan will surely fix the mentioned problem.
Step 1: Launch CMD
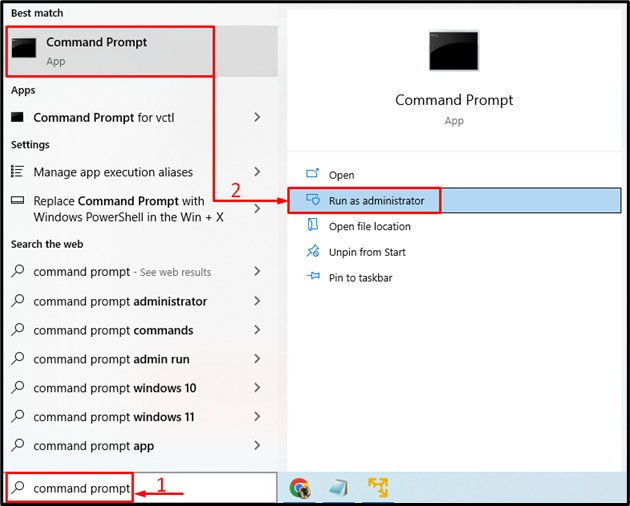
First up, navigate to the Start menu, search for the “Command Prompt” and open it:
Step 2: Run sfc Scan
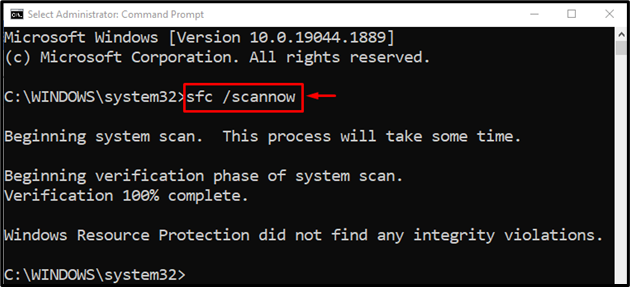
Run the “sfc” command to fix the corrupted system files:
The repairing of the system files has been accomplished.
Fix 6: Run Compatibility Troubleshooter
The “This app can’t run on your PC” error can be fixed by running the compatibility troubleshooter.
Step 1: Launch Troubleshoot Settings
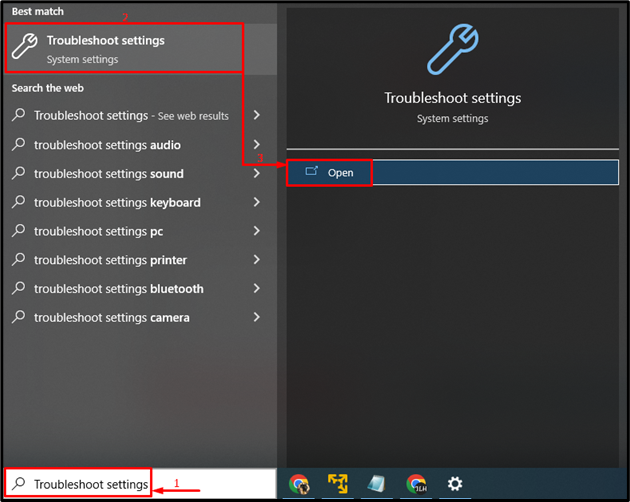
Launch the “Troubleshoot settings” via the Start menu:
Step 2: Open Additional Troubleshooters
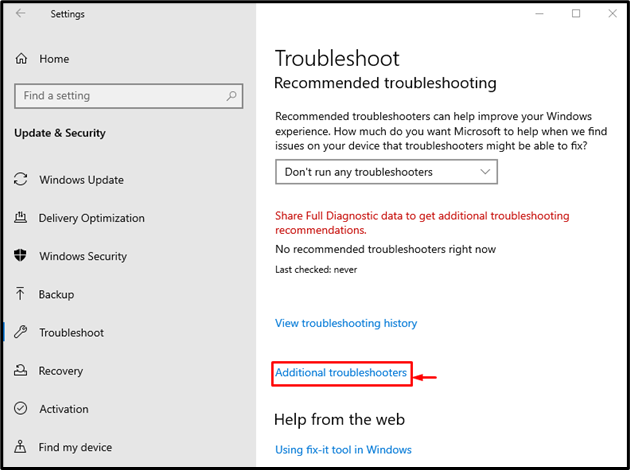
Select the “Additional troubleshooters” option:
Step 2: Run the Troubleshooter
Look for the “Program compatibility troubleshooter” and click on “Run the troubleshooter”:
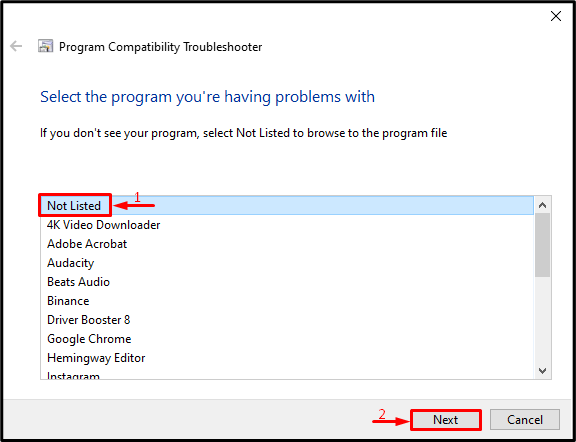
Select the “Not listed” option from the list and hit “Next”:
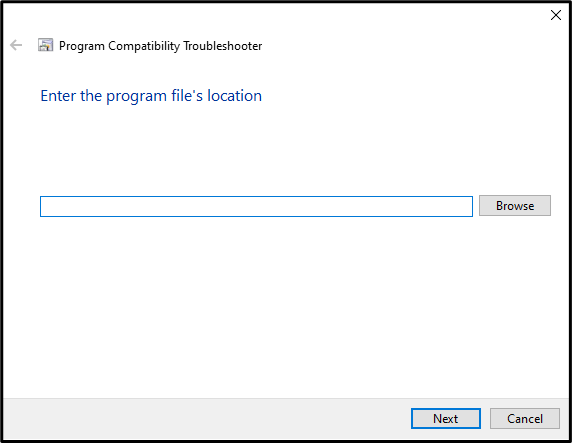
Now, click on the “Browse” button to open the problematic app and press the “Next” button:
This will troubleshoot the compatibility problems of the apps.
Fix 7: Run Full System Scan
The “This app can’t run on your PC” error can also occur when the app you want to run is infected by some virus. Therefore, running a full system scan can assist in fixing the mentioned problem.
Step 1: Launch Virus & Threat Protection
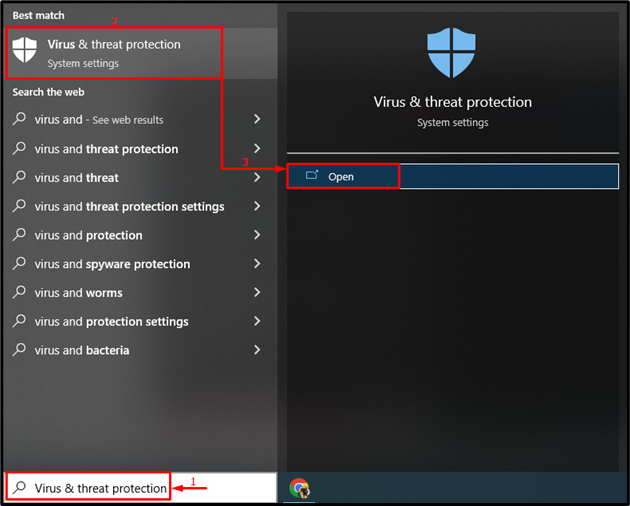
First, open “Virus & threat protection” from the Start menu:
Step 2: Launch Scan Options
Select “Scan options” from the opened window:
Step 3: Run Full Scan
Select “Full scan” and click on the “Scan now” button to initiate the full system scan:
The scan has started to remove the malware:
Restart Windows when the scan is finished, and check whether it resolved the problem or not.
Fix 8: Update Windows
In case all the methods fail to fix the stated problem, then update your Windows system.
Step 1: Open Windows Update Settings
First of all, open the “Check for updates” system settings:
Step 2: Update Windows
Navigate to the “Windows Update” section and press the “Install now” button:
Windows has now started to update:
After updating Windows, reboot the system and check if the “This app can’t run on your PC” issue got fixed or not.
Conclusion
The “This app can’t run on your PC” error can be resolved using several methods. These methods include checking system specifications, creating an administrator account, disabling SmartScreen, enabling side-loading apps, running a sfc scan, running a compatibility troubleshooter, running a full system scan, or updating Windows. This write-up has demonstrated various practical methods to fix the stated problem.

