Each filesystem also comes with its own permissions, managing which user/group can perform read/write actions. This guide will showcase fixing the “Read-only file system” error on Ubuntu.”
Filesystem Permissions
Linux is a multi-user operating system. To manage what user can access which part of the system, Linux implements various security features. One such feature is file permissions and ownership. It determines the owner of the file and who can read/write/execute them.
A similar concept applies to Linux filesystems. Each filesystem is protected by user permissions that control who is allowed to perform what action on the filesystem.
As the error suggests, the target filesystem is revoking write requests as it’s a read-only filesystem. If it’s by design, then you have to ask the system administrator to grant written permission. If that’s not the case, then follow this guide.
Solution
The solution to this issue is to fix the permissions of the filesystem. Depending on the filesystem type, there are a couple of tools available.
In most situations, these procedures are better performed from a live Ubuntu session. This way, no other program will interfere with the procedure. Alternatively, you can boot from a different Ubuntu installation. Check out installing Ubuntu on a USB stick.
Determining the Target Filesystem
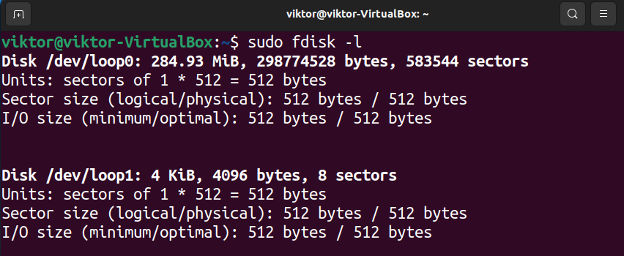
First, determine the filesystem we’re going to work with. List all the available filesystems using the following command:
Alternatively, we can also use the findmnt tool to list all the mounted filesystems:
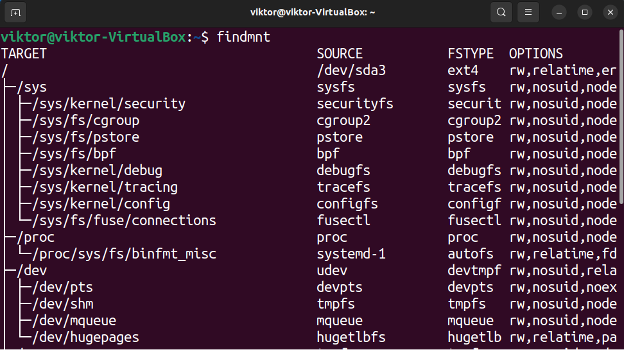
From the list, determine the target device/partition. In this example, my target device is /dev/loop17.
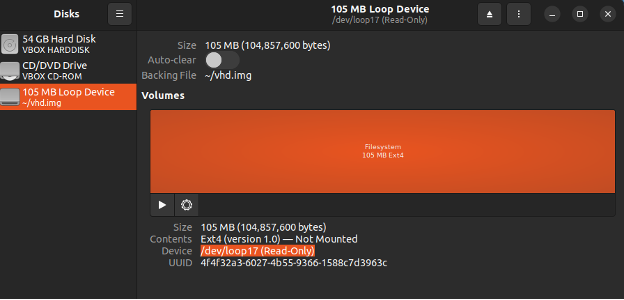
If you prefer using GUI, then you can also use the GNOME Disks utility:
Fixing the Filesystem
After we’ve determined the filesystem and the time to repair it, most Linux systems (including Ubuntu) come with fsck, a dedicated tool for repairing a Linux filesystem. Learn more about using fsck in Linux.
To fix the filesystem, run the following command:
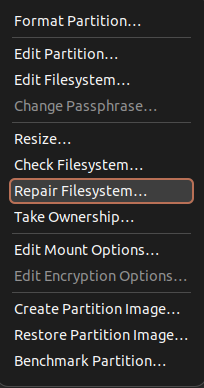
If you’re using GNOME Disks, then select the filesystem, click the gear icon, and choose “Repair Filesystem”.
Then, reboot the machine. The filesystem should now behave as expected.
Steps to Avoid Filesystem Errors
No filesystem is immune to corruption and errors. However, we can develop certain habits to increase overall stability:
- Shut down your system properly before powering off the machine. Oftentimes, improper shutdown causes data corruption and leads to various filesystem errors.
- Before removing any portable storage, properly eject/unmount it from the system. Otherwise, it can corrupt the filesystem (especially FAT-based filesystems).
- If you’re working with a hard disk, keep an eye on the SMART info of the drive. It can indicate if the drive is dying way before you end up with a dead hard disk.
- Keep your important data backed up on separate storage so that you’re not locked out.
Final Thoughts
In this guide, we demonstrated fixing a filesystem from preventing write actions, resulting in a “Read-only file system” in Ubuntu. We also went over a couple of techniques to reduce the likelihood of filesystem corruption.
Certain filesystems are more resilient to corruption than others, for example, ZFS. It comes with built-in data integrity protection and data compression and can handle high storage capacity. Check out setting up ZFS on Ubuntu.
Happy Computing!