Due to timing or other reasons, some parts of this file system are inaccessible. In case you face this issue, we recommend that you verify its integrity as soon as possible. In such cases, fsck (File System Consistency Check) comes to the rescue. The modern file system doesn’t require any third-party tool to recover the corrupt file system. Even so, fsck is sometimes the only option for repairing a “bad” file system.
What Is Fsck?
Fsck is also known as a File System Consistency Check. With this system’s utilities, you can check the file system for the outstanding issues or errors, make repairs, generate reports by finding and fixing potential errors, etc. Fsck examines the disk using a combination of the built-in tools and generates a description of its findings. You don’t need any installation process or specific steps to use fsck that comes with Linux distributions by default.
Execute fsck on an unmounted file system to avoid the data corruption problems. The system runs fsck during boot time, depending on when we last checked the file system. However, there are some facts about fsck:
- The fsck command does not work for repairing mounted file systems.
- There is a possibility of getting the wrong error message when the fsck command mounts the file system.
- You can run the fsck command on a mounted file system for reasons other than repair.
When Do You Use Fsck?
You can use fsck when there are different scenarios, such as:
- To keep the file system running in case of any problems with your system or as preventive maintenance.
- On getting the output/input error because of the system files being corrupt.
- When the system cannot boot.
- To check the health of an external drive, such as a USB flash drive or an SD card.
How to Use Fsck in Linux
Fsck is a prepackaged file system check toolkit through which you can handle the file system issues in Linux operating systems. It can also interactively repair and check the files that affect your operating system’s performance.
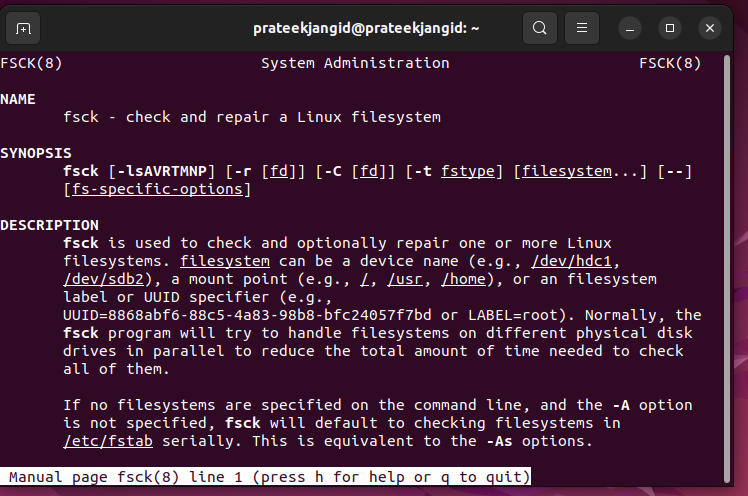
You can get all the essential information related to fsck through the previous command, such as its descriptions, exit codes, flags, etc.
Here is the basic fsck command that you can use:
The Filesystem previously mentioned can refer to a single mount point, a partition, or a device. Alternatively, you can add the file system-specific options to the end of this command.
The first step in repairing and checking your file system is to follow a few steps. Here, you need to unmount and locate a device.
Check the Partitions and Mounted Disks
First, identify the device partition which contains the Linux file system and which you want to repair or check.
Now, you can use any available tools to check the disk location in your system and view all the mounted devices.
Run the “df command” to scan the currently mounted disk. The system will not list the disc you want to test in the rescue mode.
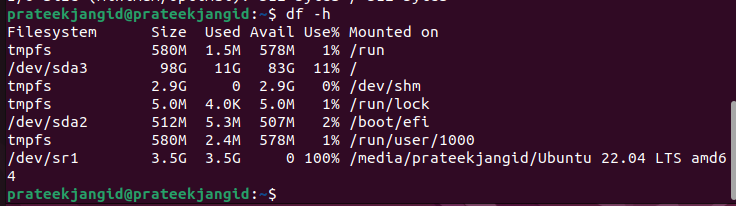
The previous command prints the data usage on your file system as the output. From the output, you have to focus on the disk which you will check with the help of the fsck command.
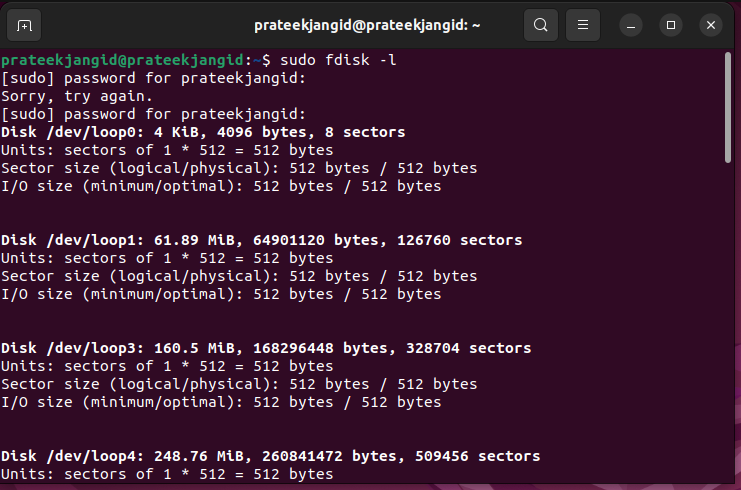
To view your disk partitions, run the following command. Here, we will see the partition for the first disk of our system:
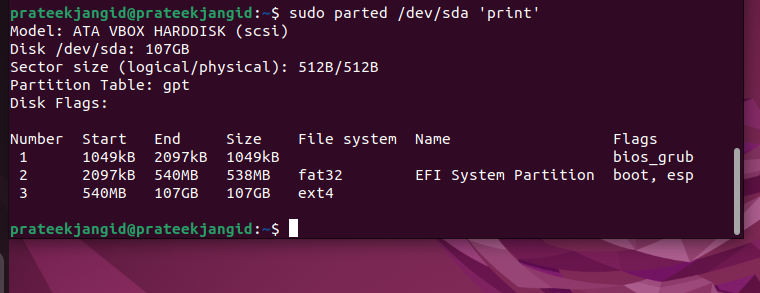
Here, sda, sdb, sdc, and so on are the number of partitions. In this case, the system only has a single partition, but it will show over one partition if the system has it.
Unmount the Disk
Before running a disk with the help of fsck, you must make sure that your partition or disk is unmounted. You get a warning when you run the fsck if your partition or disk is not unmounted. To unmount the disk or partition, run the following command:

Note: You cannot unmount the root file system, or you cannot use fsck on the running machine.
Check Errors Through Fsck
Once the disk is unmounted, you can run the fsck command:
As shown previously, a clean disk produces the same output. When there are multiple problems on your disk, a confirmation prompt appears.
Mount the Unmounted Disk
You will need to mount the disc again when the device is repaired and tested. It is then possible to use it again. We unmounted this disk again. We remount it again by using the following command:
This is the proper procedure for performing the task, which you have to follow to check and repair the disc.
Check the Fsck Schedule
If you are curious to know when the last time you checked your partitionwas, run the following command:
Run Fsck on Root Partition
Sometimes, run fsck on the system’s root partition in some conditions. If the partition is mounted, you cannot run fsck. You can get the Root partition running in Linux using any of the following methods:
1. Run fsck in Rescue Mode
Now, you must know that you cannot check the root partition on the running machine with fsck. This is because it is mounted and in use. During recovery mode, you can run fsck to check the Linux root partition.
- First of all, reboot the machine using a terminal or GUI.
- During boot-up, hold down the Shift key. Doing so will show you the GNU GRUB menu.
- Now, choose the “Advanced” Options for Ubuntu.
- Select the entry with recovery mode and allow the system to load in the recovery menu.
- Choosing fsck from the menu will appear. Select <Yes> at the prompt.
- Once you’re done, boot the system by selecting the “resume” option on the recovery menu.
2. During System Boot, Force Fsck
It is relatively easy to follow this method. Under this, you have to create a file named Forcefsck in the system’s root partition. Use the following command to do so:
Now, you can schedule or force a reboot of the system, and fsck is performed during the next bootup. Fsck takes longer if you have many used inodes on your system. Given this, if downtime is significant, it is recommended to plan it properly. Use the following command to see if the file is still present once the computer has booted up:
You can remove the file on every system boot to avoid fsck if the file exists.
Some Examples of Fsck
Let’s take a look at some examples which you can follow for your system:
1. Run fsck on All Filesystems at Once
With the -A flag, you can check all the file systems at once with fsck. This option goes one at a time through the etc/fstab file. Here, the -R option is used because the root cannot unmount the filesystem on the running machine.
2. Test Run
The fsck command can be run with the -N option before running the live check.
3. Skip Fsck on Mounted Filesystems
By adding the -M option, you can ensure that you are not running fsck on a mounted filesystem. You can use this flag to force the fsck tool to skip all the mounted filesystems.
4. Skip Fsck for a Specific Filesystem
If you don’t want the fsck to check any filesystem, run the following command. You have to add -t and “no” before the file system and -y at the end. We use the -y to skip the prompts:
5. Filesystem Check
The tool skips the filesystem check when running on a clean device. You can force check the file system using the -f option:
6. Automatically Repair Detected Errors with Fsck
The -y option can be passed to fsck to fix the potential problems without prompting. There are no errors in the output as with the -y option.
Conclusion
This was the brief information about the fsck and how you can use it in Linux. We included the different examples and use the cases to explain everything about fsck. In simple words, fsck is a File System Consistency Check that can help you check the filesystem activities. The given information may be helpful for you to understand how to use fsck in Linux.