The printer spooler is a windows component responsible for carrying instructions from you to the printer. Its main duty is to instruct the printer to perform the required printing job. However, if the printer spooler service is stopped or not working, you may face an error “Print spooler service not running”, which can be resolved using various methods that we will discuss further in this article.
This write-up will overview various methods to fix the “Print spooler service not running” issue.
How to Rectify the “Print Spooler Service Not Running After Windows 10 Update” Problem?
First, restart Windows 10 to repair the specified error. If it still didn’t resolve, you need to follow these methods:
Let’s dig in one by one to find the solution to the mentioned problem.
Fix 1: Troubleshoot Printer
The first approach is to run the troubleshooter to fix the stated problem.
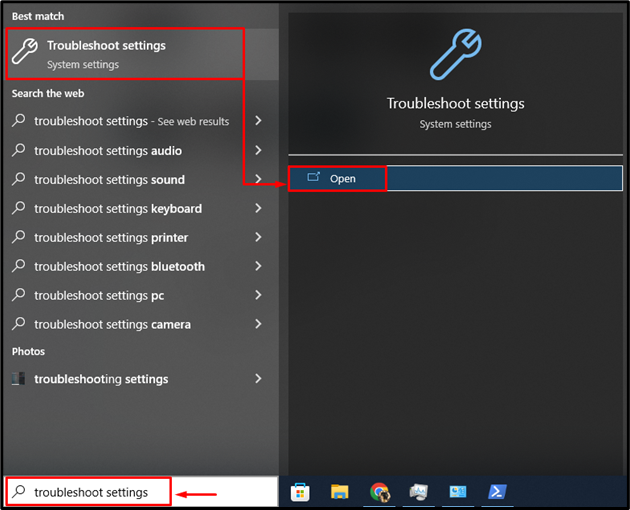
Step 1: Launch Troubleshoot Settings
As a first step, open “Troubleshoot settings” from Windows 10 Start menu:
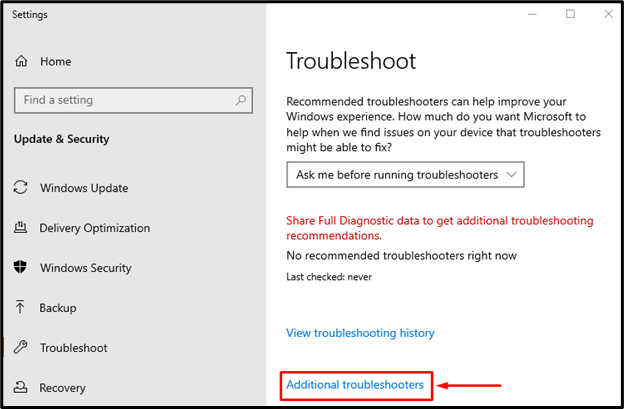
Step 2: Launch Additional Troubleshooter
Trigger the highlighted option:
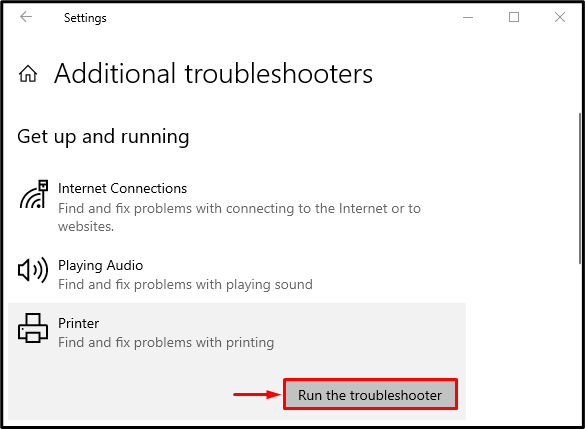
Step 3: Launch the Troubleshooter
Locate the “Printer” section and click on “Run the troubleshooter”:
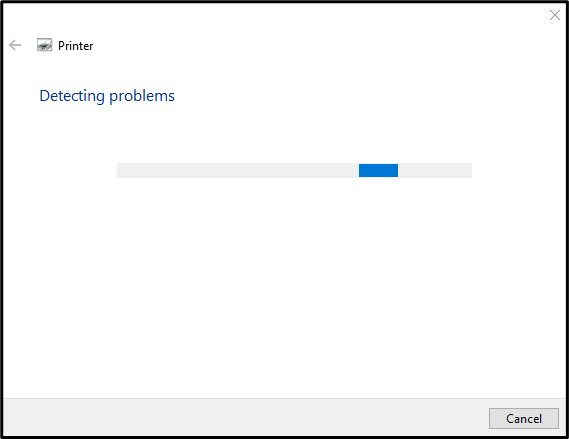
As you can see, the troubleshooting has begun to diagnose the printer problems:
Reboot Windows after troubleshooting is finished.
Fix 2: Reinstall the Printer Driver
The stated error may have occurred due to corrupt or missing driver files. So, reinstalling the driver will assist in fixing it.
Step 1: Launch Device Manager
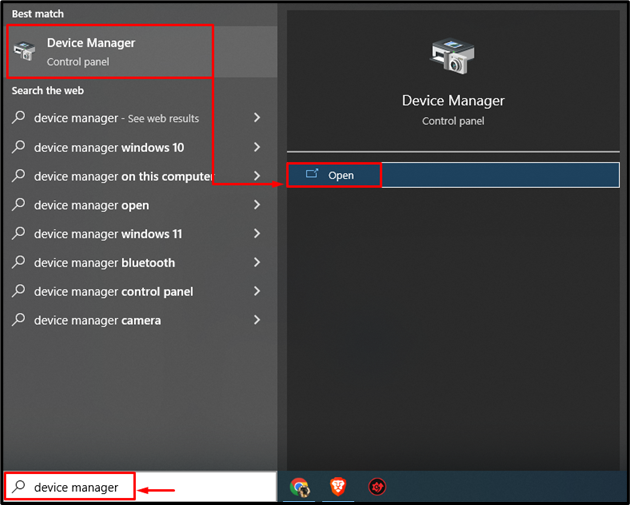
First, search and open “Device Manager” with the help of the Start menu:
Step 2: Uninstall the Driver
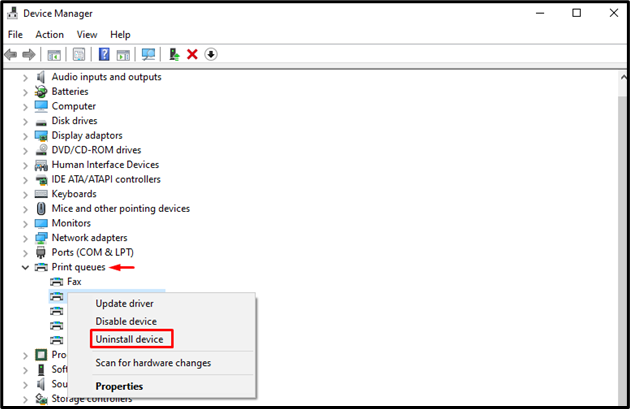
Expand the “Printer queues” section, right-click on the printer driver, and select “Uninstall Device”:
Step 3: Reinstall the Driver
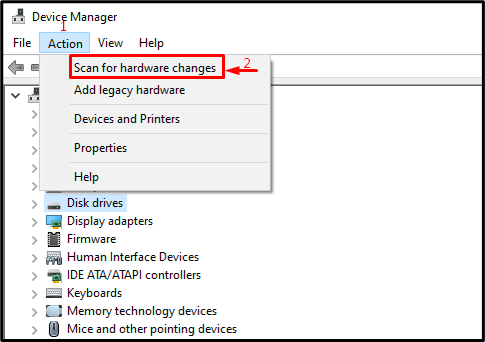
Click on the “Action” menu, and trigger “Scan for hardware changes”:
In the end, reboot Windows so that system can make changes.
Fix 3: Delete Print Spooler Files
There is a strong chance that the printer spooler service files have become corrupt, and that is why the stated error has occurred. Therefore, deleting its files will fix the problem.
Step 1: Launch Task Manager
Search and open “Task Manager” from Windows 10 “Start menu”:
Step 2: Stop the Print Spooler Service
-
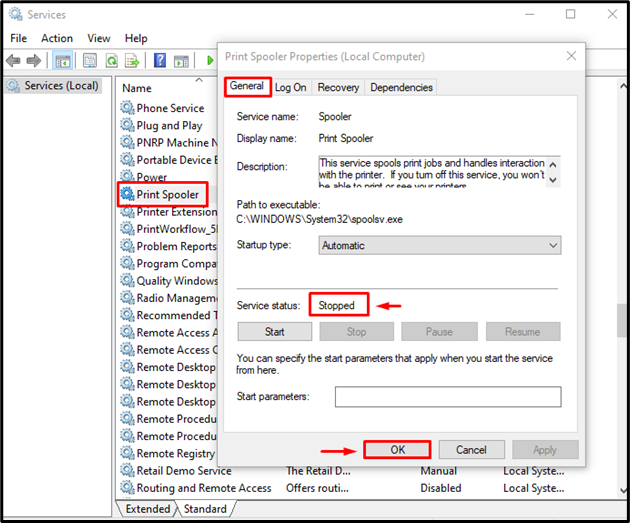
- First, locate the “Print Spooler” service.
- Double-click on it to open its “Properties”.
- Now, make sure it is stopped. If it is not, click on the “Stop” button to stop it and hit the “OK” button:
Step 3: Delete Printers Folder
-
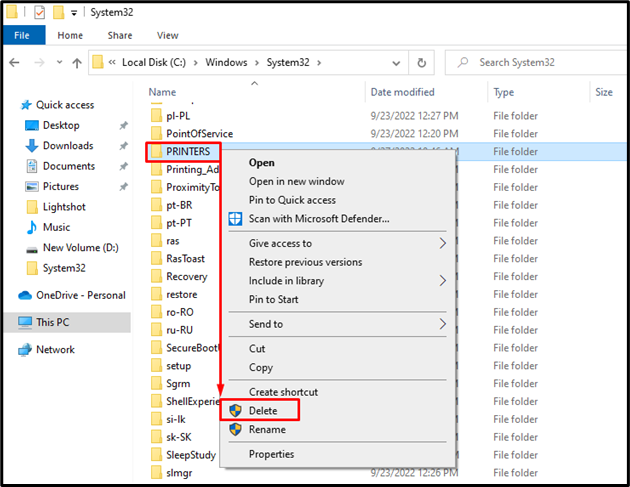
- Now, navigate to the C:\Windows\System32\spool
- Locate the “PRINTERS” folder, right-click on it and select “Delete” to remove the folder:
Reboot the system after doing so.
Fix 4: Restart Print Spooler Service
Another fix to resolve the mentioned error is to restart the print spooler service. For this purpose, check out the offered method.
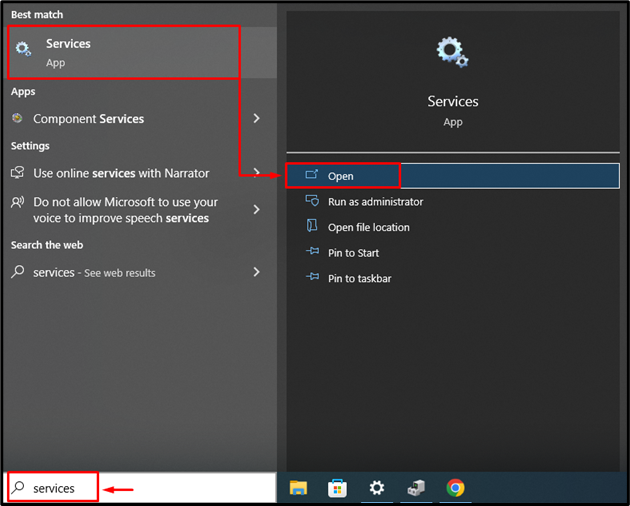
Step 1: Launch Services
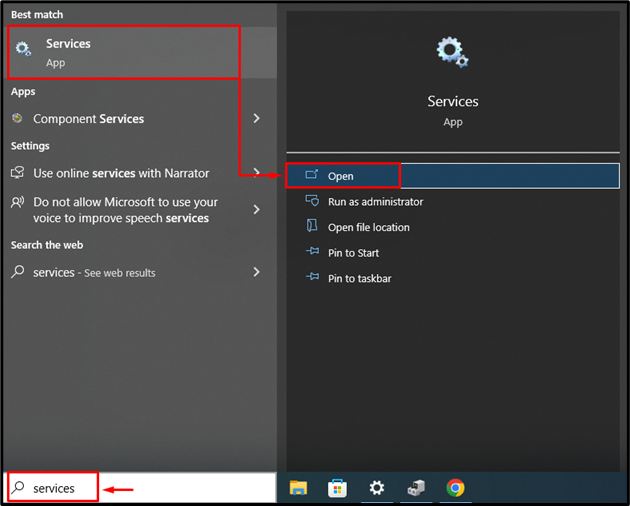
Search and open “Services” from Windows 10 Start menu:
Step 2: Restart the Service
-
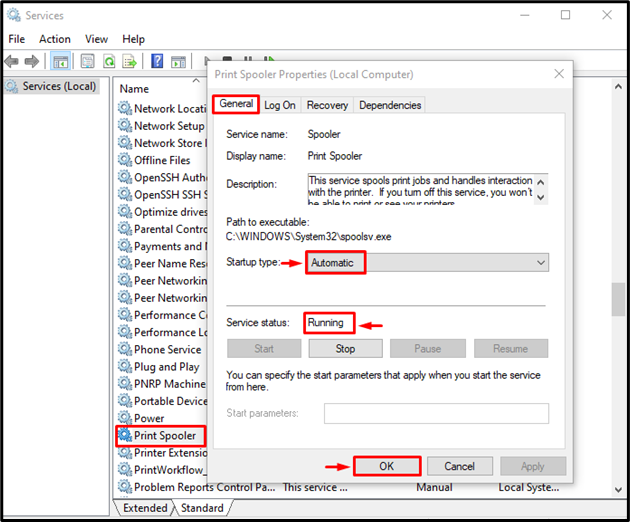
- Look for the “Print Spooler” service.
- Launch its “Properties”.
- Switch to the “General” segment.
- Set the service to open as “Automatic”.
- Finally, left-click on the “OK” button to save changes:
Restart the PC after making changes.
Fix 5: Run System File Checker
System File Checker or SFC scan is used to repair the corrupt and missing system files. Running this scan will surely fix the stated problem.
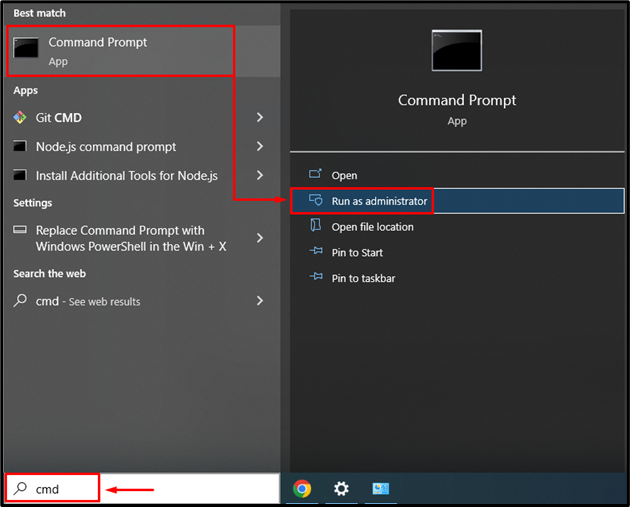
Step 1: Open CMD
First, search and launch “CMD” with the help of the Windows Start menu:
Step 2: Run the Scan
Now, execute the SFC code in the opened terminal to initiate the system file checker scan:
The system file checker scan has been completed successfully and will surely resolve the print spooler service issue.
Conclusion
The “Print spooler service not working after Windows 10 update” issue can be fixed using various methods, which include troubleshooting the printer, reinstalling the printer driver, deleting the print spooler files, restarting the print spooler service, or running a system file checker scan. This write-up has provided authentic approaches to rectify the specified issue.

