This guide will discuss:
- How to Enable or Disable “about:flags” Using Microsoft Policy Editor?
- How to Enable or Disable “about:flags” by Modifying Windows Registry?
How to Enable or Disable “about:flags” Using Microsoft Policy Editor?
To enable or disable “about:flags” by utilizing the Microsoft policy editor, follow the below-given steps:
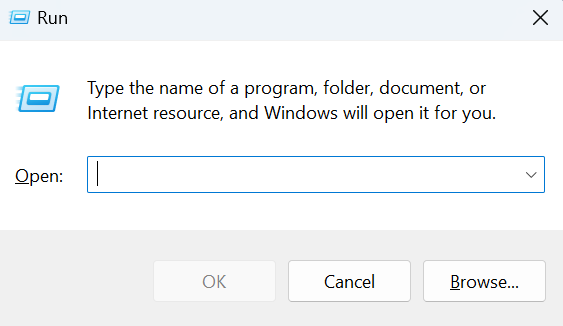
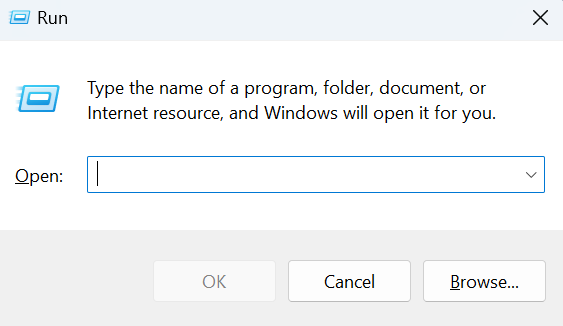
- Open the run panel by pressing the “Window + r” keys.
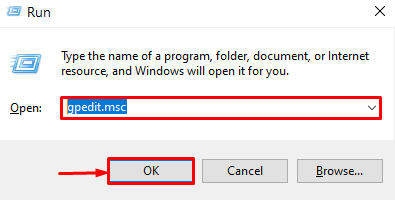
- Then, type the “gpedit.msc” in the search area and click on the “OK” button.
- Locate the “Microsoft Edge” folder inside the “Local Group Policy” editor.
- After that, enable or disable it according to your requirements.
Step 1: Launch Run Panel
First of all, open the run panel by pressing the “Window + r” keys:
Step 2: Search “gpedit.msc” Editor
Now, type the “gpedit.msc” in the required field and click on the “OK” button:
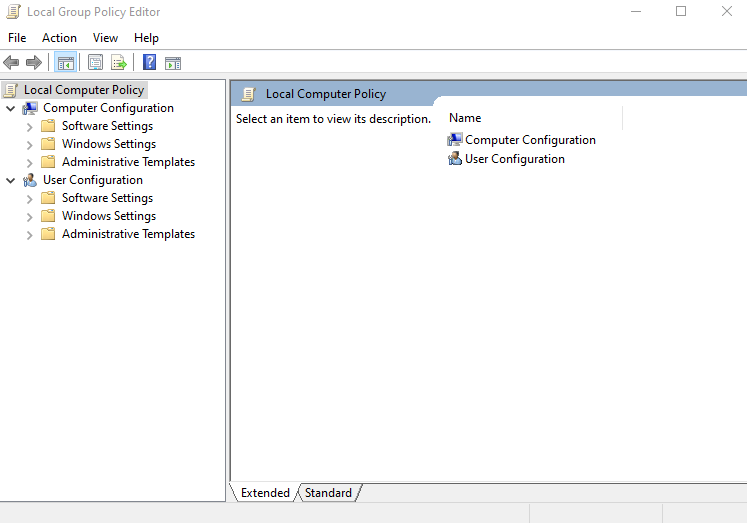
After doing so, the “Local Group Policy” editor will appear on your screen:
Step 3: Navigate the Windows Component Folder
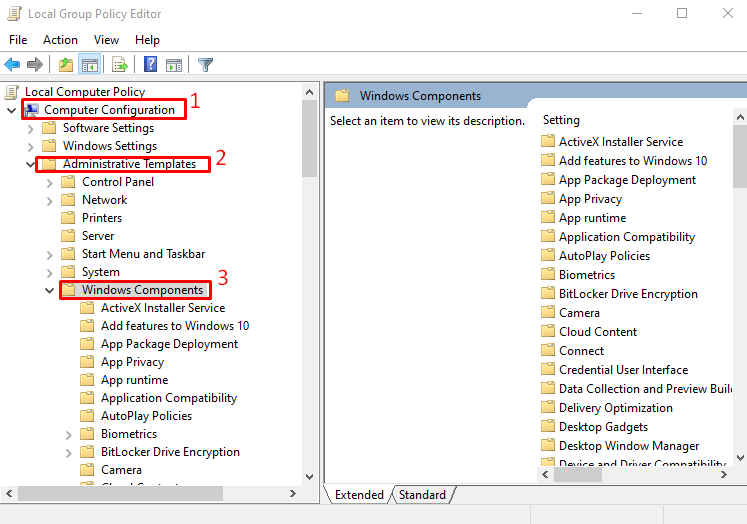
Now, move to the “Windows Component” folder by following the below instructions:
- First, select the “Computer Configuration” folder.
- Locate the “Administrative Templates” directory.
- After that, expand the “Windows Component” folder:
Step 4: Search the Policy
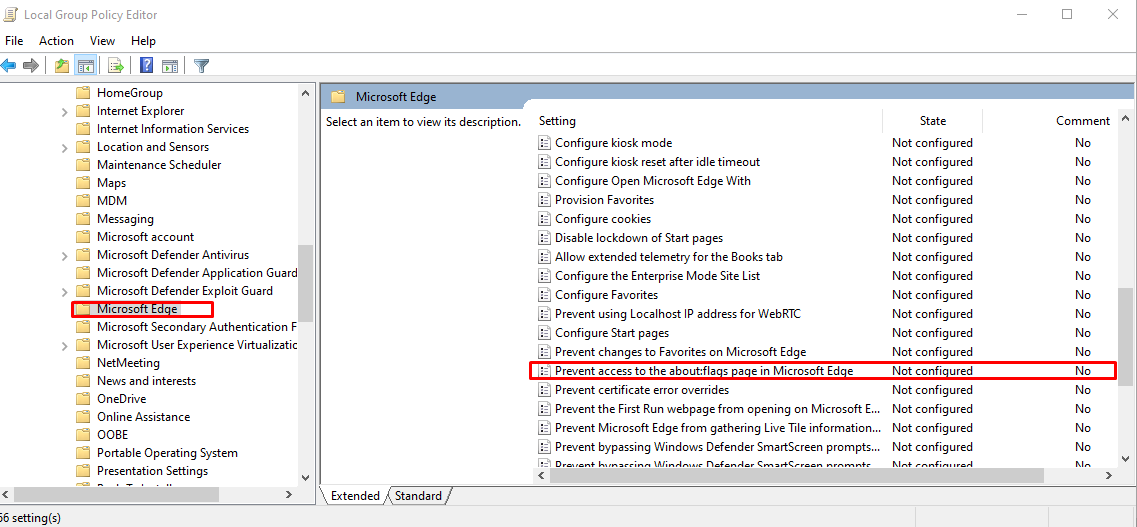
Search for the “Microsoft Edge” policy folder, double-click on the right-side tab named “Settings” and search for the highlighted policy:
Step 5: Edit Policy Setting
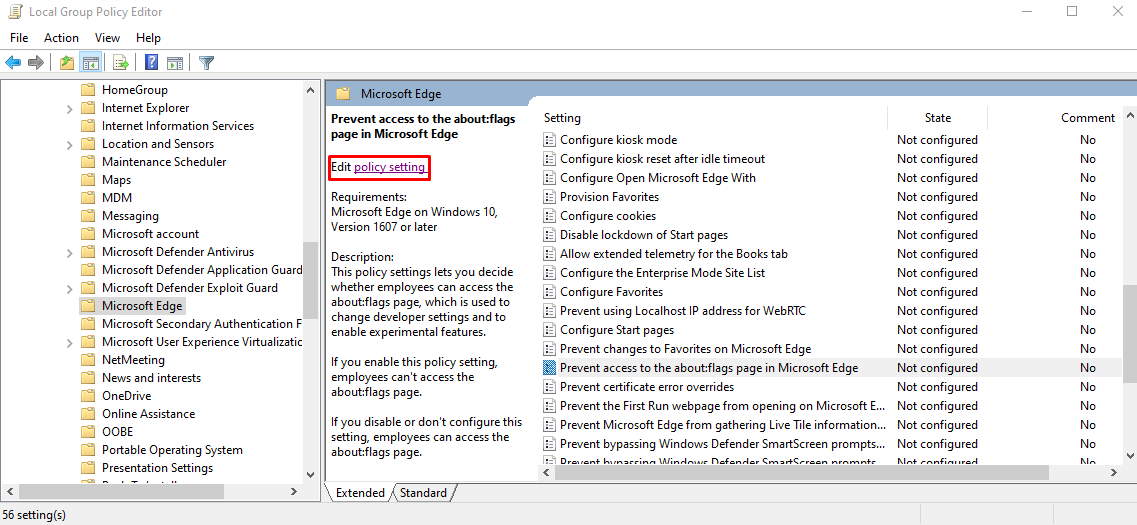
Then, click on the edit policy setting option as highlighted below:
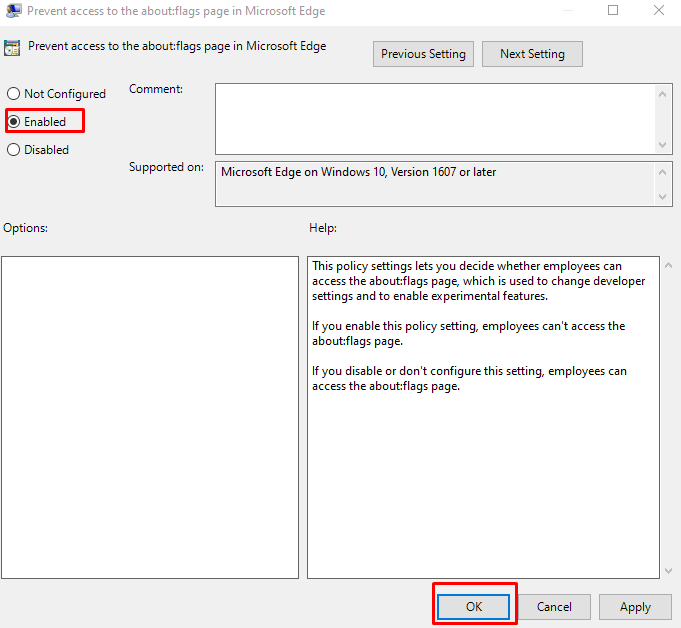
Lastly, select the “Enabled” or “Disabled” option according to our choice and press the “OK” button:
How to Enable or Disable “about:flags” by Modifying Windows Registry?
The users can modify the “Windows Registry” setting to turn on or off the “about:flags” page in Microsoft Edge. For that purpose, follow the below-given procedure:
- Open the “run” panel with the help of the “Windows + r” keys.
- Search for the registry editor by typing the “regedit”.
- Inside the registry editor locate the “Microsoft” folder and create a new named “Microsoft Edge”.
- Next, again create a new key inside the “Microsoft Edge” folder and rename it as “main”.
- After that, inside the “main” folder right-click on the left side of the registry editor window. Then, click on the “New” option, hit the “DWORD (32-bit) Value” option, and modify it with the “PreventAccessToAboutFlagsInMicrosoftEdge”.
- Lastly, enable or disable the “About:flags” page on Microsoft Edge by changing the value, such as “1” for disable and “0” for enable.
Step 1: Launch the Run Dialog Box
First, press the “Windows + r” keys to open the “Run” panel:
Step 2: Insert Text in the Dialog Box
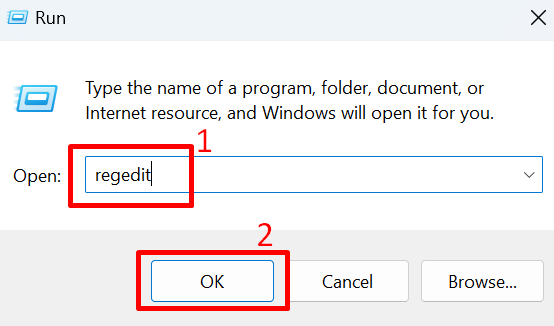
Now, add “regedit” inside the search bar and press the “OK” button:
Step 3: Registry Editor Panel
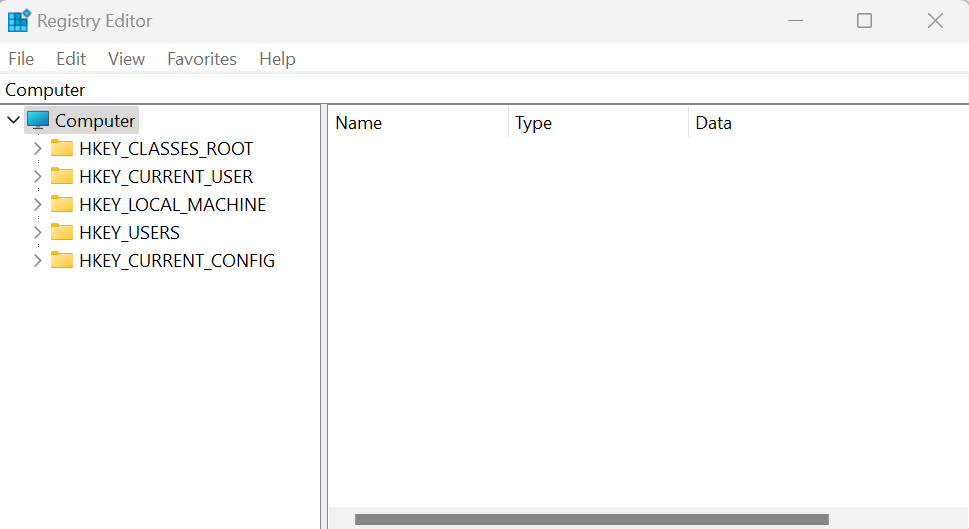
After doing so, the “Registry Editor” will appear on your screen:
Step 4: Navigate the SOFTWARE Folder
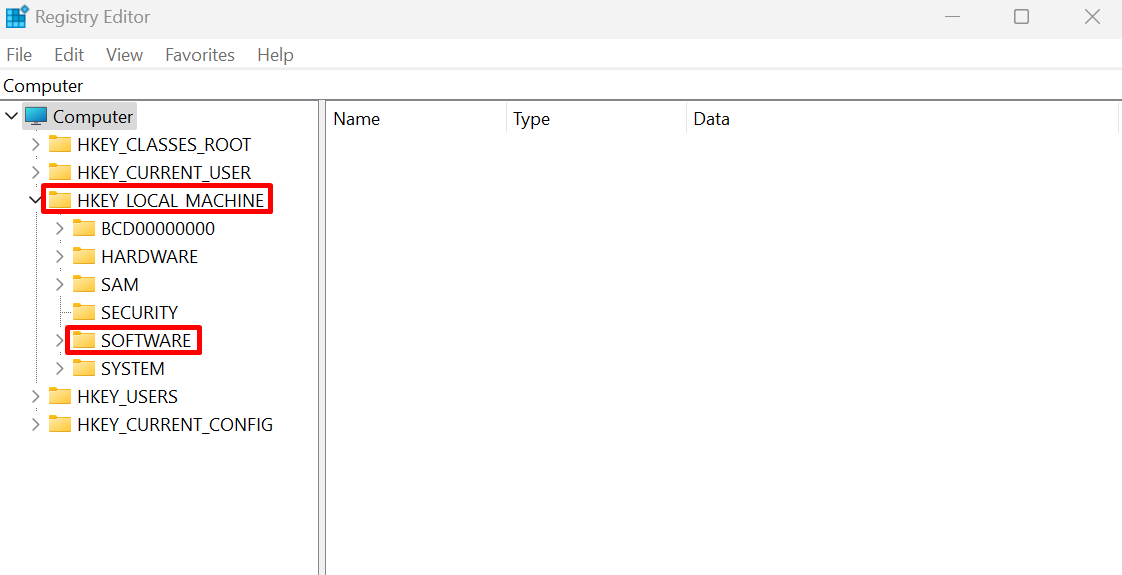
Next, locate the “SOFTWARE” folder by following the provided path:
- First, click on the “HKEY_ CURRENT_USER” arrow to expand the folder list.
- Then, hit the “SOFTWARE” folder:
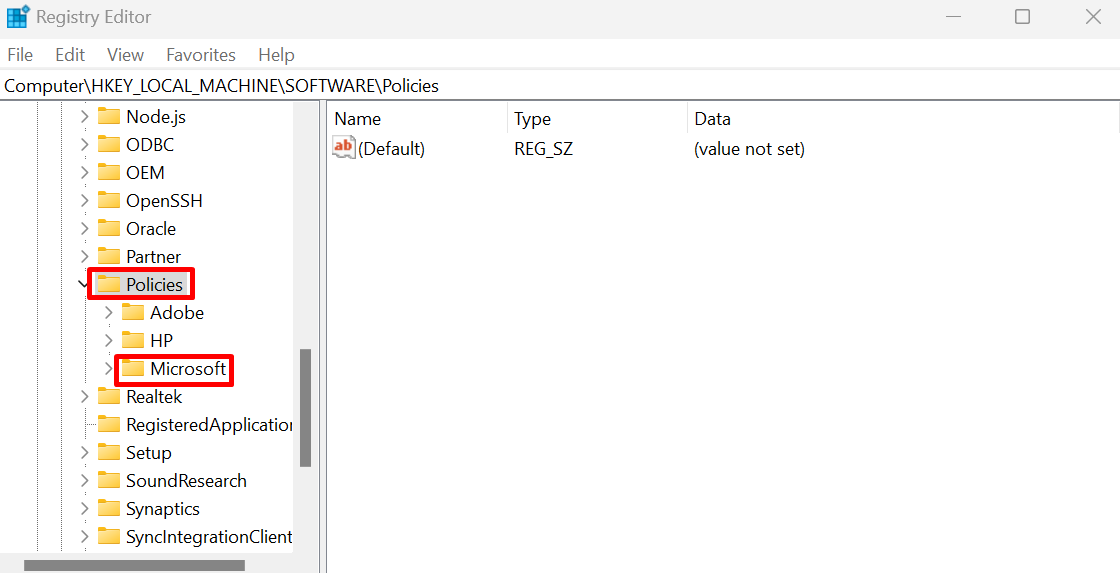
Now, scroll down to the “Policies” folder and click on it. Then, click on the “Microsoft” folder:
Step 5: Create a Key in Microsoft
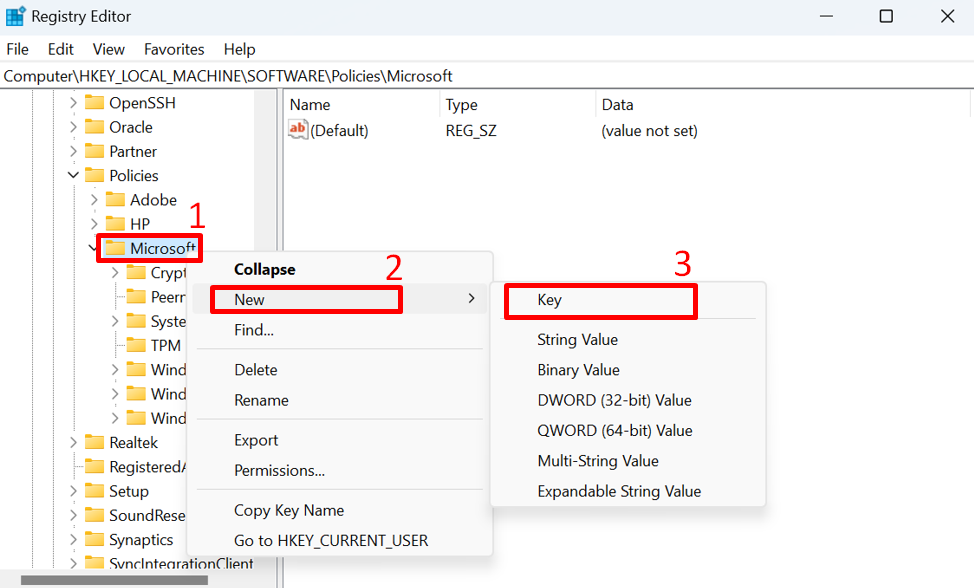
After that, click on “MicrosoftEdge” and expand it. In case, this particular folder does not exist here, you can create a new “MicrosoftEdge” by right-clicking on the “Microsoft” folder. Next, select the “New” option and click on the “Key”:
Step 6: Rename the Key as Microsoft Edge
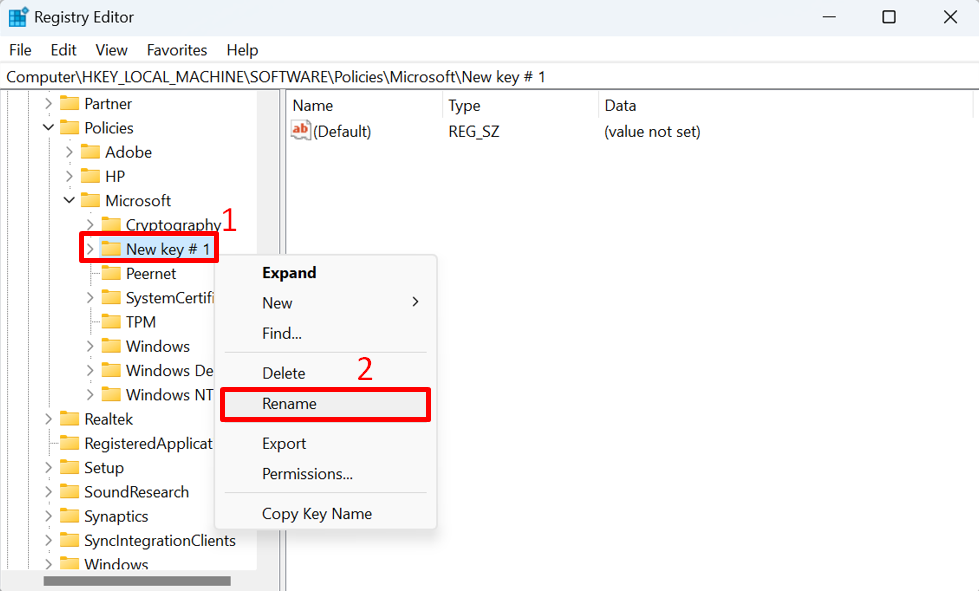
Now, rename the created key to “Microsoft Edge”. To do so, right-click on the newly created key and then hit “Rename”
Step 7: Create a Key inside Microsoft Edge Folder
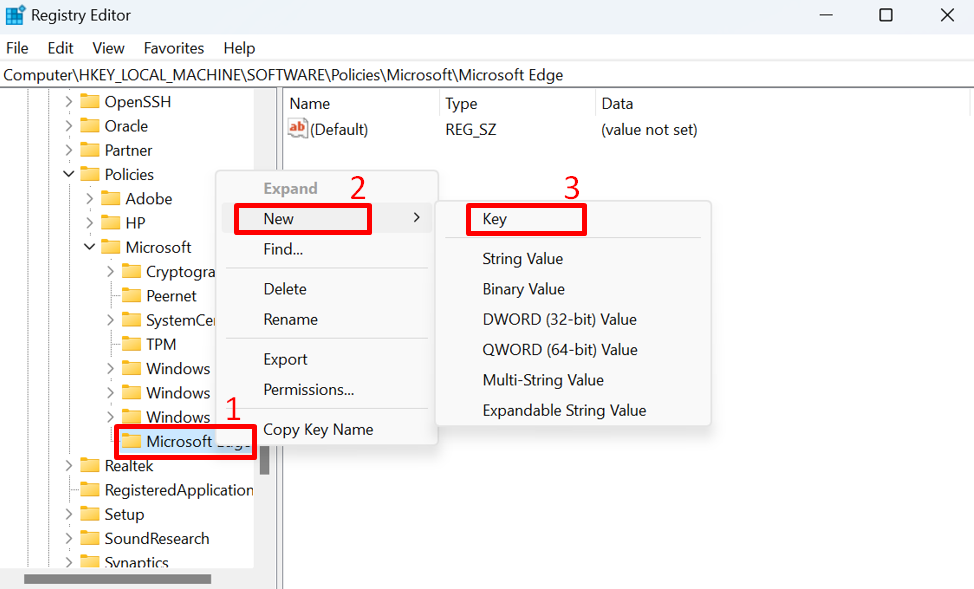
Afterward, right-click on the “Microsoft Edge” folder then go to “New” and hit “Key” to create a new key inside the “Microsoft Edge” key folder:
Step 8: Rename the Key as the Main
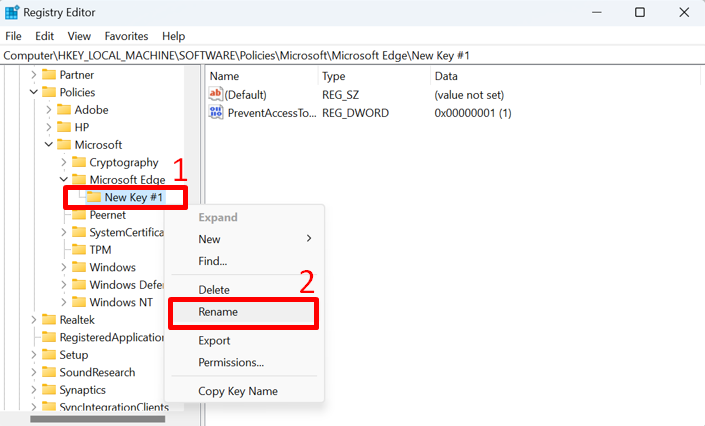
To rename a newly created key right-click on this key, then select the rename option as shown in the below-highlighted screenshot and rename the folder to “Main”:
Step 9: Create a DWORD
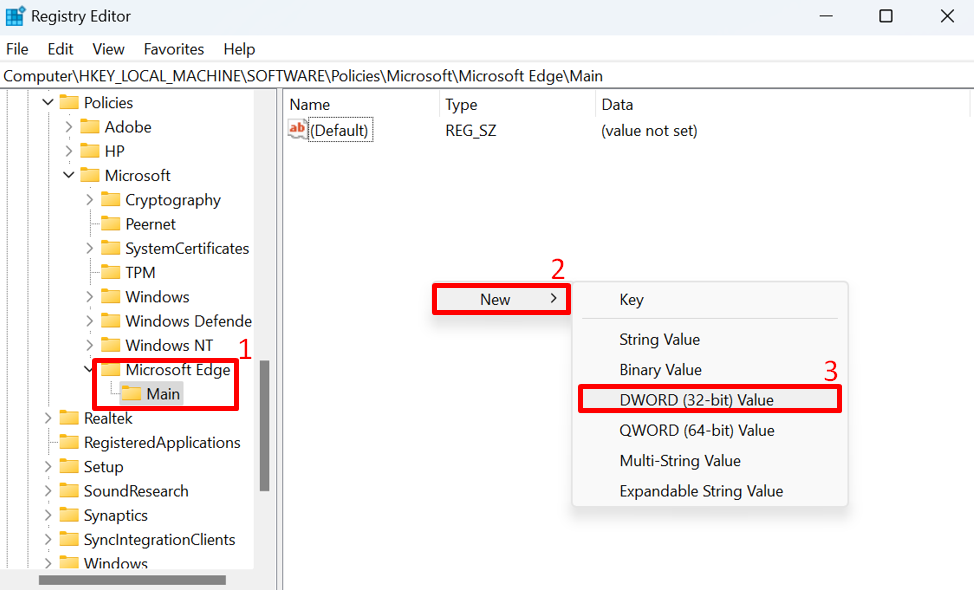
Next, choose the “Main” folder and right-click inside the registry editor window. Select the “New” option and then hit the “DWORD (32-bit) Value” option from the sub-menu:
Step 10: Rename the DWORD (32-bit) Value
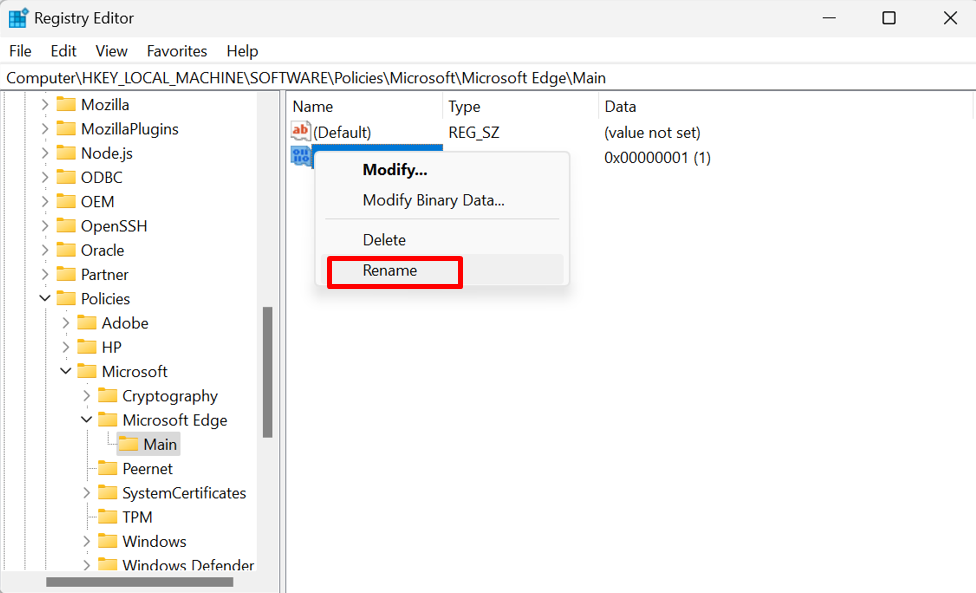
To rename the newly created “DWORD (32-bit) Value”, click on it and press the “Rename” option:
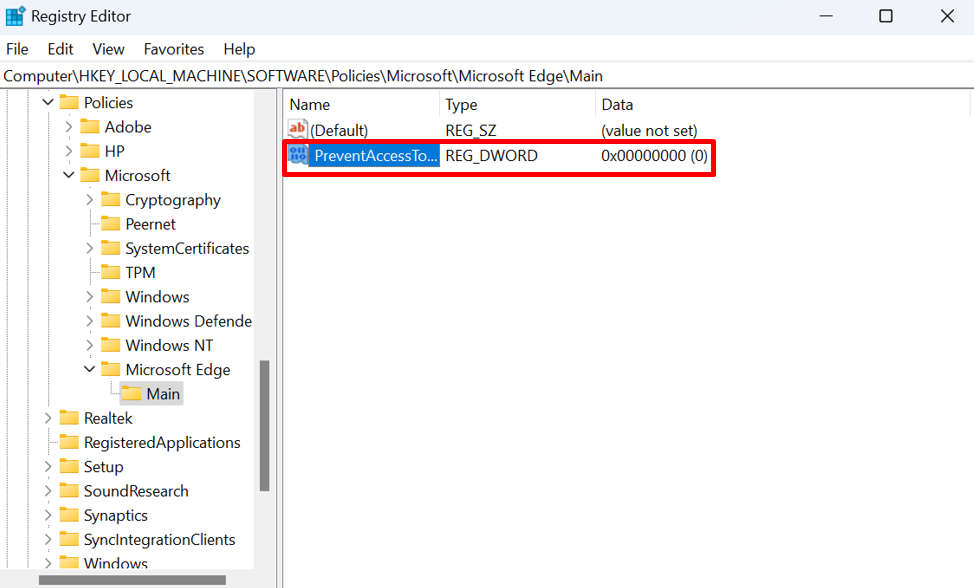
Rename the newly created DWORD as “PreventAccessToAboutFlagsInMicrosoftEdge” and hit the “Enter” button:
Step 11: Enable or Disable “About:flags” Page
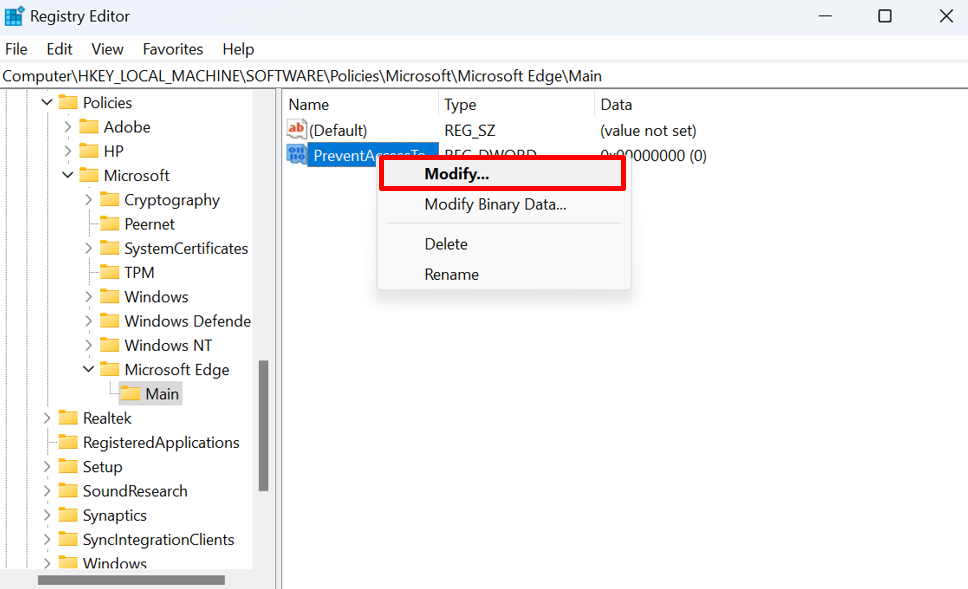
Right-click on the “PreventAccessToAboutFlagsInMicrosoftEdge” and then select the “Modify…” option to change its value:
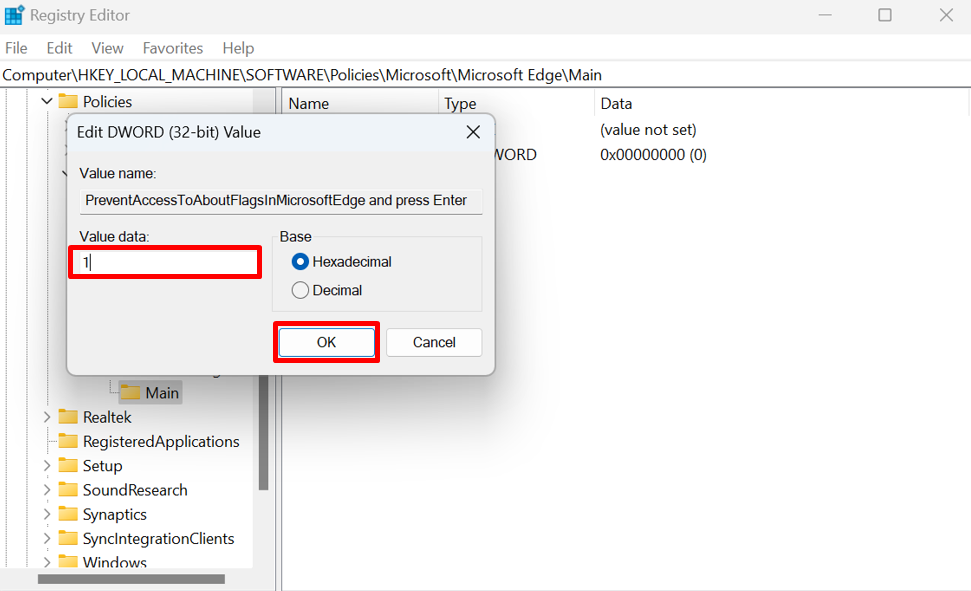
After doing so, a small prompt window will appear on your screen. Now, you can enable or disable the About:Flags Page in Microsoft Edge by providing the “Value data” as “0” for enable or “1” for disable and pressing the “OK” button:
That’s it! We have provided the easiest ways for enabling or disabling the About:Flags Page in Microsoft Edge.
Conclusion
In Microsoft Edge, the “About:Flags” pages are used for giving access to advanced settings and experimental features for developers and users who want access to enable or disable many functionalities by using advanced features. In this guide, we have demonstrated the different methods for enabling or disabling the About:Flags Page in Microsoft Edge.

