How to disable the microphone in Windows
There are multiple ways with which you can disable the microphone in Windows:
How to disable mic through taskbar speaker icon
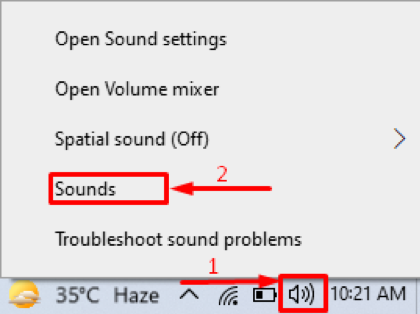
First, locate the speaker icon on your taskbar: and right-click on that icon; you will find a “Sounds” option there.
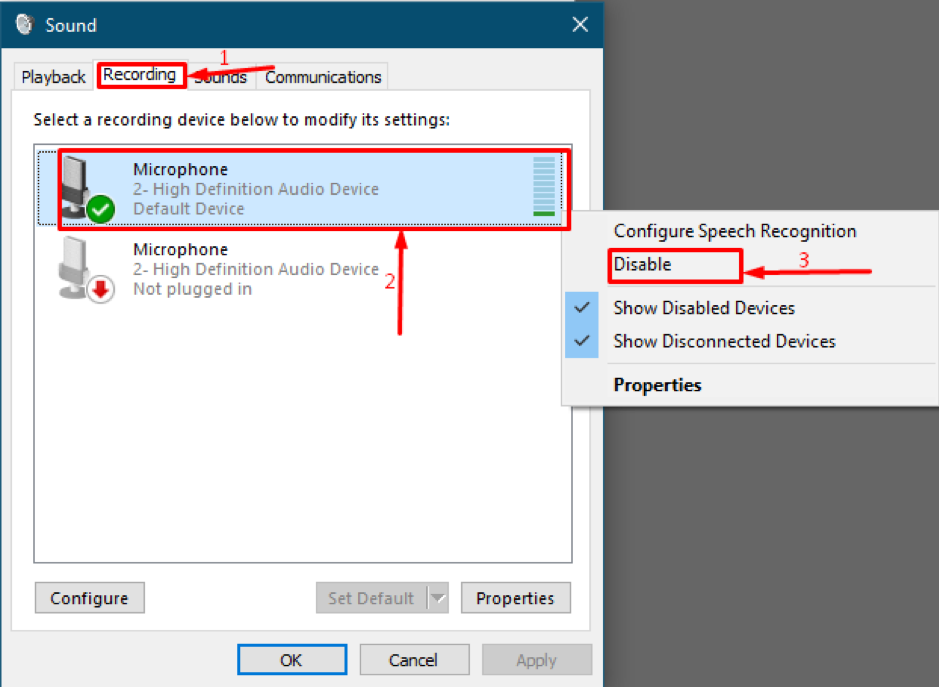
Open sounds option, you will have a window in front of you, navigate to “Recording”; you can check the built-in microphone is popping green, which means that it is enabled and can be used, to disable it; right click on the mic; you will see the “Disable” option in the context menu as given below:
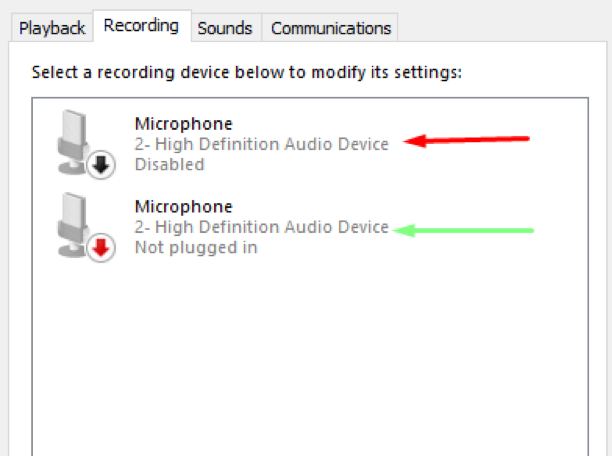
After disabling, you will get the interface shown in the image below:
If you notice any active external mic, disable it as well; moreover, if there is no such case, so the external status Microphone will be “Not plugged in”:
How to disable mic through device manager
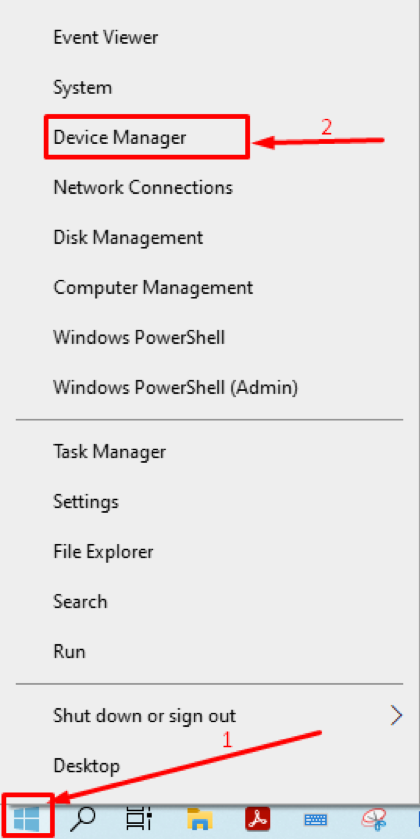
Another way you can disable your mic is through the device manager; for that, you have to open it; right-click on the “Start” icon, and look for “Device Manager”.
Once you have found it; open it and follow the instructions:
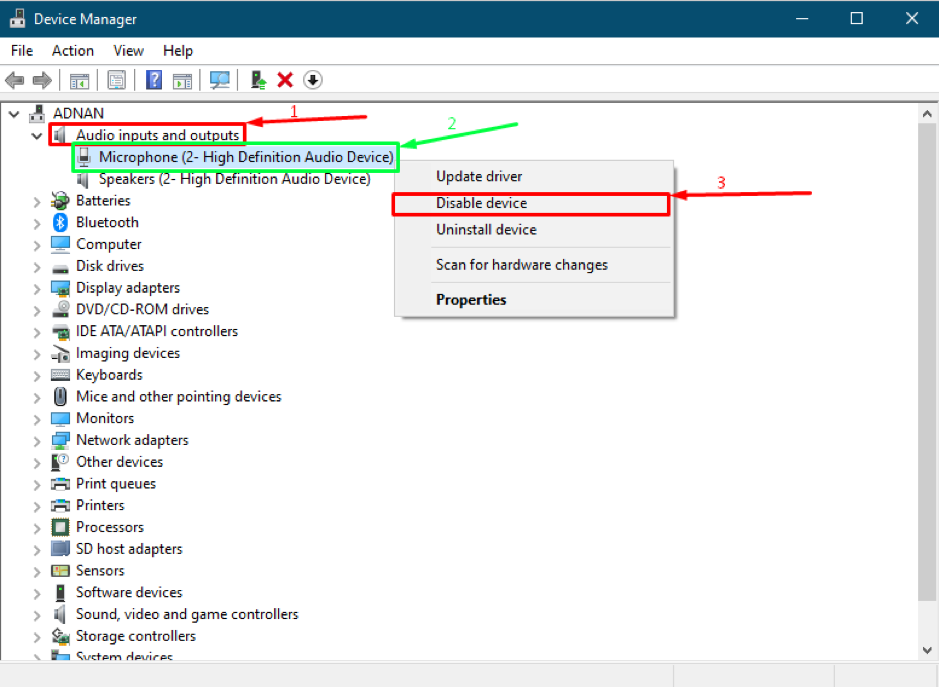
Now, search here for the “Audio inputs and outputs section” as shown below “1”, click on it and look into the drop-down menu to find the audio devices: you will find here “Microphone” audio device as shown “2”. Once you have reached “Microphone”, right-click on it. You can see the “Disable” feature:
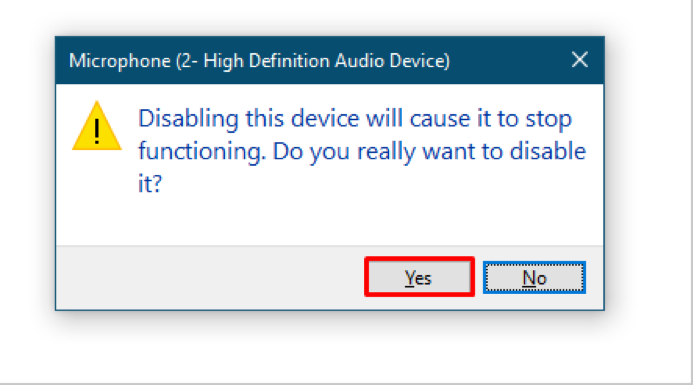
When you click on “Disable”, a warning prompt will be shown to confirm that you are making the right decision. You have to click “Yes”.
How to disable mic through system settings
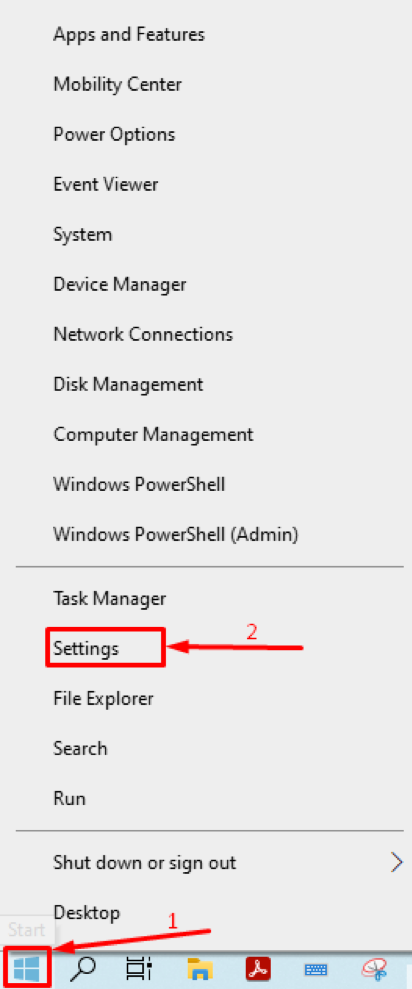
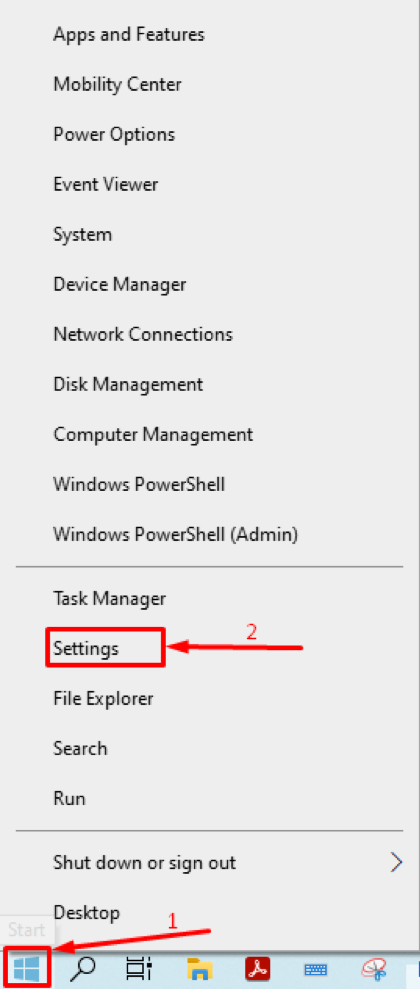
Another way to disable the microphone is by using system settings; right-click on “Start” and then navigate to “Settings” to perform this action.
After going into settings, you must navigate to “System”:
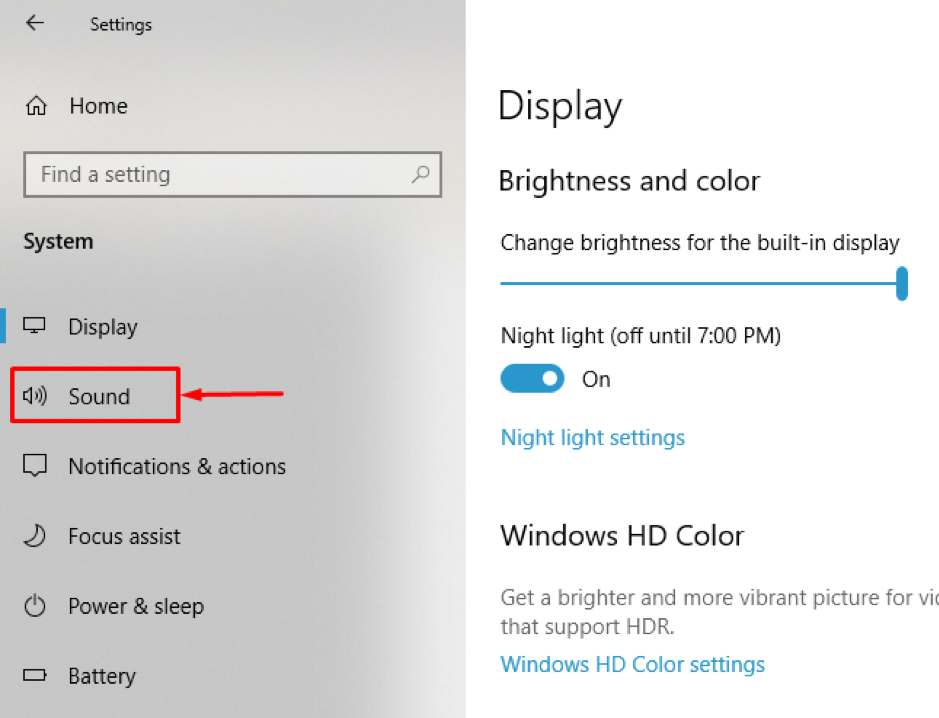
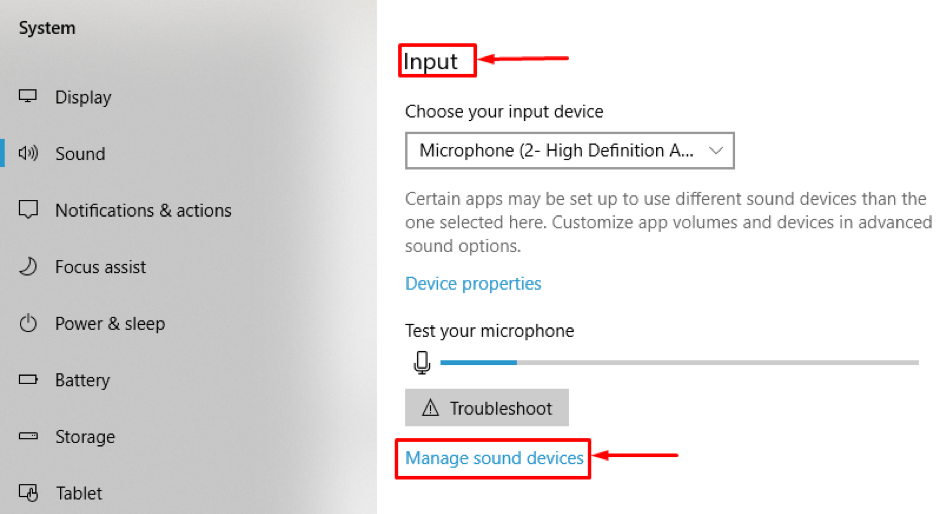
Once you open “System”, there is a menu bar on the left side that contains different system-related options; we will select “Sound” from the bar.
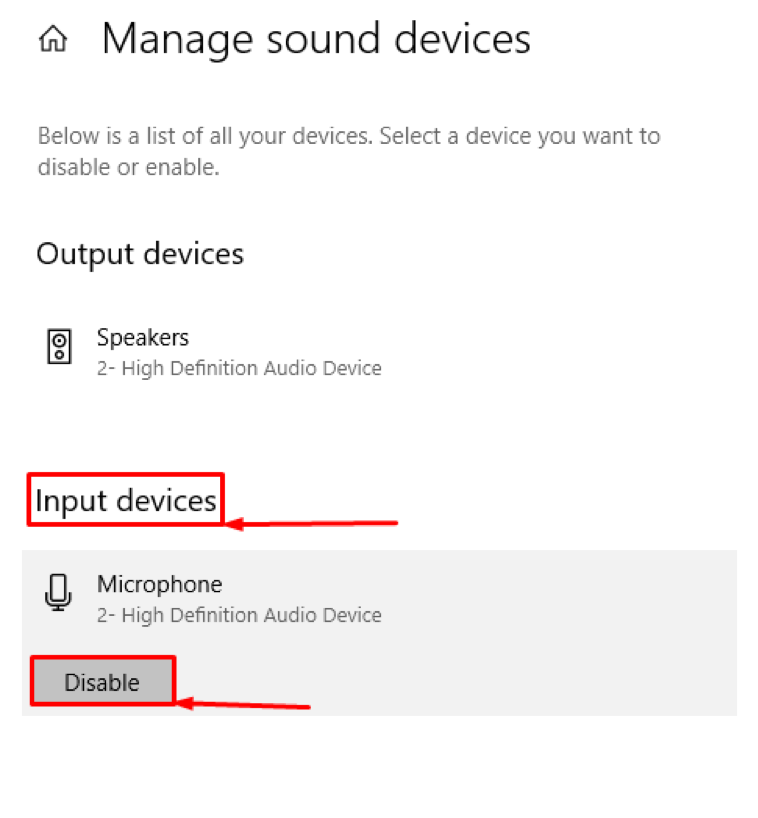
Afterward, scroll down in the “Sound” menu, and you will find “Input”; Under this option, click on “Manage Sound Devices.”
On opening this option, you will see your microphone name under “Input Devices”, click on it, and see if the microphone is enabled; it will show a “Disable” option.
How to mute the mic for a specific application in Windows
Suppose you install an application like Skype, Microsoft Teams; these applications ask you to give them access to a camera and microphone. Otherwise, they will not allow you to connect with other people; moreover, if you want to mute your mic for a specific application, steps will be helpful for you to the mute mic for any app.
So, the following steps will be helpful for you to the mute mic for any app.
At first, you have to open “Settings” by right-clicking on the “Start;
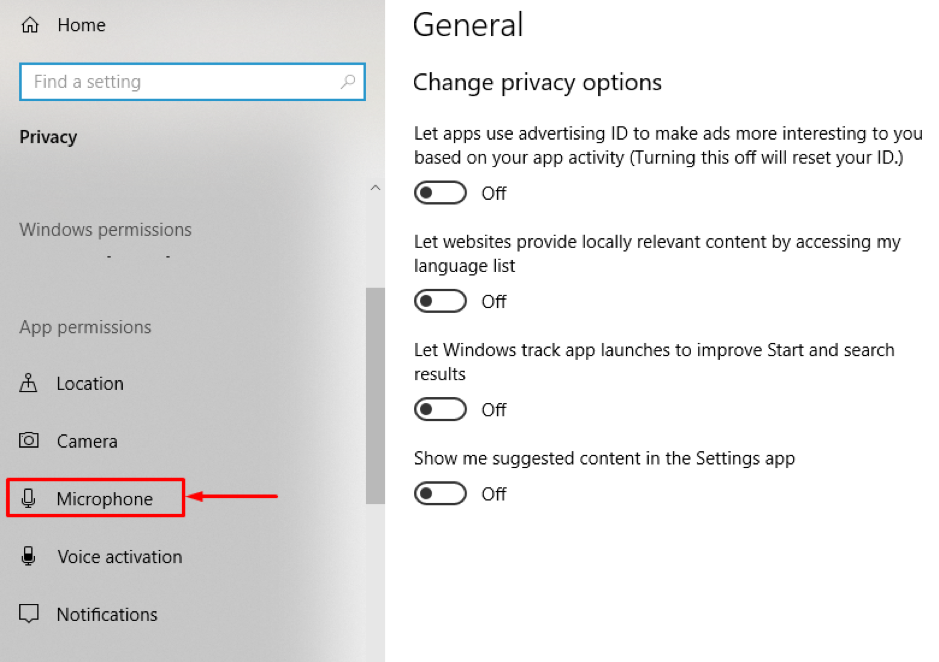
After getting into “Settings”, you have to go to “Privacy”;
As we are trying to change settings for “Microphone”, look for that inside privacy.
Once you enter the “Microphone” settings; scroll down here; you can perform two actions:
You can allow or disallow applications to access your microphone; If you disallow all, no application will access the mic. And if the permission is granted, then a specific number of applications will be allowed to use your mic. You can use the toggle button to change the permissions for any app.
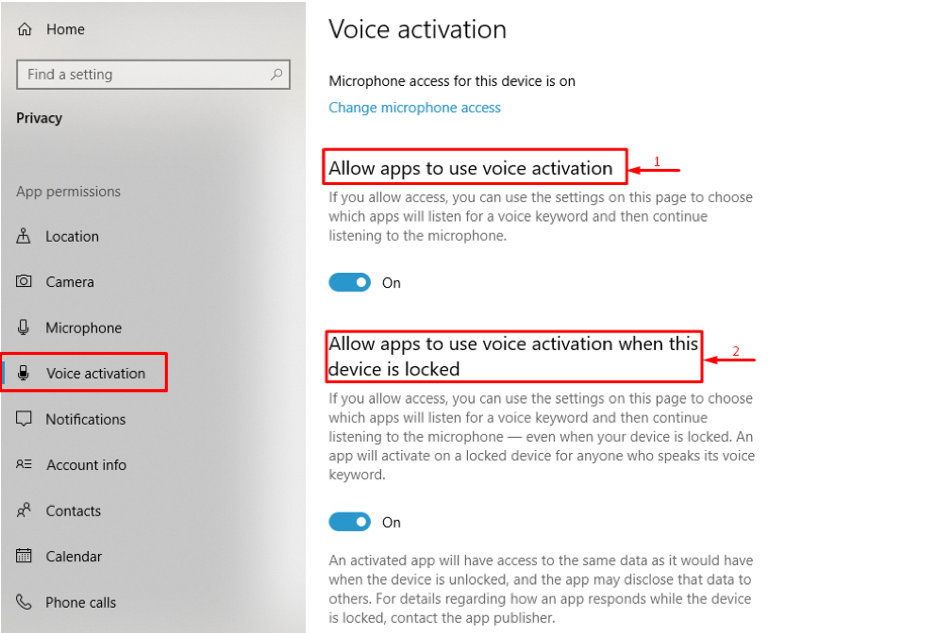
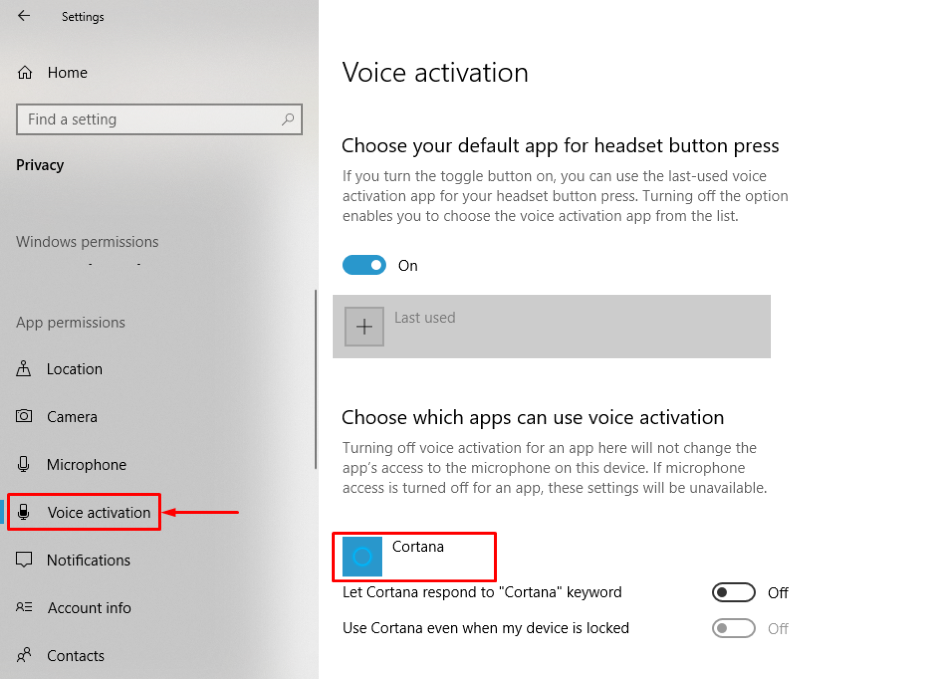
One more thing to notice is that some apps like windows10 built-in helper “Cortana” use your mic even when the device is locked until you change the settings. To restrict “Cortana” or to check if any other application is using your mic in a locked state; You have to navigate to “Settings” and then “Privacy”, scroll down here, and you will find “Voice Activation”;
Afterward, you can see two options, “Allow apps to use voice activation (1)” and “Allow apps to use voice activation when this device is locked (2)”. As option “1” shows that if you want to “Allow Apps to use voice activation,”; then your apps will keep on listening to your mic, and if option “2” is checked, then the apps will keep on listening even when the device is locked.
Moreover, to check which app uses the feature, go down in the “Voice Activation” option.
Although you can keep these settings as default, you can disable the microphone if you want a secure option.
Conclusion
After the mic invention in the 17th century, microphone technology evolved rapidly in the mid 19th and 20th centuries. The primary purpose of the mic is to communicate with the public or address a large crowd; however, the facility of the mic has been misused to breach the security of an individual or any organization.
This guide demonstrates different ways to disable the microphone on windows. However, if you have concerns related to the privacy of your system, then it is recommended to disable your microphone.

