This blog will state the approaches to cope with the malfunctioning in “Diagnostics Policy Service”.
How to Fix the “Diagnostic Policy Service is not running” Error in Windows?
To resolve the malfunctioning in the “Diagnostic Policy Service” in Windows, utilize the following fixes:
- Configure the “Diagnostic Policy Service”.
- Initiate “SFC” Scan.
- Run “DISM” Scan.
- Reinstall the Network Adapter Driver.
- Grant Administrator Privileges to the Modules.
- Apply a System Restore Via Restore Point.
Fix 1: Configure the “Diagnostic Policy Service”
The encountered error in the particular service can be due to the halted service. Therefore, initiate the “Diagnostics Policy Service” by utilizing the below-listed steps.
Step 1: Switch to “Services”
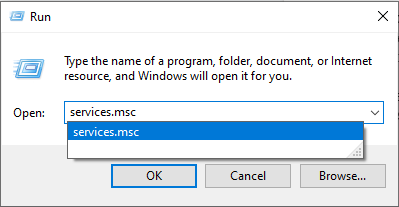
First of all, open “Services” by entering “services.msc” in the below-stated Run box:
Step 2: Locate the “Diagnostic Policy Service”
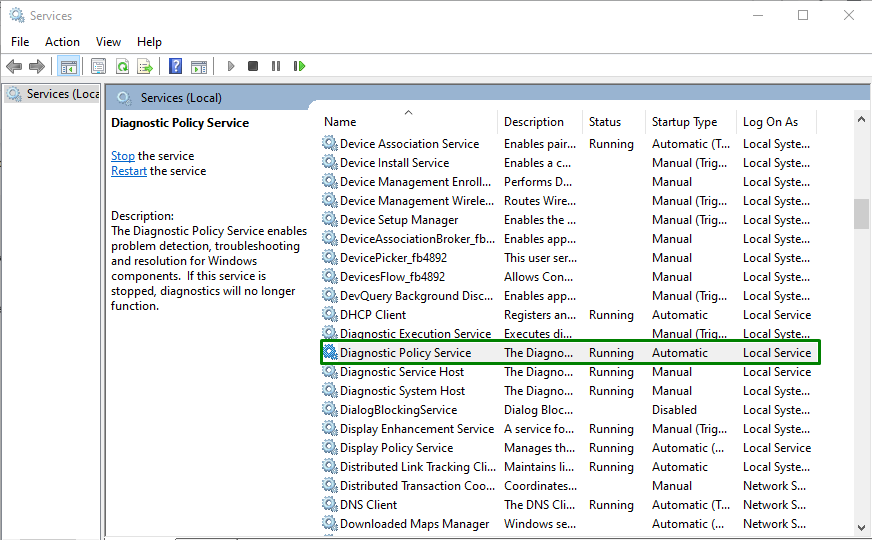
In the elevated pop-up, locate the “Diagnostic Policy Service” and double-click on it:
Step 3: Initiate the Service
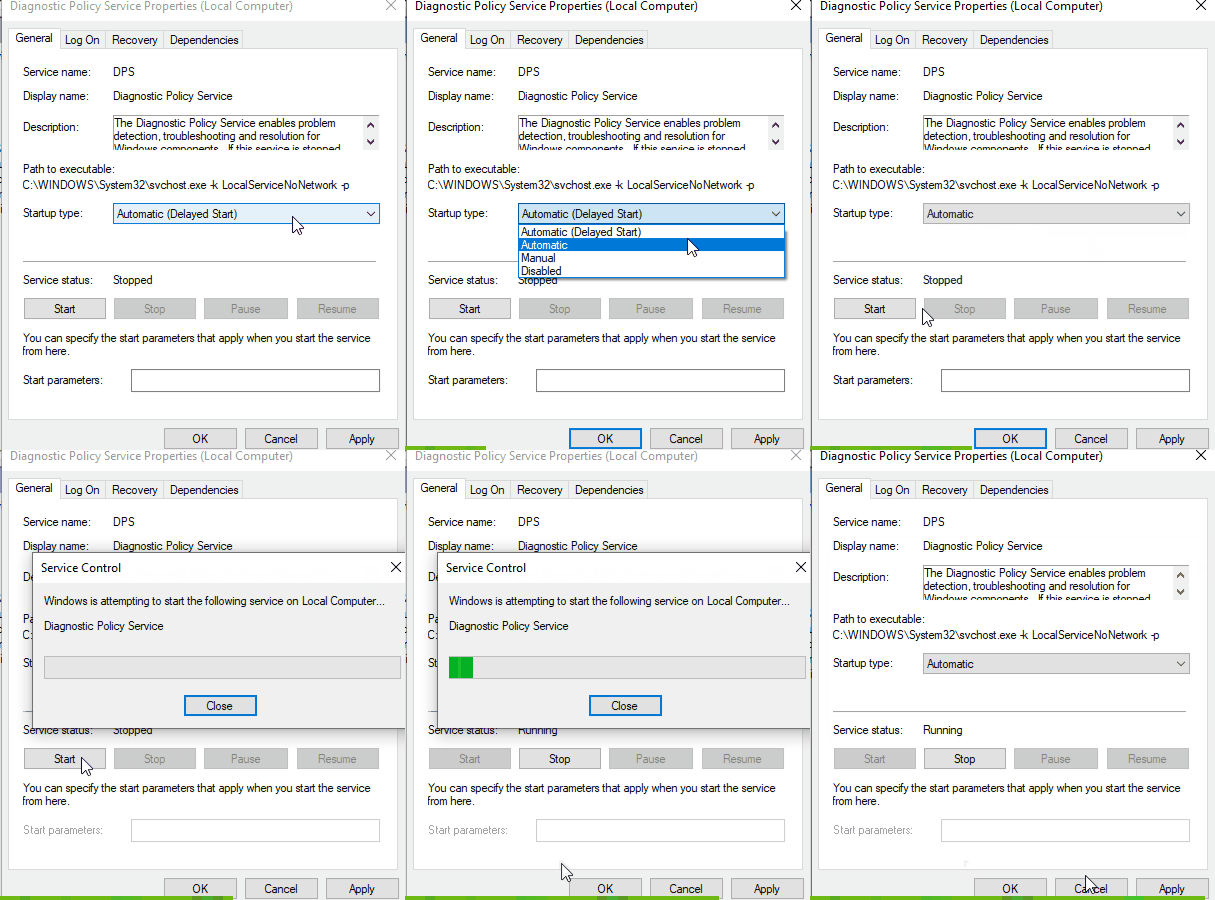
Now, configure the “Startup type” of the service as “Automatic”, and trigger the “Start” button to initiate the service:
Now, execute the “Network Diagnostics” and see if the discussed limitation vanishes.
Fix 2: Initiate “SFC” Scan
The “SFC” scans all the files in the system and replaces the malware files with a cached copy. To initiate this scan, overview the below-enlisted steps.
Step 1: Run “Command Prompt”
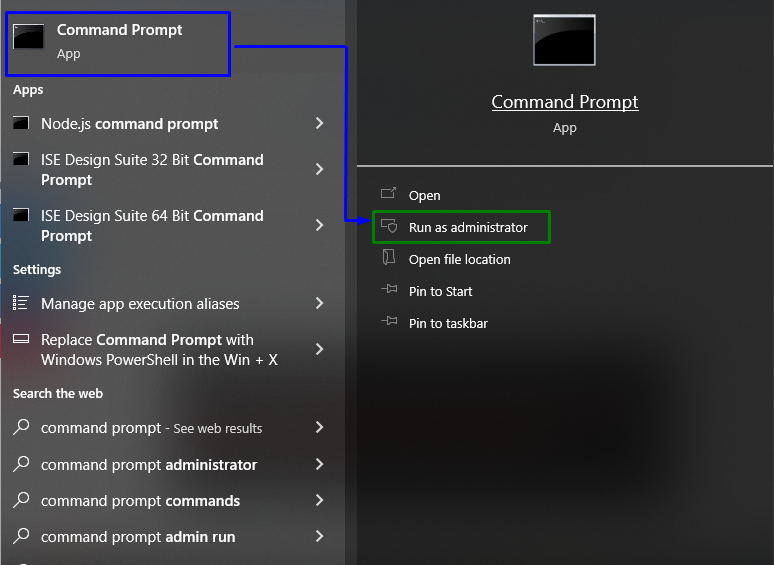
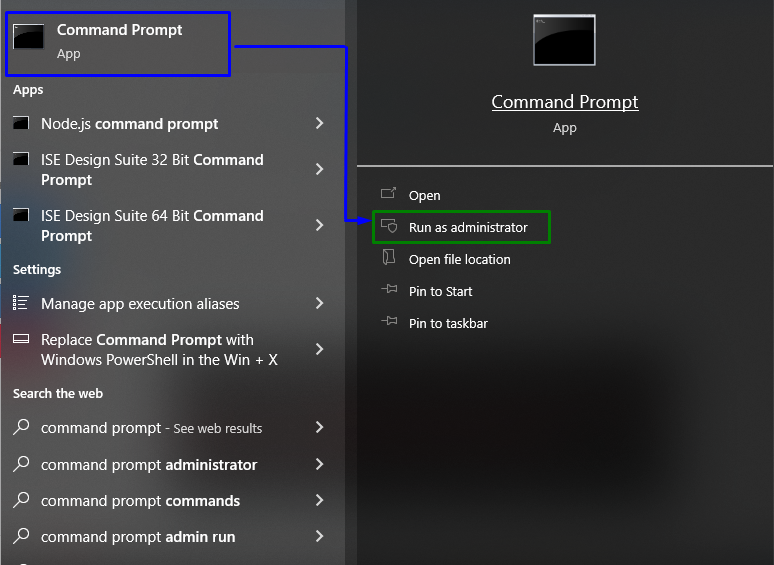
Open up the “Administrative Command Prompt”:
Step 2: Run “SFC” Scan
Then, write out the below-stated command to start a search for the corrupted/infected files:
Fix 3: Run “DISM” Scan
“DISM” scans and patches the problematic files in the component store of the Windows system image. This scan can be applied if the “sfc” scan doesn’t function properly. However, executing both of these scans is more effective.
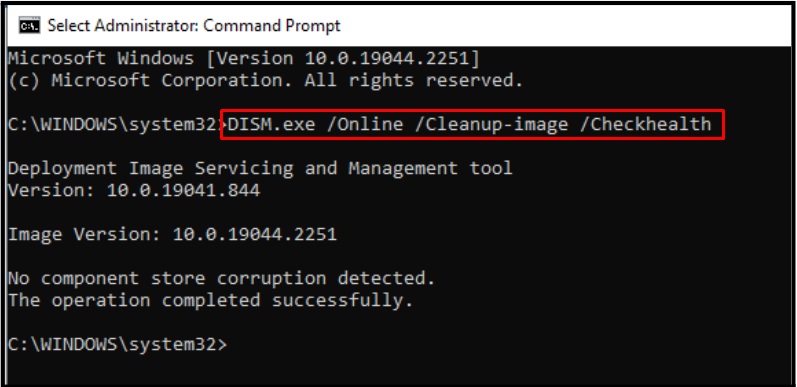
To initiate this scan, firstly, check out the system image’s health:
After that, apply a scan upon the system image’s health:
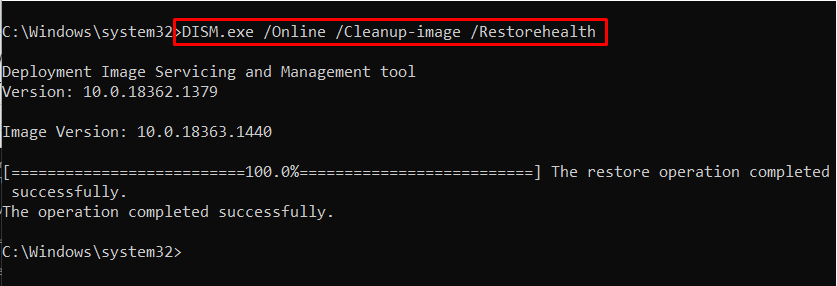
The following command will restore the system image’s health and complete the scanning process:
After applying all of these commands, check if this approach worked out for you. Else, consider the next solution.
Fix 4: Reinstall the Network Adapter Driver
The malfunctioning in the “Diagnostics Policy Service” can also be due to the faulty network adapter driver. Therefore, try reinstalling the network adapter driver by utilizing the below-enlisted steps.
Step 1: Navigate to “Device Manager”
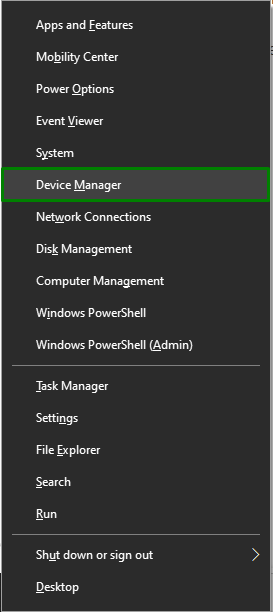
First of all, trigger the “Windows + X” shortcut keys and select “Device Manager” to navigate to the Device Manager:
Step 2: Uninstall the Network Adapter Driver
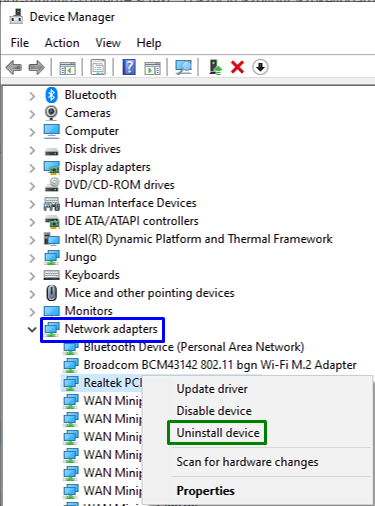
After that, extend the “Network adapters” category, right-click on the highlighted driver and select “Uninstall device”:
Step 3: Reinstall the Driver
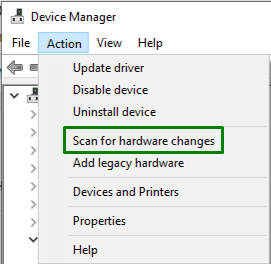
To reinstall the network adapter driver, open the “Actions” tab in the Device Manager and select “Scan for hardware changes”:
This will re-install the network adapter in an automated manner, and the faced error will likely sort out.
Fix 5: Grant Administrator Privileges to the Modules
The discussed limitation can also be faced if the “network service” and “local service administrator” modules lack administrative privileges as these particular modules need entire access to the system. To allocate the privileges, overview the below-given steps.
Step 1: Open the “Administrative Command Prompt”
Open the Command Prompt being an “administrator”:
Step 2: Allocate Administrator Privileges to Modules
Now, enter the below-given commands one by one to assign the administrator privileges to both of the discussed modules:
Now, input the following command for the “local service”:
Now, try executing the diagnostics again, and the encountered issue will be resolved.
Fix 6: Apply a System Restore Via Restore Point
If none of the above solutions worked out, try restoring the system files from a particular system restore point by going through the following steps.
Step 1: Navigate to “System Properties”
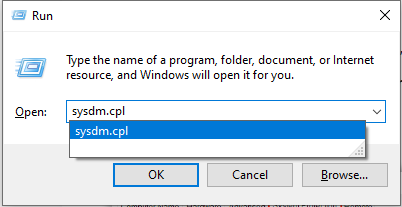
Firstly, open the “System Properties” by typing “sysdm.cpl” in the below-given Run box:
Step 2: Switch to “System Restore”
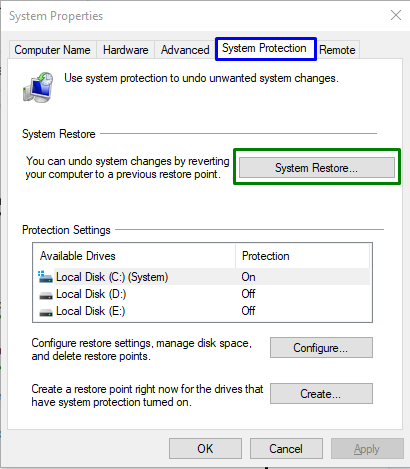
Now, trigger the highlighted button to navigate to “System Restore”:
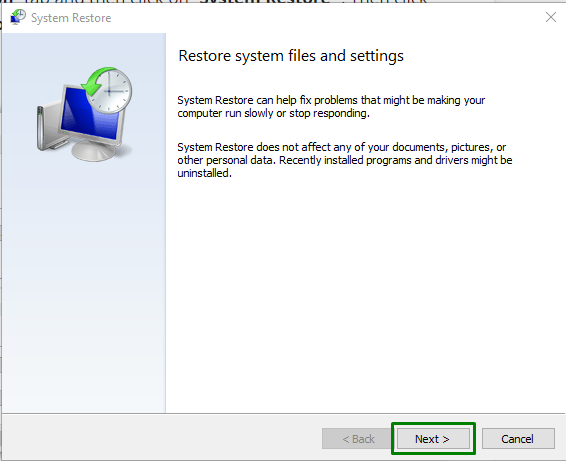
In the following pop-up, hit the “Next” button:
Step 3: Choose a Restore Point
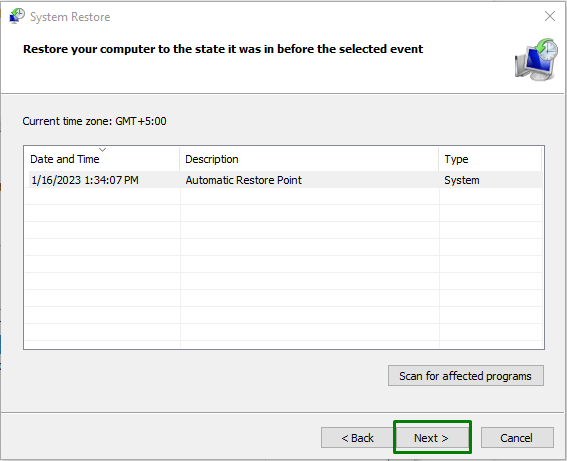
In the below-stated pop-up, select the “Restore Point” you need to restore from and trigger the “Next” button:
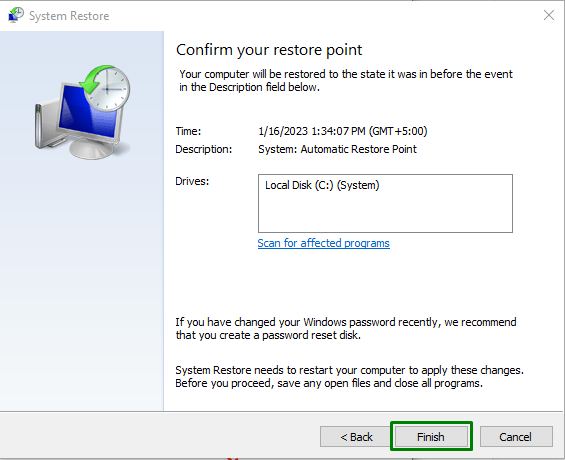
Finally, confirm the opted restore point by clicking on the “Finish” button:
After applying all the steps, the discussed service will work properly.
Conclusion
To resolve the malfunctioning in the“Diagnostics Policy Service” in Windows, configure the “Diagnostics Policy Service”, initiate the “SFC” scan, run the “DISM” scan, reinstall the Network Adapter driver, grant administrator privileges to the modules, or apply a System Restore via restore point. This article discussed the approaches to cope with the disruption in the “Diagnostics Policy Service” in Windows.

