In this tutorial, we will learn how we can deploy an Apache Kafka cluster using the docker. This allows us to use the provided docker image to quickly spin up a Kafka cluster in almost any environment.
Let us start with the basics and discuss what Kafka is.
What Is Apache Kafka?
Apache Kafka is a free, open-source, highly scalable, distributed, and fault-tolerant publish-subscribe messaging system. It is designed to handle a high volume, high throughput, and real-time data stream, making it suitable for many use cases including log aggregation, real-time analytics, and event-driven architectures.
Kafka is based on a distributed architecture which allows it to handle large amounts of data across multiple servers. It uses a publish-subscribe model where the producers send messages to the topics and the consumers subscribe to them to receive them. This allows for decoupled communication between the producers and consumers, providing high scalability and flexibility.
What Is the Docker Compose
Docker compose refers to a docker plugin or tool for defining and running multi-container applications. Docker composes us to define the container configuration in a YAML file. The configuration file includes the container specifications such as the services, networks, and volumes that are required by an application.
Using the docker-compose command, we can create and start multiple containers with a single command.
Installing the Docker and Docker Compose
The first step is to ensure that you installed the docker on your local machine. You can check the following resources to learn more:
- https://linuxhint.com/install_configure_docker_ubuntu/
- https://linuxhint.com/install-docker-debian/
- https://linuxhint.com/install_docker_debian_10/
- https://linuxhint.com/install-docker-ubuntu-22-04/
- https://linuxhint.com/install-docker-on-pop_os/
- https://linuxhint.com/how-to-install-docker-desktop-windows/
- https://linuxhint.com/install-use-docker-centos-8/
- https://linuxhint.com/install_docker_on_raspbian_os/
As of writing this tutorial, installing the docker compose requires installing the Docker desktop on your target machine. Hence, installing the docker compose as a standalone unit is deprecated.
Once we install the Docker, we can configure the YAML file. This file contains all the details that we need to spin up a Kafka cluster using a docker container.
Setting up the Docker-Compose.YAML
Create the docker-compose.yaml and edit with your favorite text editor:
$ vim docker-compose.yaml
Next, add the docker configuration file as shown in the following:
services:
zookeeper:
image: bitnami/zookeeper:3.8
ports:
- "2181:2181"
volumes:
- "zookeeper_data:/bitnami"
environment:
- ALLOW_ANONYMOUS_LOGIN=yes
kafka:
image: docker.io/bitnami/kafka:3.3
ports:
- "9092:9092"
volumes:
- "kafka_data:/bitnami"
environment:
- KAFKA_CFG_ZOOKEEPER_CONNECT=zookeeper:2181
- ALLOW_PLAINTEXT_LISTENER=yes
depends_on:
- zookeeper
volumes:
zookeeper_data:
driver: local
kafka_data:
driver: local
The example docker file sets up a Zookeeper and a Kafka cluster where the Kafka cluster is connected to the Zookeeper service for coordination. The file also configures the ports and environment variables for each service to allow for communication and access to the services.
We also set up the named volumes to persist the data of the services even if the containers are restarted or recreated.
Let us break down the previous file into simple sections:
We start with the Zookeeper service using the bitnami/zookeeper:3.8 image. This image then maps the port 2181 on the host machine to port 2181 on the container. We also set the ALLOW_ANONYMOUS_LOGIN environment variable to “yes”. Finally, we set the volume on which the service stores the data as zookeeper_data volume.
The second block defines the details to set up the Kafka service. In this case, we use the docker.io/bitnami/kafka:3.3 image which maps the host port 9092 to the container port 9092. Similarly, we also define the KAFKA_CFG_ZOOKEEPER_CONNECT environment variable and set its value to the address of Zookeeper as mapped to port 2181. The second environment variable that we define in this section is the ALLOW_PLAINTEXT_LISTENER environment variable. Setting the value of this environment variable to “yes” allows for unsecured traffic to the Kafka cluster.
Finally, we provide the volume on which the Kafka service stores its data.
To ensure that the docker configures the volumes for Zookeeper and Kafka, we need to define them as shown in the volumes section. This sets up the zookeeper_data and kafka_data volumes. Both volumes use the local driver which means that the data is stored in the host machine.
There you have it! A simple configuration file which allows you to spin up a Kafka container using docker in simple steps.
Running the Container
To ensure that the docker is running, we can run the container from the YAML file with the following command:
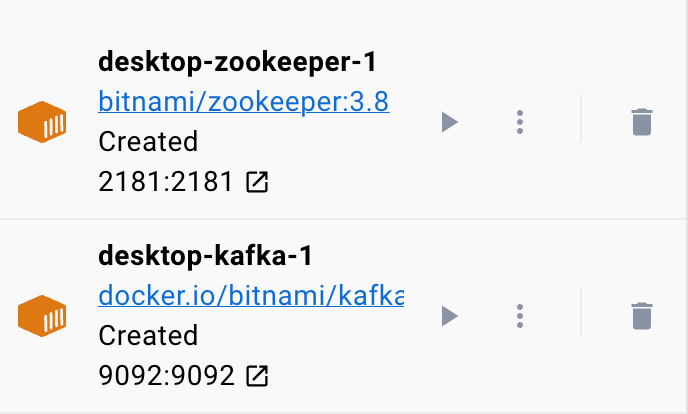
The command should locate the YAML configuration file and run the container with the specified values:
Conclusion
You now learned how you can configure and run the Apache Kafka from a docker compose YAML configuration file.

