How to Create JSON from SQLite?
To create JSON from SQLite, you can adhere to these steps.
Step 1: Install SQLite
Before we can start creating JSON from SQLite, we must first install SQLite on our computer. Follow the guide here to easily install SQLite on your system.
Step 2: Create Tables and Insert Data
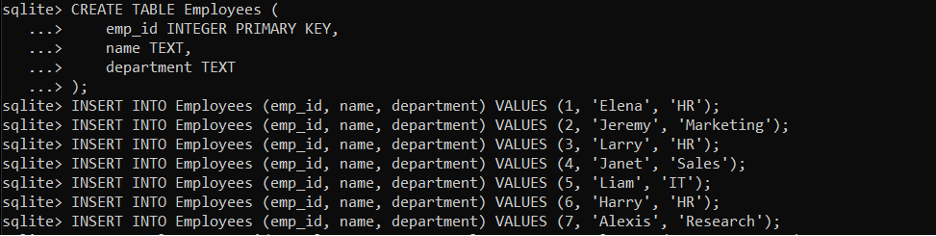
After installing SQLite, we can proceed to open it in the Command-Line Interface and create tables that will store our data. Using the CREATE TABLE command and the table name, column names, and data types, we may construct a table. A table named Employees, for instance, is created with columns for the employee’s id, name, and department by the following co
emp_id INTEGER PRIMARY KEY,
name TEXT,
department TEXT
);
sqlite> INSERT INTO Employees (emp_id, name, department) VALUES (1, 'Elena', 'HR');
sqlite> INSERT INTO Employees (emp_id, name, department) VALUES (2, 'Jeremy', 'Marketing');
sqlite> INSERT INTO Employees (emp_id, name, department) VALUES (3, 'Larry', 'HR');
sqlite> INSERT INTO Employees (emp_id, name, department) VALUES (4, 'Janet', 'Sales');
sqlite> INSERT INTO Employees (emp_id, name, department) VALUES (5, 'Liam', 'IT');
sqlite> INSERT INTO Employees (emp_id, name, department) VALUES (6, 'Harry', 'HR');
sqlite> INSERT INTO Employees (emp_id, name, department) VALUES (7, 'Alexis', 'Research');
The Employees table is created with the CREATE TABLE command. It has three columns: the primary key, emp_id, of type INTEGER, name, of type TEXT, and department, of type TEXT. Each employee’s identity and uniqueness are guaranteed by the primary key.
These instructions insert the Employees database with sample data. The columns are listed clearly in each INSERT statement, followed by the relevant values for each column. In this fashion, each employee is given a special emp_id along with their name and department.
Step 3: Export SQLite Data as JSON
To export the SQLite data as JSON, we can leverage the built-in SQLite commands that allow us to format the query results in various ways, including JSON. In the CMD, run the following command:
![]()
This command instructs SQLite to format the output in JSON format.
Step 4: Verify the JSON Mode
JSON mode can be verified by this command.

Step 5: View the Table in JSON Mode
Next, execute the SQLite query to view the contents of Employees table in JSON Format:

The query result will now be formatted as JSON.
Step 6: Revert the Mode from JSON
JSON Mode can be reverted to the Column Format with the following command:
![]()
Step 7: Print Tables in Column Mode
Now we will print the Employees table back in the Column Format using the following command:

As you can see, the records of the table are displayed in the Column Format.
Conclusion
Creating JSON from SQLite is a useful skill to have for anyone who works with SQLite databases. By following the steps outlined in this essay, we can easily export data from SQLite to JSON format, and import it back into SQLite if needed. This process can be particularly useful when you need to exchange data with systems that expect JSON as the input format.