Snort is an open-source Intrusion Detection System (IDS) for network monitoring. By reading this tutorial, you will learn how to install Snort both on Debian and CentOS and set up a custom Snort configuration and rules.
This document includes real scenario attack detection.
All explanations in this tutorial include real scenario example screenshots, making it easy for any Linux user to understand how Snort works independently from his expertise level.
Installing Snort (Debian)
This section explains how to install Snort on Debian-based systems first; after Debian installation instructions, you’ll find steps to install it on CentOS.
Before installing Snort on Debian-based Linux distributions, update your system repositories by running the following command:
After updating repositories, install Snort using the following command:
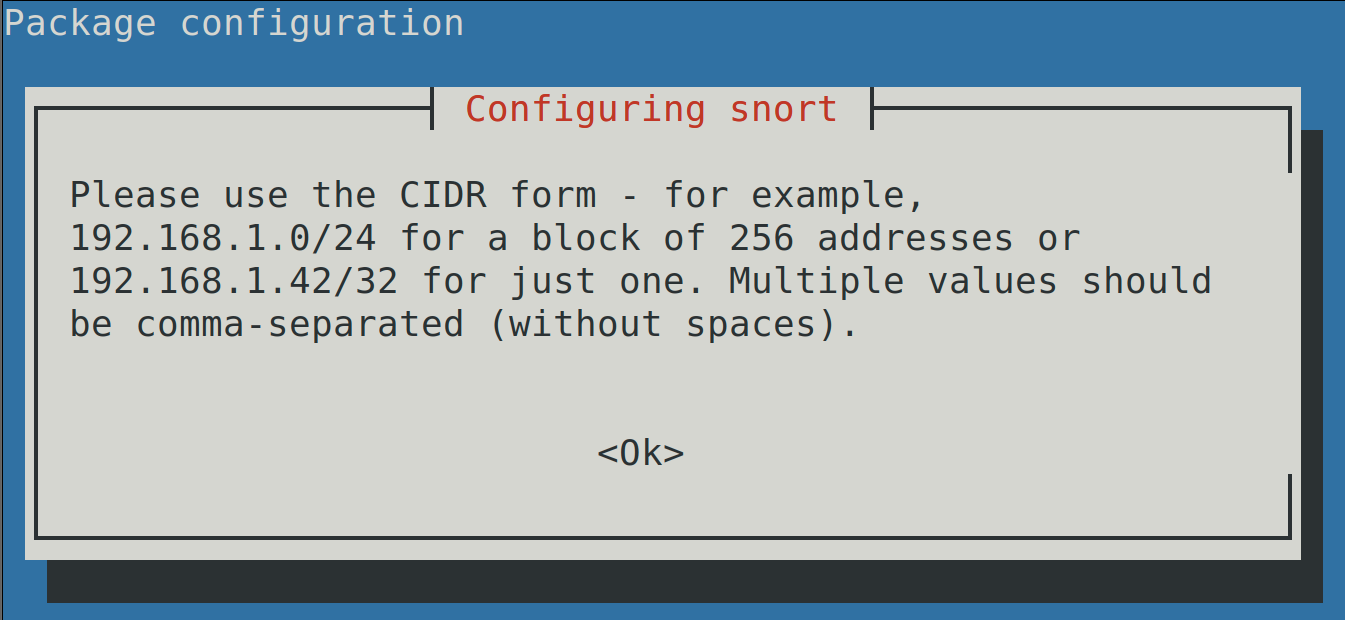
The installation process will inform you that the syntax to define network addresses in the configuration file is CIDR (Classless Inter-Domain Routing). Press ENTER to continue with the installation.
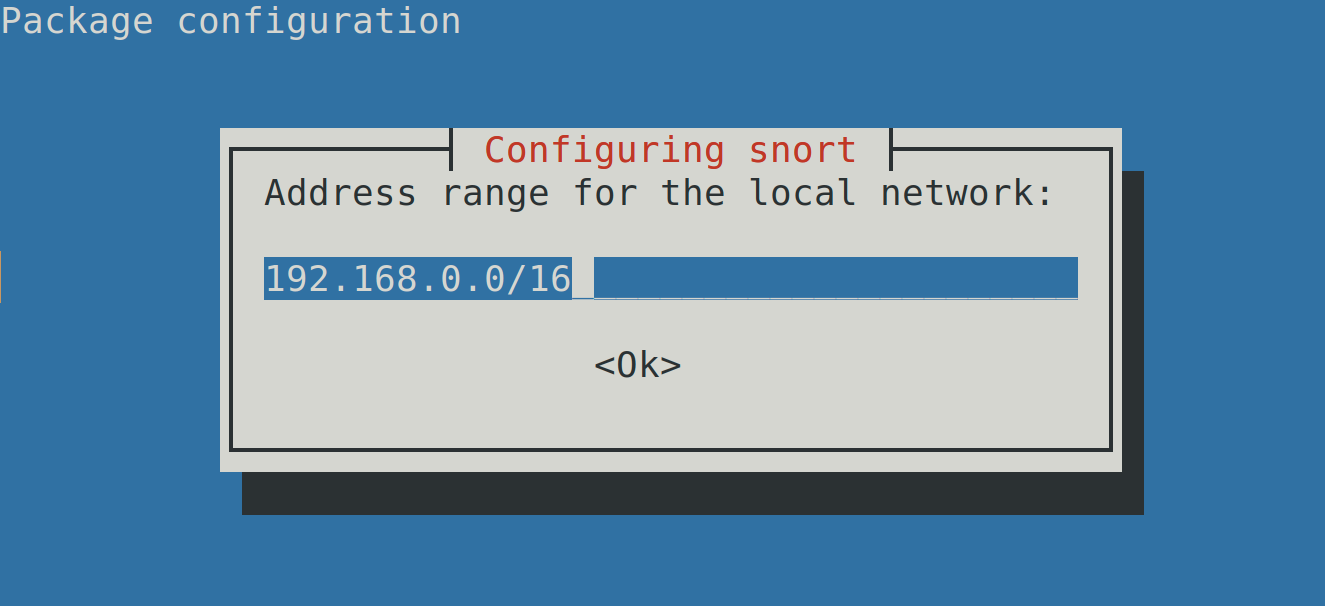
The installer will automatically detect your network structure. In this step, check if the detection is correct and fix it if necessary. Then, press ENTER.
After pressing ENTER, the installation will conclude.
Installing Snort (CentOS)
To install Snort on CentOS, download the last Snort rpm package for CentOS at https://www.snort.org/downloads#snort-downloads.
Then, run the following command, where <Version> must be replaced with the Snort version you downloaded from the previous link:
Important for Debian Users
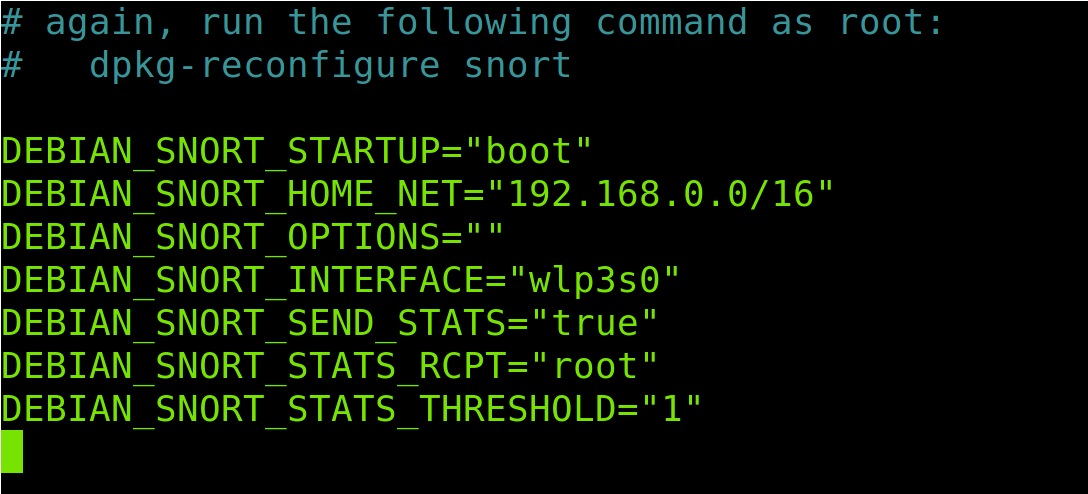
Debian Linux overwrites some options related to network settings in the Snort default configuration file. Rewriting options are fetched from the OS. Under the Snort directory’s settings, there is the /etc/snort/snort.debian.conf file where Debian network settings are imported.
Therefore, if you use Debian first, open the /etc/snort/snort.debian.conf file to check the configuration file and edit it if necessary, using the following command:
As you can see, in my case, the default configuration fetched from the OS is correct.
Note: If network settings are not correct in your case, run sudo dpkg-reconfigure snort
If your settings are correct, press Ctrl+Q to quit.
Configuring Snort
This section includes instructions for the initial Snort configuration.
To configure Snort, open the /etc/snort/snort.conf using nano, vi, or any text editor.
Inside the configuration file, find the following line:
You can add your network or specific IP addresses. To add to your network, replace the line with the following, where x.x.x.x/x must be replaced with a CIDR address:
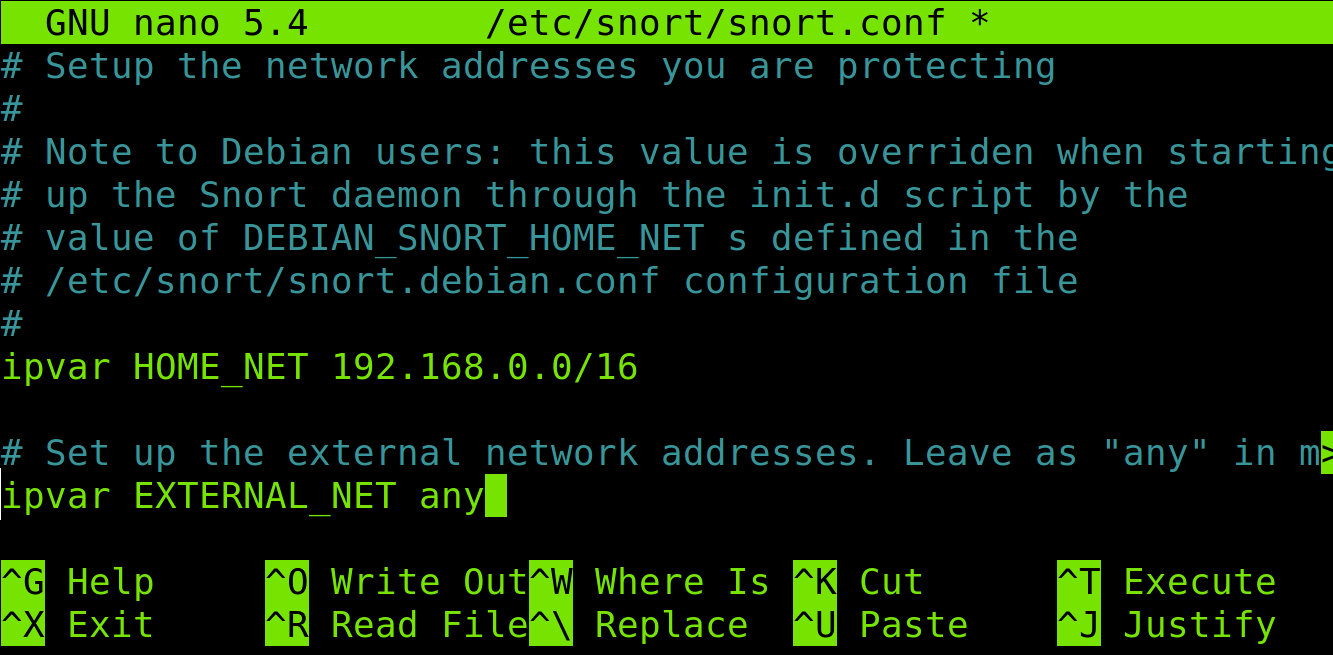
In my case, I replace that line with the following:
But, if you want to add specific IP addresses, the syntax is shown below, where 192.168.0.3, 10.0.0.4, and 192.168.1.3 must be replaced with the IP addresses to be monitored by Snort. Type all IP addresses separated by a comma between square brackets.
Leave the line ipvar EXTERNAL_NET any as default; below, you can see my configuration:
If you go down, you will see options to monitor specific services and uncomment your enabled services.
When you finish editing the file, close it to save changes. If you don’t have open services, then simply close saving changes.
Testing Snort Configuration With Real Attacks
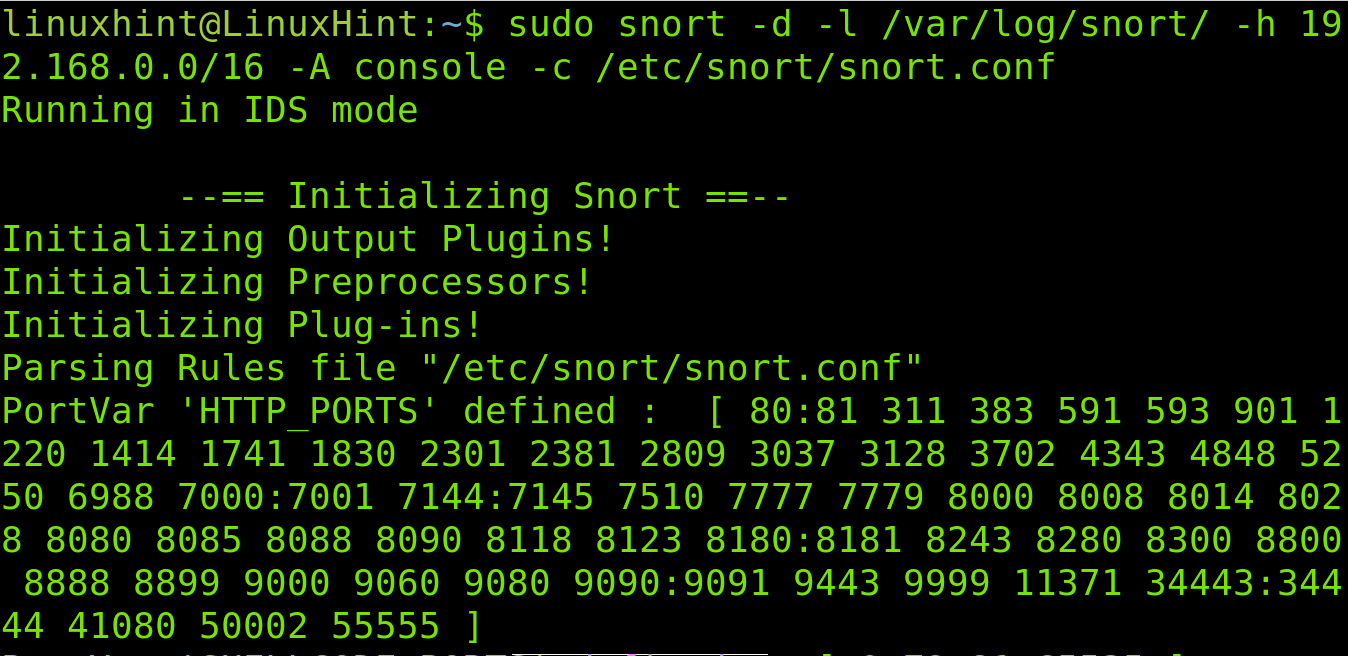
Now, let’s test Snort by running the command shown below. Replace the IP address or network with yours.
Where previously executed command flags mean:
-d= tells Snort to show data
-l= determines the logs directory
-h= specifies the network to monitor
-A= instructs Snort to print alerts in the console
-c= specifies Snort the configuration file
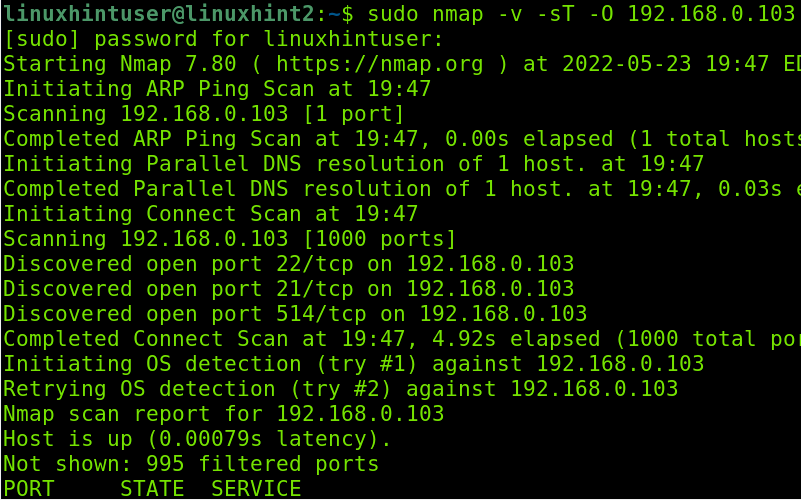
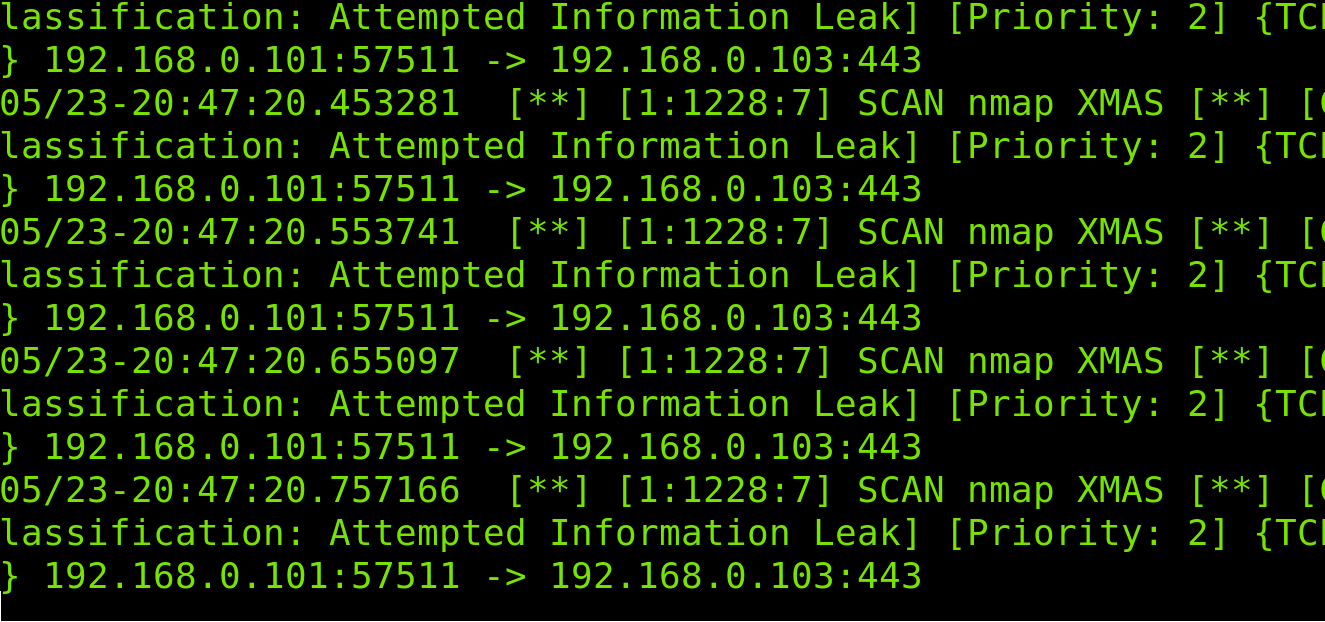
To test Snort, while it’s running, launch an aggressive fingerprint (Xmas) scan from another computer using Nmap, as shown below:
As you can see in the following screenshot, Snort detects the fingerprint attempt:
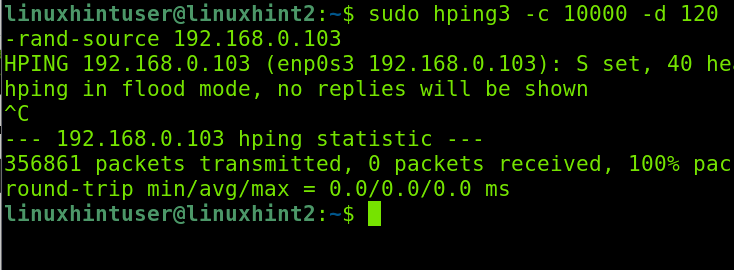
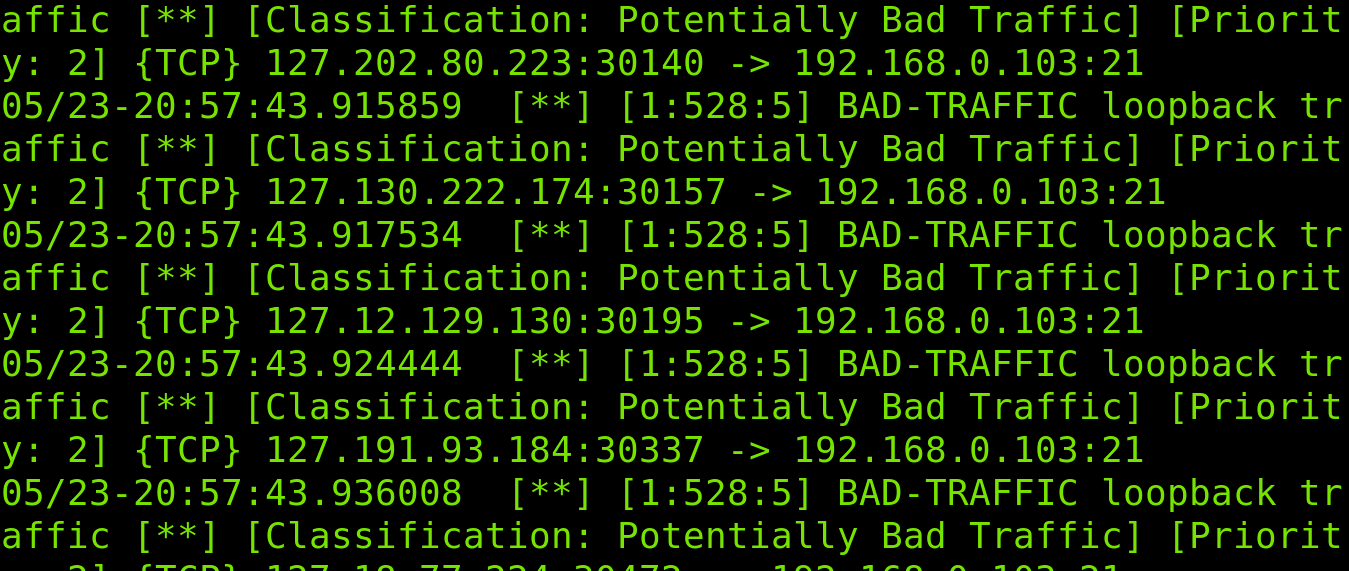
Now, let’s launch a DDOS attack using Nping3 from another computer.
As you can see below, Snort detects malicious traffic:
Now that we see how Snort works, let’s create custom rules.
Getting Started With Snort Rules
Snort default available rules are stored in the /etc/snort/rules directory. To see what rules are enabled or commented on, you need to read the /etc/snort/snort.conf file we previously edited.
Run the following command and scroll down to see disabled and enabled rules. Some rules are disabled for Debian users because they are not available in the stock Debian rules.
As said previously, rule files are stored in the /etc/snort/rules directory.
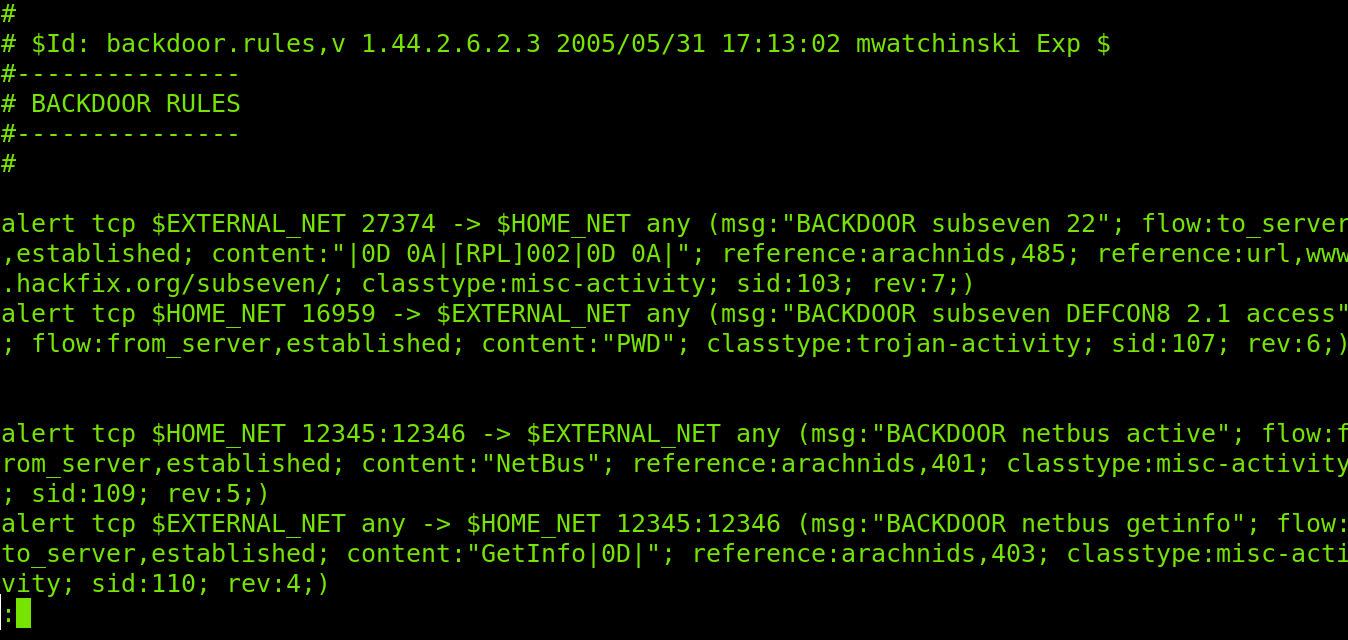
Let’s check the rules to detect and report backdoors traffic.
As you can see, there are several rules to prevent backdoor attacks. Surprisingly, there is a rule to detect and report NetBus, a trojan horse that became popular decades ago. Let’s explain how this rule works.
active"; flow:from_server,established; content:"NetBus"; reference:arachnid
s,401; classtype:misc-activity; sid:109; rev:5;)
alert tcp $EXTERNAL_NET any -> $HOME_NET 12345:12346 (msg:"BACKDOOR netbus getinfo"; flow:to_server,established; content:"GetInfo|0D|"; reference:arachnids,403; classtype:misc-activity; sid:110; rev:4;)
Where:
-> = Specifies the traffic direction, in this case from our protected network to an external one
content = Look for specific content within the packet. It can include text if between quotation marks (“ ”) or binary data if between (| |).
depth = Intense analysis; in the rule above, we see two different parameters for two different contents.
offset = Instructs Snort the starting byte of each packet to start searching for the content.
classtype = Reports what kind of attack Snort is alerting about.
sid:115 = Rule identifier.
How To Create Your Own Snort Rule
Now, we’ll create a new rule to notify about incoming SSH connections.
Create a /etc/snort/rules/yourrule.rules file using a text editor. You can name the file as you want. That’s arbitrary, so respect the path.
Paste the following rule within the file. As you can see, the rule will notify when a device tries to connect through SSH.
Close and save the file.
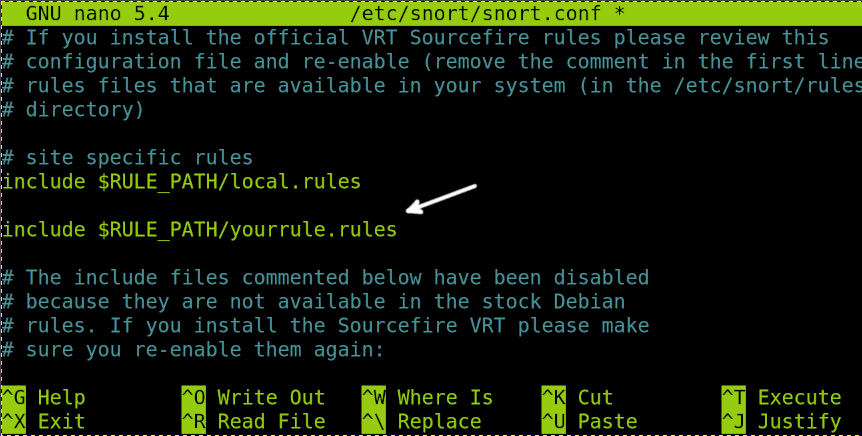
Now, add the rule to the Snort configuration file, and run the following command:
Scroll down, and in the rules section, add the following line, where “yourrule.rules” must be replaced by your custom rule name.
Close the text editor; thus, saving changes.
Now, run Snort by running the following command as we did previously; if it was already open, that’s ok:
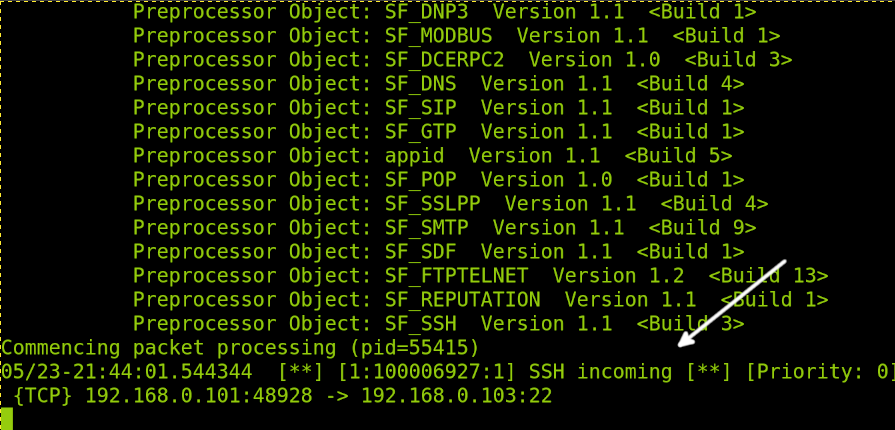
I will try to connect from another computer using SSH.
As you can see in the following image, the rule we created reports the connection attempt.
That’s all for this tutorial. If you want to learn more about Snort custom alerts, I recommend this tutorial https://linuxhint.com/snort_alerts/ to continue reading about Snort alerts.
Conclusion
As you can see, configuring and creating Snort rules is simple. Every Linux user can do it by understanding the content previously explained. It is important to remember exclusive configuration aspects for Debian users previously explained. There are some Snort alternatives you may want to try, like OSSEC, but Snort remains the most popular for Linux users. It is also important that Snort works for all operating systems within the network.
Thank you for reading this article explaining how to configure Snort IDS and how to create rules. Keep following LinuxHint for more professional Linux tutorials.


