DDNS is mainly used to update the A (IPv4)or AAAA (IPv6) record of a domain/subdomain of a computer/server whose IP address changes frequently.
If you’re using a mobile network or broadband connection as an ordinary user, it’s more likely that your ISP shares a few IP addresses with multiple customers. So, you can’t ensure that your computer/server is using the same public IP address all the time. This is not that important if all you want to do is web browsing. But, if you want to access your Synology NAS remotely using a domain name, then it becomes an issue.
To solve this problem, you will have to configure DDNS on your Synology NAS to ensure that the A or AAAA record of the domain name you want to use to access your NAS remotely is up to date.
In this article, I am going to show you how to configure DDNS on your Synology NAS. So, let’s get started.
Table of Contents:
- Things You Will Need
- Adding a DDNS Provider
- Updating DDNS IP Address Manually
- Testing DDNS Configuration
- Conclusion
Things You Will Need:
To access your NAS remotely, your ISP must allow routing packets to your computer/server. Your ISP will have to open the necessary ports for you, and you will have to configure port forwarding on your router and configure DDNS to be able to access your NAS remotely.
Adding a DDNS Provider:
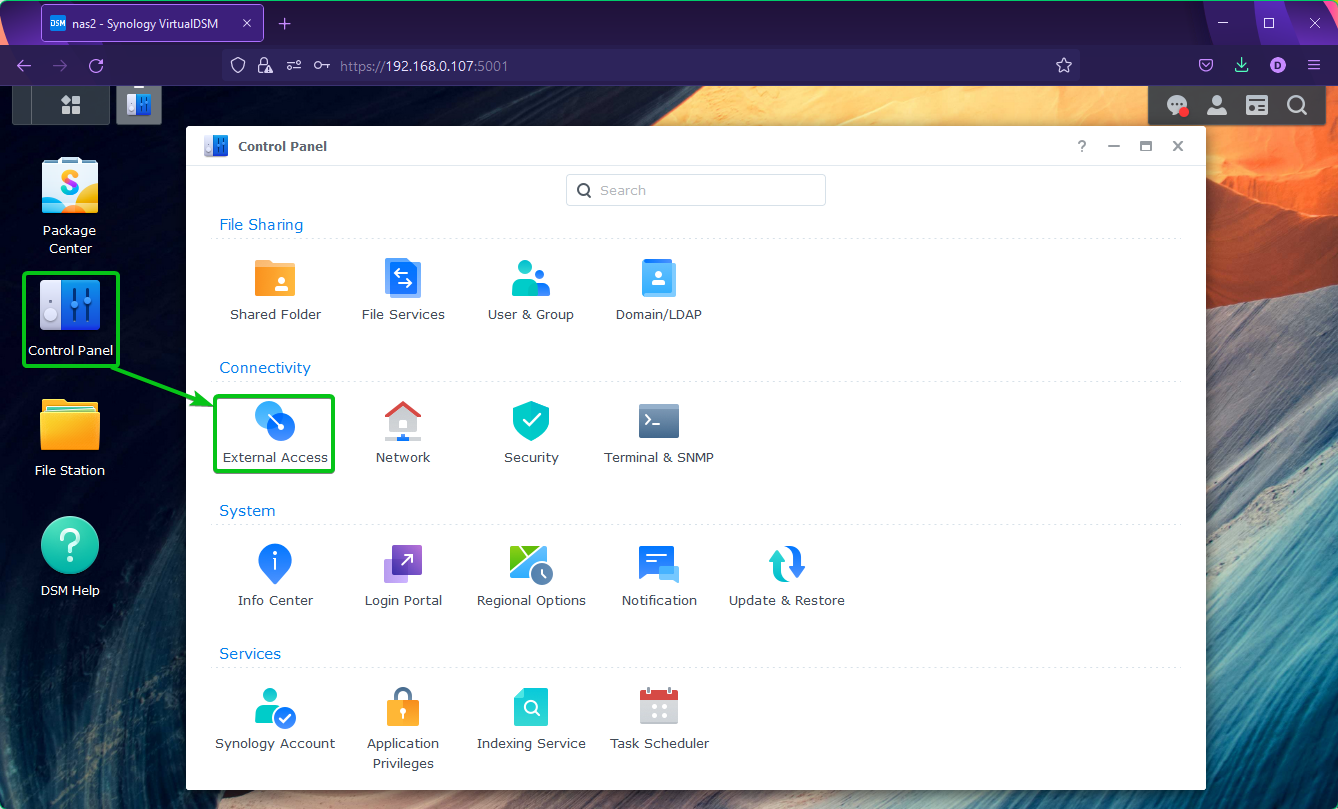
To add a DDNS provider to your NAS, navigate to Control Panel > External Access as marked in the screenshot below.
From the DDNS tab, click on Add as marked in the screenshot below.
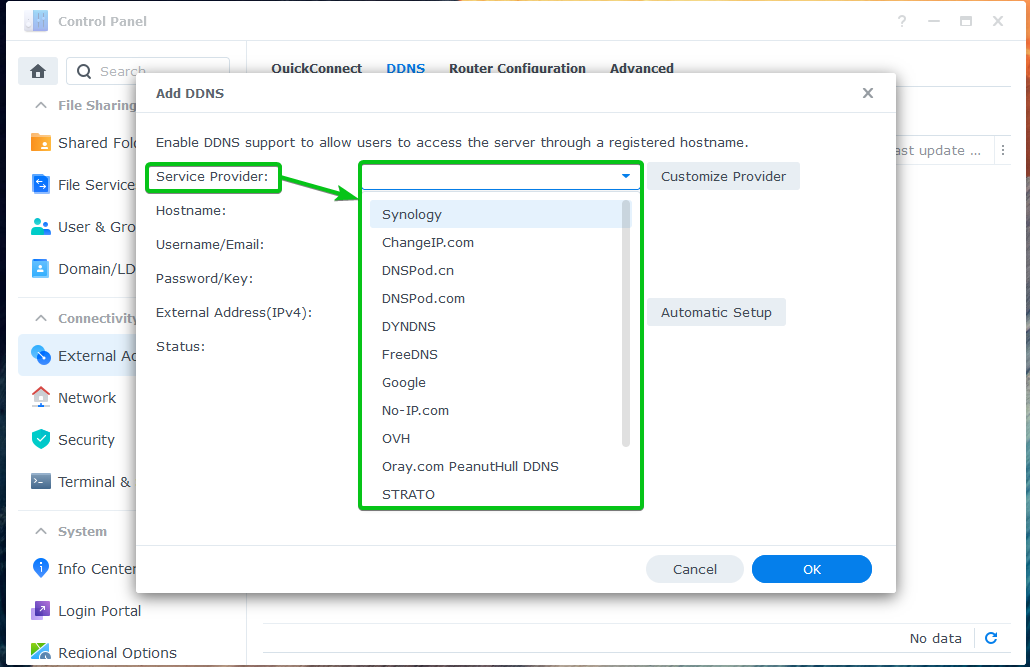
From the Service Provider dropdown menu, select the DDNS provider that you want to use.
I will use the official Synology DDNS provider in this article for the demonstration.
You will see configuration options depending on the DDNS provider you have selected.
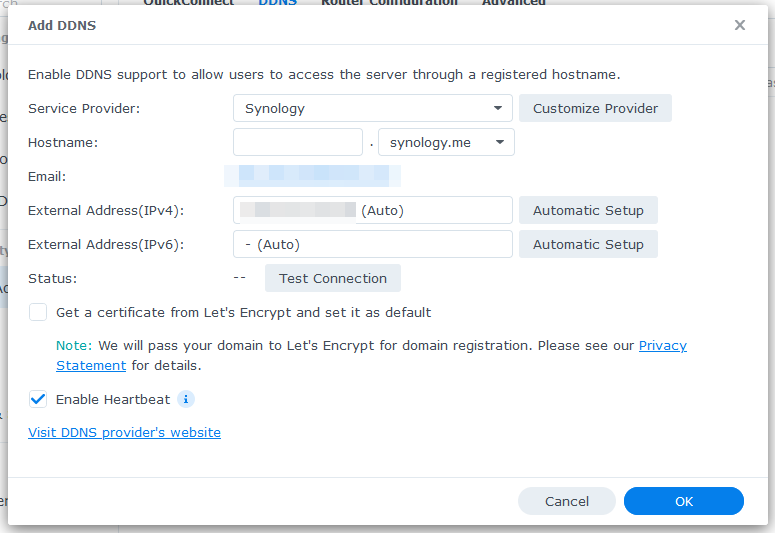
For the Synology DDNS provider, you will see the following options.
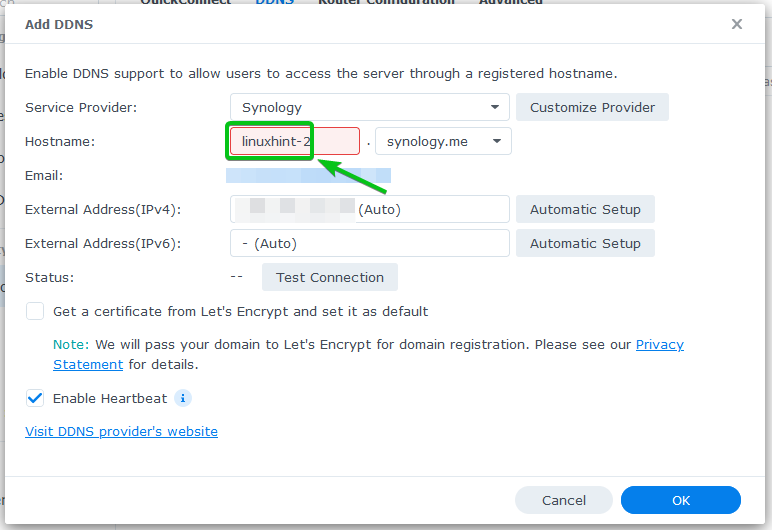
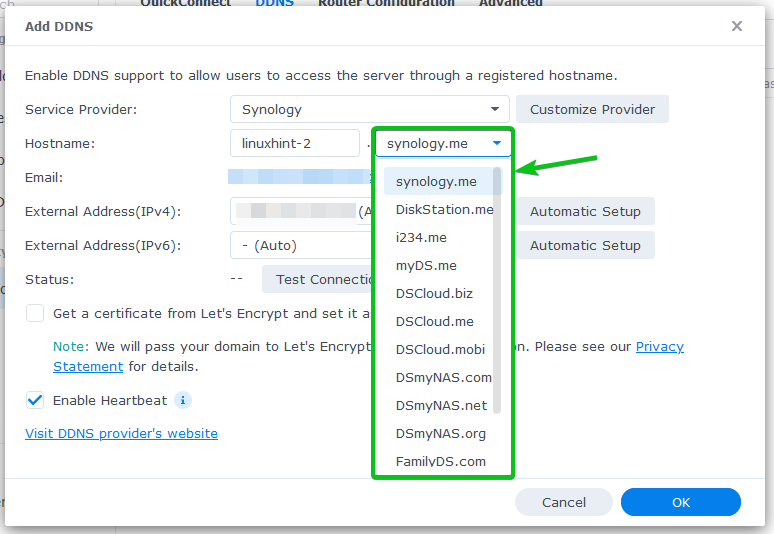
Type in a hostname in the Hostname section.
Select one of the DNS names from the Hostname dropdown menu.
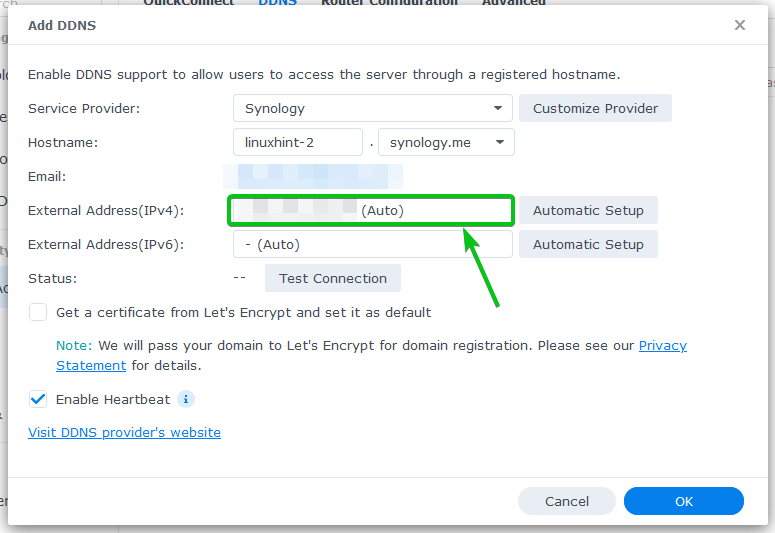
Your public IP address should be displayed in the External Address(IPv4) and External Address(IPv6) sections.
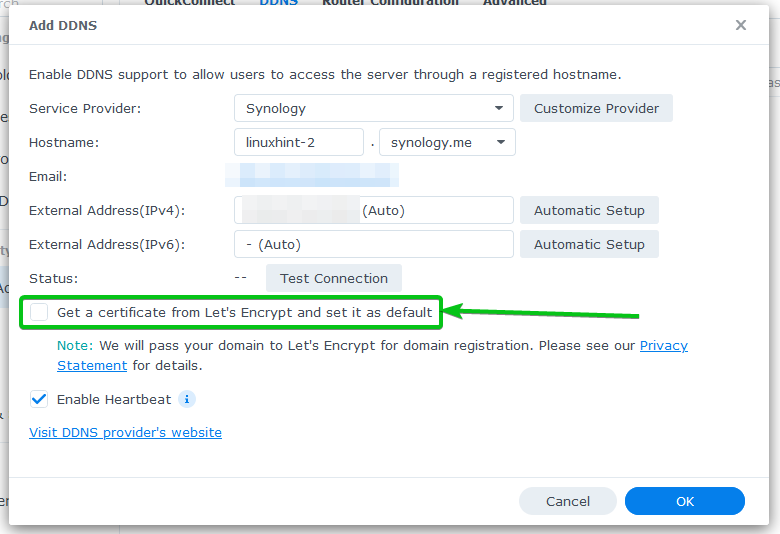
If you want to use Let’s Encrypt to enable SSL for the DDNS domain name, check the Get a certificate from Let’s Encrypt and set it as the default checkbox as marked in the screenshot below.
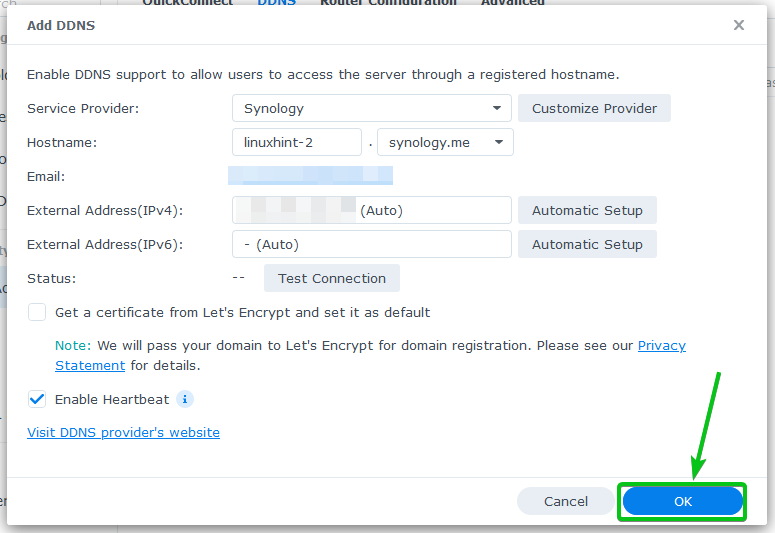
Once you’re done, click on OK.
The DDNS provider should be added. You can add as many DDNS providers as you want.
Updating DDNS IP Address Manually:
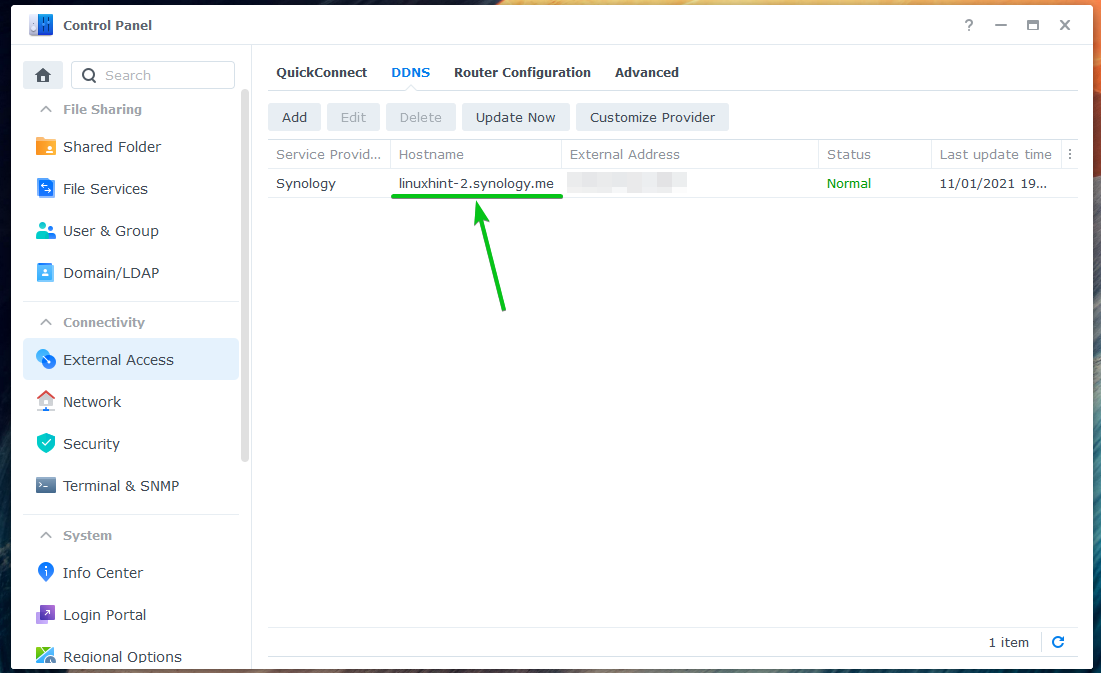
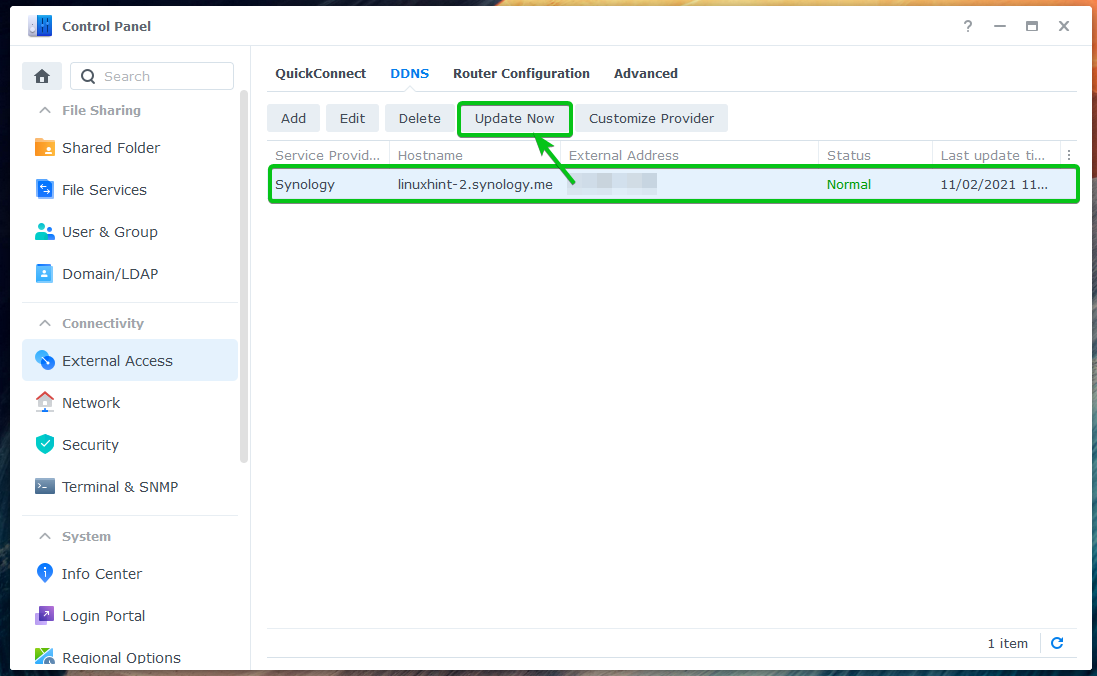
You can manually update the IP address of a DDNS provider from the Control Panel > External Access > DDNS section.
Select the DNS provider you want to update and click on Update Now, as marked in the screenshot below.
Testing DDNS Configuration:
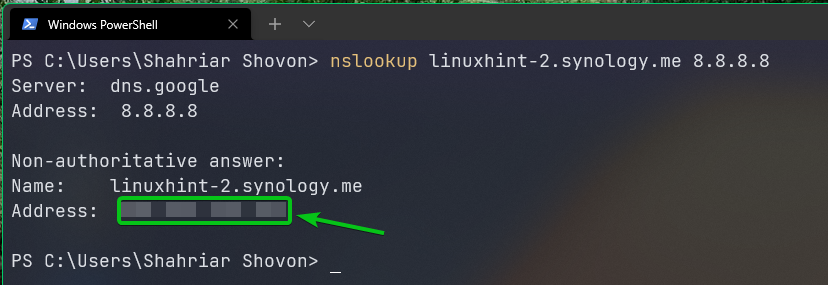
To test whether the DDNS domain (linuxhint-2.synology.me in this case) points to the desired public IP address, open a terminal and run the following command:
You should see that the DDNS domain name points to your public IP address.
Conclusion:
In this article, I have shown you how to configure DDNS on the DSM 7 operating system of your Synology NAS. I have also shown you how to manually update the IP address of a DDNS provider and how to test whether DDNS is working.

