
This tutorial shows how to install BurpSuite on Debian, how to setup your browser (in this tutorial I only show how to setup it on Firefox) and SSL certificate and how to capture packets without previous proxy configuration on the target by combining it with ArpSpoof and configuring the Invisible Proxy to listen.
To begin installing BurpSuite visit and select the Get Community option (the third one) to get BurpSuite for free.

In the next screen click on “Download the latest version” orange button to continue.

Click on the green Download button.

Save the .sh script and give it execution permissions by running:
In this case for the current version at this date I run:

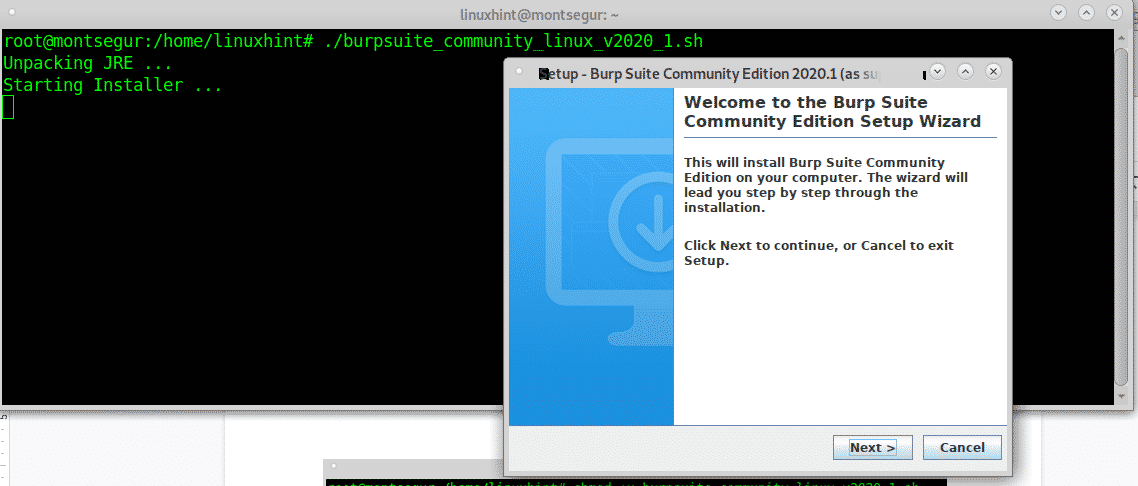
Once the execution rights were given execute the script by running:
A GUI installer will prompt, press on “Next” to continue.
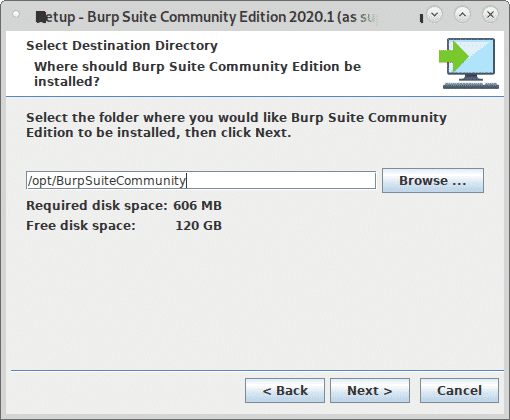
Leave the default installation directory (/opt/BurpSuiteCommunity) unless you need a different location and press Next to continue.
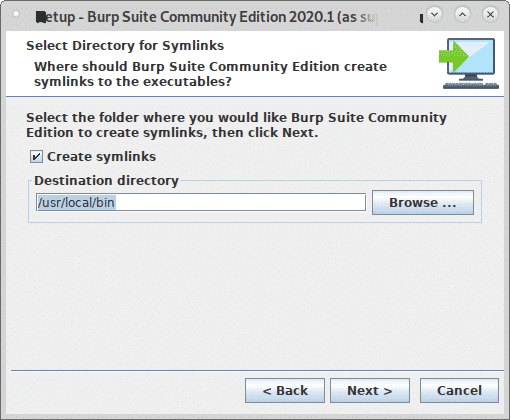
Seek “Create Symlink” selected and leave the default directory and press Next.
The installation process will start:

Once the process ends click on Finish.

From your X-Window manager apps menu select BurpSuite, in my case it was located on the category “Other”.

Decide if you wish to share your BurpSuite experience or not, click I Decline, or I Accept to continue.

Leave Temporary Project and press Next.

Leave Use Burp defaults and press Start Burp to launch the program.

You’ll see BurpSuite main screen:

Before proceeding, open firefox and open http://burp.
A screen similar to the shown below will show up, on the upper right corner click on CA Certificate.

Download and save the certificate.

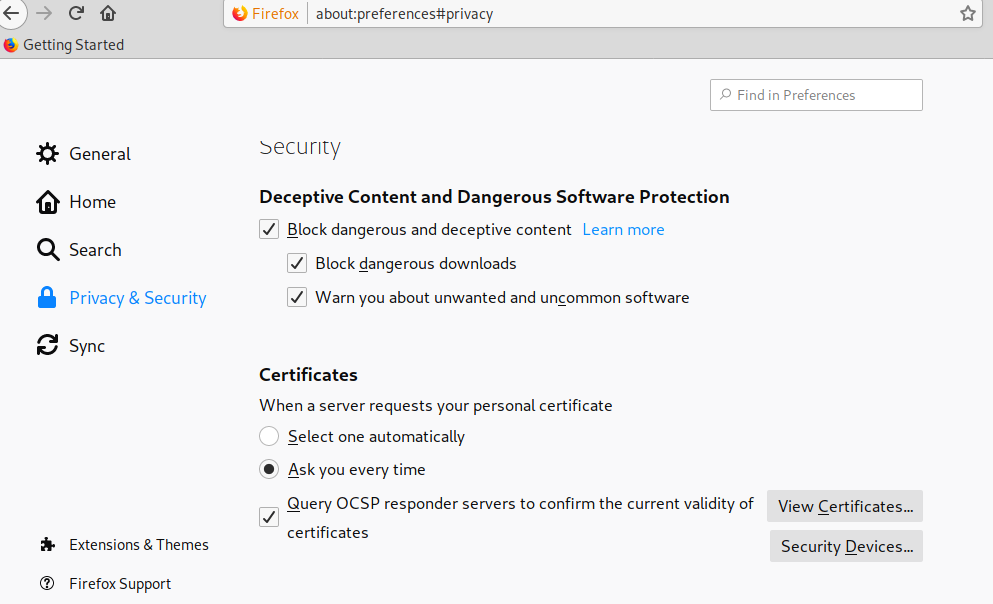
On the Firefox menu click on Preferences, then click on Privacy and Security and scroll down until you find the Certificates section, then click on View Certificates as shown below:
Click on Import:

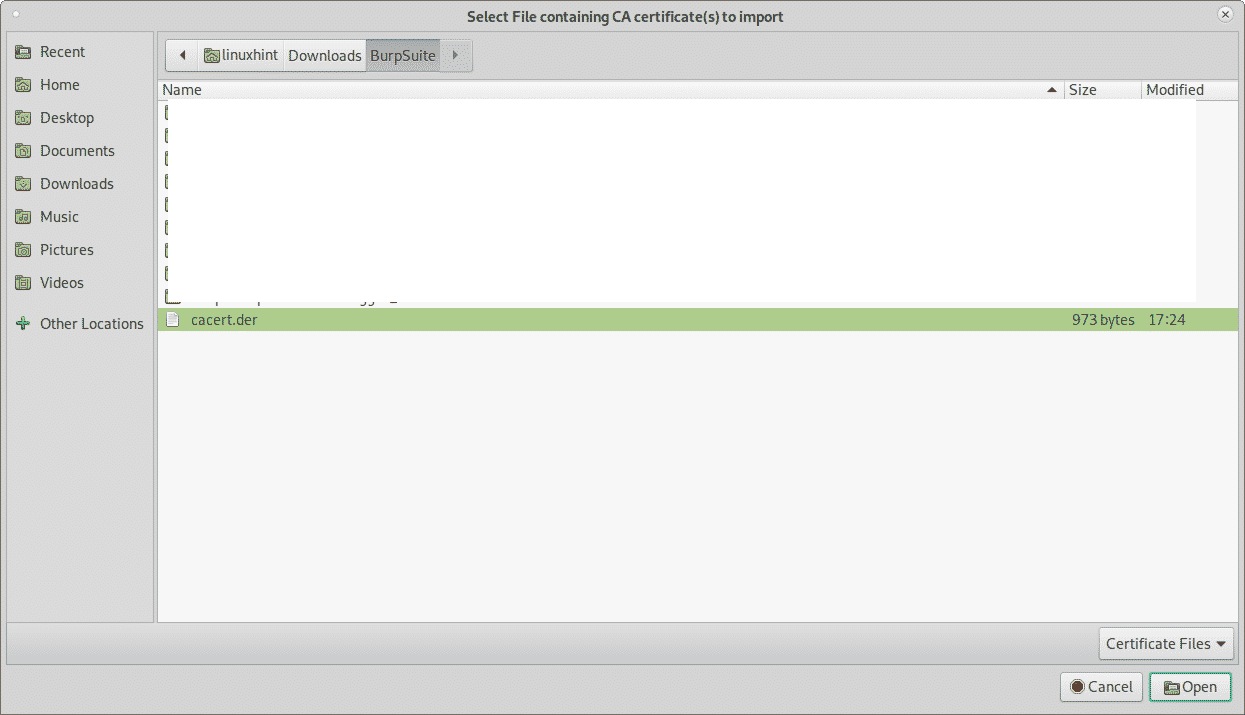
Select the certificate you got previously and press Open:
Click on “Trust this CA to identify websites.” and press OK.

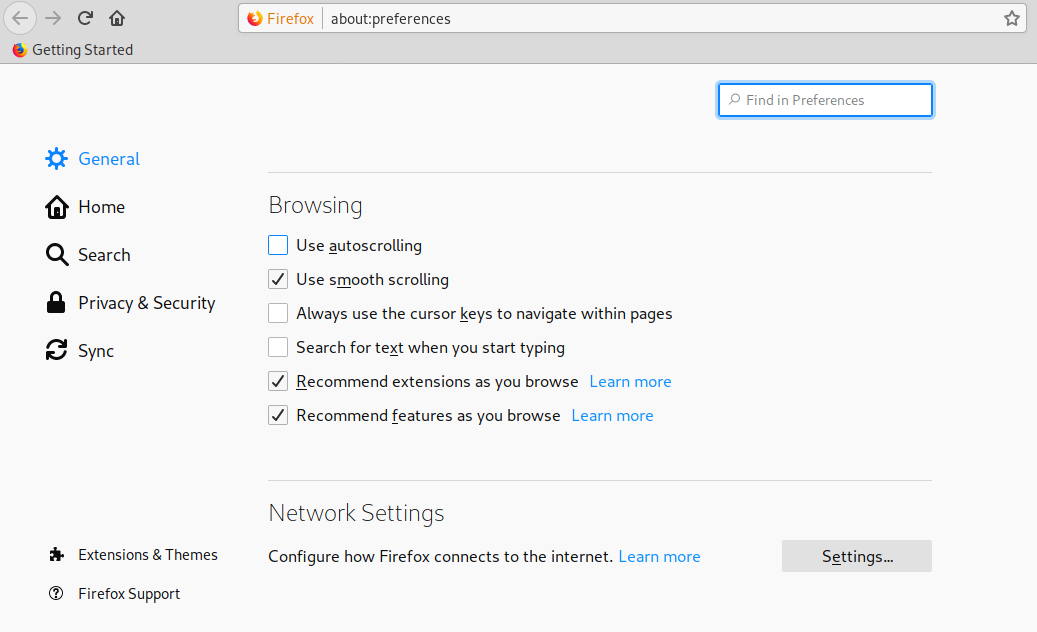
Now, still on the Firefox Preferences menu click on General in the menu located in the left side and scroll down until reaching Network Settings, then click on Settings.
Select Manual Proxy Configuration and in the HTTP Proxy field set the IP 127.0.0.1, checkmark the “Use this proxy server for all protocols”, then click OK.

Now BurpSuite is ready to show how it can intercept traffic through it when defined as proxy. On BurpSuite click on the Proxy tab and then on the Intercept sub tab making sure intercept is on and visit any website from your firefox browser.
The request between the browser and the visited website will go through Burpsuite, allowing you to modify the packets as in a Man in the Middle attack.

The example above is the classical Proxy feature show for beginners. Yet, you don’t always can configure the target’s proxy, if you did, a keylogger would be more helpful than a Man In the Middle attack.
Now we will use DNS and the Invisible Proxy feature to capture traffic from a system we can’t configure the proxy on.
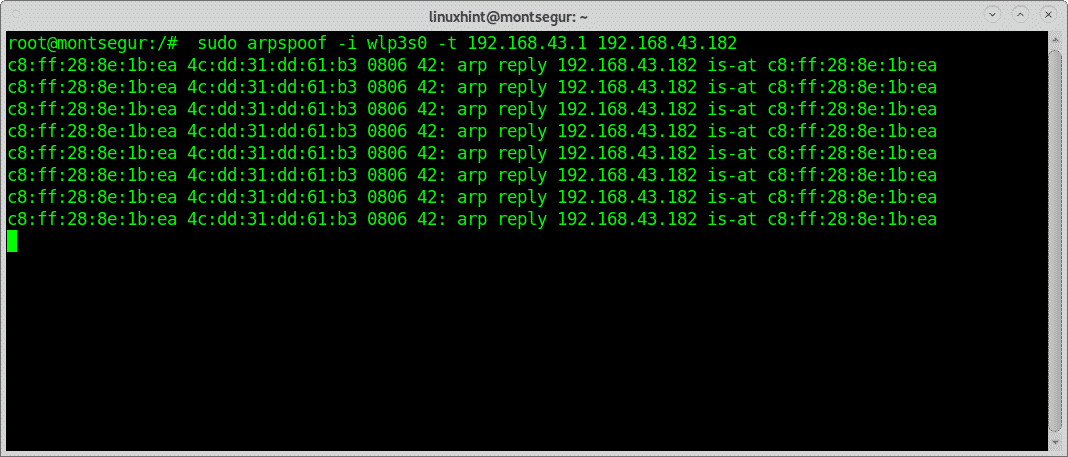
To begin run Arpspoof (on Debian and based Linux systems you can install with through apt install dsniff)Once installed dsniff with arpspoof, to capture packets from the target to the router on the console run:

Then to capture packets from the router to the target run in a second terminal:
To prevent blocking the victim enable IP forwarding:

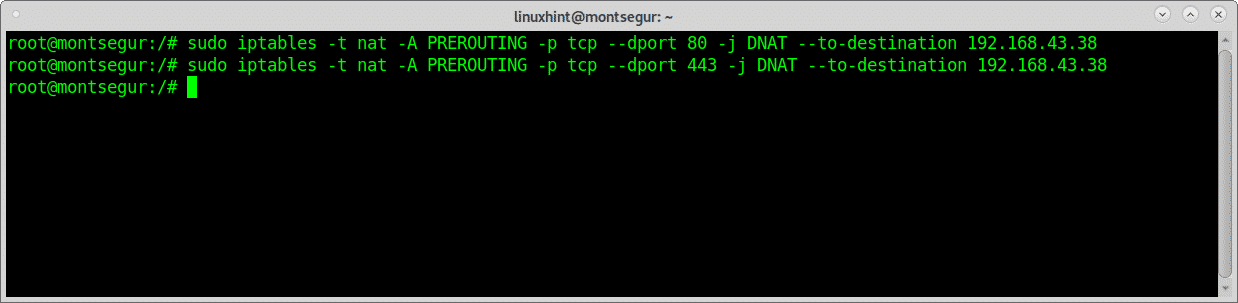
Redirect all traffic to port 80 and 443 to your device using iptables by running the commands below:
192.168.43.38
# sudo iptables -t nat -A PREROUTING -p tcp --dport 443 -j DNAT --to-destination
192.168.43.38
Run BurpSuite as root, otherwise some steps like enabling new proxies on specific ports won’t work:

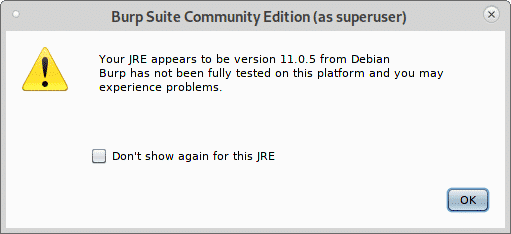
If the following warning appears press OK to continue.
Once BurpSuite is open, click on Proxy>Options and click on the Add button.

Select 80 and on Specific address select your Local network IP address:

Then click on Request handling tab, checkmark Support Invisible proxying (enable only if needed) and press OK.

Repeat the steps above now with port 443, click on Add.

Set the port 443 and again select your local network IP address.
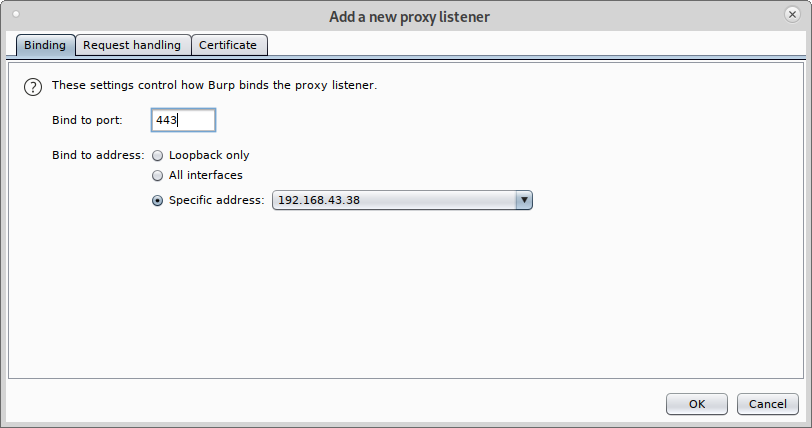
Click on Request Handling, checkmark support for invisible proxying and press OK.

Mark all proxies as running and as invisible.

Now from the target device visit a website, the Intercept tab will show the capture:
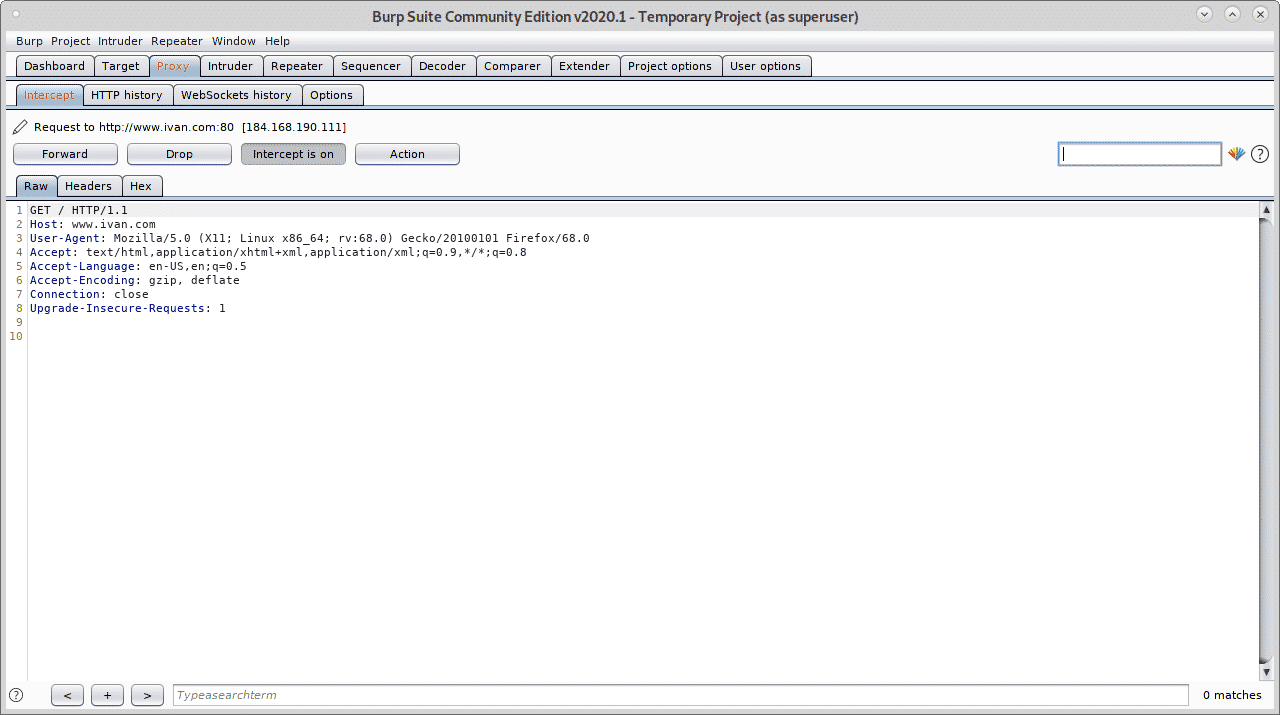
As you can see you managed to capture packets without previous proxy configuration on the target’s browser.
I hope you found this tutorial on BurpSuite useful. Keep following LinuxHint for more tips and updates on Linux and networking.