To begin with, install flask:
Step #1: Minimal Web Application
The minimal application can be found at https://flask.palletsprojects.com/en/2.0.x/quickstart/#a-minimal-application. This is a web page that displays “Hello World”. The first thing we did was create an instance of Flask() with “__name__” as the argument. The route decorator is used to inform Flask the URL that will activate the function we wrote.
app = Flask(__name__)
@app.route('/')
def index():
return "Hello World"
if "__name__" == "__main__":
app.run(debug=True)
Next, in the terminal of PyCharm, type the following (where the name of my Python file is main.py; in your case, replace main.py with your Python’s filename):
$env:FLASK_APP = "main.py"
flask run
Once you run “flask run”, the terminal will chuck out a URL with a port. This URL:PORT is where the web page is loaded. You can always press Control + c to quit. In my case, it says “Running on http://127.0.0.1:5000/ (Press CTRL+C to quit)”. So, open up your web browser, and copy and paste the URL given. In my case, I copied and pasted “http://127.0.0.1:5000/”. Please also note that the previous lines must be run every time you restart PyCharm for it to work:

Step #2: Adding HTML
The first thing you’ll need to do is open the folder where the Python script is located and create a folder called “templates”. When I first ran this, I tried putting the name “template” as the folder name, and the whole program crashed and didn’t work. So, it’s imperative that you call the folder “templates”. Within this “templates” folder, create an index.html file with your HTML code. Then, use render_template() and pass “index.html” as the argument. Now, if you run “flask run” in the terminal, your HTML code should be rendered:
My html code (index.html) for the moment is as follows:
And, my Python file code (main.py) is as follows:
app = Flask(__name__)
@app.route('/')
def index():
return render_template("index.html")
if "__name__" == "__main__":
app.run(debug=True)
The latter will render a simple HTML page.
Step #3: Adding CSS
Now, I want to add CSS to my HTML. To do this, create a folder called “static” and create a file called “main.css”. Here, the name of the actual CSS file can be anything. I’ve decided to call mine “main.css”. However, the name of the folder must be “static”! In fact, in the “static” folder, one can place anything that is static, such as CSS, JavaScript, and images. So, if you’re going to put images, JavaScript, and CSS, you may wish to create sub-folders.
First, let’s write out the CSS (main.css) I want:
margin:0;
color: #333
font-family: verdana;
font-size: 20px;
background-color: rgb(201, 76, 76);
}
.styled {
background-color: #92a8d1;
font-family: verdana;
font-size: 20px;
}
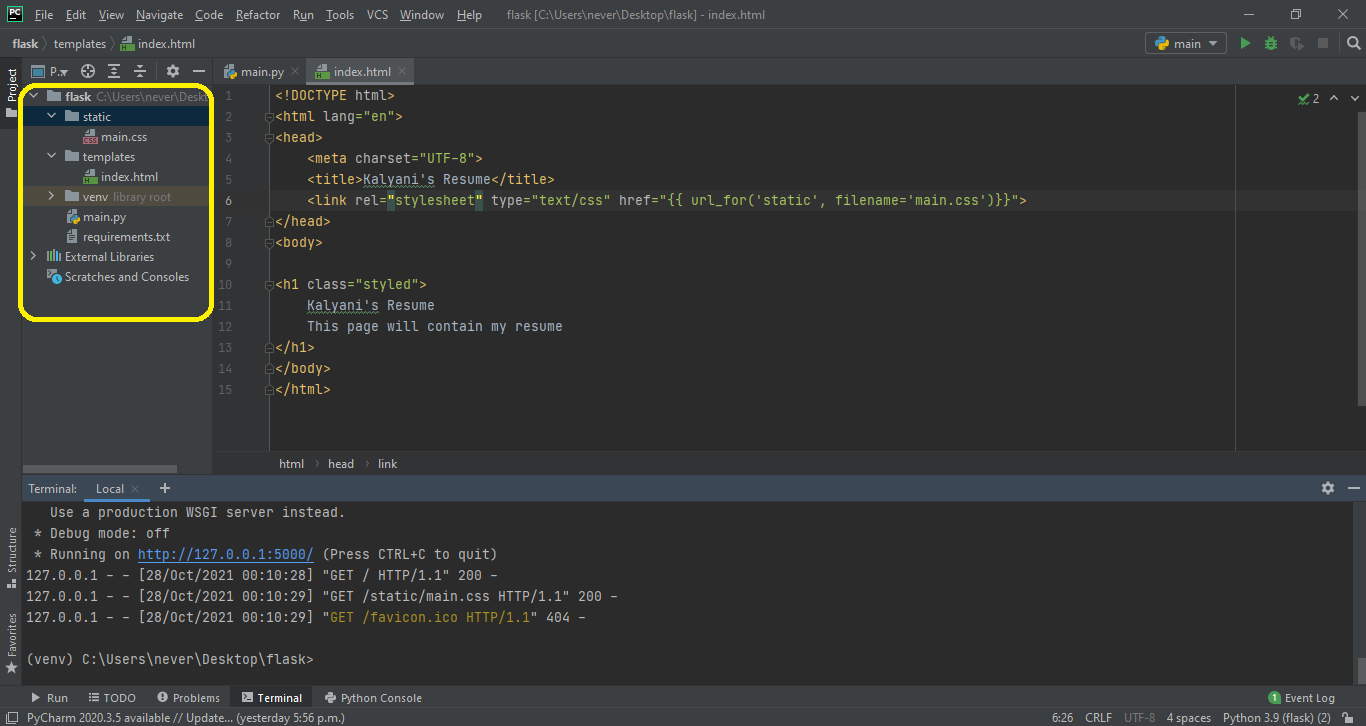
Here, in the index.html, we need to write <link rel=”stylesheet” type=”text/css” href=”{{ url_for(‘static’, filename=’main.css’)}}”> in the head of the HTML file. Here, the filename is the name of the CSS file (mine is main.css). If for instance the “main.css” is located with a sub-folder called “css”, then you’d write the following:
After that, you can use the CSS you have created. For instance, I created one called “styled”, and used it in the h1 class.
My index.html file would be as follows:
The main Python file – main.py – stays the same.
app = Flask(__name__)
@app.route('/')
def index():
return render_template("index.html")
if "__name__" == "__main__":
app.run(debug=True)
Step #4: Adding an Image
Now, let’s add an image to the HTML page we created! For this, we use the “static” folder we created. Within the “static” folder, I created another folder called “images”. Within the images folder, I placed an image. Now, let’s add the image to the HTML code as follows: <img src=”/static/images/kalyani.jpg” height=”200″ />. In this case, I set the height of the image to 200, but you can change it to whatever you want and add CSS if you want.
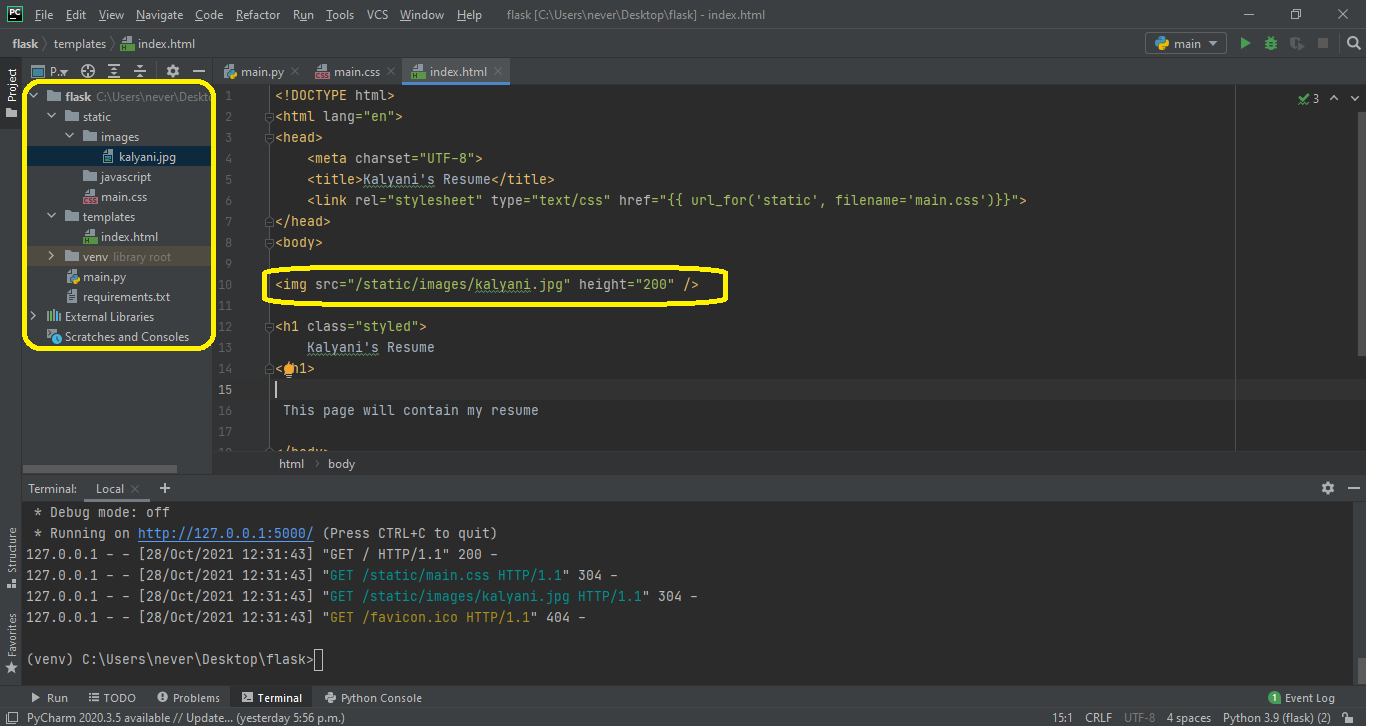
The HTML code would look as follows:
<html lang="en">
<head>
<meta charset="UTF-8">
<title>Kalyani's Resume</title>
<link rel="stylesheet" type="text/css" href="{{ url_for('static', filename='main.css')}}">
</head>
<body>
<img src="/static/images/kalyani.jpg" height="200" />
<h1 class="styled">
Kalyani's Resume
</h1>
This page will contain my resume
</body>
</html>
Alternatively, one can also use the following:
[/cce_python]
In this case, the HTML code would look like this:
[cc lang="html" width="100%" height="100%" escaped="true" theme="blackboard" nowrap="0"]
<!DOCTYPE html>
<html lang="en">
<head>
<meta charset="UTF-8">
<title>Kalyani's Resume</title>
<link rel="stylesheet" type="text/css" href="{{ url_for('static', filename='main.css')}}">
</head>
<body>
<img src="{{ url_for('static', filename='images/kalyani.jpg')}}" height="200" />
<h1 class="styled">
Kalyani's Resume
</h1>
This page will contain my resume
</body>
</html>
Step #5: Adding JavaScript
There are two ways you can add JavaScript. In this first demo, I will create a button. When the button is pressed, it would activate a function called myFunction() which will be JavaScript (found in the <script> tag). For this, set up the button. Then, set up a script tag in the head of the HTML code and within it, define a function. In my case, I’ve defined a function that will add the “whole resume” to a p element upon button click.
You can add it to the index.html file as follows:
<html lang="en">
<head>
<meta charset="UTF-8">
<title>Kalyani's Resume</title>
<link rel="stylesheet" type="text/css" href="{{ url_for('static', filename='main.css')}}">
function myFunction() {
document.getElementById("para").innerHTML = "WHOLE RESUME";
}
</script>
</head>
<body>
<img src="/static/images/kalyani.jpg" height="200" />
<h1 class="styled">
Kalyani's Resume
</h1>
This page will contain my resume
<br>
<br>
<p id="para"> </p>
<button id="button" type="button" onclick="myFunction()"> Click to see Resume </button>
</body>
</html>
However, in most cases, JavaScript files tend to be documents themselves, and not one liners. In such cases, we’d have a .js file that we have to link. In my case, I’d write: <script src=”/static/javascript/javascript.js”> </script>. So, much like the image file, we link the js file as follows:
<html lang="en">
<head>
<meta charset="UTF-8">
<title>Kalyani's Resume</title>
<link rel="stylesheet" type="text/css" href="{{ url_for('static', filename='main.css')}}">
<script src="/static/javascript/javascript.js">
</script>
</head>
<body>
<img src="/static/images/kalyani.jpg" height="200" />
<h1 class="styled">
Kalyani's Resume
</h1>
This page will contain my resume
<br>
<br>
<p id="para"> </p>
<button id="button" type="button" onclick="myFunction()"> Click to see Resume </button>
</body>
</html>
Alternatively, you can also use this: <script src=”{{ url_for(‘static’, filename=’javascript/javascript.js’)}}”></script>. The latter would generate this HTML code:
<html lang="en">
<head>
<meta charset="UTF-8">
<title>Kalyani's Resume</title>
<link rel="stylesheet" type="text/css" href="{{ url_for('static', filename='main.css')}}">
<script src="{{ url_for('static', filename='javascript/javascript.js')}}">
</script>
</head>
<body>
<img src="{{ url_for('static', filename='images/kalyani.jpg')}}" height="200" />
<h1 class="styled">
Kalyani's Resume
</h1>
This page will contain my resume
<br>
<br>
<p id="para"> </p>
<button id="button" type="button" onclick="myFunction()"> Click to see Resume </button>
</body>
</html>
Conclusion
Flask is a micro framework that is user-friendly and great for beginners. In particular, the documentation itself is great, and it can be found at https://flask.palletsprojects.com/en/2.0.x/quickstart/#static-files. In this tutorial, we learned how to build a simple website, add CSS, add images and add JavaScript to the website using Python’s Flask module. We hope you found this article helpful and please check out Linux Hint for more informative articles.