This blog will state the approaches to cope with the mentioned abnormality in the BlueStacks application.
How to Fix “BlueStacks Stuck on Loading Screen” Issue in Windows 10?
To resolve the malfunctioning in the “BlueStacks” application in Windows 10, consider the following fixes:
- Restart the System.
- Check the System Requirements.
- Enable Virtualization.
- Run the PC/Laptop in Clean Boot Mode.
- Verify the Compatibility Between the Bluestacks Application and Windows.
- Configure the BlueStacks App Settings.
- Update the Graphics Driver.
Prior Check: Restart the System
Restarting the system can resolve most of the problems faced with software and hardware. Therefore, try restarting the system, and the malfunction in the application will likely resolve. If the limitation still remains, proceed to the next solution.
Fix 1: Check the System Requirements
One of the foremost checks can also be verifying the minimum system requirements to execute the “BlueStacks” app on a PC/Laptop, as there is a criterion for the system set by the BlueStacks application team, which can be verified from the following link.
Fix 2: Enable Virtualization
Virtualization ensures a streamlined application experience. Hence, the encountered limitation can also be faced due to this feature being “disabled”. Therefore, make sure to enable it by following the below-listed steps.
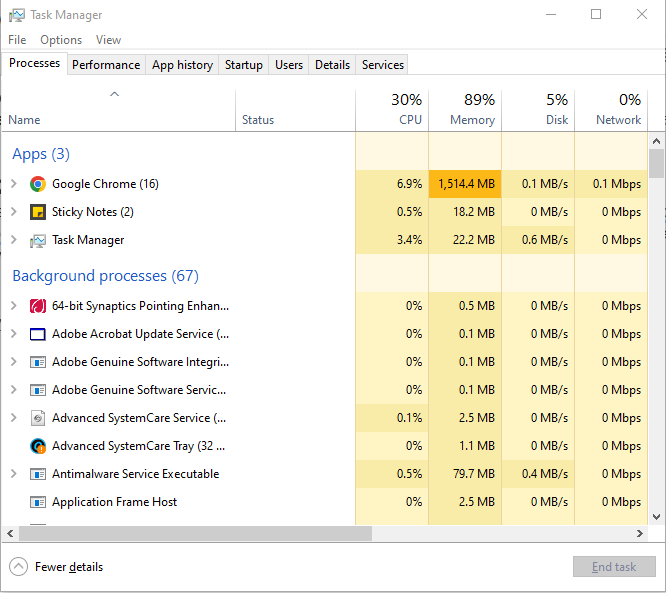
Step 1: Open “Task Manager”
Firstly, trigger the “CTRL + SHIFT + ESC” combined keys to open “Task Manager”:
Step 2: Examine the “Virtualization” Feature
After that, open the “Performance” tab and make sure that the stated feature is “Enabled”:
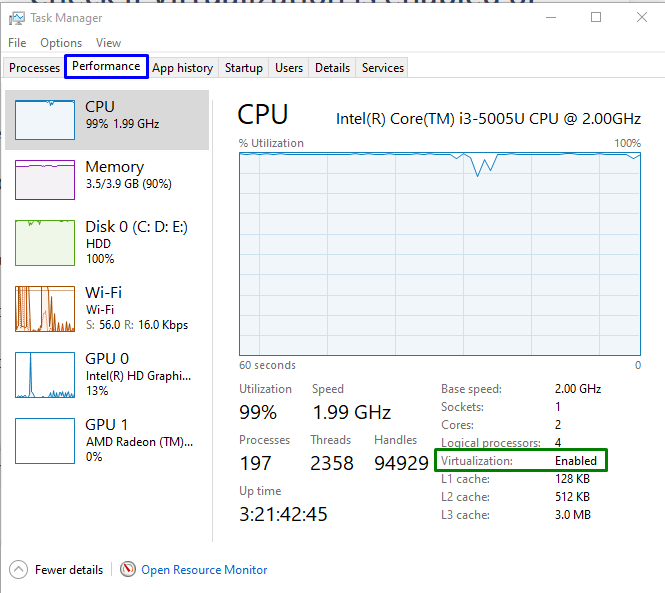
If the discussed feature is “Disabled”, enable it from BIOS setup and see if the BlueStacks application is functional now. Else, move on to the next approach.
Fix 3: Run the PC/Laptop in Clean Boot Mode
The “Clean Boot” mode detects problematic programs and drivers. Therefore, try executing the system in this mode to resolve the malfunction in the BlueStacks application.
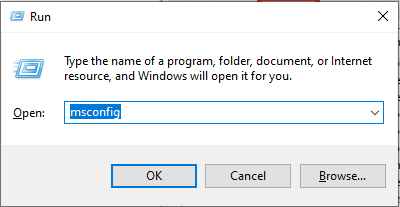
Step 1: Open “System Configuration”
Firstly, input “msconfig” in the following Run box to switch to “System Configuration”:
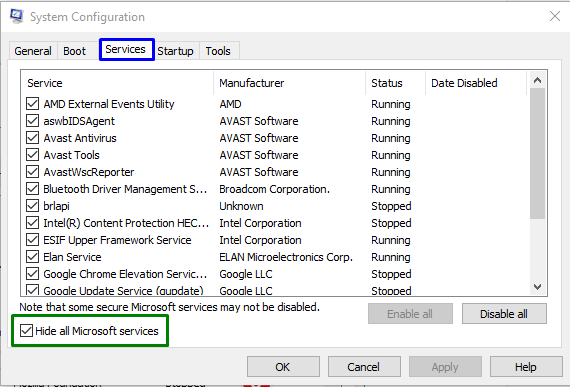
Step 2: Open the “Services” Tab
Here, open the “Services” tab. Mark the highlighted checkbox and trigger the “Disable all” button:
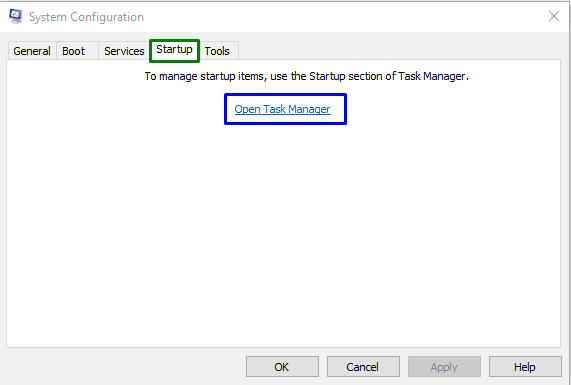
Step 3: Open the “Startup” Tab
After that, open the “Startup” tab and trigger the highlighted link:
Finally, disable the following “Startup” applications one by one:
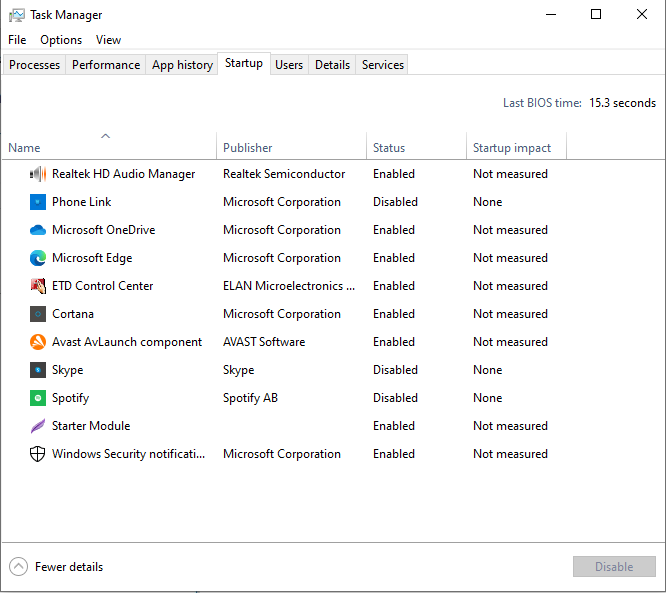
After doing so, restart the system, and the encountered issue with the “BlueStacks” application will likely resolve.
Fix 4: Verify the Compatibility Between the Bluestacks Application and Windows
The discussed bottleneck in initiating the application can also be due to the incompatibility between the particular application and Windows. Therefore, check the compatibility mode by overviewing the below-enlisted steps.
Step 1: Navigate to BlueStacks Properties
First of all, right-click on the BlueStacks application icon and select “Properties”:

Step 2: Execute the Application in Compatibility Mode
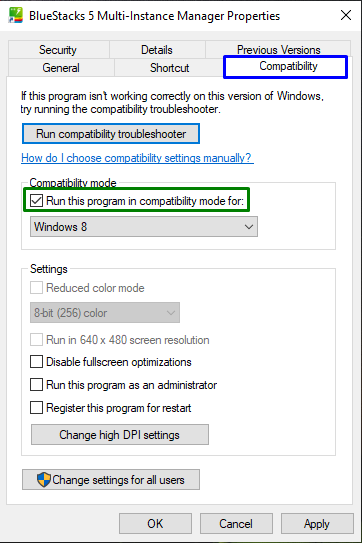
Now, apply the following steps:
- Firstly, switch to the “Compatibility” tab.
- Mark the stated checkbox.
- Finally, opt for “Windows 8” if you are a Windows 10/11 user and hit “Apply-> OK”:
After performing all the above steps, initiate the application and see if the stated limitation vanishes. Otherwise, head to the next solution.
Fix 5: Configure the BlueStacks App Settings
Configuring the application settings by adjusting “Graphics engine mode” and “Graphics renderer” and restarting the application can also help in getting rid of the abnormality faced while initiating “BlueStacks”. For doing so, utilize the below-listed steps.
Step 1: End the BlueStacks Application
Firstly, end the particular application by right-clicking on it and hitting “End task”:

Step 2: Restart the Application in DirectX Mode
Now, launch the “BlueStacks” application again and switch to its “Settings” via three dots at the top:

In the following pop-up, open the “Graphics” settings. Here, follow the below stated steps:
- Mark the “Compatibility” radio button under the “Graphics engine mode” options.
- Configure “DirectX” as the “Graphics renderer” and hit “Save changes”.
- Finally, a pop-up will appear. Here, trigger the “Restart now” button to restart Bluestacks in “DirectX mode”:
Fix 6: Update the Graphics Driver
The updated graphics driver plays a great role in integrating the hardware with the OS in a better way. Therefore, updating the graphics driver can also be efficient in coping with the limitation of the discussed application.
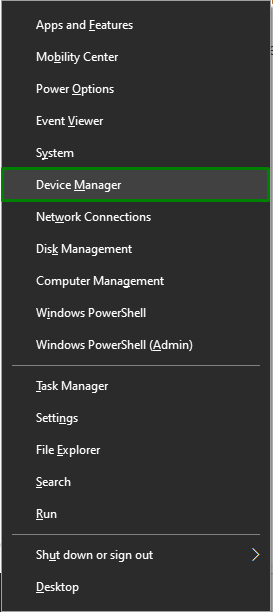
Step 1: Open “Device Manager”
First, hit the “Windows + X” shortcut keys and select “Device Manager” to switch to it:
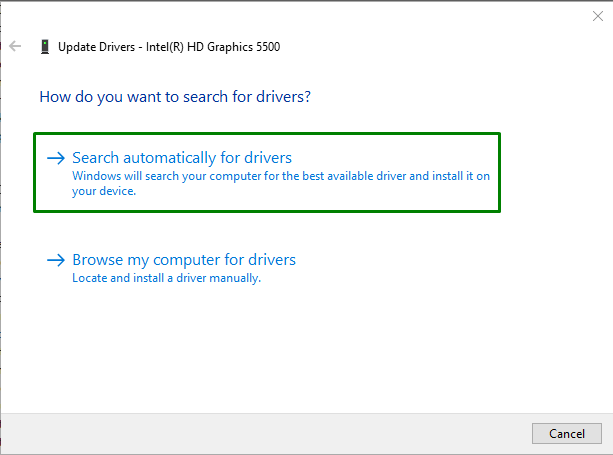
Step 2: Update Display Driver
Now, extend the “Display Adapter” category, right-click on the highlighted driver and select “Update driver” option:

In the below pop-up, select the first option to get the latest available driver:
After the driver is installed, restart the system, and the encountered limitation related to the BlueStacks application will get resolved.
Conclusion
To resolve the malfunctioning in the “BlueStacks” application in Windows 10, restart the system, check the system requirements, enable Virtualization, run the PC/Laptop in Clean Boot mode, verify the compatibility between the Bluestacks application and Windows, configure the BlueStacks app settings, or update the graphics driver. This article stated the fixes to resolve the abnormal behavior in the BlueStacks application.