This article guides you through the basics of batch scripting with practical examples, providing a comprehensive understanding on how to get started with batch files.
Understanding the Batch Files
Batch files use the “.bat” or “.cmd” file extensions and consist of a set of commands that are written in a simple text format. These commands are executed in the order that they appear in the file, making the batch files an excellent choice for automating the repetitive tasks, managing the files, and performing a system maintenance.
Practical Example to Create the First Batch File
Creating your first batch file is an easy process. In essence, batch files are scripts that are written in plain text that contain a list of instructions that must be executed sequentially. Here, we’ll provide you a thorough, step-by-step tutorial to start creating your first batch file.
We need a text editor to begin creating a batch file. You can use any of the available text editors to create a batch file, but the simplest one is Notepad which comes pre-installed on most Windows systems. So, in this tutorial, we will go with the Notepad editor.
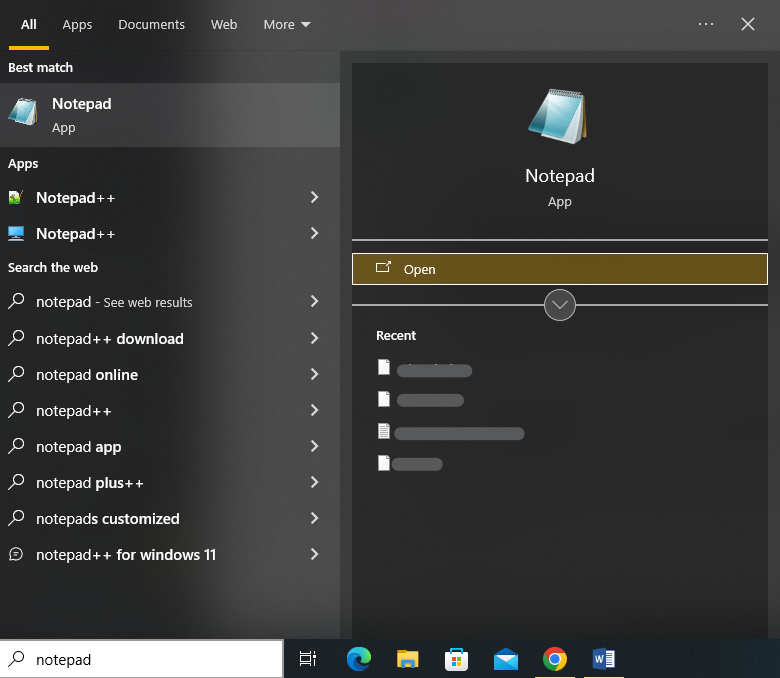
To open the Notepad, simply press the “Windows” key which opens a window that contains the installed applications. After that, enter “Notepad” into the search box by pressing “Enter.”
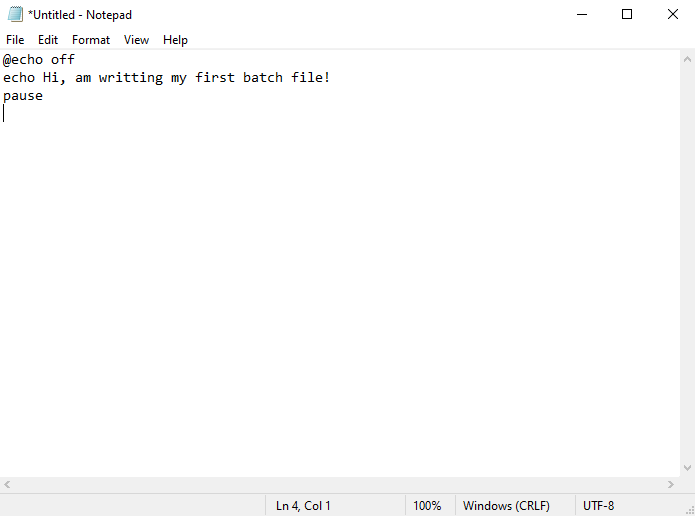
This launches the Notepad editor interface. We can start writing our batch scripts in the text editor. We now write a batch script in Notepad to display a simple message on the command prompt when the script is executed.
Here is the script that we enter:
echo Hi, am writing my first batch file!
Pause
Let’s break it down step by step to understand its commands.
The script starts with the “@echo off” command where the “@” symbol tells the batch script not to display the command itself in the output when it’s executed. The “echo off” command turns off the automatic display of each command in the batch script as it’s executed. In other words, it suppresses the “echo” behavior for subsequent lines, so they won’t be displayed in the command prompt.
Then, we use the “echo” command to display the text in the command prompt. The text that we provided to display on the screen is “Hi, am writing my first batch file!”.
Lastly, we use the “pause” command. This is used to temporarily stop the batch script’s execution and prompt the user to press any key to continue. It is often utilized at the end of batch scripts to keep the command prompt window open after executing the script so that the user can see the output. If we do not use the “pause” command within our script, the command prompt window closes immediately after the script finishes running.
The script starts when we run this batch script. Because of “@echo off”, it doesn’t display the command itself. It displays the text “Hi, am writing my first batch file!” on the screen. It displays the text, then stops as it awaits your next keypress.
After writing our batch commands, it’s time to save the file. Click on “File” in the Notepad menu. Then, select “Save As” from a list of available options.
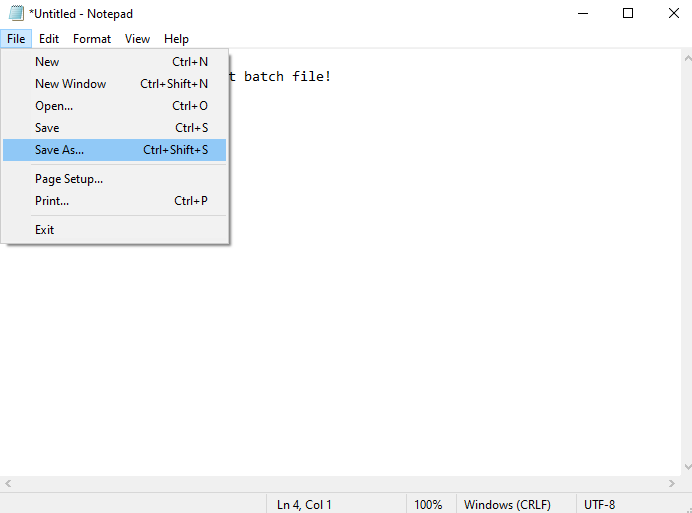
This opens a window where we are required to choose a location where we want to save our batch file. Although we are saving it to our desktop in the following instance, you can save it anywhere on the machine that you are using.
Next, choose “All Files” from the “Save as type” selection choice and provide a name to our batch file in the “File Name” field. Since the batch files use the “.bat” extension, we provide it with the “batchfile.bat” name. Now, hit the “Save” button and our batch file will be saved in a specified location with the provided name and file type.

To run our newly created batch file, we have to navigate to where the file is saved (e.g., desktop) and double-click on it.

This action opens a command prompt window and executes the commands in our batch file.

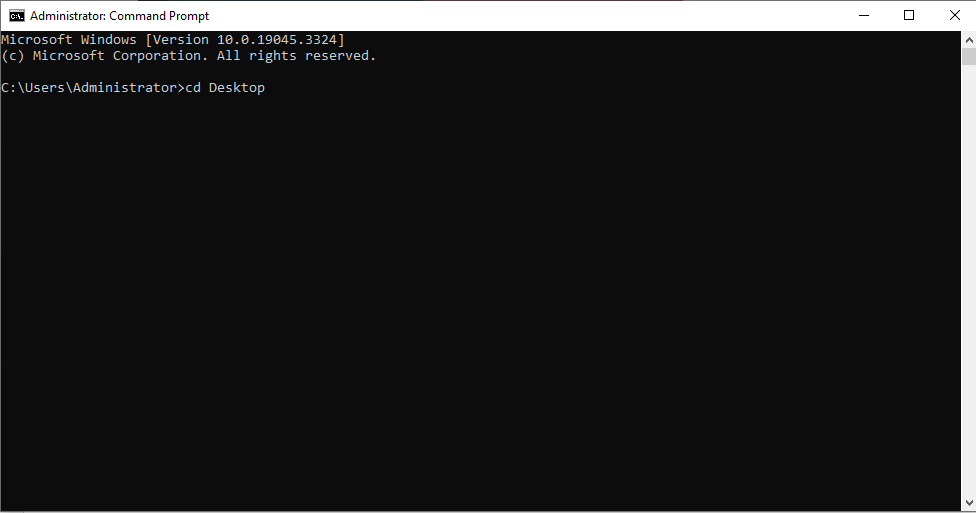
As an alternative, we may alternatively execute a batch file using PowerShell or through the command prompt. To achieve this, press on the “Win + X” short keys and choose “Command Prompt” or “Windows PowerShell” from the menu to launch the command line or PowerShell.
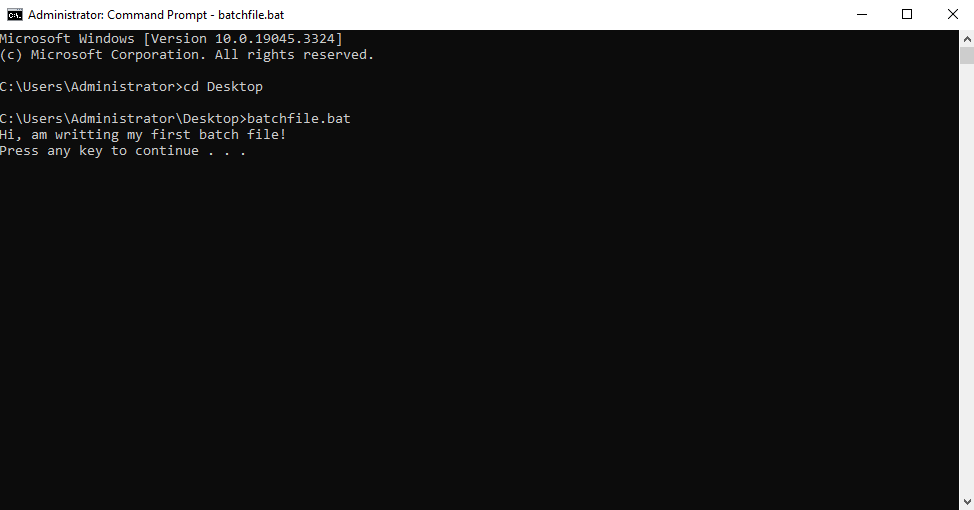
We write the “cd” command to navigate to the folder where our batch file is located. For example, since our batch file is on the desktop, we can use “cd Desktop” to navigate to the desktop folder.
Once we’re in the correct folder, we must type the batch file name (including the “.bat” extension) and press “Enter”. For example, if our batch file is named “batchfile.bat”, we type in “batchfile.bat” and press “Enter”.

In this case, the “Hello, this is my first batch file!” message is displayed in the command prompt window. Then, until you touch a key, the pause instruction will keep the window open.
Conclusion
Batch files are versatile tools for automating the tasks and managing the Windows systems efficiently. You have just read a thorough introduction to batch scripting in this article. We explained all the basic steps and tools that are used for scripting. A practical example is carried out to comprehend the basic syntax batch scripting. Also, we discussed the two alternatives that can be used to execute the batch script on the command prompt. Following this guide enables you to start your first batch script easily.