In this guide, we will show you how you can backup your Raspberry Pi data with some useful methods.
How to backup Raspberry Pi SD card
All your Raspberry Pi OS image is stored on your internal SD card and therefore, you will surely need to backup your SD card so that it will save your important data. Here, you will learn some methods that assist in backing up your Raspberry Pi SD card data in a few minutes. So, let’s start discussing each one of them.
Method 1: Using “SD Card Copier” to backup Raspberry Pi SD card data
Another easy way to backup your SD card data is by using the SD card copier option available in the Raspberry Pi main menu. To use this option first insert a USB drive into the Raspberry Pi and go to the “Accessories” option of Raspberry Pi there you will find the “SD card copier”.

Open the SD Card Copier.
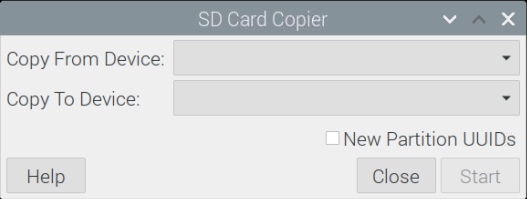
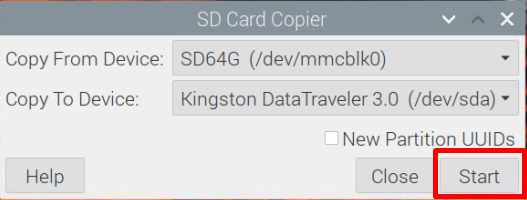
Choose the SD card using the “Copy From Device option” and USB storage using the “Copy to Device” option.

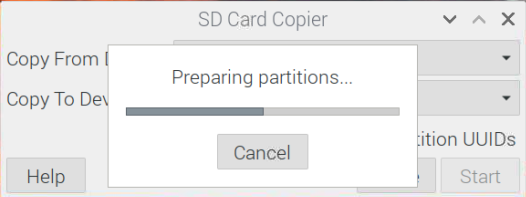
Click on the “Start” option to perform the process and it will copy your SD card data onto your USB storage.
Method 2: Copying your SD card image
Copying a full image of your SD card is one of the methods that you should consider in backing up your Raspberry Pi data. This process is opposite to flashing the image of your OS on the SD card as here we are backing up all the Raspberry Pi data onto a single image file so that you can restore it later.
To perform this method, you have to execute the following steps.
Step 1: Power off your Raspberry Pi device and insert your SD card into the card reader device and then plug the device into your PC.
Step 2: Download and install Win32DiskImager on your PC from the website.
Step 3: Open the Win32DiskImager after your PC completes the installation.
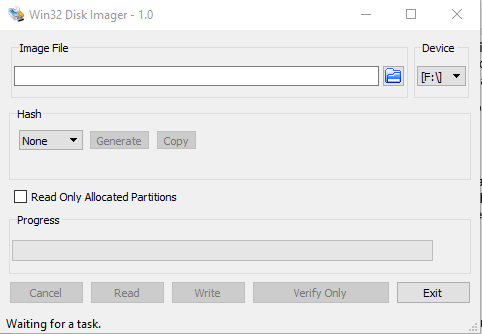
Step 4: Confirm whether the Win32 Disk Imager selects the correct SD card of Raspberry Pi.

Step 5: Select the “Folder” icon.
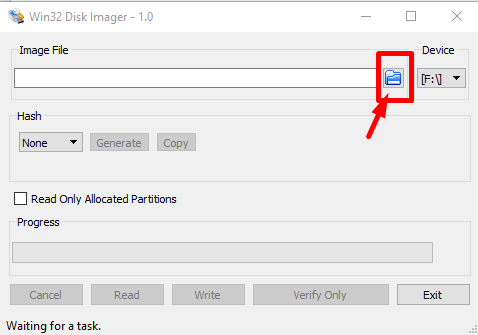
Step 6: Don’t select any file, instead navigate to the folder where you want to keep your SD card image. Provide a name to your image file with the .img extension and when it’s done click on the “Open” option.


Step 7: Click on the “Read” option to start backing up your Raspberry Pi data in an image file.
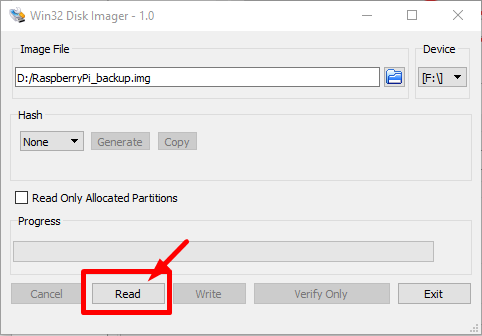

The process will take around 5-10 minutes and once it completes, it creates an image of your Raspberry Pi OS data on your PC folder so that it can be restored later on.

Method 3: Compressing the Home Directory of Raspberry Pi
If you are looking for a more comfortable option without removing your SD card from the device then you should need to execute this method. In this method, you will perform the backup of only the home folder and when it is done, you will then easily uncompress the file and restore every directory of your Raspberry Pi OS.
To perform this method, you will require the execute the following commands in the terminal.
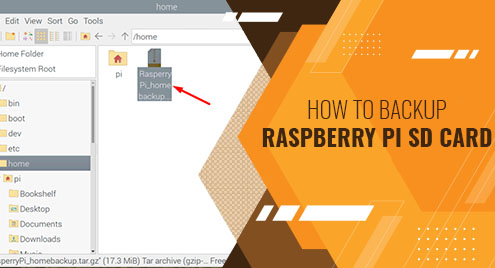
$ sudo tar czf RasperryPi_homebackup.tar.gz pi

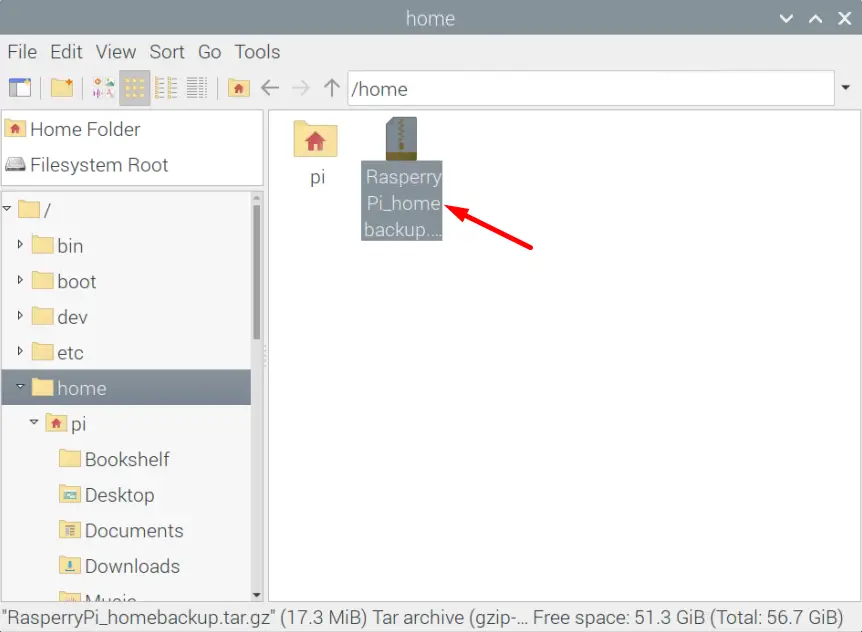
The above script will create a backup file with the name “RaspberryPi_homebackup.tar.gz” and you can save this file on the cloud or on your PC with the help of a USB drive.
Conclusion
Raspberry Pi is a good source of learning for people of all ages and when someone works on this device, he/she needs to think about backing up their Raspberry Pi SD card data in order to avoid accidentally losing data. The above methods will be necessary for everyone who wants to secure their important data onto their PC and if you are among them then you should pick the one that will be easy for you.