Prerequisites:
To perform the steps that are demonstrated in this guide, you need the following components:
- A properly configured Windows system
- Admin access
Windows Routing Table
A routing table refers to a set of rules that specifies where the data packets traveling over the network will go to. The rules are often represented in a table format, hence the name. The goal is to make effective routing decisions.
Any operating system with networking capabilities come with some form of a routing table and Windows is no exception. In Windows 10 and Windows 11, if you’re connected to a network, the operating system automatically generates a routing table.
Besides the existing rules, we can also manually add rules to the routing table. While most users don’t need this feature, it can come in handy in some situations. For example:
- There are multiple internet connections and they serve different purposes.
- There are multiple subnets on the network and they need to send traffic to a particular subnet.
- Your Windows system is acting as a network router.
Viewing the Windows Routing Table
To view the default routing table in Windows, from an elevated Command Prompt or Windows PowerShell console, run the following command:
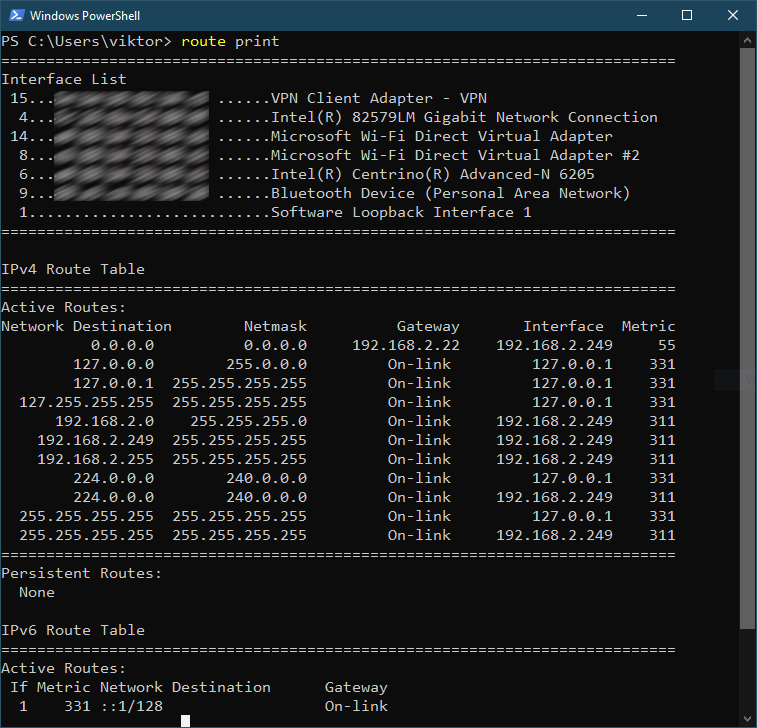
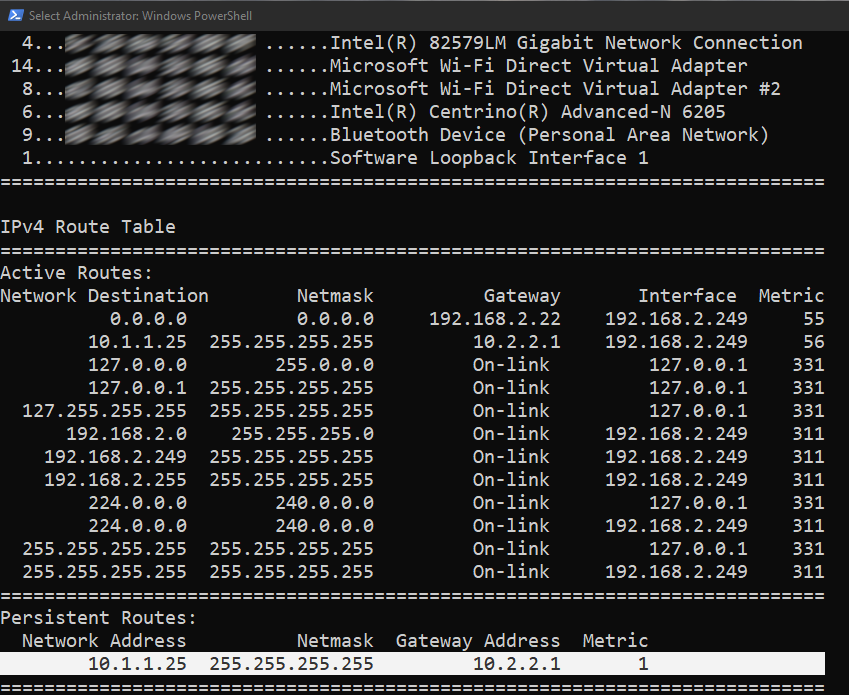
Each routing rule entry has several values:
- destination: It specifies the host to be reached.
- netmask: The subnet mask value for the route entry. If not specified, the default value is used (255.255.255.255).
- interface: The interface for the specific route.
- metric: The weight of the destination. The lower the value, the higher the priority of the rule.
The routing table should be organized by the metric value. Windows shows the routing table upside down which means that the first entry is the last rule (the default rule if all other rules fail).
For any IP destination, the operating system consults the routing table. If several rules match, the rule with the smallest metric value is used.
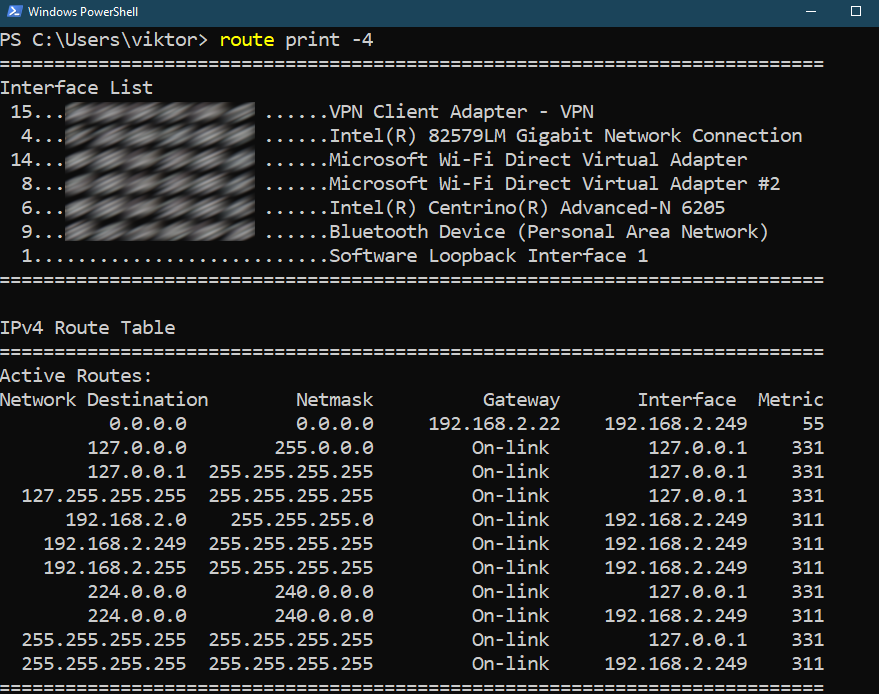
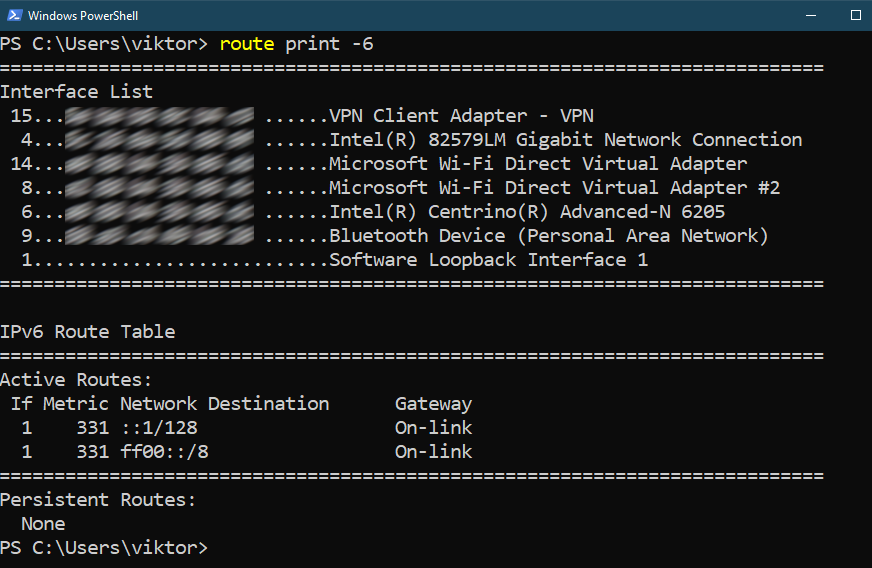
There are different routing rules for both IPv4 and IPv6. To get the routing rules for a specific protocol, use the following commands instead:
Adding Static Routes
Using the “route” command, we can add a static route to the routing table. The command structure is as follows:
For example, to add a route for 10.1.1.25 to use the gateway 10.2.2.1, the command looks like this:

After adding the route, verify if the routing table is updated accordingly:
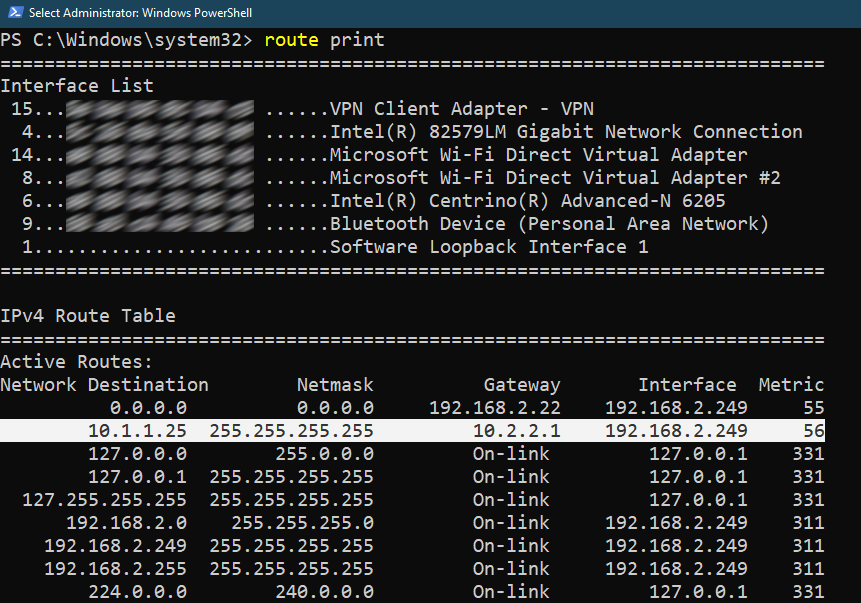
Note that we didn’t specify any metric value of our custom route entry, so it was decided automatically.
Adding Permanent Static Routes
In the previous example, we added a static route to the Windows routing table. However, the entry is temporary as Windows will reset back to the default routing table after a reboot.
If we want to create a permanent static route, the command structure is as follows:

Here, the additional “–p” flag tells the “route” command to add a permanent static route to the routing table.
If added successfully, the rule should appear under the “Persistent Routes” section.
Deleting a Static Route
If a routing rule is no longer necessary, it’s recommended to remove it from the routing table to reduce the clutters and increase the efficiency.
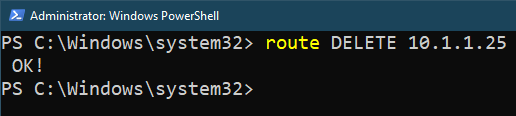
When adding a static route, we had to specify the network, subnet mask, and gateway. To delete the entry, however, we only need to mention the network. Thus, the command structure is as follows:
For example, to delete the static route for 10.1.1.25 that we added previously, the command is as follows:
Modifying the Static Route Rules
When working with custom route rules, you may have to update the rule(s) multiple times to achieve the desired result. Thankfully, the “route” command supports modifying the static route rules.
To edit a static route, the command structure is as follows:

Note that we can only change the gateway and metric value of an existing rule. If you want to completely change the rule, you have to delete it and recreate it from scratch.
Conclusion
In this guide, we discussed about the static routes table in Windows. It’s a database that is responsible for redirecting the network traffics to the destination in the most efficient manner. We demonstrated how to add the custom static route rules to the routing table. We also showcased how to modify and delete an existing rule as needed.
Interested in mastering the Windows operating system? Check out the Windows OS sub-category with tons of guides to help you achieve a total control of your system.
Happy computing!