This article will explore the possibility of accessing the SQLite database from JavaScript.
Is it Possible to Access an SQLite Database from JavaScript?
Yes, you may use JavaScript to access an SQLite database. To do this, you will need JavaScript platforms like Node.js (an important platform for software development that uses JavaScript on the server-side) to access SQLite databases directly. Node.js provides various SQLite modules and libraries that allow JavaScript applications to interact with SQLite databases.
One popular SQLite library for Node.js is node-sqlite3. It provides a powerful and efficient interface for working with SQLite databases. The steps needed for the process are given below:
Step 1: Install Node.js and SQLite
The first step in getting started with accessing SQLite DB from JavaScript is to install Node.js and SQLite. Downloading and setting up Node.js is possible from this page. SQLite can be installed by following the guidelines here.
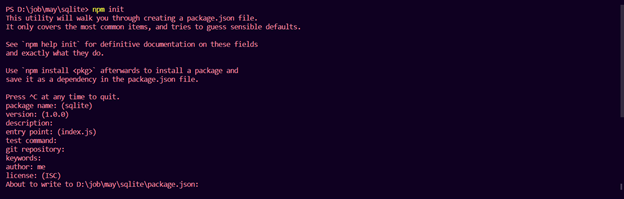
Step 2: Start a Node.js Project
Any coding editor that you are familiar with can be used to launch a Node.js project. Specifically for this, I’m using Visual Studio Code.
Open a project, go to its terminal, and enter the following command to create a Node.js Project.
Step 3: Install the SQLite3 Library
Once we have installed Node.js and SQLite, we need to install the sqlite3 library in Node.js. This can be done by running the following command in the command line:
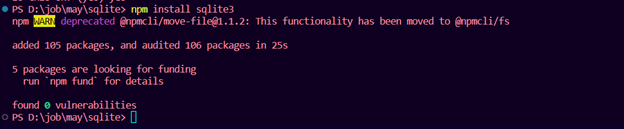
After installation, this dependency will be added to the package.json file, which can be found on the left-hand side of the File Explorer section in the Visual Studio Code.

Step 4: Create an index.js File
Create an index.js file, in which you will connect to the SQLite Database and access it.
You can click on this icon to create a new file and type index with the extension .js to create the index.js file.

Step 5: Access SQLite DB in Node.js
To access the SQLite DB in Node.js, we need to create a new JavaScript file and require the sqlite3 library:
Step 6: Connect to the Database
We can then connect to the database using the following code:
if (err) {
console.error(err.message);
}
console.log('Connected to the data database.');
});
In this example, we create a new sqlite3.Database instance and specify the path to the SQLite database file. If the file doesn’t already exist, SQLite will create it for you.
Step 7: Create a Table
To create a table in this database, you will enter the CREATE TABLE command in the index.js file.
Step 8: Insert Rows
To insert a row in the above-created table, you can enter the below given INSERT INTO command:
Step 9: Run Query
Once we have connected to the database, we can run SQL queries using the following code:
if (err) {
throw err;
}
rows.forEach((row) => {
console.log(row.name);
});
});
This example will retrieve all the rows from the user’s table and log their names to the console.
Step 10: Close the Connection
Finally, we need to close the connection to the database when we are done using it:
if (err) {
console.error(err.message);
}
console.log('Closed the database connection.');
});
Here’s the full code of using node-sqlite3 to access an SQLite database in Node.js:
let db = new sqlite3.Database('./data.db', (err) => {
if (err) {
console.error(err.message);
}
console.log('Connected to the data database.');
});
db.serialize(() => {
db.run('CREATE TABLE IF NOT EXISTS users (id INT, name TEXT)');
db.run('INSERT INTO users (id, name) VALUES (?, ?)', [10, 'Janet']);
db.all('SELECT * FROM users', [], (err, rows) => {
if (err) {
throw err;
}
rows.forEach((row) => {
console.log(row.name);
});
});
db.close((err) => {
if (err) {
console.error(err.message);
}
console.log('Closed the database connection.');
});
});
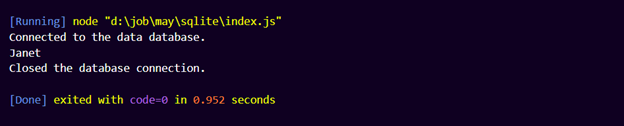
The above code creates a connection to the data.db SQLite database file. If a table called users doesn’t already exist, it creates one and adds a record with the name Janet and an id of 10. The user’s table is then fully retrieved, and the names of all rows are printed. It ends by closing the database connection.
Output
Conclusion
By following the step-by-step guide outlined above, one can easily create a new database, create tables, insert data, query data, and close the connection. With the power of SQLite and Node.js together, developers can build complex applications that require persistent data storage.