We will be using different Nginx server configuration files as it helps in avoiding the common mistakes and also helps in maintaining the default configuration files as a fallback option.
Step 1:
As always, first, update your APT.
Step 2:
Now, upgrade your APT.
Step 3:
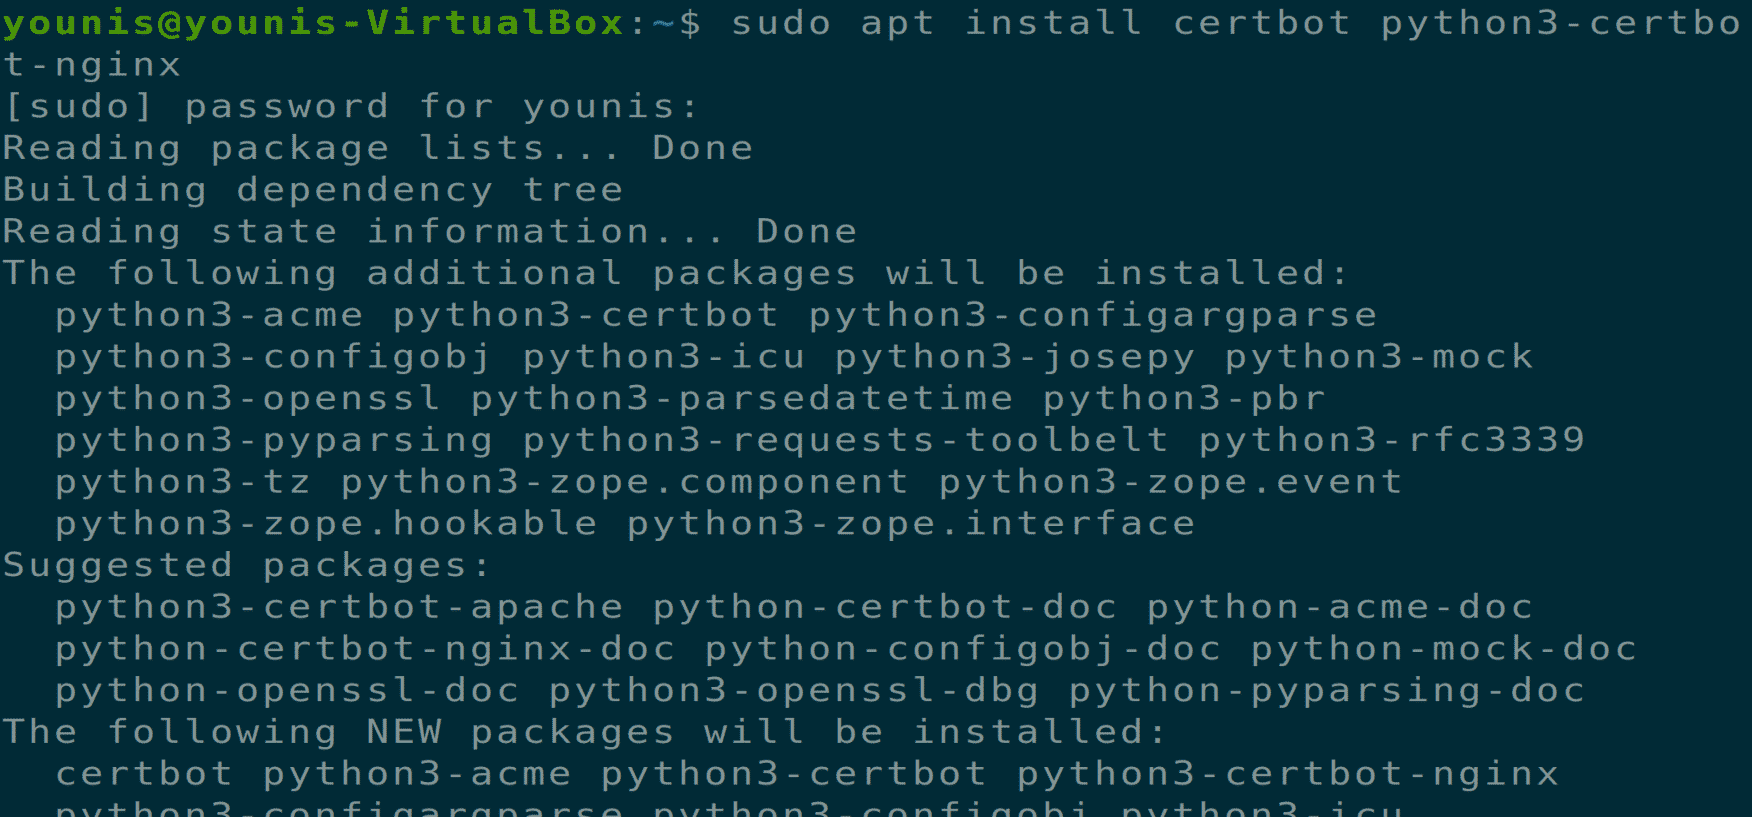
Now, download and install a Certbot software tool that will help you to get an SSL certificate from Let’s Encrypt. Execute the following terminal command for installing Certbot via APT.
This will install certbot, but you will still need to configure the Ngnix configuration file for SSL certificate installation.
Step 4:
You should set up a server block before moving to the next step, and it is a necessary step in case you are hosting multiple sites. We will create a new directory in “/var/www” path and let the default directory un-touched. Execute the following command for creating a new directory.
Step 5:
Now provide ownership permissions to this directory via the following terminal command.
Step 6:
Now ensure that the permissions are granted by executing the following terminal command.
Step 7:
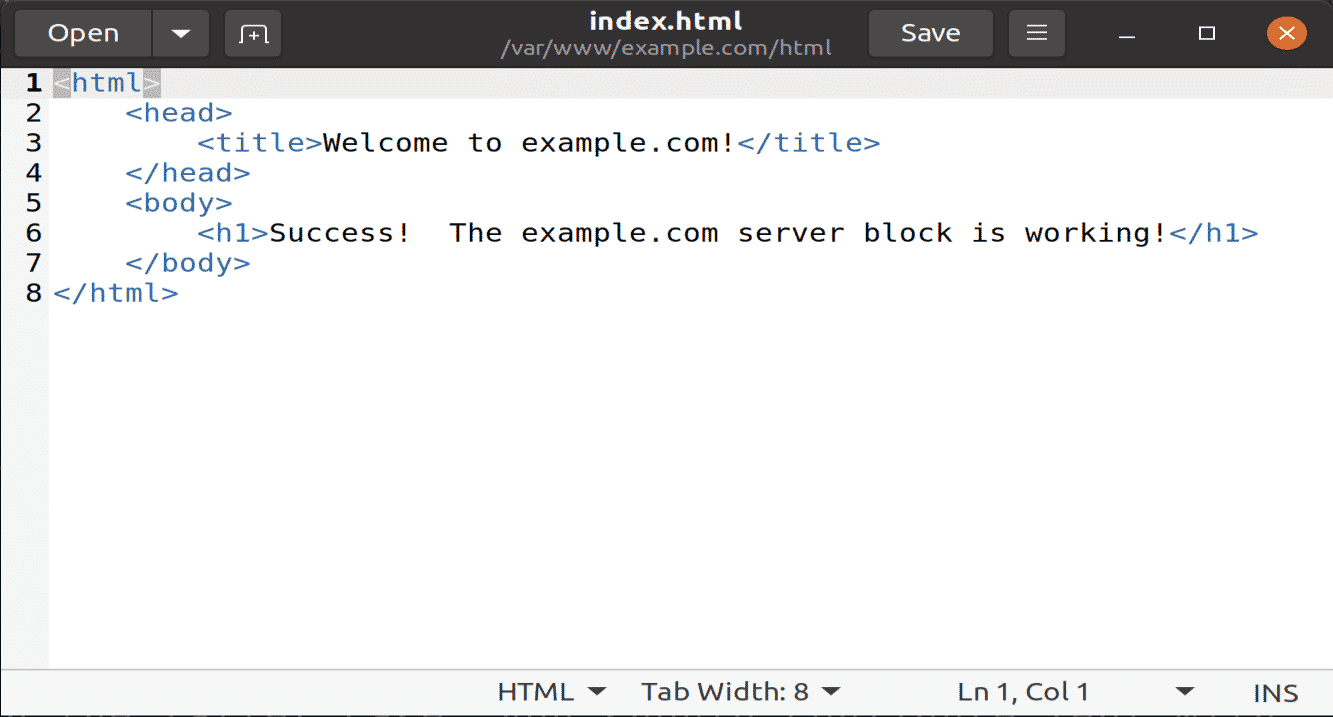
Now create an index.html file using your favorite text editor, I am using a gedit text editor.
Add the following text inside this HTML file.
Save and close the file.
Step 8:
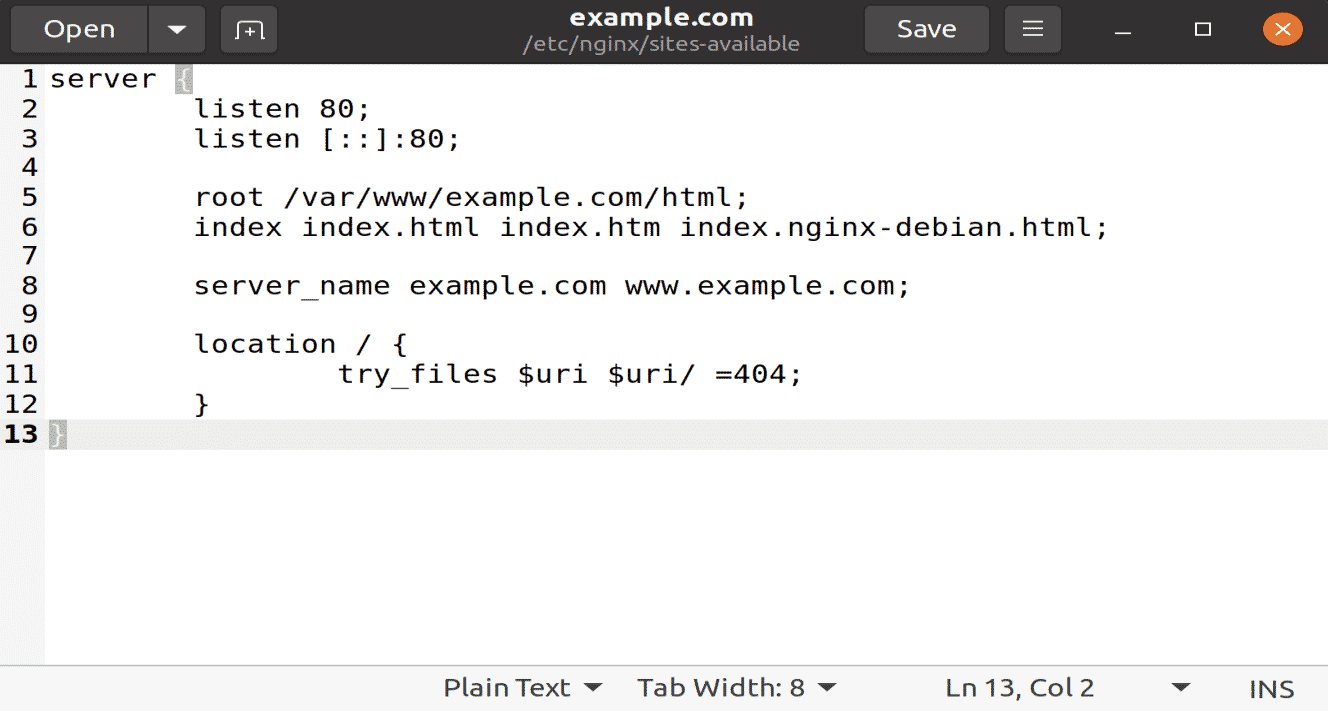
Now create a new configuration file the sites-available directory using your favorite text editor by executing the following command.
Now add the following text in this configuration file for the new directory and domain name.
listen 80;
listen [::]:80;
root /var/www/example.com/html;
index index.html index.htm index.nginx-debian.html;
server_name example.com www.example.com;
location / {
try_files $uri $uri/ =404;
}
}
Save and close this file to take effects.
Step 9:
Now, enable the new directory for Nginx startup via the following terminal command.
Step 10:
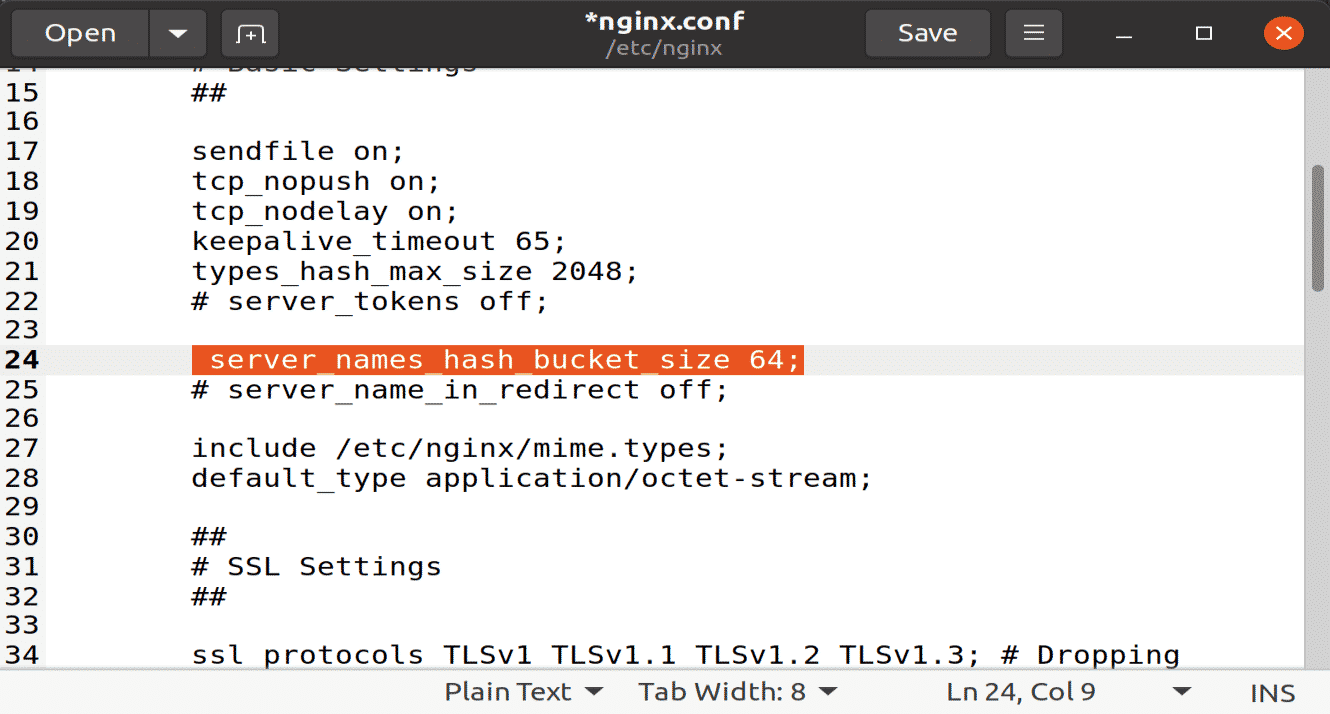
To avoid any server name hash bucket memory problems, provide a single value in the following configuration file.
Now remove the # sign from hash_bucket_size option to uncomment it. Save the close the file.
Step 11:
Now type the following two commands for removing syntax errors and restarting the Nginx server.
Step 12:
Now, you need to verify and confirm Nginx configuration files. As certbot needs to find the correct server block in Nginx configuration, so it looks for a server_name that is in matching with the requested domain. To verify these configuration files, type the following terminal command.
Step 13:
Now, update your UFW firewalls rules to allow Nginx for full permissions. If you are having any previous rules relating to the HTTP server, delete them by using the UFW deny option before adding the following command.
Step 14:
Now we arrive at the point where we have to install an SSL certificate using certbot software. Execute the following terminal command.
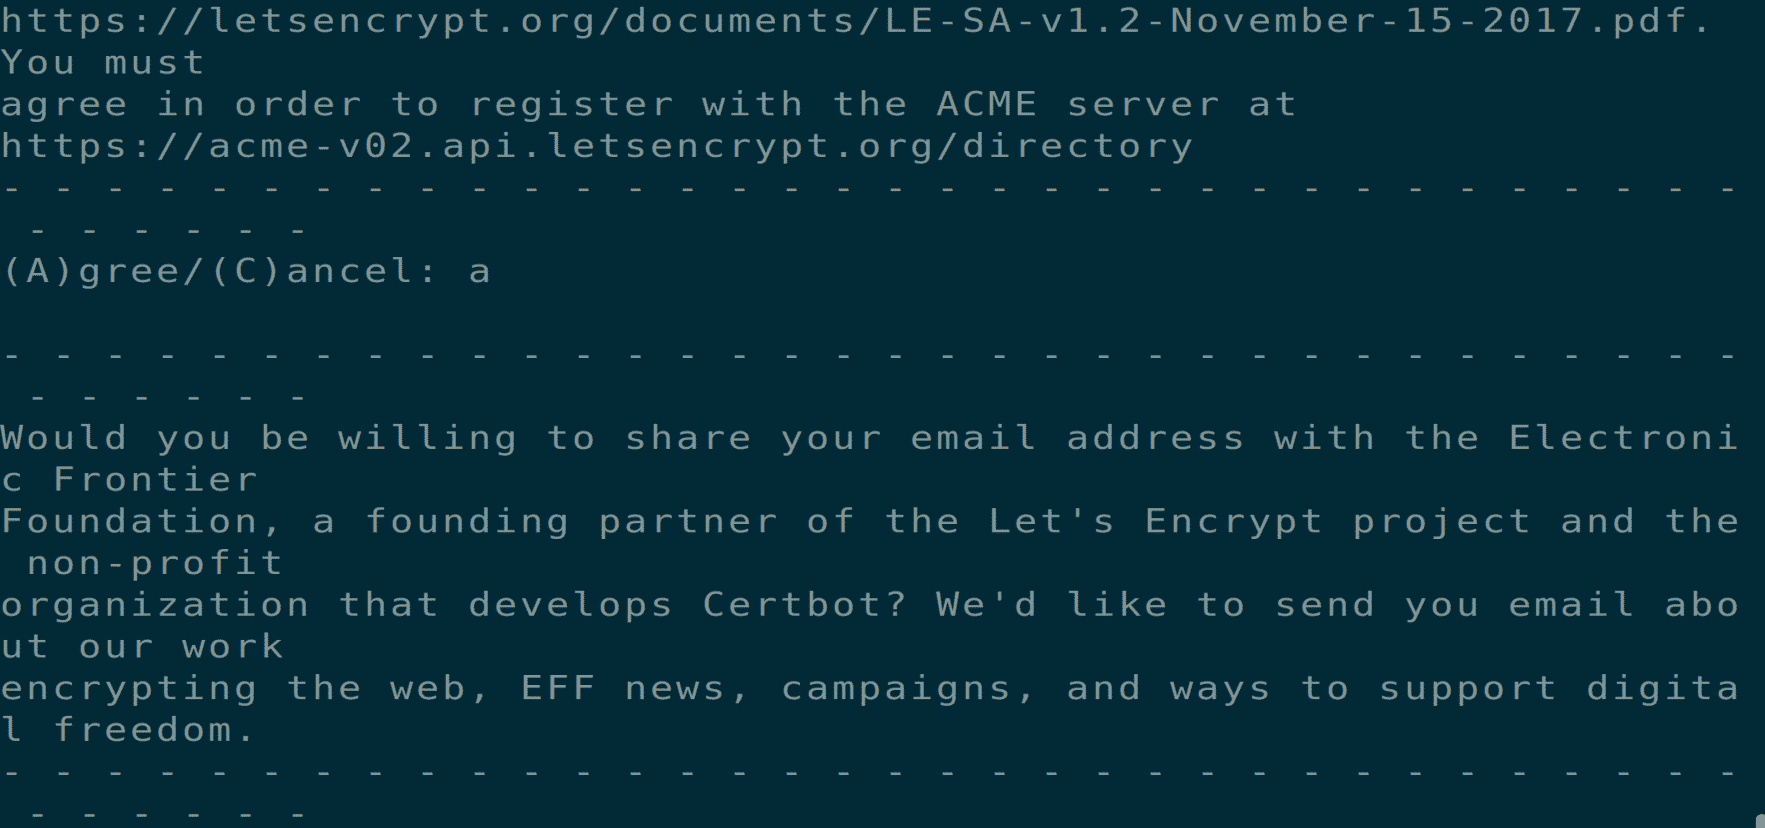
If you are using certbot for the first time, you will be asked for an email address and terms and conditions prompt, agree to do so, and you will be able to move the next step.
Step 15:
Now you will be asked for configuration of your HTTPS settings, choose the necessary options, and hit the Enter button to continue. Certbot will install all the required certificates and update the Nginx files; your server will reload with a message to tell you that your process is successful.
Step 16:
Now that you have installed the certificates, you should also make sure that these certificates are auto-renewed after a specific time. Execute the following two terminal commands to ensure this process’s ability.
Conclusion:
So far, we have covered how to build a separate server block in Nginx, install certificates using Certbot software tool from Let’s Encrypt certificate authority servers, and how to apply a renewal process for these certifications.


