In this guide, you will find:
How to Change VNC Ports for Remote Access Raspberry Pi
- How to Change VNC Ports for Remote Access Raspberry Pi Using Command
- How to Change VNC Ports for Remote Access Raspberry Pi within VNC Server File
- How to Change VNC Ports for Remote Access Raspberry Pi Using SSH Command
- How to Change VNC Ports for Remote Access Raspberry Pi Using PuTTY
- How to Kill Current VNC Session on Raspberry Pi
- How to Fix “You’ll have to kill the Xvnc process manually” Error on Raspberry Pi
How to Change VNC Ports for Remote Access Raspberry Pi
You can change VNC ports for remote access Raspberry Pi using:
- Command
- VNC Server File
- SSH
- PuTTY
How to Change VNC Ports for Remote Access Raspberry Pi Using Command
One of the simplest ways to change the VNC ports for remote access Raspberry Pi is adding the port number with the VNC server you want to create. You have to use the keyword rfbport and assign it the port number according to your choice.
The following command will assign port number 5906 to the VNC server created on Raspberry Pi:
The above command will work on Raspberry Pi Bookworm OS, however, if you are using other Raspberry Pi OSs, you can use the following command to change VNC port:
The vncserver command will create a desktop session with port 5906, which you can confirm from below-mentioned output of the above command:
In the above output, the 6 relates to port 5906, because it uses 5900 as default port for VNC.
How to Change VNC Ports for Remote Access Raspberry Pi Using VNC Server
You can also add the keyword RfbPort with the port number and add this inside the VNC Server file, which you can open from the following command:
Inside this file, just add the following line:
Now save the file using CTRL+X, add Y and press Enter to exit back to the terminal. Then reboot the device to apply the changes.
How to Change VNC Ports for Remote Access Raspberry Pi Using SSH Command
Remotely accessing Raspberry Pi through VNC over SSH is a secure way compared to directly accessing it through VNC. The reason is the hacker can easily crack your Raspberry Pi password and login to your Raspberry Pi using the default username and VNC port number. Thus, if you use SSH for VNC access, you can later configure your SSH and make it more secure. This will help prevent unauthorized access to your Raspberry Pi device.
Changing VNC ports for remote access Raspberry Pi is straightforward if you are using a Mac or Linux system. The only thing you have to do is to open the Mac or Linux terminal and execute the following command:
Note: If you are having trouble accessing the device remotely on Mac or Linux, you have to enable screen sharing and remote login option from the System settings.
How to Change VNC Ports for Remote Access Raspberry Pi Using PuTTY
PuTTY is an open-source SSH client for Windows that allows you to change the port number for VNC to remotely access the Raspberry Pi. You can use the following steps to change VNC port on Windows and access the Raspberry Pi device on the same system with the desired port number:
Step 1: Install and Open PuTTY on Windows
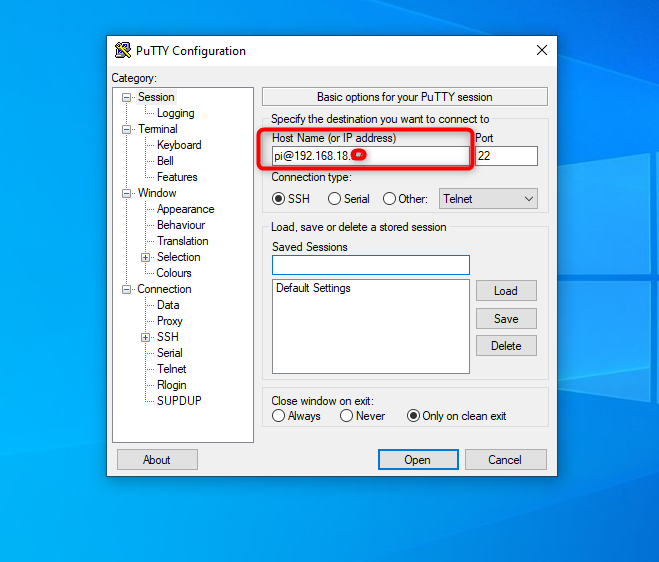
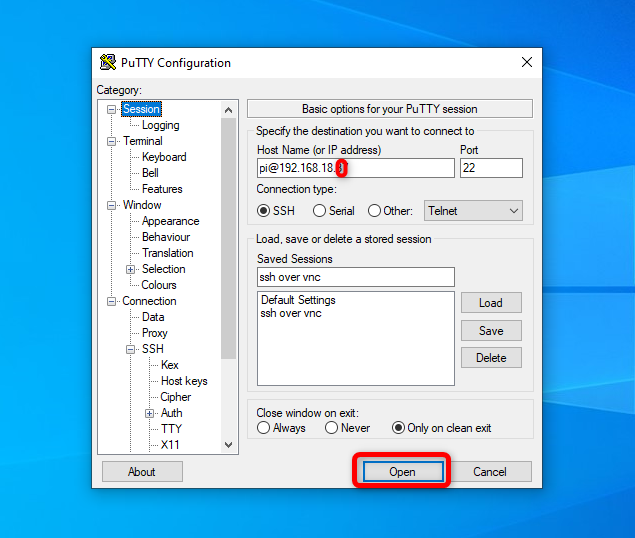
Install PuTTY on Windows from here and open it from the Start Menu, then enter the username and host IP address of your Raspberry Pi using the following syntax:
Note: The Raspberry Pi’s IP address can be found via terminal through hostname -I command.
Step 2: Save the Current PuTTY Session
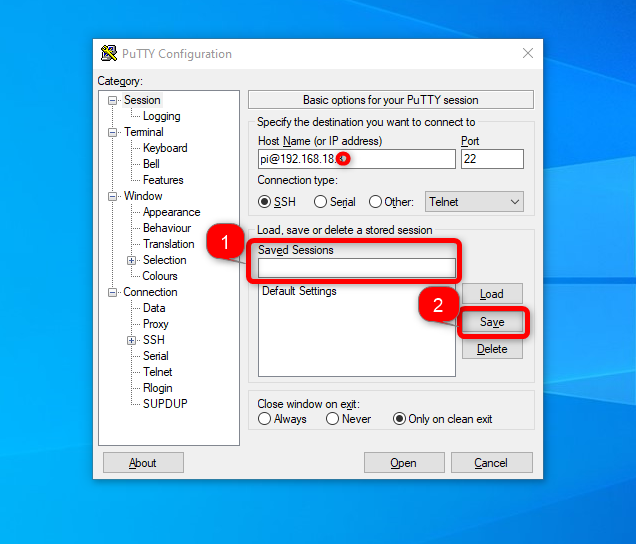
Enter the session name in the Saved Sessions box then save the session using the Save button:
Step 3: Forward Port in PuTTY on Windows
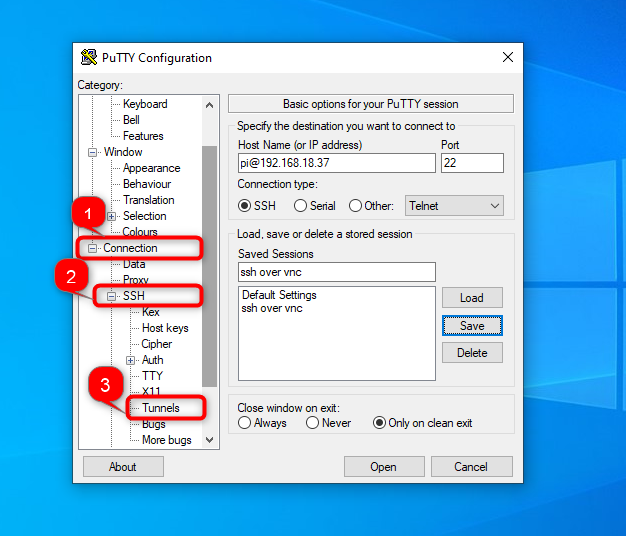
Go to the Connection settings, expand it then navigate to the SSH settings and choose the Tunnels option:
Step 4: Enter Source Port and Destination
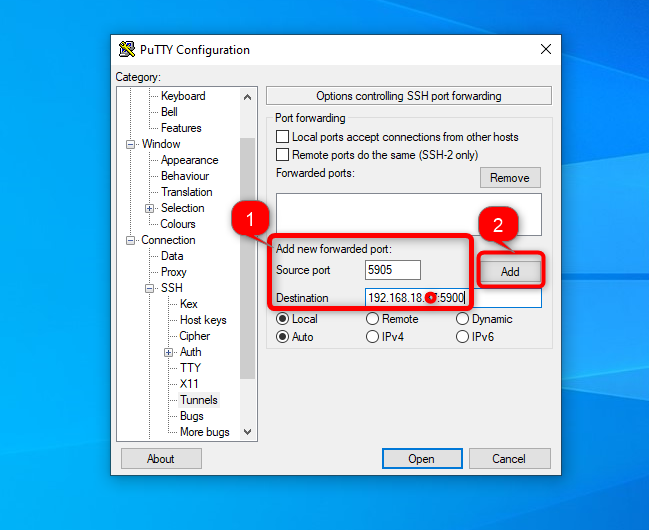
Enter the new port number in the Source port box, and write the IP address with the default VNC port number in the Destination box. Then click on the Add button:
Step 5: Open the PuTTY Session
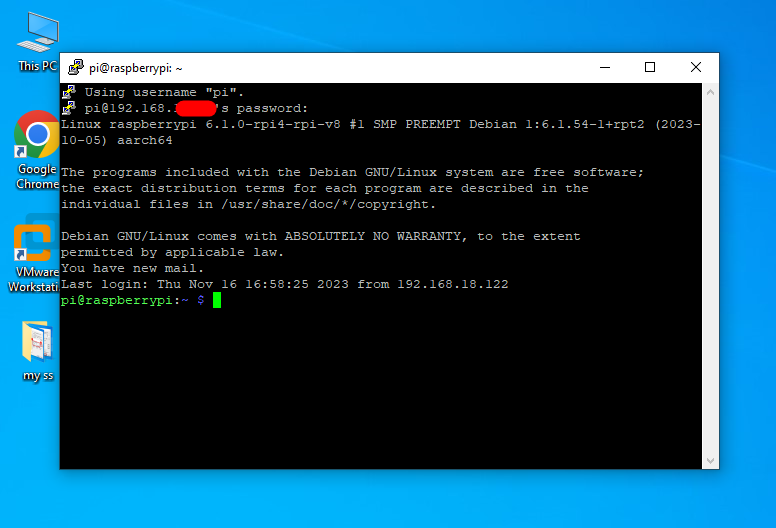
Move to Session option again and click on the Open button to open the PuTTY session:
This will change the VNC port number and you can use this port number to access the Raspberry Pi device.
How to Access Raspberry Pi Through VNC with Port Number
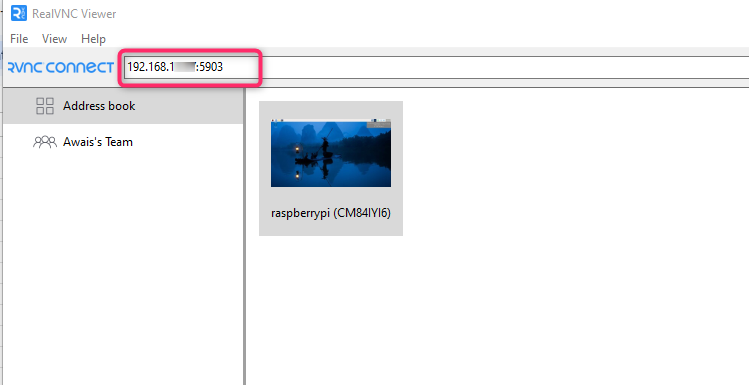
You must have to download and install VNC Viewer on your other computer to access the Raspberry Pi device. Then open VNC Viewer and use the Raspberry Pi IP address with the desired port number to access it by entering username and password.
Note: If you have used the SSH command to change VNC port for Raspberry Pi, you can use localhost with the desired port number instead of providing the Raspberry Pi IP address to access the device.
How to Kill Current VNC Session on Raspberry Pi
If you have created multiple VNC servers with different port numbers and want to kill those servers to reduced load on Raspberry Pi, you can use the following command:
Note: Use vncserver only instead of vncserver-virtual if you are using Raspberry Pi OS other than Raspberry Pi Bookworm.
How to Fix “You’ll have to kill the Xvnc process manually” Error on Raspberry Pi
While executing the kill command to kill the VNC Server with a desired port number, you may encounter error “You’ll have to kill the Xvnc process manually”, as shown below:
This error occurs because you have set the port number in the VNC Server file, and you have to remove the line “RfbPort = port_no” from the file and then reboot the device. This will not only fix the above issue but it will fix the connection refused issue that will be encountered while accessing the Raspberry Pi from the VNC Viewer.
Conclusion
Changing the default VNC port for Raspberry Pi is crucial for securing your Raspberry Pi device from unauthorized access. You can change VNC ports for remote access Raspberry Pi by using command or inside the VNC Server file. You can also use the SSH command to change VNC ports for Raspberry Pi, however, it will work only for Mac or Linux systems. For Windows, you have to use PuTTY to change the default VNC ports for Raspberry Pi using the step-by-step guide presented in the above section of this guide.


