In this article, we will show you how to uninstall the NVIDIA drivers from Windows 10 and Windows 11 operating systems.
Topic of Contents:
- Uninstalling the NVIDIA Drivers from Windows 11
- Uninstalling the NVIDIA Drivers from Windows 10
- Conclusion
Uninstalling the NVIDIA Drivers from Windows 11
In this section, we will show you how to uninstall the NVIDIA GPU drivers from Windows 11.
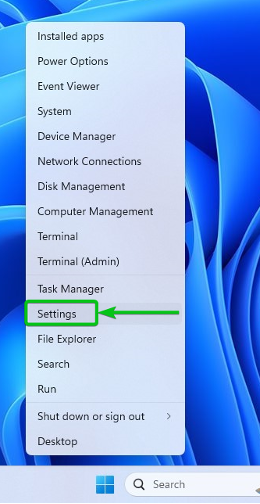
First, right-click (RMB) on the start menu of Windows 11 and click on “Settings”.
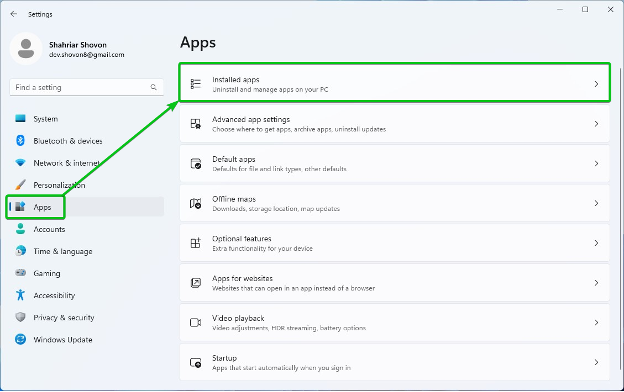
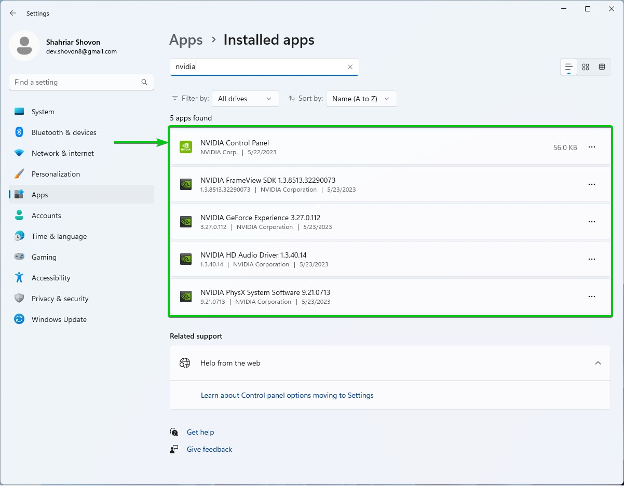
From the Settings app, click on Apps > Installed apps.
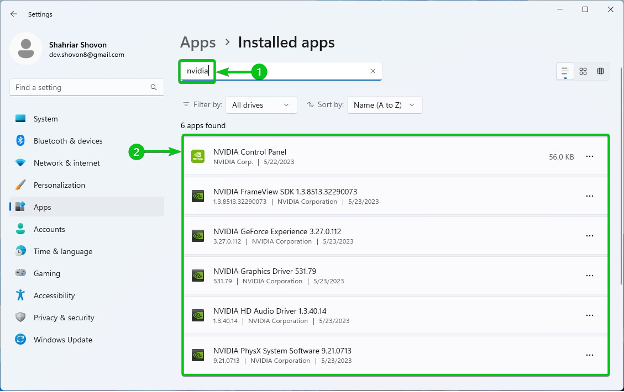
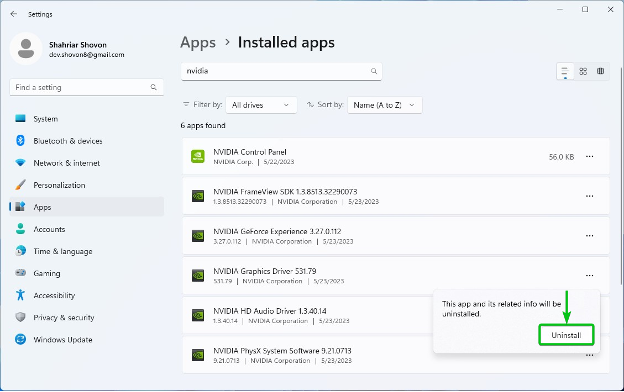
Search for nvidia[1] and all the NVIDIA drivers and apps that are installed on your Windows 11 computer should be listed[2].
You should uninstall the NVIDIA Graphics Driver first.
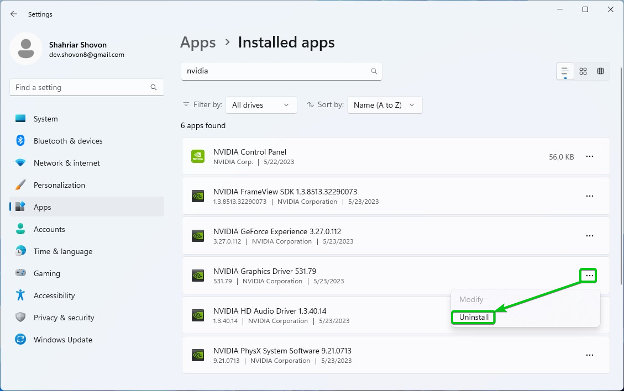
To uninstall the NVIDIA Graphics Driver, click on ⋯ > Uninstall.
Click on “Uninstall”.
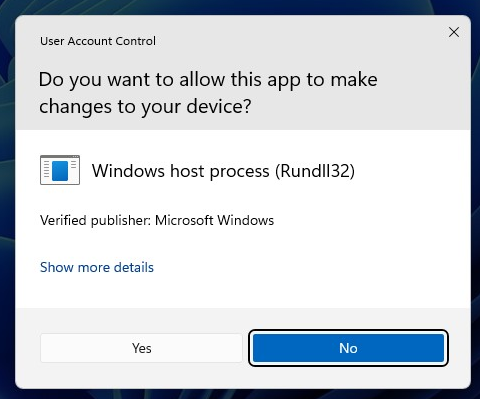
Click on “Yes”.
The NVIDIA Uninstaller window should be displayed.
Click on “UNINSTALL”.
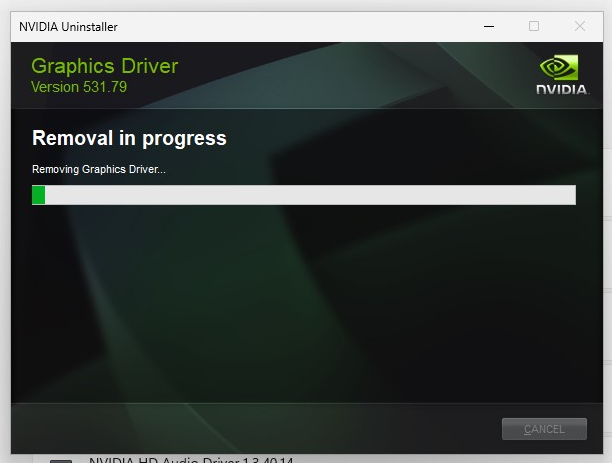
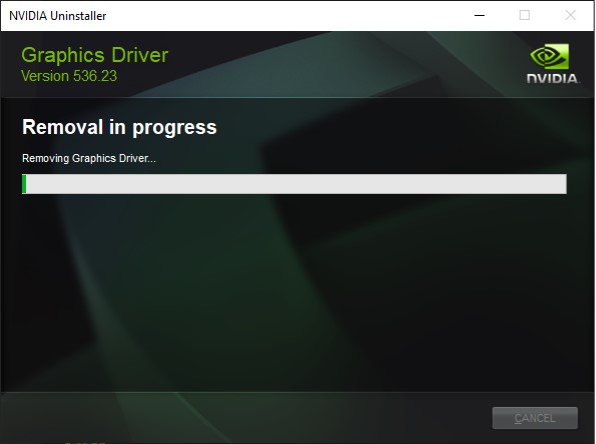
The NVIDIA Graphics Driver is being uninstalled. It takes a few seconds to complete.
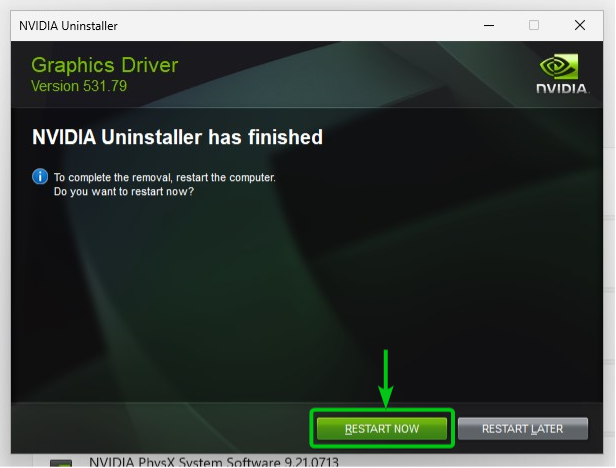
At this point, the NVIDIA Graphics Driver should be uninstalled.
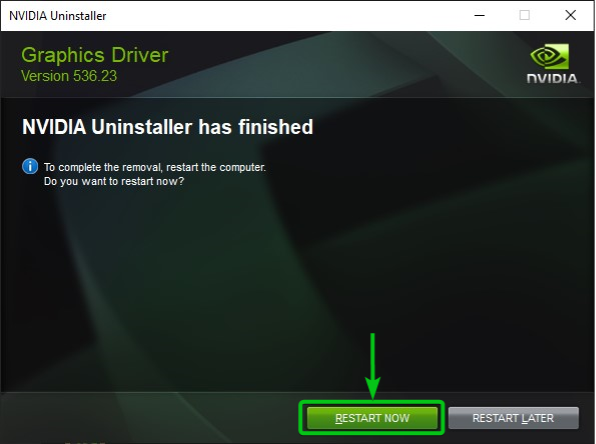
For the changes to take effect, click on “RESTART NOW” to restart your computer.
In the same way, uninstall all the NVIDIA drivers and apps one by one from the Apps > Installed apps section of the Settings app of Windows 11.
NOTE: You might need to restart your computer a few times to uninstall all the NVIDIA drivers components from Windows 11.
Uninstalling the NVIDIA Drivers from Windows 10
In this section, we will show you how to uninstall the NVIDIA GPU drivers from Windows 10.
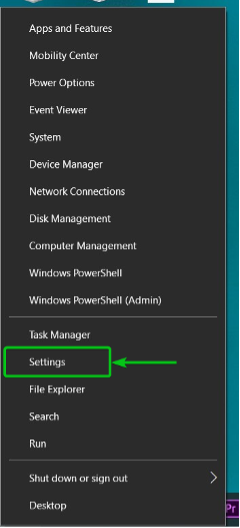
First, right-click (RMB) on the start menu of Windows 10 and click on “Settings”.
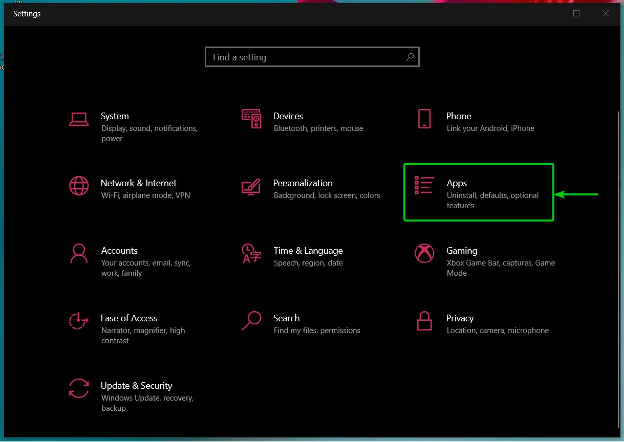
Click on “Apps”.
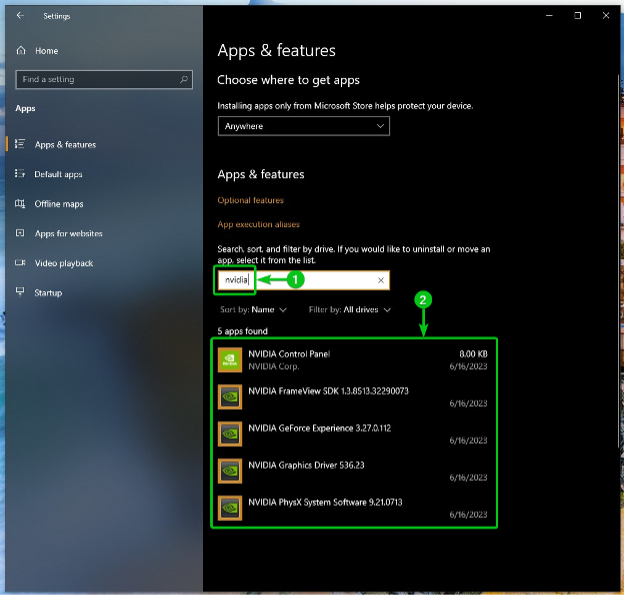
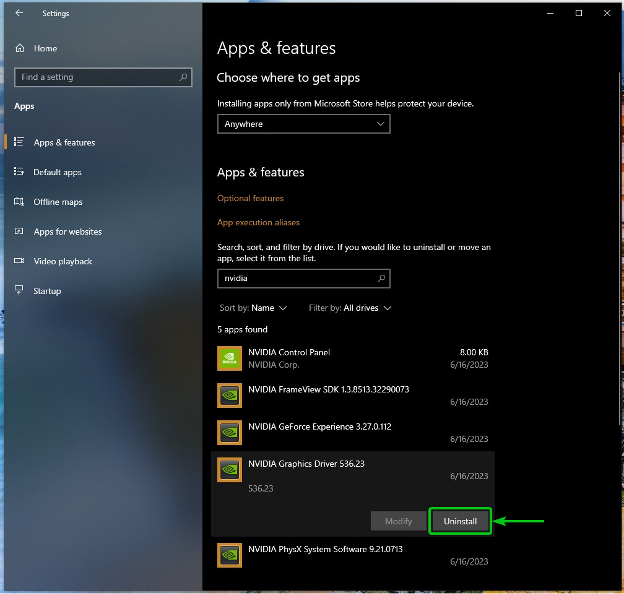
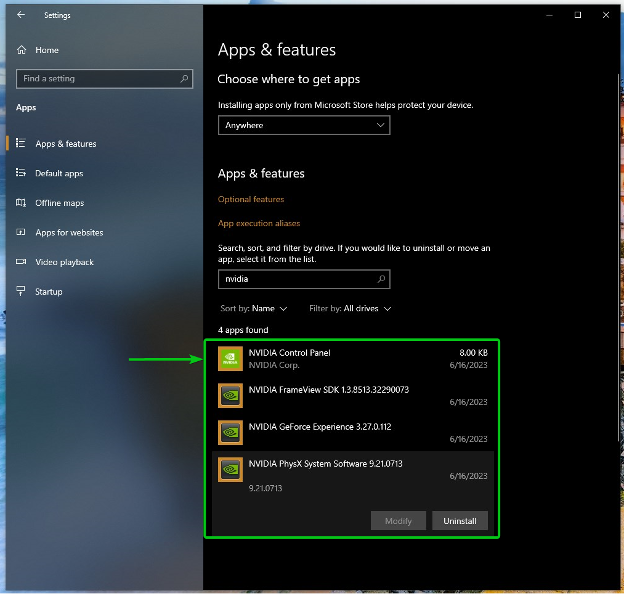
From the “Apps & features” section, search for nvidia[1] and all the NVIDIA drivers components that are installed on your Windows 10 computer should be listed[2].
You should uninstall the NVIDIA Graphics Driver first.
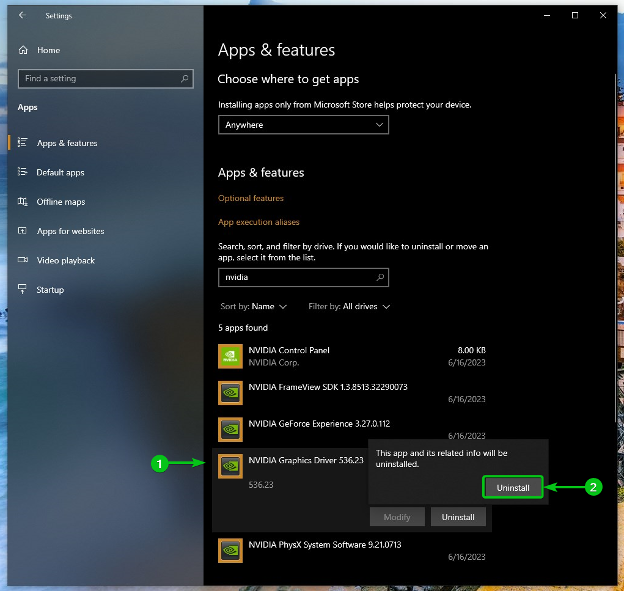
To uninstall the NVIDIA Graphics Driver, click on it and click on “Uninstall”.
Click on “Uninstall”.
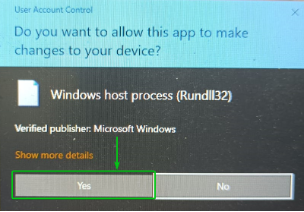
Click on “Yes”.
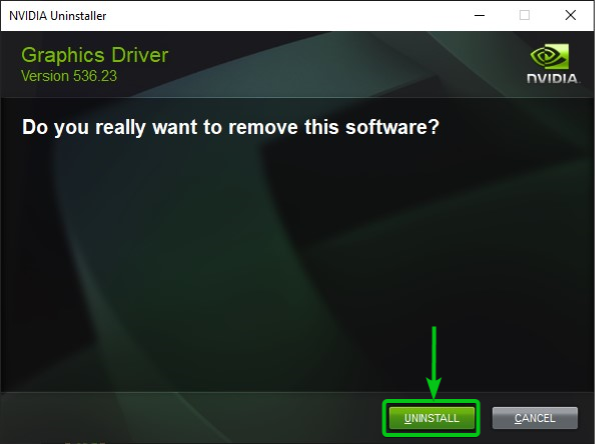
The NVIDIA Uninstaller window should be displayed.
Click on “UNINSTALL”.
The NVIDIA Graphics Driver is being uninstalled. It takes a few seconds to complete.
At this point, the NVIDIA Graphics Driver should be uninstalled.
For the changes to take effect, click on “RESTART NOW” to restart your computer.
In the same way, uninstall all the NVIDIA drivers components one by one from the Apps > Apps & features section of the Settings app of Windows 10.
NOTE: You might need to restart your computer a few times to uninstall all the NVIDIA drivers components from Windows 10.
Conclusion
We showed you how to uninstall the NVIDIA GPU drivers completely from Windows 10 and Windows 11 operating systems.

