This article is a step-by-step guide on how to install an Oracle Instant Client for Toad for Oracle.
How to Install an Oracle Instant Client for Toad for Oracle
To install an Oracle Instant Client for Toad for Oracle follow the following steps:
- Download the Oracle Instant Client Zip File.
- Install and Configure Oracle Instant Client.
- Confirm the Installation in Toad.
- Create a New Connection.
Step 1: Download Oracle Instant Client Zip File
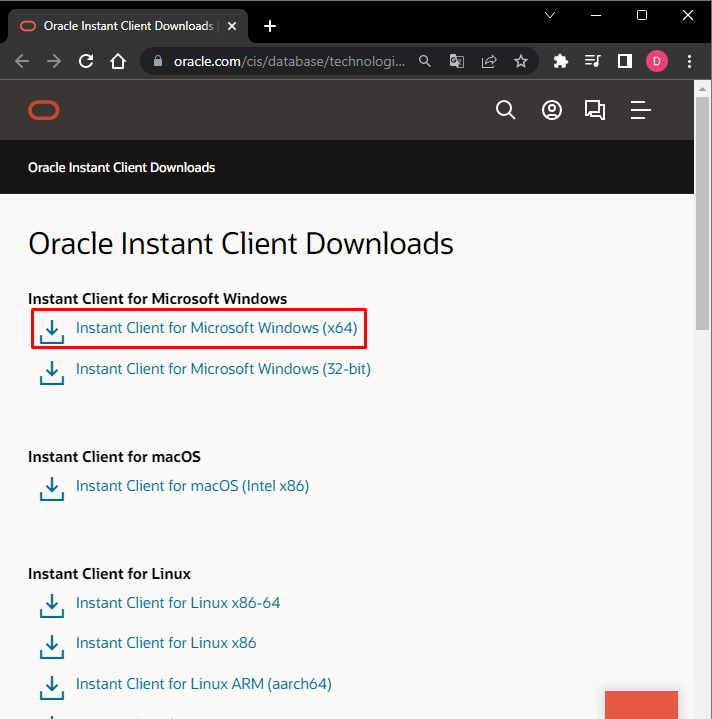
In order to install the Oracle Instant Client a zip file is required, which can be downloaded by navigating to the Oracle Instant Client Downloads page. This page allows you to download the “Oracle Instant Client” based on your operating system. For this post, the “Instant Client for Microsoft Windows (x64)” is selected:
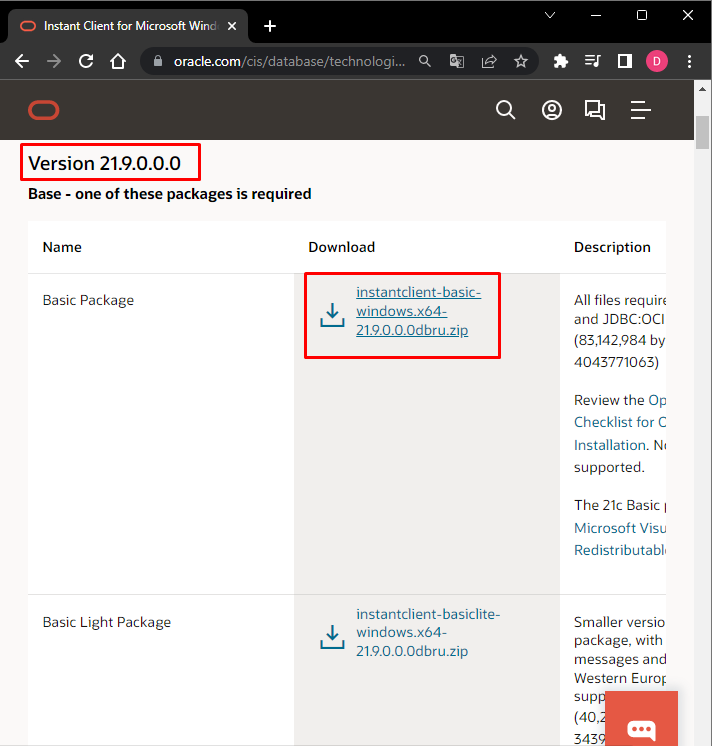
Select the version and download the zip file accordingly. For this post the file is “instantclient-basic-windows.x64-21.9.0.0.0dbru.zip”:
Step 2: Install and Configure Oracle Instant Client
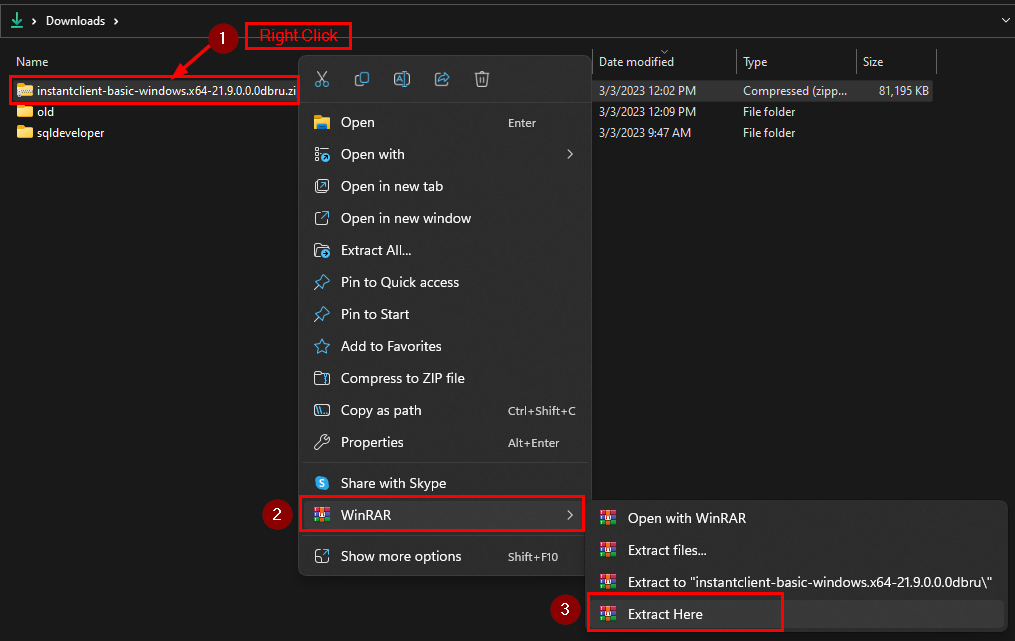
After the successful download, go to the download directory and extract the file:
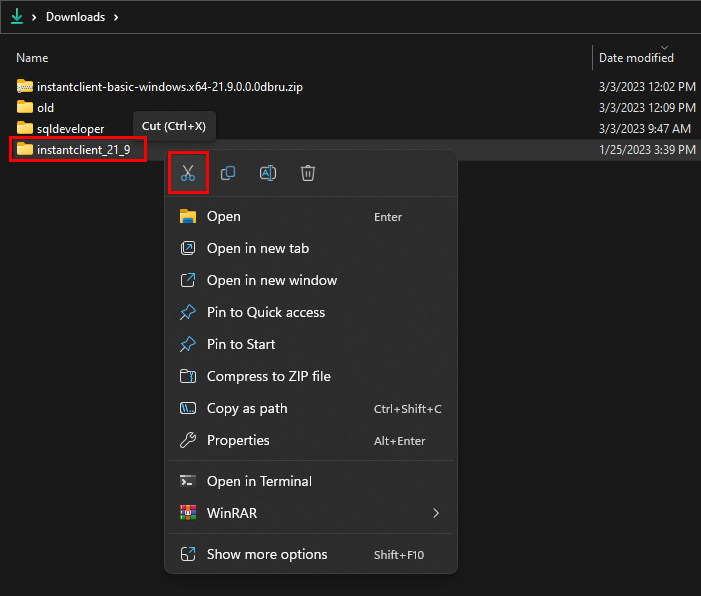
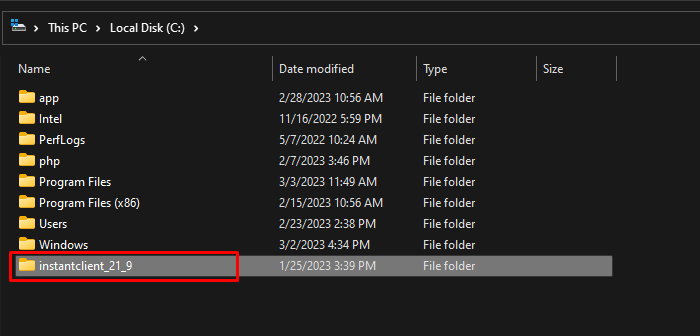
Let’s move this extracted folder to the windows directory (C), so cut it from here:
Paste in the Windows (C) directory:
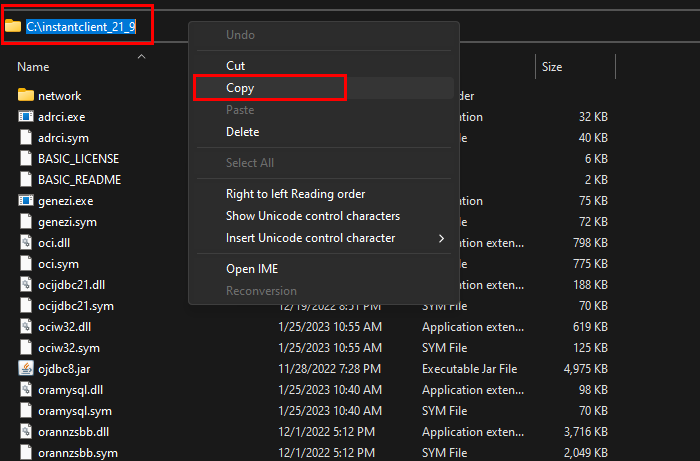
Go into the instant client directory and copy the path of this directory, because, for the installation, the path needs to be added in the system environment variable:
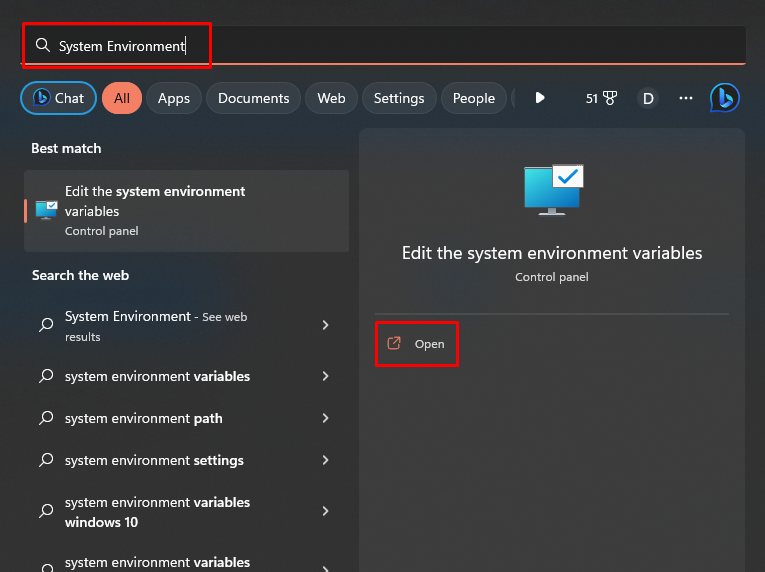
Press the Windows button, type System Environment, and click on open:
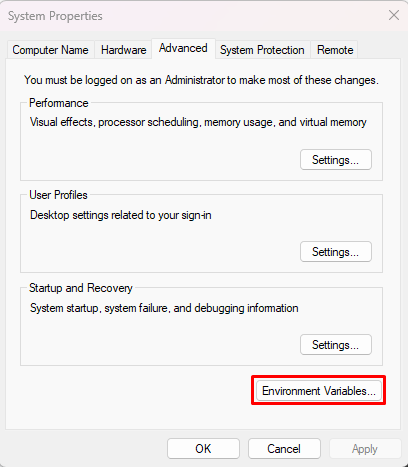
The System Properties screen will open, then click on the “Environment Variables…” button:
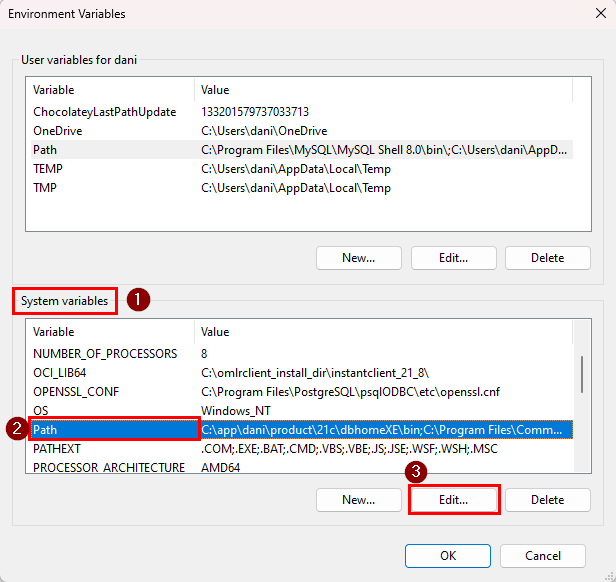
Select the “Path” in the “System variables” and click on the “Edit” button to add the Oracle Instant Client path:
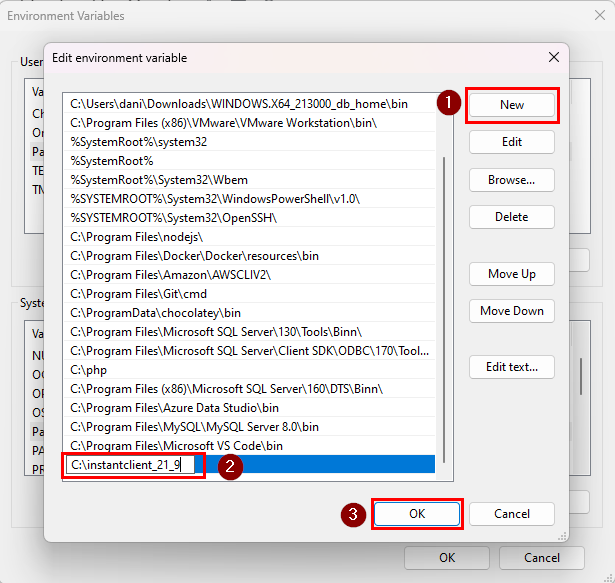
Click on the “New” button, paste the copied path (instant client), and click on “OK”:
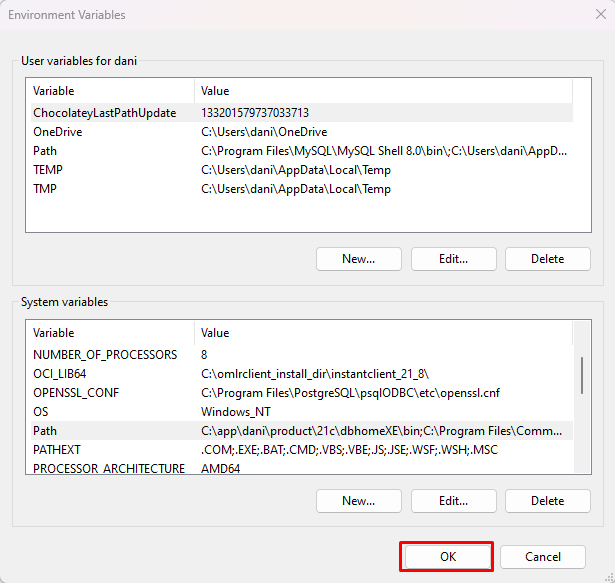
Click on the “OK” button to close the “Environment Variables” window:
Step 3: Confirm the Installation in Toad
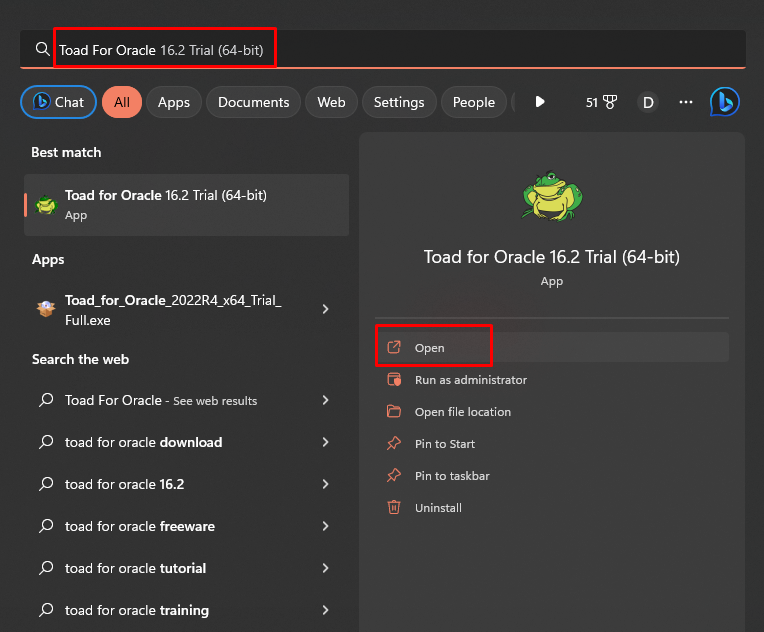
To confirm the installation of the Oracle Instant Client in Toad, press the windows 🪟 button, type Toad for Oracle, and click on open:
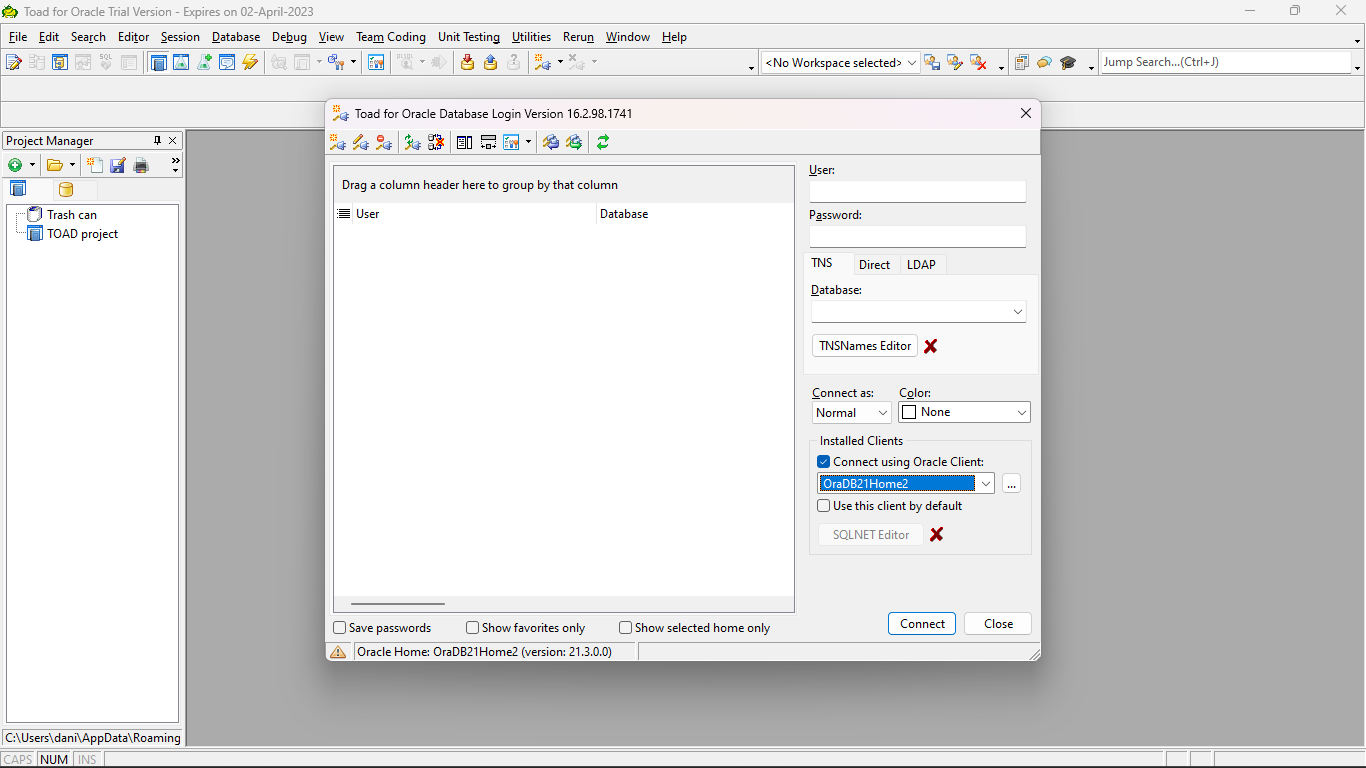
As a result, the following screen will appear:
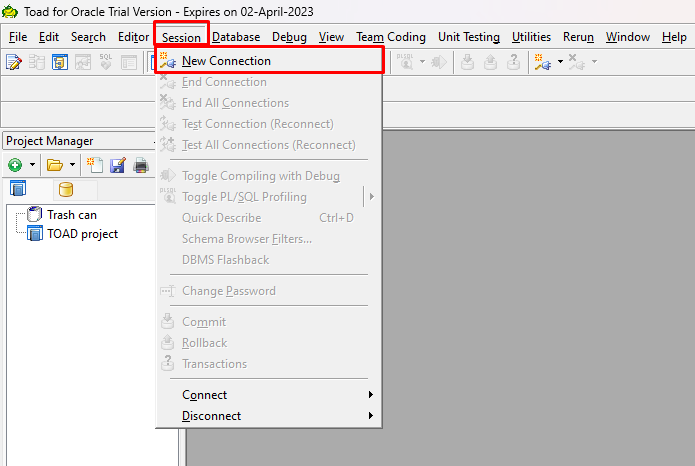
Alternatively, the New connection screen can be opened by clicking on the New Connection in the Session menu:
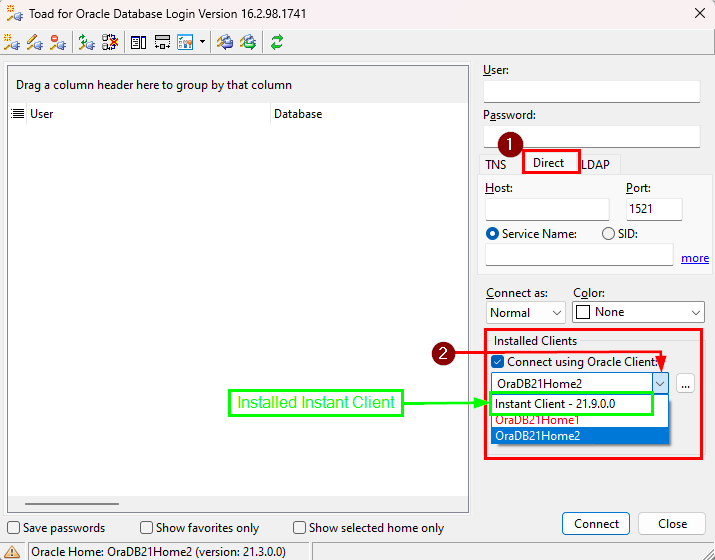
In the login screen, go to the “Direct” option, and then navigate to the drop-down menu of Installed clients. The presence of the instant client option confirms the installation of Oracle Instant Client for Toad:
Step 4: Create Connection Using Oracle Instant Client
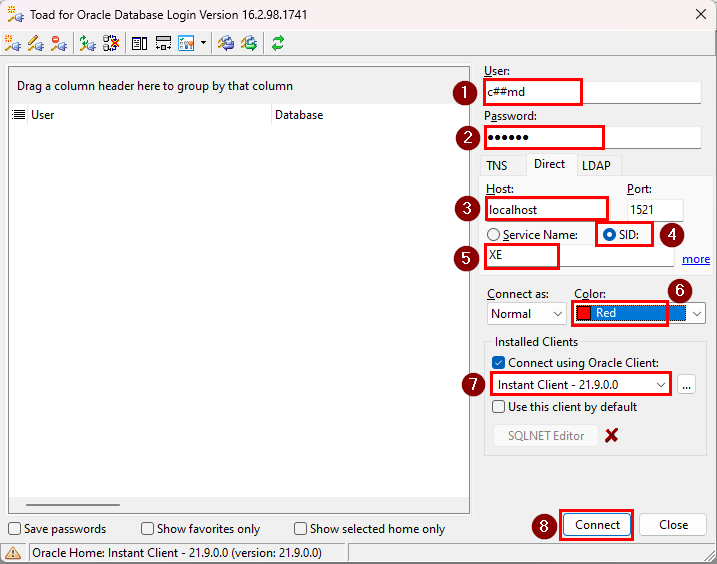
To make a new connection type the User name, Password, and Host Name. After that, select SID, suitable color, and then select the Instant Client in the installed Clients option. Finally, click on Connect button to create a new connection:
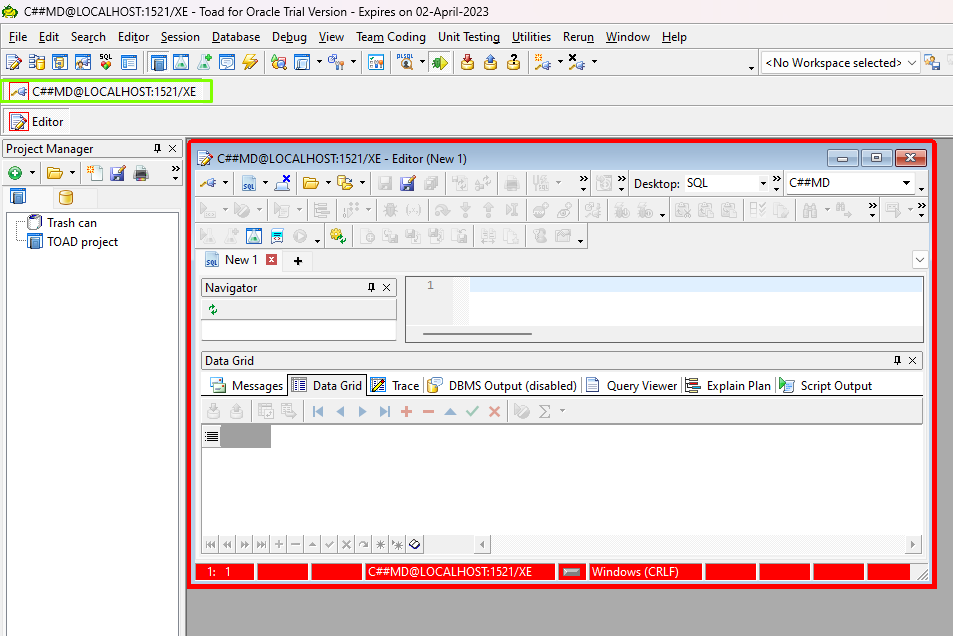
The following screen displayed that the connection has been created:
This is how you can install an Oracle Instant Client for Toad for Oracle.
Conclusion
To install an Oracle Instant Client for Toad for Oracle, the Instant Client is required that can be downloaded from Oracle’s Official website. After that, extract it and then cut and paste the extracted file into the C directory. In order to complete the installation and configuration of the Oracle instant client, set the Environment variable. After that make a new connection by selecting the Oracle instant client in Toad for Oracle. This Oracle post presented a practical guide on installing the Oracle Instant Client for Toad for Oracle.

