Introduction to I2C LCD
An I2C LCD is a type of liquid crystal display (LCD) that uses the inter-integrated circuit (I2C) protocol to communicate with a microcontroller or computer. It is a popular choice for displaying text and graphics in a variety of applications, such as household appliances, handheld devices, and industrial equipment.
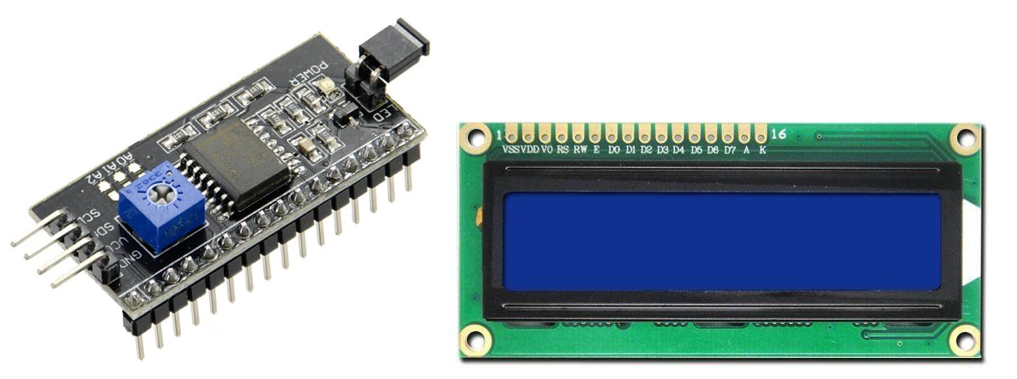
One of the key benefits of using an I2C LCD is that it requires fewer wires for communication compared to traditional LCDs that use a parallel interface. This makes it easier to integrate into a circuit and reduces the number of pins needed on the microcontroller. I2C LCDs also have the advantage of being able to share the same bus with other I2C devices, allowing for more efficient communication between multiple devices.
Interface I2C LCD with Arduino Nano
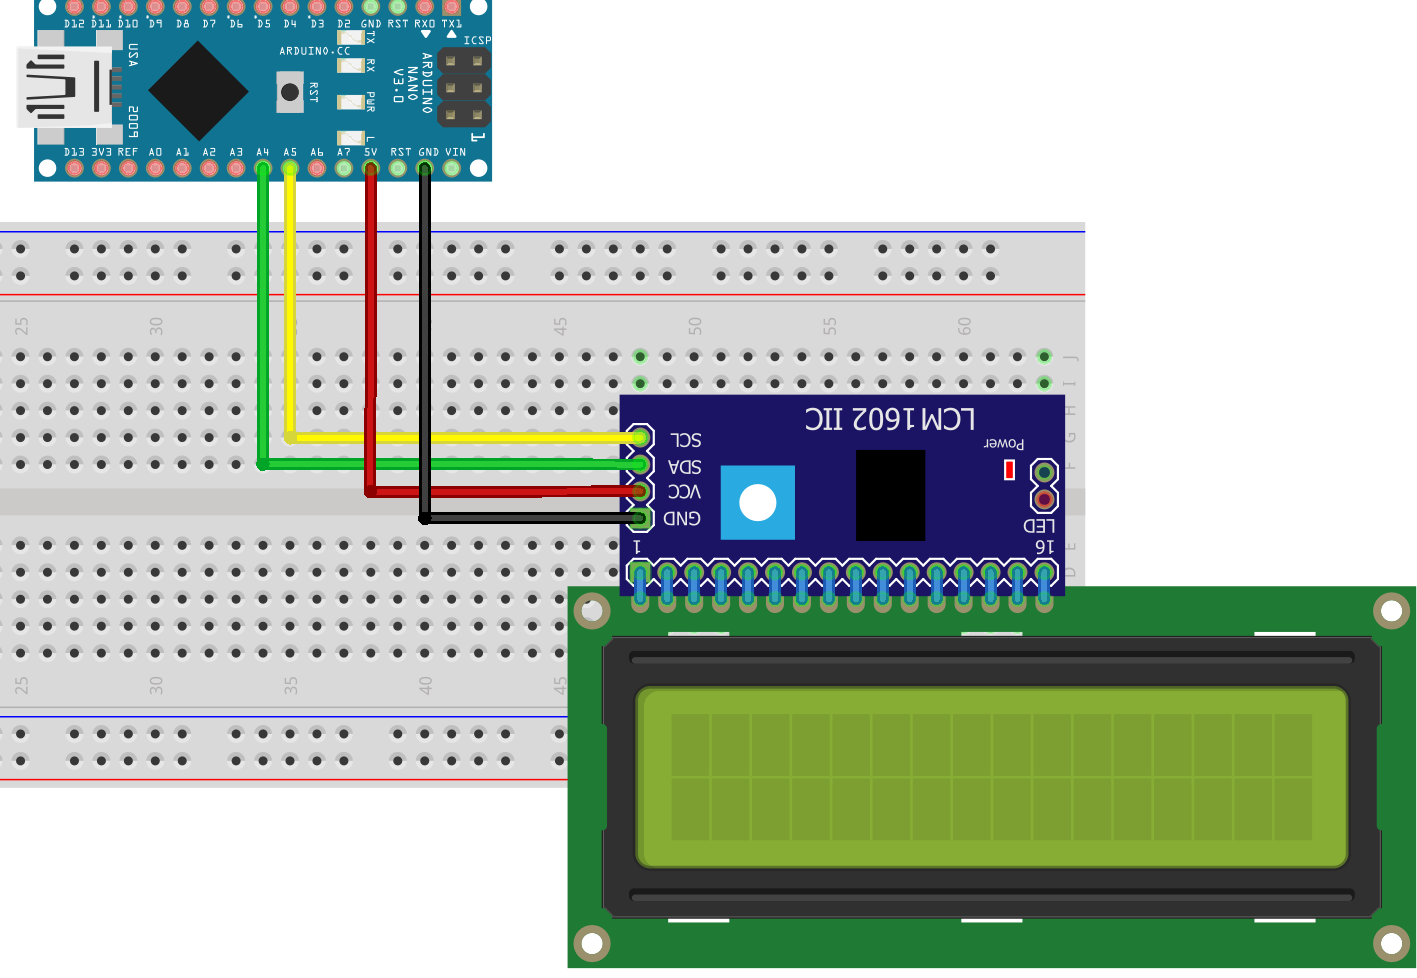
To interface the I2C LCD with the Arduino Nano we will use the I2C pins of the Nano board. On the I2C LCD module, these lines are typically labeled as SDA and SCL. On the Arduino Nano, these lines are typically labeled as A4 (SDA) and A5 (SCL). You can also use a breadboard to make the connections if needed.
Schematic
Following image shows the schematic diagram of an I2C LCD with Arduino Nano.
Connection table of LCD with Nano board:
| I2C LCD | Arduino Nano |
|---|---|
| VCC | 5V |
| GND | GND |
| SDA | A4 |
| SCL | A5 |
After interfacing LCD with Arduino Nano now we will install the required library in Arduino IDE.
Installing the LiquidCrystal_I2C Library in Arduino IDE
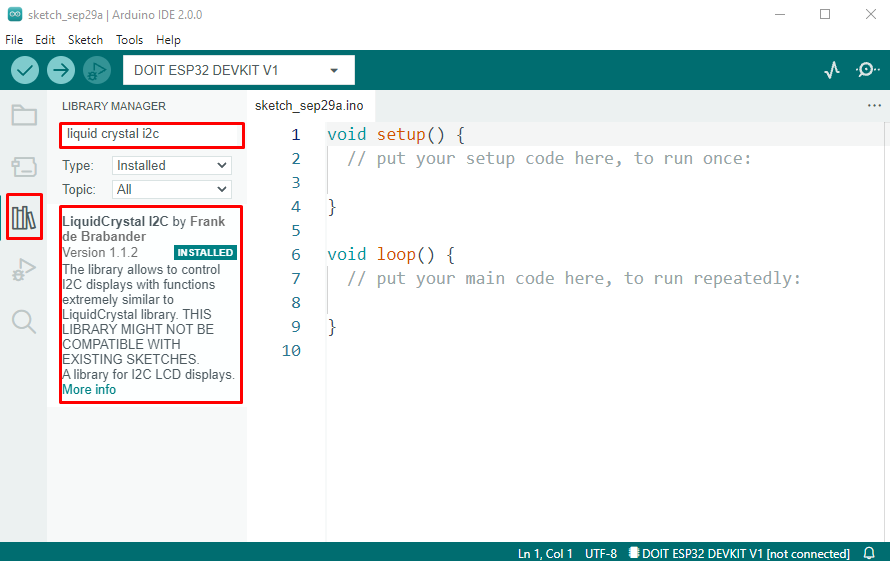
Install the appropriate libraries and software to control the display. You will need to download and install the LiquidCrystal_I2C library into the Arduino Integrated Development Environment (IDE). This library has multiple functions that make it easy to control the I2C LCD.
Open IDE and install the Frank de Brabander library:
After installing Liquid Crystal library now, we can program Arduino Nano and LCD screens. But before that check the I2C address for the LCD screen.
Getting the LCD Address
It is important to check the I2C address of an I2C device before interfacing it with an Arduino (or other microcontroller) because the I2C address is used to identify the device on the I2C bus. Each I2C device must have a unique address, and if two devices have the same address, they will conflict with each other on the bus and may not function properly.
Once you have determined the correct I2C address of the device, you can use it in your Arduino sketch to communicate with the device over the I2C bus.
To check the I2C address of the LCD screen, connect the Arduino Nano with the LCD screen and upload code given in the article Scan I2C devices address.
After uploading code, we will get the following output on the serial monitor. Here the LCD display has an I2C address of (0x27).
Displaying Text on the LCD
Interfacing an I2C LCD with an Arduino Nano is a simple process that allows you to display text and graphics on the screen. Here are the steps to follow:
- Connect the I2C LCD module to the Arduino Nano I2C pins A4 (SDA) and A5 (SCL).
- In the Arduino IDE, create a new sketch and include the LiquidCrystal_I2C library at the top of the sketch.
- Initialize the I2C LCD by creating an instance of the LiquidCrystal_I2C class and passing in the I2C address of the LCD and the dimensions of the display.
- Use LiquidCrystal_I2C library functions to control the I2C LCD display. For example, you can use the begin() function to initialize the display, the print() function to print text to the screen, and the setCursor() function to set the cursor position.
To test I2C LCD display upload code to the Nano board.
Code
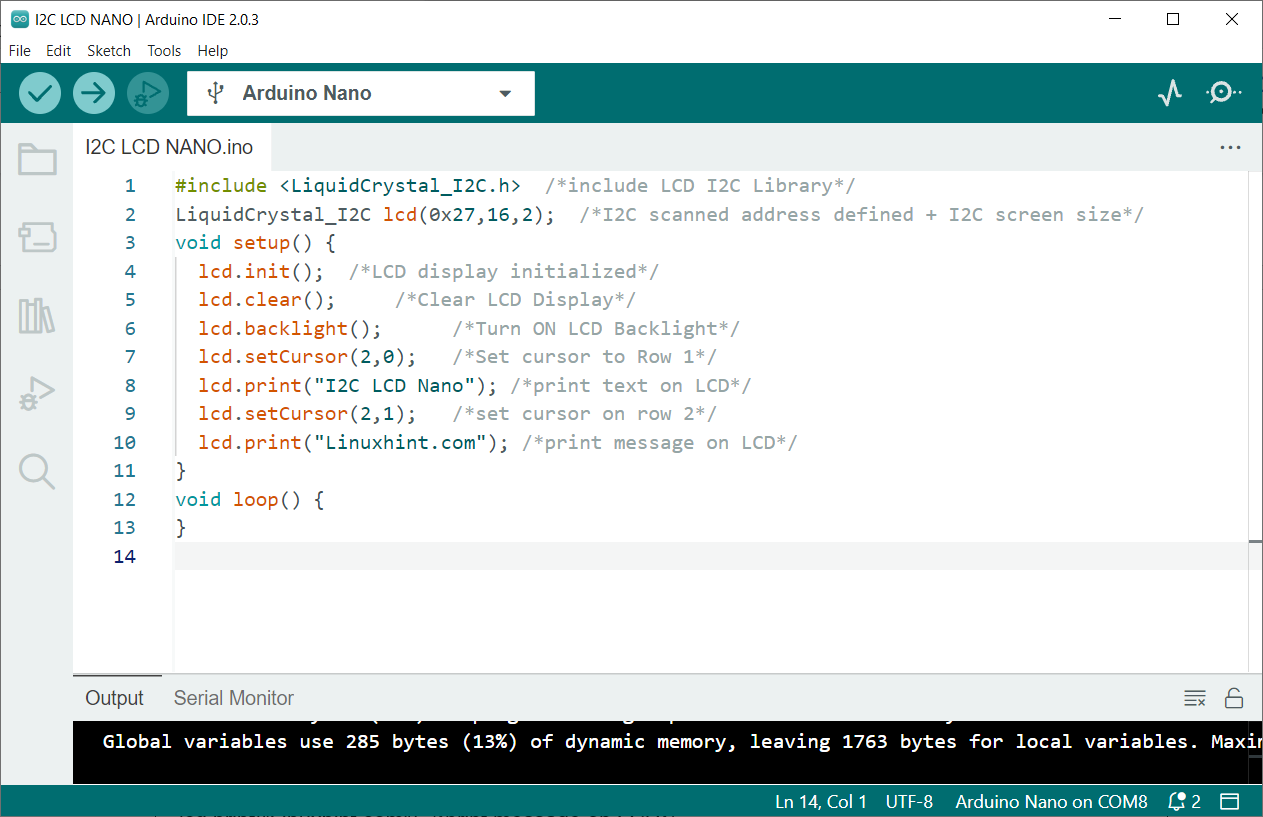
Open the IDE and upload the given code to Arduino Nano.
LiquidCrystal_I2C lcd(0x27,16,2); /*I2C scanned address defined + I2C screen size*/
void setup() {
lcd.init(); /*LCD display initialized*/
lcd.clear(); /*Clear LCD Display*/
lcd.backlight(); /*Turn ON LCD Backlight*/
lcd.setCursor(2,0); /*Set cursor to Row 1*/
lcd.print("I2C LCD Nano"); /*print text on LCD*/
lcd.setCursor(2,1); /*set cursor on row 2*/
lcd.print("Linuxhint.com"); /*print message on LCD*/
}
void loop() {
}
Code started by including the I2C liquid crystal library. After that, using the function from the same library, we defined the I2C address which we got using the I2C Scanner Code.
Next LCD display is initialized, and the backlight is turned ON. Two different strings are displayed by setting the cursor position.
Output
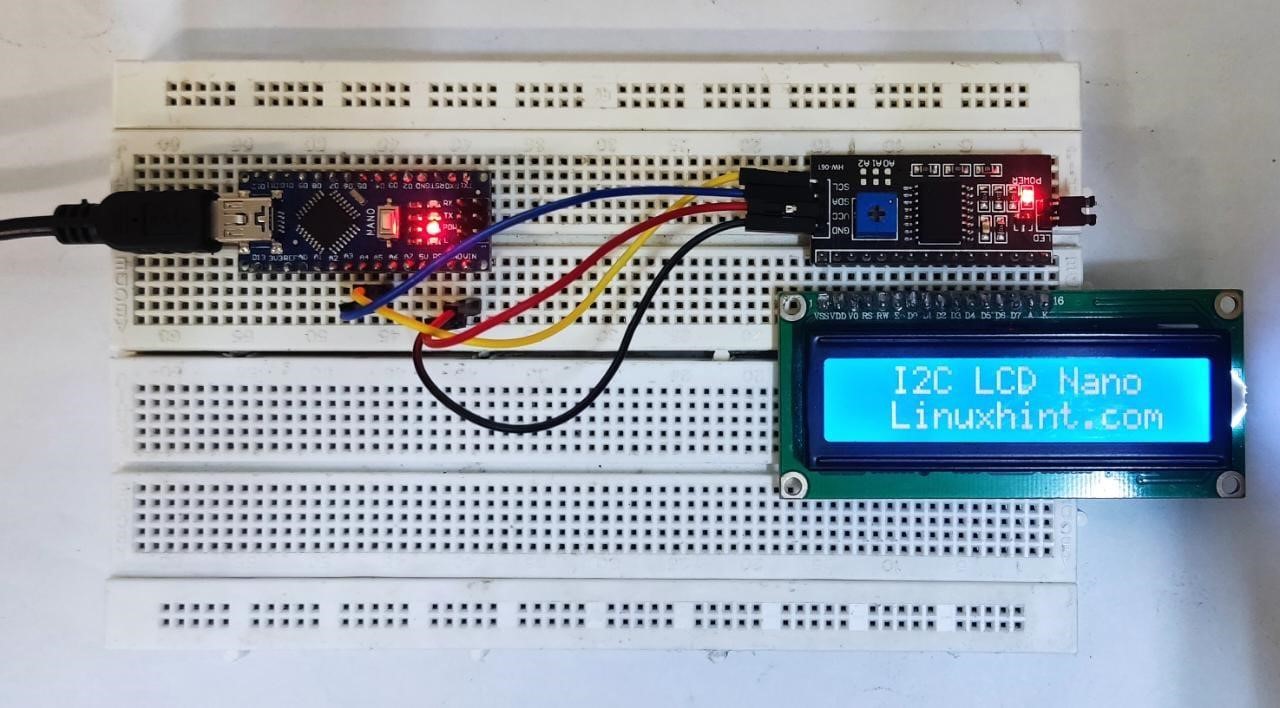
In the output we can see the I2C LCD displayed two strings in row 1 and row 2 of LCD.
Conclusion
Arduino Nano is a compact microcontroller board that can be interfaced with multiple devices and sensors. This article covers the complete code required for displaying text on an I2C LCD display. Using the Arduino IDE any I2C screen can be programmed; however, before initializing the display, always check for the I2C address first. For more detail read the article.

