This blog will offer different fixes for resolving the Skype not opening issue.
How to Fix the “Skype for Windows 10 Not Opening or Responding After Update” Problem?
First of all, restart Windows 10 to fix the mentioned problem. If still the problem didn’t get fixed, then try these methods:
- Run Skype in compatibility mode
- Repair Skype app
- Reset Skype app
- Re-install Skype
- Allow Skype to use webcam & microphone
- Reset network configurations
Let’s take a look at each of the fixes one by one.
Fix 1: Run Skype in Compatibility Mode
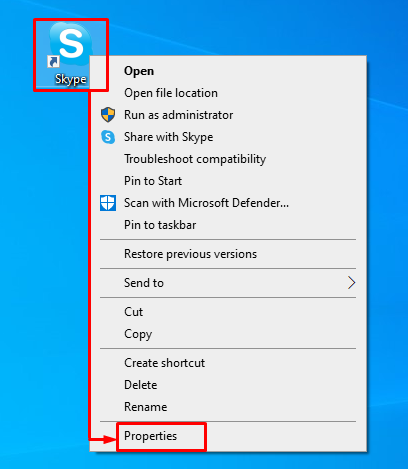
The Skype not opening after the update issue can be resolved by opening it in compatibility mode. To do so, initially, right-click on the Skype icon available on the desktop and select “Properties”:
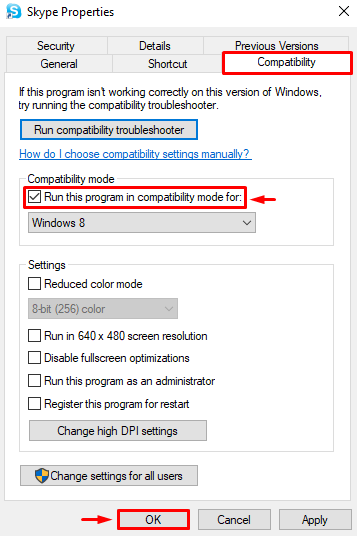
Navigate to the compatibility tab. Mark check the “Run this program in compatibility mode for” checkbox and click on the “OK” button:
Fix 2: Repair Skype App
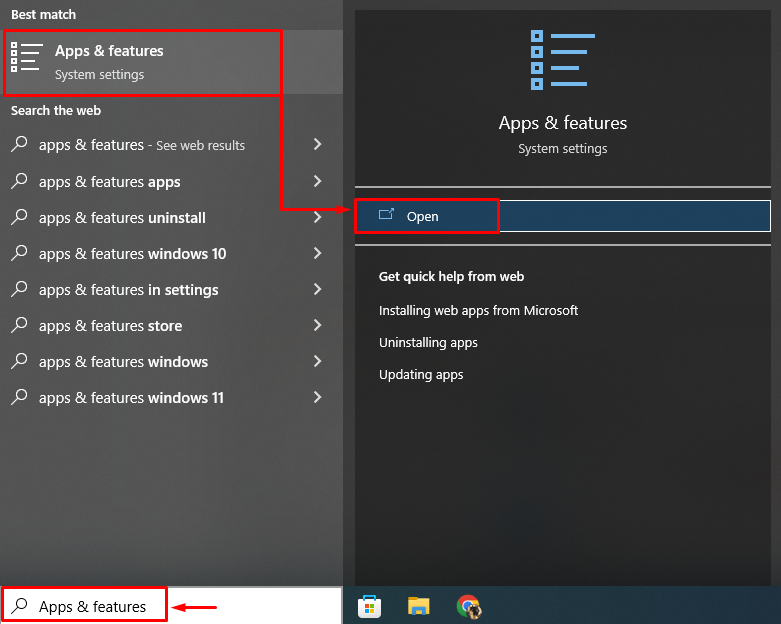
There could be bugs in the app, or its settings are wrongly configured, causing the problem to occur. Therefore, repairing the Skype app may fix the problem. For that purpose, launch “Apps & features” via the Start menu as the first step:
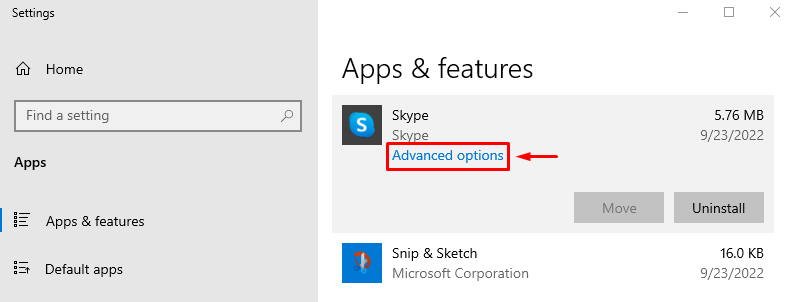
Find the Skype app and click on the “Advanced options”:
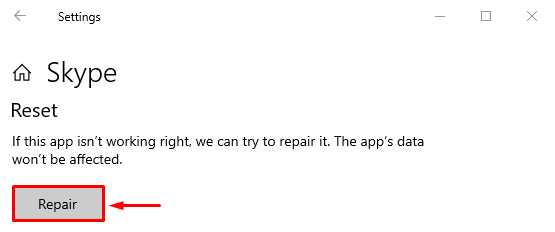
Hit the “Repair” button to repair Skype:
Restart Windows 10 after repairing Skype, and check whether it resolved the problem or not.
Fix 3: Reset Skype App
Resetting Skype will restore the Skype default settings, which might help in resolving the problem. For that purpose, follow these instructions:
- Firstly, launch “Apps & features” with the help of the Start menu.
- Find Skype from the available apps.
- Click on the “Advanced options” options.
- Left-click on the “Reset” button to reset Skype:
Restart Windows 10 and check whether or not it resolved the problem.
Fix 4: Re-install Skype
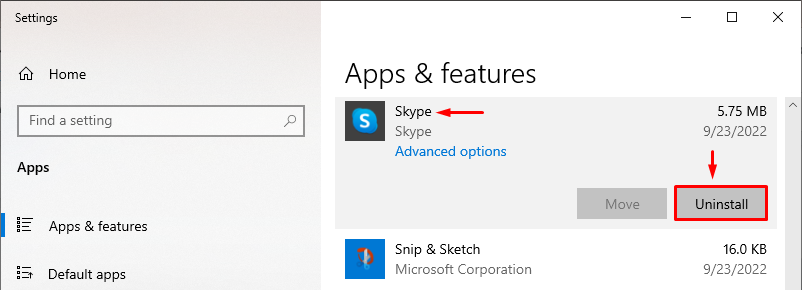
Reinstalling Skype can also help in fixing the stated issue. For that purpose, first, open “Apps & features” with the help of the Windows Start menu. Locate Skype, and click on the “Uninstall” button to remove it:
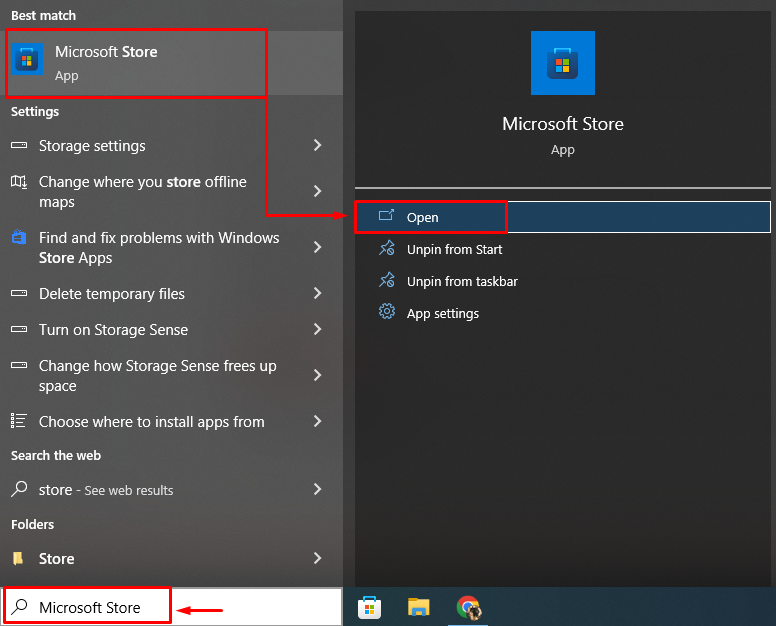
Open “Microsoft Store” from the Start menu:
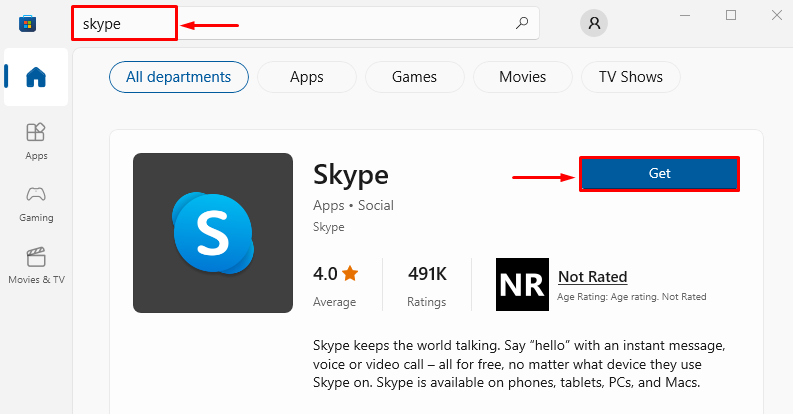
Search for “Skype”, and click on the “Get” button to install Skype:
Restart Windows 10 after reinstalling Skype and examine whether it fixed the problem or not.
Fix 5: Allow Skype to Use Webcam & Microphone
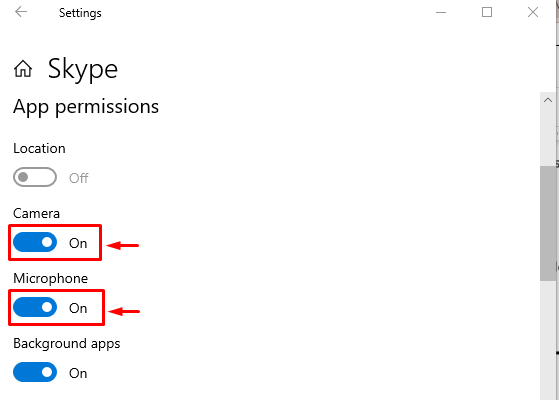
There can be a reason that you have not granted the microphone or webcam permissions to Skype, which is restricting the app to respond. To grant required permissions, go through these instructions:
- First, search and open “Apps & features” with the help of the Windows Start menu.
- Locate Skype.
- Click on the “Advanced options”.
- Scroll down and find the “App permissions” section.
- Toggle on the “Camera” and “Microphone” to allow Skype to use the camera and microphone:
Reboot Windows 10 and check whether it resolved the problem or not.
Fix 6: Flush DNS and Reset TCP/IP
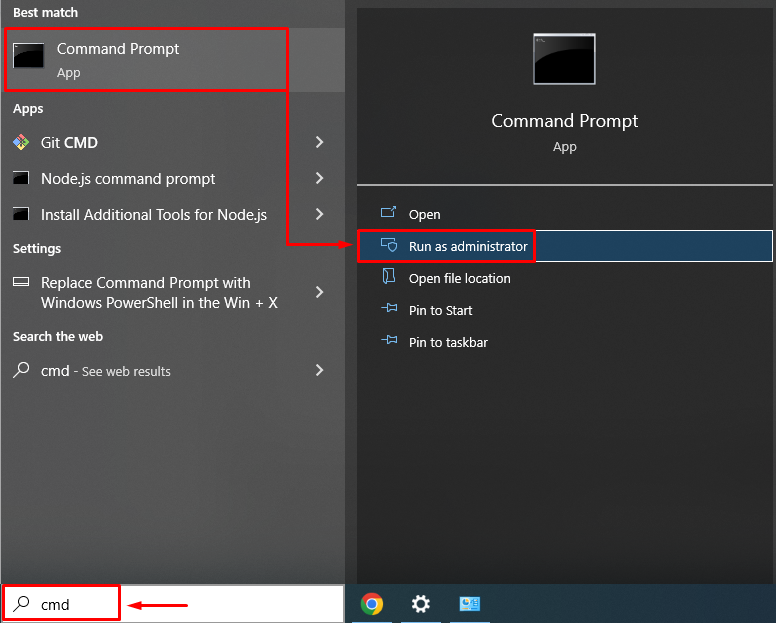
Flushing DNS will clear all the saved addresses in the DNS. It will also help in resolving the Skype not opening error. For this, first of all, launch “CMD” from the Start menu as an administrator:
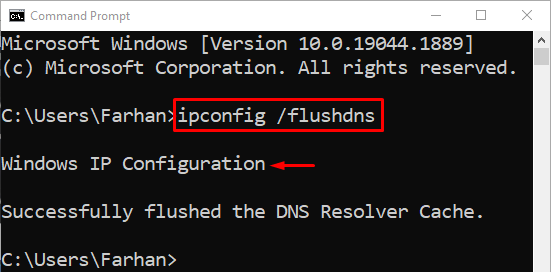
Flush the DNS by executing the “ipconfig” command with the “/flushdns” option:
The DNS cache has been flushed successfully. Now, open Skype and check if the stated error did not occur again.
Conclusion
The “Skype for Windows 10 not opening or responding after update” problem can be resolved using various methods including reinstalling Skype, resetting Skype, repairing Skype, running Skype in compatibility mode, or flushing the DNS. This write-up has demonstrated several methods to rectify the mentioned issue.

