This write-up will teach you seven different fixes to resolve the stated error.
How to Resolve “There was a Problem Starting C:\Windows\System32\LogiLDA.dll” Error?
To fix the stated error, we have listed various methods that are given below:
- Restart Windows 10
- Disable Logitech on startup
- Reinstall Logitech software
- Reinstall mouse drivers
- Update Windows 10
- Remove Logitech from the registry
- Install Logitech gaming software
Let’s try each of the methods one by one to get our solution.
Fix 1: Restart Windows 10
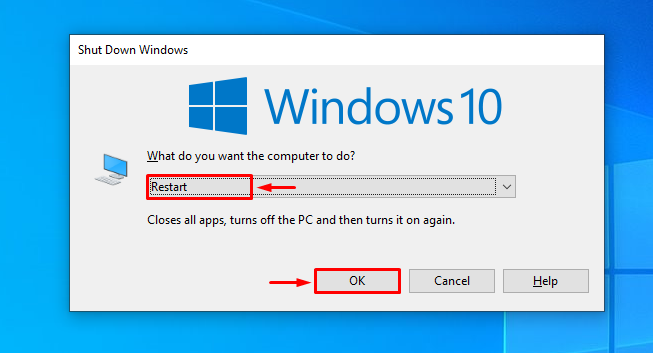
First, press “Alt+F4” to open the “Shut Down Windows” pop-up. Select “Restart” from the drop-down list, and hit the “OK” button to restart Windows 10:
Fix 2: Disable Logitech on Startup
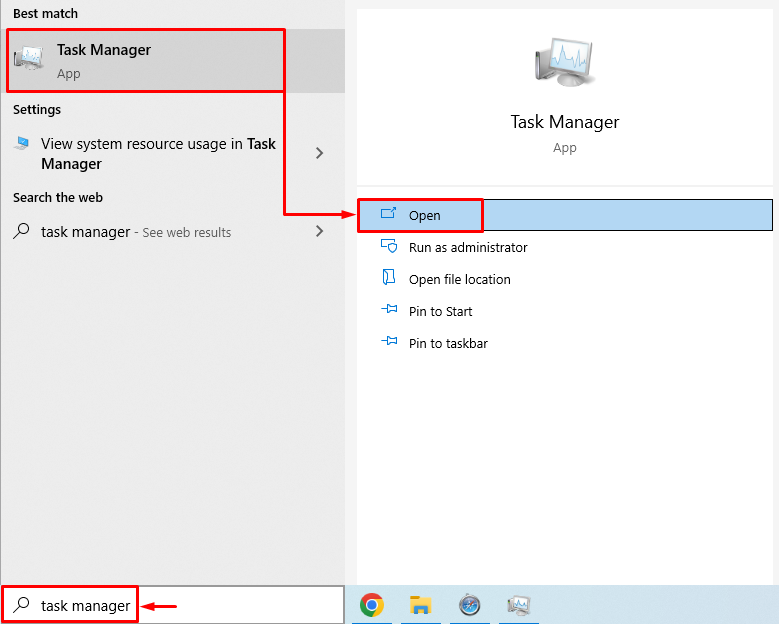
Disabling Logitech on start-up will prevent the abnormal launch of Windows. To disable Logitech on startup, first, launch “Task Manager” by using Windows 10 “Start menu”:
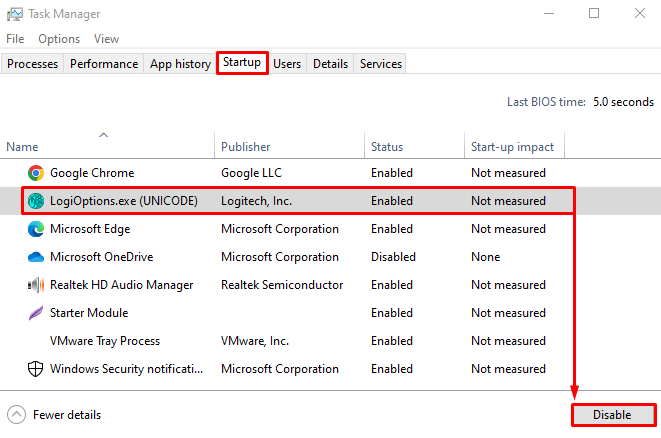
Move to the “Startup” tab. Locate and select “LogiOptions.exe(UNICODE)”, and hit the “Disable” button:
The Logitech has been disabled successfully.
Fix 3: Reinstall Logitech Software
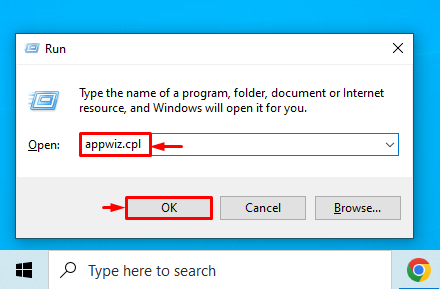
Logitech files may have been corrupted, and it is now throwing an error. Therefore, we need to reinstall it to resolve the error. For that reason, firstly, open the “Run” dialog box by pressing the “Windows+R” key. Type “appwiz.cpl” and hit the “OK” button:
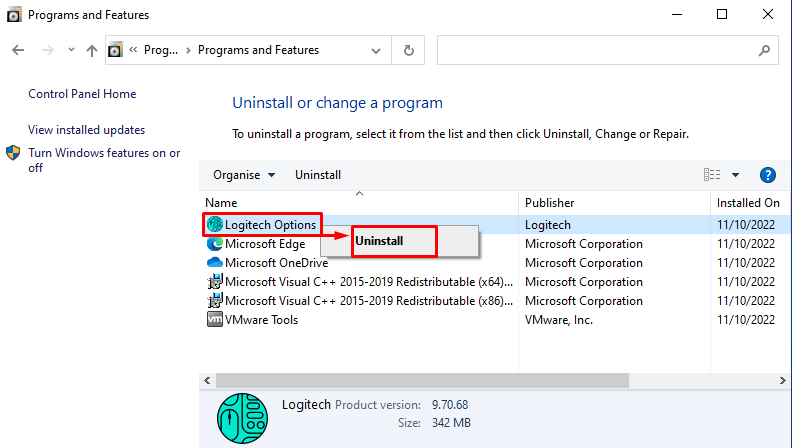
Locate “Logitech Option” from the “Programs and Features” window. Right-click on the “Logitech Options” program and click “Uninstall” to remove it:
Restart the system after removing “Logitech Options”.
Fix 4: Reinstall Mouse Drivers
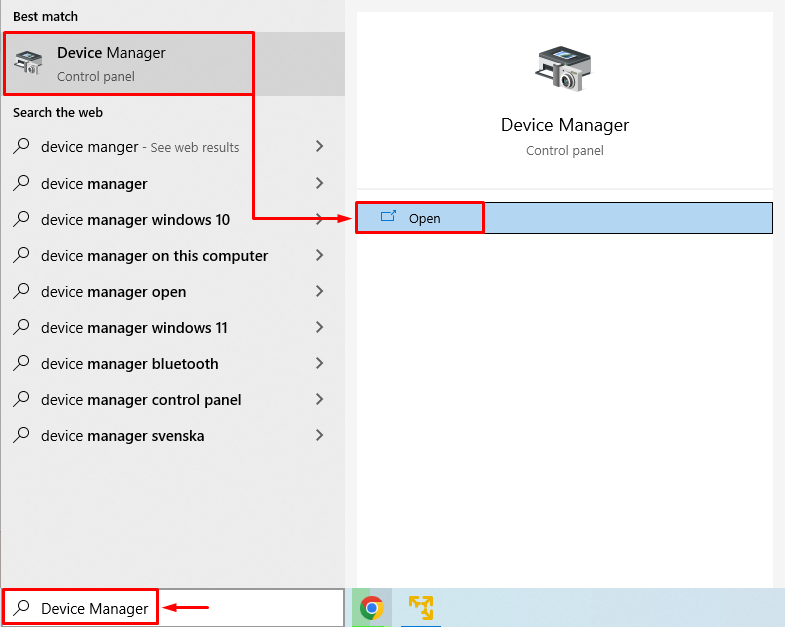
First, open “Device Manager” via the Start menu:
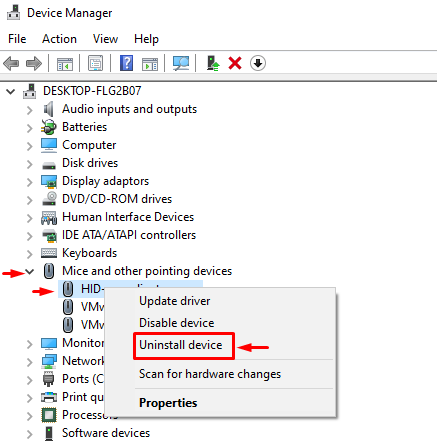
Expand the “Mouse and other pointing devices” section. Right-click on the mouse driver and select “Uninstall device”:
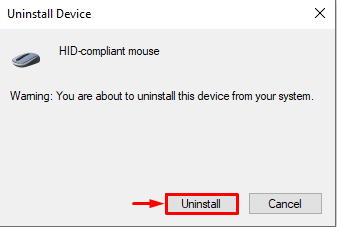
Select “Uninstall” to completely remove the driver from Windows:
When the driver is removed completely, restart Windows, which will automatically install the compatible driver that will work fine.
Fix 5: Update Windows 10
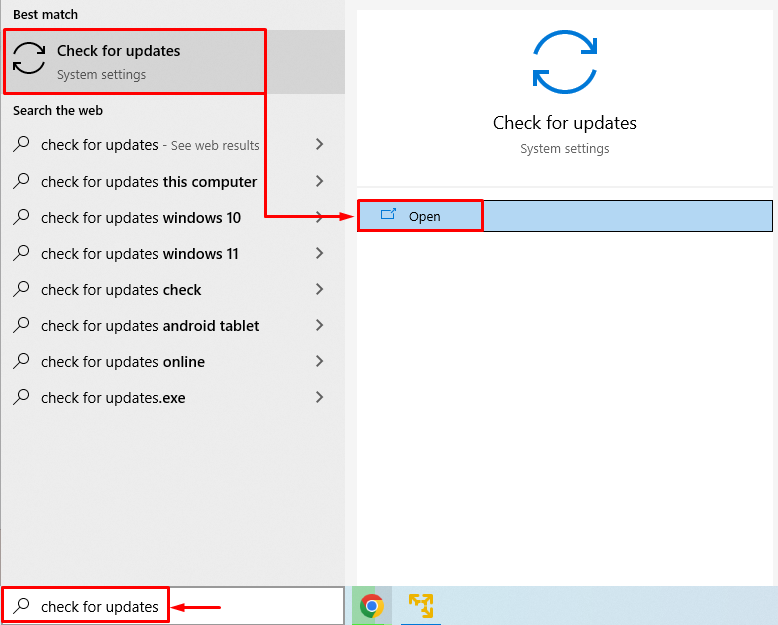
The stated error can be fixed by updating Windows 10. It resolves plenty of stuck problems. For that reason, firstly, open the “Check for updates” settings via the Start menu:
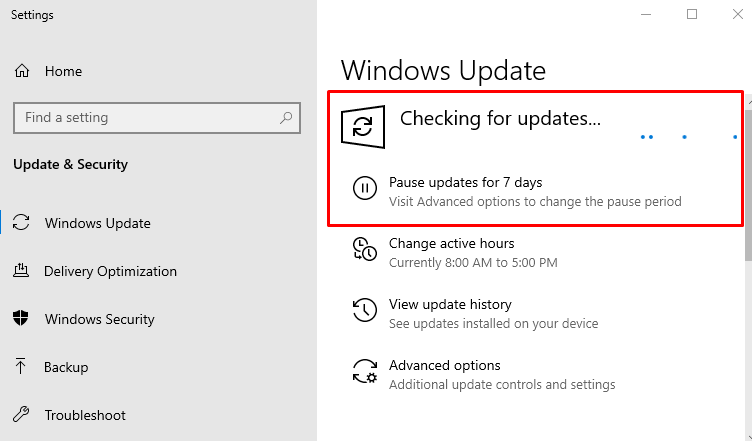
Click on the “Check for Updates” button. If the updates are available, then it will download and install them:
When the updates get completed, restart Windows 10 and check whether the problem is resolved or not.
Fix 6: Remove Logitech From the Registry
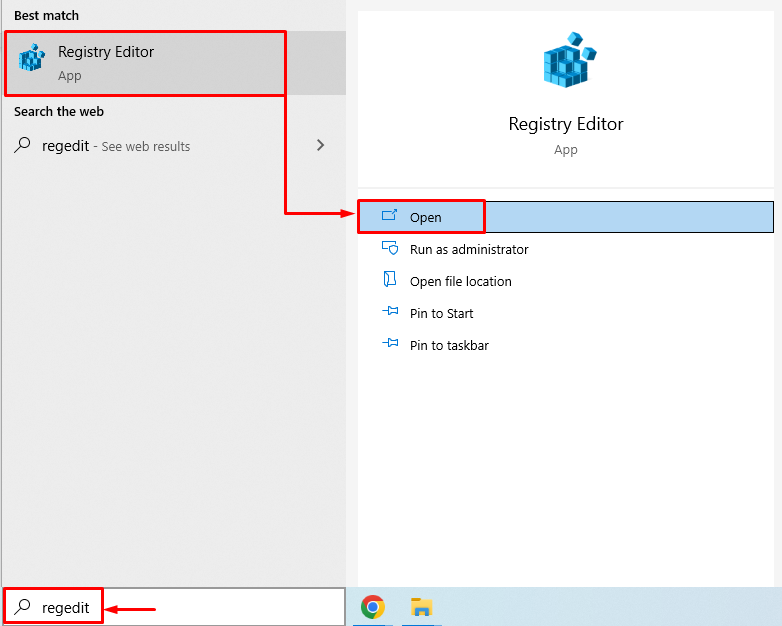
Launch “Registry Editor” from Windows 10 “Start menu”:
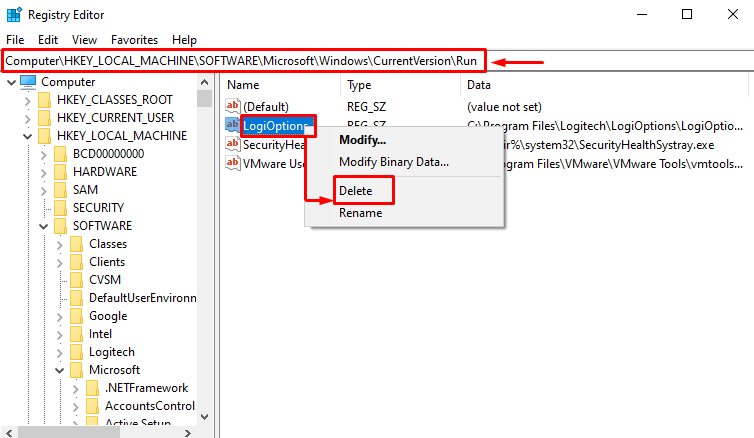
Copy and paste the following path “HKEY_LOCAL_MACHINE\Software\Microsoft\Windows\CurrentVersion\Run” in the “Registry Editor” address bar and hit the “Enter” button. Now, locate the “LogiOptions” file, right-click on it and select “Delete”:
After deleting the selected file from the registry editor, restart Windows 10 and check if the issue is resolved.
Fix 7: Install Logitech Gaming Software
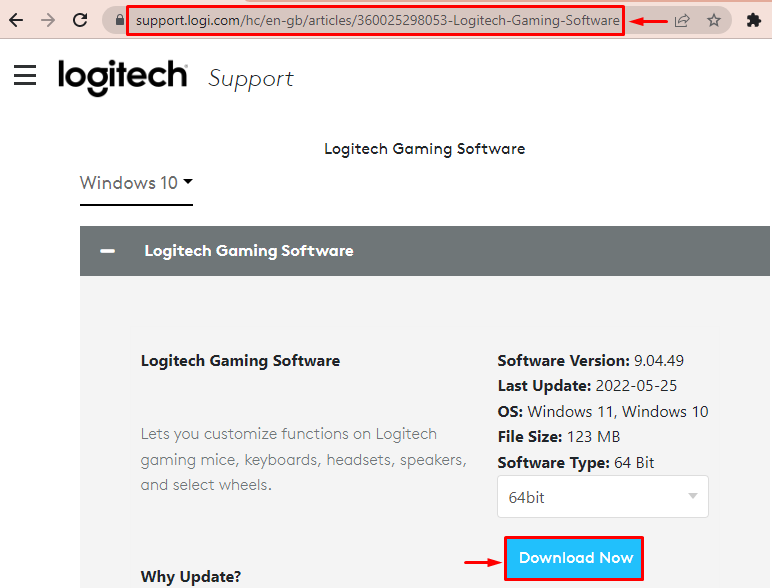
First of all, navigate to the following link, and download the Logitech gaming software:
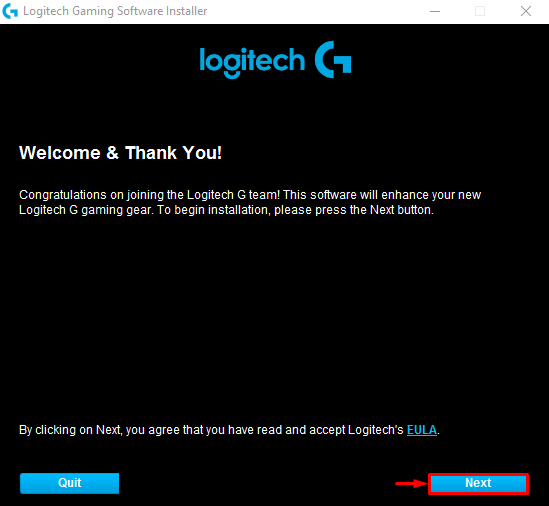
When the file is downloaded, open it, and select the “Next” button:
Tick the checkbox “Please restart my computer now”, and hit the “Finish” button:
After restarting Windows 10, check whether the problem is resolved or not.
Conclusion
“There was a problem starting C:\Windows\System32\LogiLDA.dll” error can be resolved by restarting Windows 10, disabling Logitech on startup, reinstalling Logitech software, reinstalling mouse drivers, updating Windows 10, removing Logitech from the registry, or installing Logitech gaming software. This blog has provided all the possible fixes to solve the stated error.

