Apache Cassandra, or Cassandra, is a free and open-source distributed No-SQL database. It is one of the most renowned wide-column databases of the modern century.
A wide-column database is a No-SQL database with tables, rows, and columns. However, unlike the good-old relational table, it lacks features such as Joins. This is by design which allows Cassandra to be used in highly critical operations.
It is instrumental in highly sensitive environments where you must capture and store extensive data.
This full tutorial will explain the setup process of configuring an Apache Cassandra cluster on your Windows machine.
Installing Java JDK on Windows
Like most Apache projects, Cassandra requires the Java JDK to be installed and available on your system. In this post, we will set up the Corretto JDK as it’s free and easy to use.
https://docs.aws.amazon.com/corretto/latest/corretto-11-ug/downloads-list.html
Select the installer for your system and download.
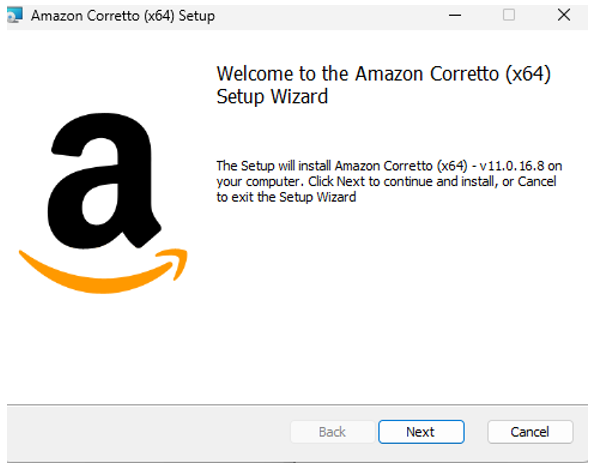
Launch the installer upon completion.
Click Next to proceed with the installation prompt.
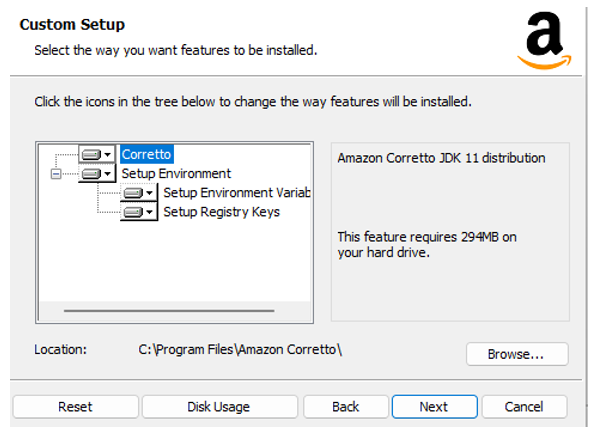
Click Next to proceed.
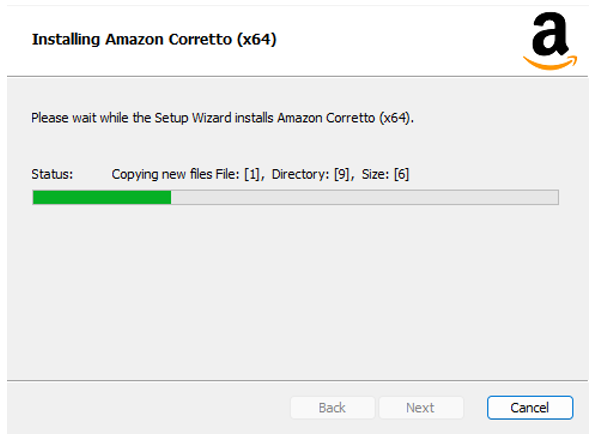
Lastly, click Install to progress with the installation.
Launch the command prompt to verify that the JDK is installed with the command:
The command should return brief information about the installed JDK version.
From the output above, the JDK was successfully installed as version 11.
Add the JAVA_HOME variable. Launch the command prompt (elevated privileges).
setx PATH "%PATH%;%JAVA_HOME%\bin";
If you installed the JDK in a different location, make sure to change the value in the first command.
Reload your terminal session to apply the changes.
Installing Python Interpreter on Windows
Another dependency of the Apache Cassandra cluster is a Python interpreter. The Python interpreter is required for using the CQL language.
Browse to:
https://www.python.org/downloads/
Select the Windows version and download the installer package.
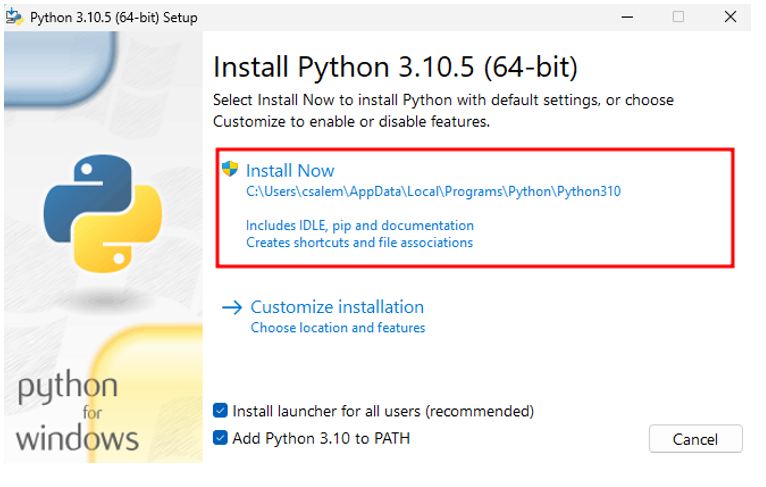
Upon completion, start the installation. Ensure to enable “Add Python 3 to Path” during installation.
Finally, click Install Now to complete the installation with default values.
Upon completion, run the command below in your command prompt:
Python 3.10.5
Installing Apache Cassandra
Once we have the dependencies ironed out, let us proceed to install Apache Cassandra on our system.
Open your browser and navigate to Cassandra’s download page:
https://archive.apache.org/dist/cassandra/3.11.4/
Download the provided archive.
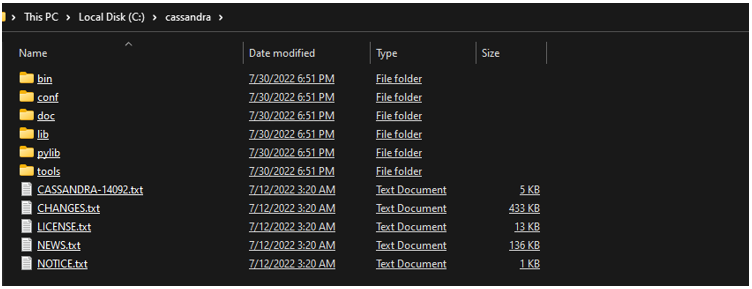
Extract the archive to a specific directory. Again, avoid using long path names to avoid Windows conflicts.
In our example, we extract the archive to C:\Cassandra
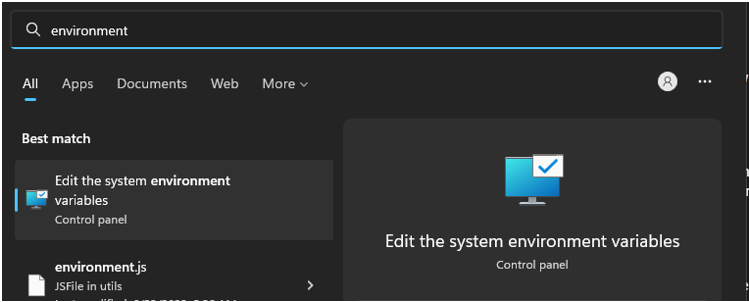
Next, copy the path to the Cassandra directory. Then, open the Windows search tool and search for “edit environment variables.”
This should take you to your system variables, allowing you to delete or add values.
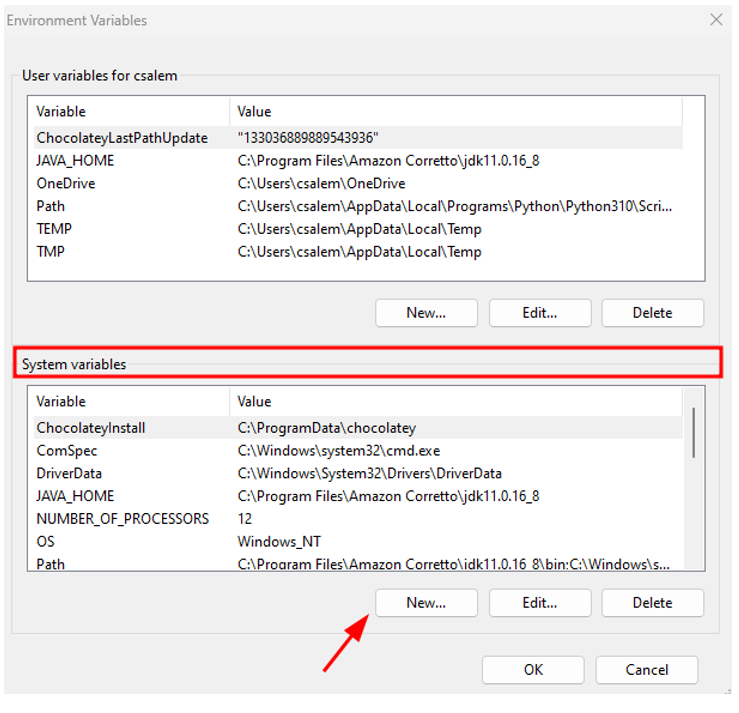
Note to avoid selecting the option “edit environment variables for your account” as it may hinder editing of system variables.
Under System Variables, click on New to add a new environment variable.
Set the variable name as CASSANDRA_HOME and the variable value to the path of the Cassandra directory.
Click OK to save.
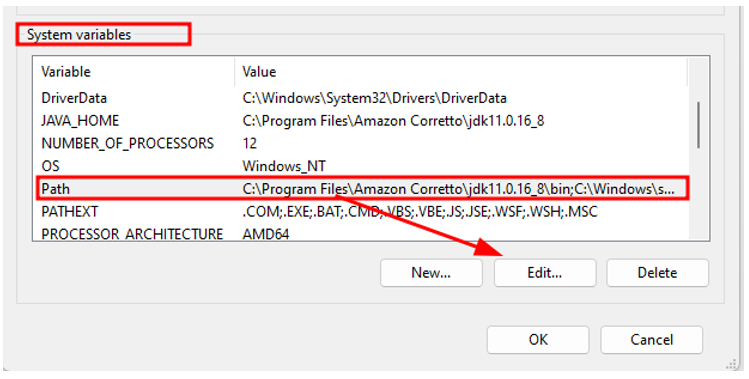
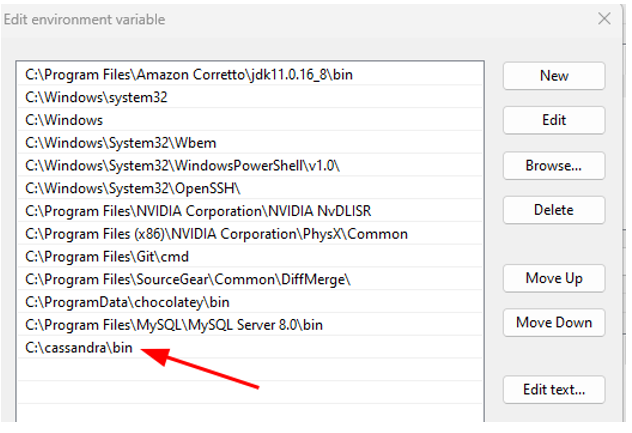
Next, under the System’s Variables, select Path and click on Edit.
In the New Window, click New to add a new value and set it to the path of the Cassandra bin directory.
Select OK to save the changes.
Launch the command prompt and execute:
The command will invoke the Cassandra file and run the server.
You can now access the Cassandra server or the CQL shell by running the cqlsh command.
Conclusion
Through this article, you discovered how to install and configure the Apache Cassandra server on your Windows machine.


