VirtualBox Exception happens only when Virtualization is not enabled in the setup of BIOS or in the Virtual machine software. It is generally required to enable virtualization when we want to run other operating systems on our existing system. For instance, you need to run Linux on your Windows system. However, you may face the VirtualBox Exception while doing so.
This blog will provide the solutions to solve the mentioned VirtualBox Exception.
How to Solve VirtualBox Exception “VT-x is disabled in the BIOS for both all CPU modes”?
There could be two reasons why the VT-x is disabled, and the related exception occurred. The first reason could be that the virtualization is disabled in the BIOS, and the second could be that the physical address extension is disabled in the VMware software.
To solve the stated exception, you can perform the following operation:
-
- Enable Virtualization in BIOS
- Enable Physical Address Extension in the Virtualbox
Let’s check out each approach one by one!
Method 1: Enable the Virtualization in the Setup of BIOS
To solve the VirtualBox exception problem, you must have enabled Virtualization. In order to do that, follow the guide as instructed.
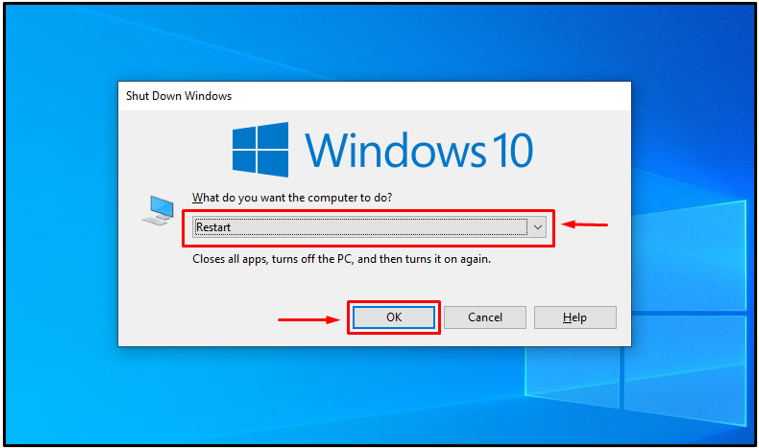
Step 1: Restart Windows 10
To restart Windows 10, first of all, press the “Alt+F4” keys altogether to select Restart from the Shut Down Windows prompt, and click “OK”:
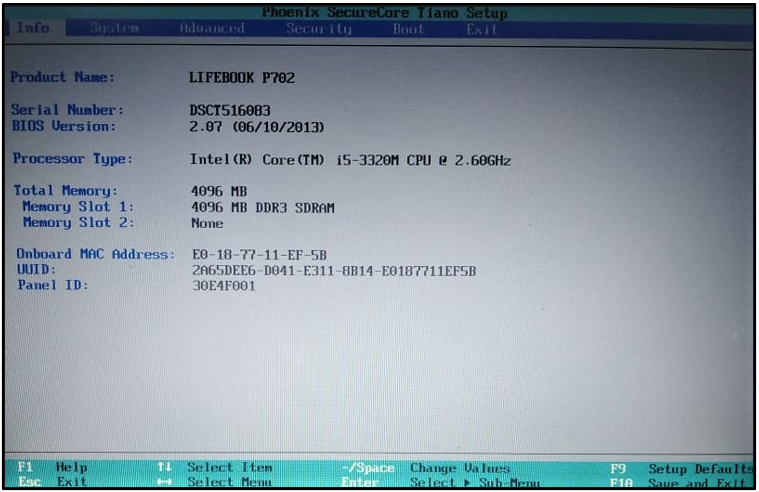
Step 2: Launch BIOS Setup
After restarting the system, enter into BIOS setup by pressing the “F2” key when the manufacturer logo shows up.
Note: In our case, the mentioned key is used to enter into the BIOS setup. It might be different according to your Laptop/PC manufacturer.
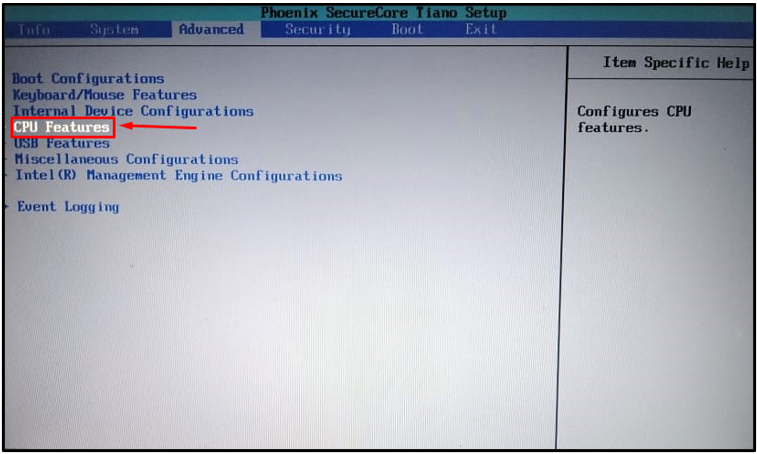
Step 3: Enable Virtualization
Move to the “Advanced” tab and click on the “CPU Features” option:
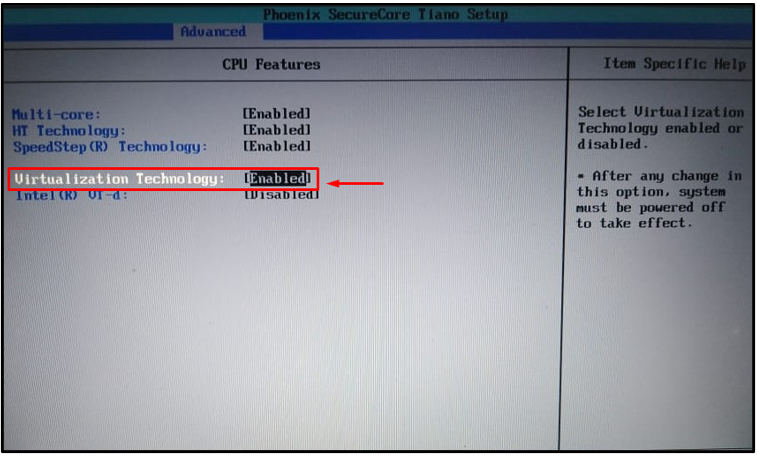
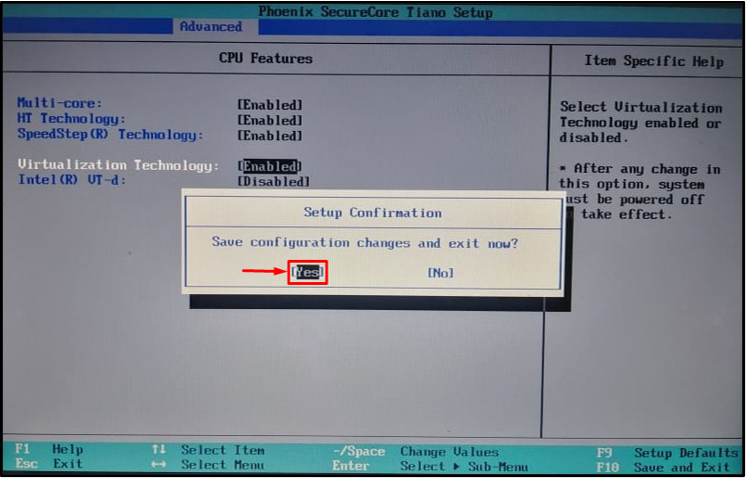
Now, click on the “Virtualization Technology” CPU feature and “Enable” it:
Step 4: Save Changes
Press “F10” to save the configuration changes and click on the “Yes” option of the setup confirmation dialog box:
If the above-mentioned method did not work for you, check out the next section!
Method 2: Enable Physical Address Extension
In order to enable Physical address extension, you need to follow the given instructions!
Step 1: Launch VirtualBox
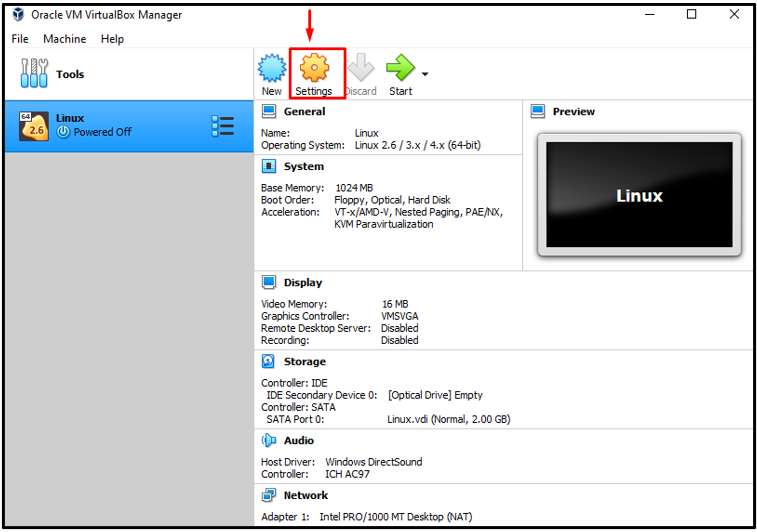
First of all, launch the VirtualBox, and click on the “Settings” icon:
Step 2: Enable Physical Address Extension
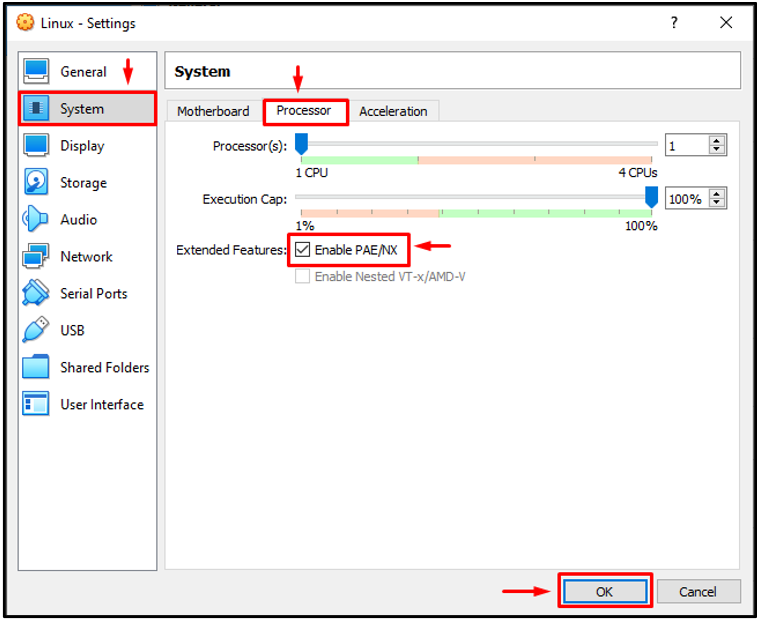
To enable physical address extension, open the “System” category and move to the “Processor” tab, mark the “Enable PAE/NX” checkbox, and click on the “OK” button:
You have learned different methods to resolve the Virtualbox exception problem.
Conclusion
VirtualBox Exception occurs when the Virtualization is not enabled in the BIOS setup or in the Virtualbox machine software such as VirtualBox. To handle this exception, you must enable Virtualization in both the BIOS setup and the Virtualbox. In our blog, we have provided different solutions related to solving the mentioned VirtualBox Exception.

